I have been behind on my promotion of SAB. And sadly it is coming to a close on Friday. The card I am sharing contains one of the most popular of the SAB items. It is the Toadstool Gardens Designer Series paper. This paper is so fun and can be used for almost any card idea.
STAMPS& PUNCH
The fabulous sentiment has stolen the show on this card! That fun font of the Poppin’ Up is one of the best I have seen. It is from the Terrific Toadstools stamp set. As are the fun mushrooms and grass stamps.
The mushrooms are stamped with Poppy Parade ink and Melon Mambo ink. I love the addition of the bright green of the grass or leaf image. Those are stamped using Granny Apple Green. And the stems, plus the sentiment, are stamped using Early Espresso Ink.
The mushrooms have a punch that punches the mushroom head and stem. This punch does not leave a white outline, so it really makes it easier to line up without that worry. I have used Stampin’ Dimensionals under the head of the larger mushroom to add some depth. And the fabulous sentiment layer is raised with Stampin’ Dimensionals as well.
PAPERS
These fun DSP sheets just make me smile! The colors remind me of the 1970’s and I remember wearing all of those colors. Personally I love the mix of orange and pink. The different greens just brings everything together. These DSP sheets are from Sale-A-Bration. The Toadstool Gardens Designer Series Paper is a Free product with a qualifying order through the end of February. So only a few days left.
The DSP strips are where all of the colors of the card were pulled from. I went with a very light card base of Fresh Freesia. It really pulls that color from the two DSP sheets. The sentiment layer is also a piece of the DSP. Stamping on the DSP always seems so special.
EXTRAS
The mushrooms are layered onto a Basic White die cut from the Spotlight on Nature Dies. These fun circles all have different details around the edge. It adds an extra touch. And for the bling I went with a single Sunny Day Iridescent Dots. The orange really pops with all of the colors.
HOST CODE
My FEBRUARY HOST CODE is S2EYAW9N. Orders of $50.00 or more will receive an appreciation gift from me. I appreciate you choosing me as your demonstrator!
Thank you for stopping by today. I hope you enjoyed today’s project and will come back. I do read and reply to all of the comments individually. They mean a lot to me. Please reach out if you have a question.
Smile and Keep On Stamping,
Jackie
New Scrapbooking Catalog
The newest addition to Stampin’ Up! is an Online catalog of Scrapbooking products. You can see the catalog by clicking the photo below and save it to your computer.
Online Exclusives
New Online Exclusives have dropped. There are Halloween, Fall, Christmas, and many that are great year round. Of course the new Designer Series Papers and Embellishments are fabulous as well!
You can go directly to these in my Online Store by clicking HERE
You are getting a couple of sneak peeks of upcoming Online Exclusives. I have gone a bit overboard on the demonstrator pre order on this upcoming release. It is fabulous. The card I am sharing is a case of the sample card when this goes Live next month.
STAMPS
These trees are from the upcoming Online Exclusive stamp set Wooded Acres. I love the simple tree textures. However there is almost the exact stamp, but with full leaves, included in the set. It is a two stamp set. And after this card I am really excited to play with it even more.
The trees are stamped using Pebbled Path Ink. I believe it gives it the far off in the distance look without being too bold. If you look at the trio of trees on the bottom right and add them to the edge of the left side, that is the length of the stamp. So you can see how I stamped it off the paper with every inking.
The sentiment is from another of the preorder Online Exclusives. It is from a large Suite of products. This sentiment is from the Textured Notes stamp set. And like I said, it is a large Suite that you will fall in love with if you like natural and texture.
PAPERS& INKS
There are no special papers today. I used Berry Burst cardstock as the base with Wild Wheat cardstock for the narrow layer. Then I created the stamped background with inks and blending brushes. In my mind, it is a sunset view in the mountains.
The bottom section is a light coloring using Wild Wheat Ink. Next is the sunset using Berry Burst Ink. Finally the sky is Misty Moonlight. All of the colors were done fairly lightly.
EXTRAS
To tie in all of the ink colors I added the Natural Tones Linen Thread in the dark blue. I had used the other two ink colors with matching paper. But had not used a blue paper. So a wrap around and a bow took care of the blues.
The final touch is the bling! I used the Sale-A-Bration Purple Adhesive Sequins scattered around. There are different shades of purple/pink sequins in the package. I used three different shades to go along with my color shading.
HOST CODE
My FEBRUARY HOST CODE is S2EYAW9N. Orders of $50.00 or more will receive an appreciation gift from me. I appreciate you choosing me as your demonstrator!
Thank you for stopping by today. I hope you enjoyed today’s project and will come back. I do read and reply to all of the comments individually. They mean a lot to me. Please reach out if you have a question.
Smile and Keep On Stamping,
Jackie
New Scrapbooking Catalog
The newest addition to Stampin’ Up! is an Online catalog of Scrapbooking products. You can see the catalog by clicking the photo below and save it to your computer.
Online Exclusives
New Online Exclusives have dropped. There are Halloween, Fall, Christmas, and many that are great year round. Of course the new Designer Series Papers and Embellishments are fabulous as well!
You can go directly to these in my Online Store by clicking HERE
My card to share today is a quick and easy one that showcases a sweet embossing folder. The rest of the card falls under the #simplestamping profile. It is a pretty one to make multiples of as well.
EMBOSSING
The dry embossed layer is one of several focal points to me. I love the look that embossing folders can add to a very simple card. The one I have used is the Eyelet 3D Embossing Folder. Those little flowers look good with most anything. Embossing is an alternative to using DSP as a layer, or stamping a background layer. For this card there are any number of different embossing folders that would have worked just as well. I hope you will give your embossing folders a second look as I have.
STAMPS
This bold sentiment is from the fun With You In Mind stamp set. It is a stand alone set that offers bold sentiments like this one for birthday, best wishes, thank you and thinking of you. Plus the addition of the small icon stamps to boost your sentiment. And it is only $20.00 for a nice group of stamps.
The Happy Birthday is one single stamp. Again, I love the mix of fonts. Those always get a second look from me. I used the cupcake stamp twice. One is full strength ink and the other is stamped off. Plus I added a second of the icon stamps in the heart. It was chosen to add more to sentiment, but to also tie in a touch of blue from the DSP strips.
PAPERS
To pick the predominant paper from this card is difficult. The DSP strips are what designated the other colors so I will begin there. These strips are from the Beautiful Bokeh Designer Series Paper. It is a 6×6 pack of fun colors that all have the bokeh dots or the more ink splatter look. The two outside strips are the ink splatter as I call it. And the center one is the Bokeh. These are the two sides of one sheet, so you can choose as you see fit. These strips measure 1 X 3.
The card base is Berry Burst from the bokeh sheet. And the embossed layer is Fresh Freesia from the splatter side. These pair great together. I could have added a Balmy Blue but thought just the blue heart was sufficient to highlight it.
EXTRAS
There are various Extras all over this card. First is the Frayed White Ribbon. It grounds the floating sentiment. Then there are the two cupcakes which are fussy cut and added to the opposite corners of the sentiment. And finally I have added a scattering of the Iridescent Pearls to some of the embossed flowers for the bling!
HOST CODE
My FEBRUARY HOST CODE is S2EYAW9N. Orders of $50.00 or more will receive an appreciation gift from me. I appreciate you choosing me as your demonstrator!
Thank you for stopping by today. I hope you enjoyed today’s project and will come back. I do read and reply to all of the comments individually. They mean a lot to me. Please reach out if you have a question.
Smile and Keep On Stamping,
Jackie
New Scrapbooking Catalog
The newest addition to Stampin’ Up! is an Online catalog of Scrapbooking products. You can see the catalog by clicking the photo below and save it to your computer.
Online Exclusives
New Online Exclusives have dropped. There are Halloween, Fall, Christmas, and many that are great year round. Of course the new Designer Series Papers and Embellishments are fabulous as well!
You can go directly to these in my Online Store by clicking HERE
I have a wonderful Fun Fold to share with you today. Not only is the fold great, but I have used the fabulous birthday DSP that partners with the Birthday Celebration bundle and Suite. These are all products that will make you smile!
The card is in a stand for photographing so I could get it sort of flat. I could not get the proper angle with it standing on it’s own. Here is a look at it open to see the inside as well as more of the side strips of DSP.
STAMPS& DIES
There are actually only three stamps used from the Birthday Celebration stamp set. And they are beautifully scripted. That is always something I look for. I love different fonts. These are probably some of my all time favorites in terms of bold and beautifully done. Both the inside and the front are stamped using Blueberry Bushel Ink. And the banner strip on the inside is stamped using Wild Wheat Ink. I am so going to miss that color when the In Colors change this Summer. That is my go to for a Gold stamping.
The only Die used is the tag on the front. It is also from the Birthday Celebration Bundle. I was thrilled when I realized it fit the sentiment plus added a great layer to the front of the card. And it shows that Blueberry Ink is a good pairing with Pool Party card stock. I called this a tag, when it really is not. There are no holes in this Die. It is designed to make multiple banners for the birthday celebration. As you can see though it works great as a single layer!
PAPERS
The star of the card is this gorgeous DSP. All of the sheets used are from the Wildflower Birthday Designer Series Paper. This is not just pretty paper. But half of the sheets have gold foil details. You can see on the front with the cakes. And also on the Pool Party strip on the inside with the scallops of gold. There is a second of that strip on the left hand side that you cannot see the way I photographed. The pink check strips are a reverse side of another sheet.
To pair the Blueberry Bushel with the cake sheet really pulls the blue to the forefront. If you follow me I shared a previous card using one of the floral sheets and paired it with Blueberry Bushel as well. It is a perfect match and I could not resist doing it again. Here is a view of the previous card. https://jackiebeers.com/2025/01/banner-window-card/ The Pool Party Banner card stock is pulled from the paper also. And of course I cannot forget the Basic White inside layer.
EXTRAS
This fun card is a CASE of the Fun Fold from Connie Stewart. She called it Vertical Free Standing and has a video. I have a link to my project sheet with basic directions below.
The need for bling on this card was minimal with all of the gold foil in the DSP. I did use the Gold Twisted Thread for the bow of the banner on the front. It needed a bit more attention. And I added a single gold dot from the Low-Profile Dots.
My FEBRUARY HOST CODE is S2EYAW9N. Orders of $50.00 or more will receive an appreciation gift from me. I appreciate you choosing me as your demonstrator!
Thank you for stopping by today. I hope you enjoyed today’s project and will come back. I do read and reply to all of the comments individually. They mean a lot to me. Please reach out if you have a question.
Smile and Keep On Stamping,
Jackie
New Scrapbooking Catalog
The newest addition to Stampin’ Up! is an Online catalog of Scrapbooking products. You can see the catalog by clicking the photo below and save it to your computer.
Online Exclusives
New Online Exclusives have dropped. There are Halloween, Fall, Christmas, and many that are great year round. Of course the new Designer Series Papers and Embellishments are fabulous as well!
You can go directly to these in my Online Store by clicking HERE
Plaids are a pattern that should fit anyone. At least that is my view of the gorgeous plaid DSP Stampin’ Up! currently has. Add this to a simple fun fold card and I think you have a winner. A different shape of the sentiment is the cherry on top of the cake!
STAMPS
The star of this card is hard to define. There are three different options. But I am beginning with the sentiment. This one is from the stamp set that is a must have for sentiments. It is the So Sincere set. I love the vertical Happy Birthday! The layout of the card fits that vertical perfectly. I sometimes look for these and of course do not find them. There should be a vertical sentiment stamp set of the most common sentiments I believe.
The inside sentiment is also from the So Sincere stamp set. That is really an added bonus. I tend to mix and match. But I love having a pair in one set. Here is the open view of the card.
PAPERS
This beautiful plaid DSP is from the Timeless Plaids Designer Series Paper. I really love the colors in this sheet. And all of the plaids are really nice matching colors. The checkerboard on the front strip is the reverse of this piece, I believe. Sorry but I made this card last week for a class and my memory is shorter every day! 🙂 The best part of this paper pack is there are plaids to fit anyone.
The card base is Basic Beige cardstock. This cardstock is so pretty and versatile. It is a soft color in my book. I did pair it with Very Vanilla for the sentiment and the inside. But I could have simply used the Basic Beige there as well. It is light enough to stamp on easily.
DIES
There are two different Die sets used here. That perfect long oval for the sentiment is from the Greetings of the Season Die set. I love that long oval and the fact it fit the sentiment perfectly is just a bonus.
The second Die set used is the Changing Leaves Dies. These are the leaves on the front. There are two leaves attached and one single. The details are great and they add just enough texture to the card. These Dies come with the Hybrid Embossing Folder. Both of these Die sets are on the Last Chance List. This means that they are retired when the last ones are sold.
EXTRAS
The single bling today is unusual of course. If you follow my posts then you know I love bling. Today I restrained myself and used the single Adhesive Backed Sparkle Gems. These are a mix of four different colors of mostly earth tone. This one is black sparkle. It could be elegant or rustic. The placement is important because all of the Greetings of the Season Dies are all tags. My black sparkle dot covers that tag hole!
HOST CODE
My FEBRUARY HOST CODE is S2EYAW9N. Orders of $50.00 or more will receive an appreciation gift from me. I appreciate you choosing me as your demonstrator!
Thank you for stopping by today. I hope you enjoyed today’s project and will come back. I do read and reply to all of the comments individually. They mean a lot to me. Please reach out if you have a question.
Smile and Keep On Stamping,
Jackie
New Scrapbooking Catalog
The newest addition to Stampin’ Up! is an Online catalog of Scrapbooking products. You can see the catalog by clicking the photo below and save it to your computer.
Online Exclusives
New Online Exclusives have dropped. There are Halloween, Fall, Christmas, and many that are great year round. Of course the new Designer Series Papers and Embellishments are fabulous as well!
You can go directly to these in my Online Store by clicking HERE
Reminder that we are nearing the end of Sale-A-Bration!! And the additional FREE product choices Stampin’ Up! added for this month are some amazing products!
I have occasionally started my cards using scraps. Today is sort of one of those type cards. I found strips from the Splendid Autumn DSP on my desk. Scraps of DSP make great options for quick cards. This is one of those.
STAMPS
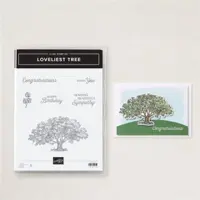
The only stamping on the front of this sweet card is from the Loveliest Tree stamp set. I love a simple birthday sentiment. And yes I know they are in a lot of different stamp sets. But the different sizes and fonts always intrigue me. Plus I sell my retired sets so lose some of those sentiments that way. This mix of small printed Happy with the gorgeous scripted Birthday just spoke to me.
PAPERS
These DSP strips are actually the star of the card. They are from the Splendid Autumn Designer Series Paper pack. These were buried on the back of my desk form a previous project of who knows when! They measure 1 1/2 X 4 3/4 and 1 3/8 X 4 1/2. Since daffodils are blooming in my yard, I saw these daisies as another sign of Spring. (Although we are scheduled for another round of really cold this week)
The card base is Fresh Freesia and the layer is Lemon Lolly. Both of these colors are pulled from the daisy piece of DSP. And there are many options for other color combinations from just that small strip of paper.
EXTRAS
The first of my Extras today is the Fern 3D Embossing Folder. This is used on the Lemon Lolly and really stands out. I love the detail it has. The next Extra is the punched ends of the sentiment strip. It is made using the Happy Labels Pick A Punch. * This is a current option for the Sale-A-Bration Free product choices!! Next is the Bakers Twine bow behind the sentiment. Finally is the purple Shimmer Gems that are a favorite of mine.
HOST CODE
My FEBRUARY HOST CODE is S2EYAW9N. Orders of $50.00 or more will receive an appreciation gift from me. I appreciate you choosing me as your demonstrator!
Thank you for stopping by today. I hope you enjoyed today’s project and will come back. I do read and reply to all of the comments individually. They mean a lot to me. Please reach out if you have a question.
Smile and Keep On Stamping,
Jackie
New Scrapbooking Catalog
The newest addition to Stampin’ Up! is an Online catalog of Scrapbooking products. You can see the catalog by clicking the photo below and save it to your computer.
Online Exclusives
New Online Exclusives have dropped. There are Halloween, Fall, Christmas, and many that are great year round. Of course the new Designer Series Papers and Embellishments are fabulous as well!
You can go directly to these in my Online Store by clicking HERE
Happy Valentine’s Day everyone! I hope you have shared at least one of your hand made card filled with love. I think all of our hand made cards are filled with love personally. But today is a special one. I looked for a set that maybe would not scream Valentine’s Day. And I believe I found it for today’s card.
STAMPS
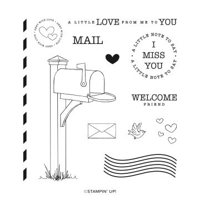
The stamp set I found to spread love is the Sending Love stamp set. I only used the stamps with no Dies. And all of the stamps used are from this one set. The mail box is the main aspect and is not exactly colored traditionally! All of the coloring is done using Stampin’ Blends. I used Smoky Slate for the post but topped it with Highland Heather. And added Granny Apple Green for the mail box itself. I know this would not fly in most communities, but it can work in this card’s world.
To add the sentiment was a question for me. I knew I would have to cut it as this is one long sentiment. It really would not look proper being larger than the focal panel. There was this scrap of Peach Pie on my desk and the answer presented itself. I stamped on the Peach Pie and then simply cut the sentiment in half. This brought out yet another color of the DSP in a fun way. Plus pairs perfectly with the mail box theme.
PAPERS
These sheets of DSP are both from the Toadstool Garden Designer Series Paper. This is a Free 6X6 paper pack in Sale-A-Bration. With a qualifying order this is one of the products you can choose. SAB goes through the end of the month so you still have time to get some of the freebies!
I pulled all of the colors from the toadstool sheet of DSP. The Peach Pie was a surprise addition but I love how it helps those mushrooms to pop. The card base is Granny Apple Green. That striped sheet is a mix of Fresh Freesia and Highland Heather. Those are the colors I tried to add in to the mailbox panel.
EXTRAS
The trio of shimmer gems are all from the 2024-2026 In Color Shimmer Gems. I used different shades of the pink/purple and then a Peach Pie one as well. This is a more whimsical card where it does not require elegant bling!
LAYERS
The card base measures 4 1/4 X 11 and is scored at 5 1/2. The two DSP strips are 2 1/2 X 5 1/8 for the left side and 2 X 5 for the right side. For the focal layer there is a thin layer of Granny Apple that measures 2 3/4 X 4 3/8 with the Basic White layer being 2 3/8 X 4 1/4.
HOST CODE
My FEBRUARY HOST CODE is S2EYAW9N. Orders of $50.00 or more will receive an appreciation gift from me. I appreciate you choosing me as your demonstrator!
Thank you for stopping by today. I hope you enjoyed today’s project and will come back. I do read and reply to all of the comments individually. They mean a lot to me. Please reach out if you have a question.
Smile and Keep On Stamping,
Jackie
New Scrapbooking Catalog
The newest addition to Stampin’ Up! is an Online catalog of Scrapbooking products. You can see the catalog by clicking the photo below and save it to your computer.
Online Exclusives
New Online Exclusives have dropped. There are Halloween, Fall, Christmas, and many that are great year round. Of course the new Designer Series Papers and Embellishments are fabulous as well!
You can go directly to these in my Online Store by clicking HERE
I am so behind on making birthday cards this month. That being said I am taking a break from Valentine today and sharing one of the birthday cards. It is a mix of gorgeous DSP patterns from the Floral Delight Designer Series Paper pack. Why use just one sheet when they all layer so well!
PAPERS
These beautiful sheets of paper are from the Floral Delight Designer Series Paper pack. I chose the floral sheet first as the star of the card. Then I thought to look for a green that would layer instead of using card stock. This linen look sheet was perfect! Next for a sentiment strip I found the checked yellow piece. It was actually a scrap from a previous card. I always save my scraps for just this purpose.
The card base is Pool Party cardstock. It is shown in the floral layer as little highlights. To add a bit more of the Pool Party I used a scrap to stamp the Happy Birthday. It seems to tie the card together. For one last touch of cardstock I used a scrap of Old Olive to die cut the small leaf outline. It helps tie in with the floral leaves of the DSP.
STAMPS
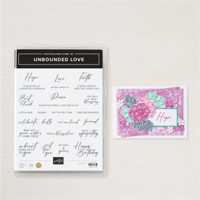
The only stamping on this card front is the sentiment. The papers are so great that there was no need. And this makes it a pretty quick and easy card to make. This elegant font of Happy Birthday is from the Unbounded Love stamp set. It can stand alone as it is bold enough with the beautiful font to gain attention.
EXTRAS
There are two Die cut pieces for this card that count as extras. First is the little leaf next to the sentiment . It and the sentiment shape are from the Mixed Labels Die set. The sentiment layer is a great size plus the detailed edging really takes it up a notch. And the final extra is the bling. I restrained myself and with only one piece of bling. A single Pearl on the sentiment layer seemed plenty with all of the floral pattern.
LAYER MEASUREMENTS
The card base is cut to 5 1/2 X 8 1/2. None of the DSP pieces are directional, but if they were they should be cut landscape. The green pattern is cut 5 X 3 3/4 with the floral cut to 4 1/4 X 3. For the strip of checked DSP it measures 4 X 3/4 and then is angle cut on each end.
HOST CODE
My FEBRUARY HOST CODE is S2EYAW9N. Orders of $50.00 or more will receive an appreciation gift from me. I appreciate you choosing me as your demonstrator!
Thank you for stopping by today. I hope you enjoyed today’s project and will come back. I do read and reply to all of the comments individually. They mean a lot to me. Please reach out if you have a question.
Smile and Keep On Stamping,
Jackie
New Scrapbooking Catalog
The newest addition to Stampin’ Up! is an Online catalog of Scrapbooking products. You can see the catalog by clicking the photo below and save it to your computer.
Online Exclusives
New Online Exclusives have dropped. There are Halloween, Fall, Christmas, and many that are great year round. Of course the new Designer Series Papers and Embellishments are fabulous as well!
You can go directly to these in my Online Store by clicking HERE
I have mixed two of the heart stamp sets that are current with Stampin’ Up!. The Adoring Hearts stamp set and the Hearts of Elegance Dies. Add some gorgeous DSP and you have a lovely card.
STAMPS
The focal heart is made from the two products mentioned at the beginning. The sweet sentiment and the flowers are from the Adoring Hearts stamp set. I had the idea of the paper and heart but what to be the focal part was a problem. As soon as I looked through the stamps in the stamp set I found exactly what would fit.
These are stamped after the heart is cut. That makes placement very easy. The flowers are stamped with Memento Tuxedo Black Ink and colored using Old Olive and Pretty In Pink Stampin’ Blends.
DIES
The heart die cut is from the Hearts of Elegance Die set. Is it a part of the bundle with the DSP and the Gold Twine. There are two large hearts, a solid and an outline. Then there are a series of layering dies. This is the second largest of those.
PAPERS
To help the marbled sheet of DSP stand out I used a second sheet from the pack. These are both from t he Marbled Elegance Designer Series Paper. I was not sure in the beginning how well they would work together. After layering the White I was sure I had chosen correctly to help everything stand out.
The card base is Pretty In Pink which is the lightest color in the marbled DSP. The layers measure 4 X 5 1/4, 3 7/8 X 5 1/8, then 2 3/4 X 4 and 2 5/8 X 3 7/8. The heart was from a scrap of Basic White.
EXTRAS
There are two extras to complete this card. I wanted to carry on with the gold. So I chose the Gold Twisted Twine. It is wrapped around the marbled layer three times. I then added a triple strand bow to the front. I tucked the heart behind the twine thinking it looked better that way.
The bling is a subtle one. I went with a single bling for a change. This is the Regal Foiled Adhesive Dots. There are four colors and I chose the pinkish one. (That is a technical term:)
HOST CODE
My FEBRUARY HOST CODE is S2EYAW9N. Orders of $50.00 or more will receive an appreciation gift from me. I appreciate you choosing me as your demonstrator!
Thank you for stopping by today. I hope you enjoyed today’s project and will come back. I do read and reply to all of the comments individually. They mean a lot to me. Please reach out if you have a question.
Smile and Keep On Stamping,
Jackie
New Scrapbooking Catalog
The newest addition to Stampin’ Up! is an Online catalog of Scrapbooking products. You can see the catalog by clicking the photo below and save it to your computer.
Online Exclusives
New Online Exclusives have dropped. There are Halloween, Fall, Christmas, and many that are great year round. Of course the new Designer Series Papers and Embellishments are fabulous as well!
You can go directly to these in my Online Store by clicking HERE
I have another first on today’s card. Not a super first, but a step for myself. A few weeks ago I shared a card using one of the Kits. It was the Watercolor one. That was the first time I had used a kit project. (You can see that post HERE) And today I have used die cut / punch outs from one of the DSP. It is similar to what the kits contain. To say I was impressed with the paper and the colors is an understatement. I was amazed and in love. So much that it is the star of today’s card.
PAPERS
The amazing DSP pack this gorgeous bouquet comes from is the Wildflower Birthday Designer Series Paper. There are two sheets of punch outs just as there are two sheets of each pattern paper. All of these punch outs are as pretty as this bouquet. I hope you see why it is the star of the card. Now I am ready to give all of the kits another look.
This is also the second time in recent days that I have used Blueberry Bushel for the card base. This bright color pops on it’s own. And it really pulls the bits of blue from the bouquet. The blue is the first thing I notice now.
STAMPS
The bouquet really is impressive and fills the front of the card. So there was not a lot of need, or room, for a sentiment layer. However I wanted to add one. So I went with this simple sentiment using two different stamps from the Sentimental Park stamp set. Because they are photopolymer, it was so easy to stamp the bottom sentiment and then add the top centered above it. To give the Basic White strip a touch of extra, I flagged each end with my paper snips.
EXTRAS
This bouquet is beautiful but it still needed something behind it. To add some additional texture I went with the Distressed Tile Embossing Folder. I think it adds just the right background without taking away from the bouquet.
To add bling to match the gold from the bouquet, I added a trio of the Gold Textured Adhesive Dots along with a bow from the Gold Twisted Thread. This thread is easy to work with and a great way to add some shine to a card.
HOST CODE
My FEBRUARY HOST CODE is S2EYAW9N. Orders of $50.00 or more will receive an appreciation gift from me. I appreciate you choosing me as your demonstrator!
Thank you for stopping by today. I hope you enjoyed today’s project and will come back. I do read and reply to all of the comments individually. They mean a lot to me. Please reach out if you have a question.
Smile and Keep On Stamping,
Jackie
New Scrapbooking Catalog
The newest addition to Stampin’ Up! is an Online catalog of Scrapbooking products. You can see the catalog by clicking the photo below and save it to your computer.
Online Exclusives
New Online Exclusives have dropped. There are Halloween, Fall, Christmas, and many that are great year round. Of course the new Designer Series Papers and Embellishments are fabulous as well!
You can go directly to these in my Online Store by clicking HERE
The content in this blog is the sole responsibility of Jackie Beers as an Independent Stampin' Up! Demonstrator. The use of and content of classes, services or products offered is not endorsed by Stampin' Up!