A notecard can be so handy to have on hand. I try to make some up that are good for most occasions for when I need a last minute acknowledgment. The one I have today is more specific in that it says Hello. That could be changed merely with a different sentiment and everything else staying the same.
But First, please do not forget that today is the last day of the Double Stampin’ Rewards. They end at 11:59 PM Mountain Time.
Notecards are the Best!
Notecards are quick to make as they are smaller. Yet can still be as pretty as a full size card or scrapbook page. The one I have to share today is using some DSP scraps and two stamps. Plus a couple of Extras. Still very quick and simple.
Paper
The White Notecards come with 20 cards and 20 envelopes for the small price of $10.00. Using this DSP scrap layout, that could be a lot of ready to go cards using the small strips leftover from other projects. And no one wants to throw away those beautiful strips!
The DSP used is two sides of the Delicate Dreams Designer Series Paper. This is so gorgeous. Partly because it showcases the beautiful new In Color of Hydrangea Hue. In addition there are some Bronze effects on some of the leaves and flower centers. It did not show well in the photo.
I shared a piece of the Hydrangea Hue cardstock with the tag. That color to me is not only beautiful but it reminds me of the blue/purple hydrangea flowers which are one of my most favorite flowers. Plus it is not like any other color we have. it is truly unique and I love it. The green DSP is the reverse of the beautiful floral and really highlights the greens there.
Stamps
The sentiment as well as the little bird are from the Cutest Crew Stamp set. This stamp set was on it’s way to me as soon as it was available and apparently to a lot of other folks. It has been out of stock, but is expected back the end of the month.
To get the little bird image, I stamped only half of the bird stamp and then fussy cut this one apart from the others. He became a Blue Bird to match the color theme. He is colored using the Hydrangea Hue Stampin’ Blends.
For the sentiment, I stamped it and then fussy cut around the sides and top to give some interest and not cover the entire tag. It also helps the sentiment to stand out a little more when it has some different shapes.
Extras
The tag is from the Labeled With Love Punch. This guy is on the Last Chance List for $15.00. I love the unique shape as it does look like a ticket or small tag. To give a bit more texture to the card, I added a bow using Linen Thread. This is always a good choice when you want a ribbon or just some texture and it really goes with almost anything.
Finally I have to add Bling! I have shared a few upcoming products from the May – August Catalog on this little card. All of these are only a couple of weeks away and I felt it was an okay time to bring them out for you to see. These 2026-2028 In Color Dots are in all of the new In Colors. and in two sizes. I used the Hydrangea Hue of course. These have a “pearl” like shine to them so they qualify as true bling.
New Product Reminder
The Hydrangea Hue products will all be available to order beginning on May 5th. I believe you will love this new catalog, And it is in portrait form like the Annual Catalog, not landscape as the Mini Catalogs have been.
STAMPIN’ REWARDS
You will earn rewards on all orders over $20.00 in products The system will track your rewards for you. And they will be available for use on your next order, or you can save up for a larger purchase. All you need to do is on your first order is agree to participate. You will then begin receiving rewards on qualifying orders.
Orders of $50.00 or more you will still receive an appreciation gift from me. I appreciate you choosing me as your demonstrator!
COMMENTS
Please know that I love to hear from you and answer any questions you may have. My responses generally are not done here on the post. They are made using my phone as I have found it is easier to answer a question for you personally. So you will be receiving an email from me if you make a comment.
Thank you for stopping by today. I hope you enjoyed today’s project and will come back. I do read and reply to all of the comments individually. They mean a lot to me. Please reach out if you have a question.
Smile and Keep On Stamping,
Jackie
Online Exclusives
New Online Exclusives drop every other month. These are amazing products and are a supplement to the Annual and Mini Catalogs. This way you have access to even more New and Awesome products!
You can go directly to these in my Online Store by clicking HERE
I have been all about simple cards so far this week and today is no exception! This one truly is a #simplestamping card.
Cutest Crew
The Cutest Crew stamp set has to be one of the “cutest” stamp sets in a while. It has both cats and dogs, and they are adorable! I love both, actually most animals, so of course it was immediately on my list when it first debuted. I used the little birds, which I had really not even looked at originally, along with the sweet sentiment. Both are stamped using Memento Tuxedo Black and the birds are given a touch of color with some Stampin’ Blends. I also stamped the birds on the inside layer of the card for added fun.
Blending
This is a super simple card but I wanted to add a touch of extra to it. So I stamped the birds and the sentiment and then did something I do not often do. I used Blending Brushes to create the background colors. Pool Party is used for the sky and Old Olive for the grass.
Even if you are new to Blending Brushes and Blending Ink on your paper, this is an easy one to do. I will say “always…begin with the brush off of your cardstock”. And less is more. You can add more color, but cannot take away. Start with just a bit of color on your brush, rub it on your Grid Paper, then slide it across the grid paper and onto your cardstock. This alleviates the dark spots that happen. And if that happens don’t fret over it. An embellishment or some darker shading next to it can camouflage that. After all, these are handmade!!
Papers
I chose the Cute As A Bug Designer Series paper to go with my sweet layer. The two sheets compliment each other and are both bright and cheerful. I layered the two pieces, which each measures 5 1/8 X 1 7/8, on to a Basic White that measures 5 1/4 X 4. Two cover any joining issues, I added a strip of Old Olive that is 5 1/4 X 1/4. The only Extra today is a single Brushed Brass Butterfly. These went on the Last Chance List and were immediately scooped up. So sadly they have all flown away. They will be missed by me!
To carry the fun theme to the inside, I layered the Basic White onto a piece of Poppy Parade cardstock. And added only the Pool Party blending over them
STAMPIN’ REWARDS
You will earn rewards on all orders over $20.00 in products The system will track your rewards for you. And they will be available for use on your next order, or you can save up for a larger purchase. All you need to do is on your first order is agree to participate. You will then begin receiving rewards on qualifying orders.
Orders of $50.00 or more you will still receive an appreciation gift from me. I appreciate you choosing me as your demonstrator!
COMMENTS
Please know that I love to hear from you and answer any questions you may have. My responses generally are not done here on the post. They are made using my phone as I have found it is easier to answer a question for you personally. So you will be receiving an email from me if you make a comment.
Thank you for stopping by today. I hope you enjoyed today’s project and will come back. I do read and reply to all of the comments individually. They mean a lot to me. Please reach out if you have a question.
Smile and Keep On Stamping,
Jackie
Online Exclusives
New Online Exclusives drop every other month. These are amazing products and are a supplement to the Annual and Mini Catalogs. This way you have access to even more New and Awesome products!
You can go directly to these in my Online Store by clicking HERE
Card making is something I do because I love it. I was wowed and in love from the first home party I went to many years ago. Since I have been busy with the houses and not stamping as much I have felt the lack of being me. Now that I am stamping regularly again I am back to my happy place. Today’s card is one that fits my feelings. It is a card for no reason other than “Just Because” . I believe there are quite a lot of people that would appreciate a simple Just Because card.
Beautifully Celebrated
These layering Dies are from the Beautifully Celebrated Die set. There are flowers and other pieces to the set, but I wanted these lovely layering pieces. For me the layers make the card. I used three different sheets from the Mixed Up Patterns Designer Series Paper. Not really sure why I chose to add Strawberry Slush to the Balmy Blue, but it works.
Gallery Blooms
The single floral stem is from the Gallery Blooms Bundle. I sponged the colors using Sponge Daubers and stamped a couple of times to get the right colors. There are some bleeding over, but I am ok with that. Handmade cards are not perfect. At least mine are not!
The stem is cut using the matching Die from the Bundle. I did raise it from the layers using Stampin’ Dimensionals for some depth. And I added a double Linen Thread Bow for texture. To add a simple bow to a single flower is something I tend to always do.
Sentiment
This sweet and perfect sentiment is one that is in the February Product of the Month. I hope you have grabbed this set entitled Fabulous Sayings. There is a great mix of sentiments in this set. It is only $5.00 with a $75.00 order. And it is while supplies last. But if it does not sell out in February, it will still be available in March while supplies last.
Extras
I have already mentioned the Linen Thread as the first Extra for today. The other are Rhinestones. These are something that I love but forget when there are new embellishments to play with. However they are definitely one to keep in your stash. They work with almost any card layout. Some really shiny bling is never wrong!
STAMPIN’ REWARDS
You will earn rewards on all orders over $20.00 in products The system will track your rewards for you. And they will be available for use on your next order, or you can save up for a larger purchase. All you need to do is on your first order is agree to participate. You will then begin receiving rewards on qualifying orders.
Orders of $50.00 or more you will still receive an appreciation gift from me. I appreciate you choosing me as your demonstrator!
COMMENTS
Please know that I love to hear from you and answer any questions you may have. My responses generally are not done here on the post. They are made using my phone as I have found it is easier to answer a question for you personally. So you will be receiving an email from me if you make a comment.
Thank you for stopping by today. I hope you enjoyed today’s project and will come back. I do read and reply to all of the comments individually. They mean a lot to me. Please reach out if you have a question.
Smile and Keep On Stamping,
Jackie
Online Exclusives
New Online Exclusives drop every other month. These are amazing products and are a supplement to the Annual and Mini Catalogs. This way you have access to even more New and Awesome products!
You can go directly to these in my Online Store by clicking HERE
I am continuing my group of cards made with the Love Notes Designer Series Paper. It is such a fun paper and makes cards in a snap. Today’s is EX-tra Fun I think.
Love Notes in a Cup
All of the papers, with the exception of the card base and layer, are the Love Notes DSP. As I have said several times, this paper is so much fun to use. It is like “what can I pair together next?”. Personally I was overjoyed when I saw these purple layers. Purple, along with orange, are my favorite colors. So this was meant to be.
The purple polka dot layer is so cute with the faded look going on. And the strip of plaid is the reverse of another sheet of the DSP I had trimmed. It matches the heart on the cup. And the two are what gave me the Flirty Flamingo as the card base and layer.
Extras
This is maybe the simplest of all of the Love Notes cards I have made. So there is only one extra today. But it is also a favorite that I am so happy is still an active product. It is the Purple Shimmer Gems. These are so pretty as they come in a variety of purples. Almost like the polka dot DSP, there are different shades of purple. They are a great embellishment to have on hand.
STAMPIN’ REWARDS
You will earn rewards on all orders over $20.00 in products The system will track your rewards for you. And they will be available for use on your next order, or you can save up for a larger purchase. All you need to do is on your first order is agree to participate. You will then begin receiving rewards on qualifying orders.
Orders of $50.00 or more you will still receive an appreciation gift from me. I appreciate you choosing me as your demonstrator!
COMMENTS
Please know that I love to hear from you and answer any questions you may have. My responses generally are not done here on the post. They are made using my phone as I have found it is easier to answer a question for you personally. So you will be receiving an email from me if you make a comment.
Thank you for stopping by today. I hope you enjoyed today’s project and will come back. I do read and reply to all of the comments individually. They mean a lot to me. Please reach out if you have a question.
Smile and Keep On Stamping,
Jackie
Online Exclusives
New Online Exclusives drop every other month. These are amazing products and are a supplement to the Annual and Mini Catalogs. This way you have access to even more New and Awesome products!
You can go directly to these in my Online Store by clicking HERE
I have been behind on my promotion of SAB. And sadly it is coming to a close on Friday. The card I am sharing contains one of the most popular of the SAB items. It is the Toadstool Gardens Designer Series paper. This paper is so fun and can be used for almost any card idea.
STAMPS& PUNCH
The fabulous sentiment has stolen the show on this card! That fun font of the Poppin’ Up is one of the best I have seen. It is from the Terrific Toadstools stamp set. As are the fun mushrooms and grass stamps.
The mushrooms are stamped with Poppy Parade ink and Melon Mambo ink. I love the addition of the bright green of the grass or leaf image. Those are stamped using Granny Apple Green. And the stems, plus the sentiment, are stamped using Early Espresso Ink.
The mushrooms have a punch that punches the mushroom head and stem. This punch does not leave a white outline, so it really makes it easier to line up without that worry. I have used Stampin’ Dimensionals under the head of the larger mushroom to add some depth. And the fabulous sentiment layer is raised with Stampin’ Dimensionals as well.
PAPERS
These fun DSP sheets just make me smile! The colors remind me of the 1970’s and I remember wearing all of those colors. Personally I love the mix of orange and pink. The different greens just brings everything together. These DSP sheets are from Sale-A-Bration. The Toadstool Gardens Designer Series Paper is a Free product with a qualifying order through the end of February. So only a few days left.
The DSP strips are where all of the colors of the card were pulled from. I went with a very light card base of Fresh Freesia. It really pulls that color from the two DSP sheets. The sentiment layer is also a piece of the DSP. Stamping on the DSP always seems so special.
EXTRAS
The mushrooms are layered onto a Basic White die cut from the Spotlight on Nature Dies. These fun circles all have different details around the edge. It adds an extra touch. And for the bling I went with a single Sunny Day Iridescent Dots. The orange really pops with all of the colors.
HOST CODE
My FEBRUARY HOST CODE is S2EYAW9N. Orders of $50.00 or more will receive an appreciation gift from me. I appreciate you choosing me as your demonstrator!
Thank you for stopping by today. I hope you enjoyed today’s project and will come back. I do read and reply to all of the comments individually. They mean a lot to me. Please reach out if you have a question.
Smile and Keep On Stamping,
Jackie
New Scrapbooking Catalog
The newest addition to Stampin’ Up! is an Online catalog of Scrapbooking products. You can see the catalog by clicking the photo below and save it to your computer.
Online Exclusives
New Online Exclusives have dropped. There are Halloween, Fall, Christmas, and many that are great year round. Of course the new Designer Series Papers and Embellishments are fabulous as well!
You can go directly to these in my Online Store by clicking HERE
I have a simple and sweet card for you today. The Book fold is a Fun Fold that is really easy to make. It is paired with a quick stamped image for a simply sweet card. I added a touch of humor in the sentiment as the final touch.
Here is the open view
STAMPS
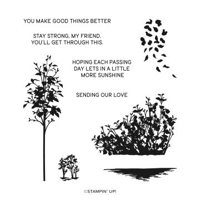
There are two stamp sets on this card. The tree image is from the Delicate Forest stamp set. I love the simpleness of the tree. This image has been used previously on a sympathy card. I thought the more shadow look of the tree was perfect. And I was headed that way today. But decided that it really did not need to be a sympathy. It works for any type card. And I love stamping on the DSP. The Pebbled Path Ink does lend it to a shadow look though. I also used the small tree stamp to adorn the inside of the card. You can see that in the second photo. This type card can get by without an inside sentiment I think.
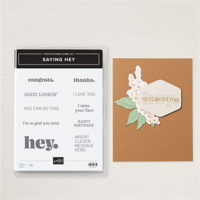
The fun sentiment is from the Saying Hey stamp set. This may be one that you have overlooked in the Annual Catalog. It includes the basic sentiments that we all want like Happy Birthday, but also some really fun ones like today’s. I believe this is a great way to tell someone you miss them.
PAPERS
These two DSP sheets are both from the Everyday Skies Designer Series Paper. This is a 6X6 pack of papers that have fabulous sky images on one side and then complimentary patterns on the opposite. Both of these are the reverse side of papers. I paired them with Pretty In Pink for the card base. This paper pack is an Online Exclusive.
The Bookfold is a simple card base. The Pretty In Pink is 11 X 4 1/4. Score it at 4 1/4 and then 5 1/2. Fold on both score lines and then add adhesive between the two. This makes the “spine” of the book. Easy Peasy!
EXTRAS
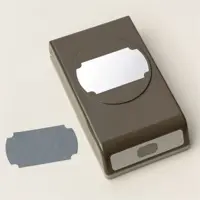
The sentiment layer is a big extra. These layering Dies are from the Mixed Labels Dies that are a Bundle in the Online Exclusives. I love the different little details around the edges. Another simple Extra is the White Frayed Grosgrain Ribbon. A little knot and it is a nice touch added to the spine. For an added bonus, this ribbon is on the Last Chance List at almost half price. And to compliment more of the White, I added a scattering of Pearls around the front layer.
HOST CODE
My January Host Code is KSG3THS3. Orders of $50.00 or more will receive an appreciation gift from me. I appreciate you choosing me as your demonstrator!
Thank you for stopping by today. I hope you enjoyed today’s project and will come back. I do read and reply to all of the comments individually. They mean a lot to me. Please reach out if you have a question.
Smile and Keep On Stamping,
Jackie
New Scrapbooking Catalog
The newest addition to Stampin’ Up! is an Online catalog of Scrapbooking products. You can see the catalog by clicking the photo below and save it to your computer.
Online Exclusives
New Online Exclusives have dropped. There are Halloween, Fall, Christmas, and many that are great year round. Of course the new Designer Series Papers and Embellishments are fabulous as well!
You can go directly to these in my Online Store by clicking HERE
The content in this blog is the sole responsibility of Jackie Beers as an Independent Stampin' Up! Demonstrator. The use of and content of classes, services or products offered is not endorsed by Stampin' Up!