I have had the Ocean Friends Bundle for a month and this is the first time I have inked it up. That is shocking! Now I see a lot more crabs in my future. And choosing the colors is such a fun task to make the crab your own.
I apologize for the darkness. not sure what is going on with my photography.
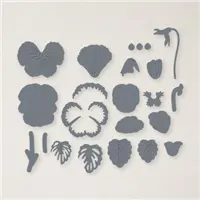
STAMPS& DIES
The Ocean Friends stamp set is such a cute set. The crab and lobster are a perfect mix of real and fun. Plus the sentiments are sweet like this Hello, Friend. The seaweed behind the crab is part of the stamps. It did not have a matching Die but was not difficult to fussy cut. The crab did have a Die and was easy to cut.
There are different thoughts regarding two step stamping. I go back and forth with which should be stamped first the solid or the outline. For me on the crab it was easier to line things up with stamping the outline first. I used Pumpkin Pie for the outline. Then I was able to line up the solid with the top near the eyes and the bottom legs. Peach Pie was used for the solid shape. But everyone has their own technique.
PAPERS
The adorable starfish paper is one of the amazing sheets from the pack of Friends of The Ocean Designer Series Paper. Those colors are a mix of exactly my colors. I wanted to use more of it, but also wanted the embossing folder. The compromise of this strip surprised me at how well it stands out. I paired it with bright colors that come from the paper. Again the dark photography doesn’t do it justice. The card base is Lemon Lime Twist with the embossed layer being Summer Splash.
The measurements are 5 1/2 X 8 1/2 for the card base. With the layer being 5 X 3 3/4. And the strip of DSP is 4 3/4 2. I liked giving the waves some show off space but still have enough of the starfish paper showing.
EXTRAS
The main of the extras is an embossing folder that is part of the ocean Suite. It is the Soft Waves Embossing Folder. The swirls are amazing, and perfect for the images. Of course the bling matches well also. The Antique Pearls are scattered around the waves for some shine there.
HOST CODE
My January Host Code is KSG3THS3. Orders of $50.00 or more will receive an appreciation gift from me. I appreciate you choosing me as your demonstrator!
Thank you for stopping by today. I hope you enjoyed today’s project and will come back. I do read and reply to all of the comments individually. They mean a lot to me. Please reach out if you have a question.
Smile and Keep On Stamping,
Jackie
New Scrapbooking Catalog
The newest addition to Stampin’ Up! is an Online catalog of Scrapbooking products. You can see the catalog by clicking the photo below and save it to your computer.
Online Exclusives
New Online Exclusives have dropped. There are Halloween, Fall, Christmas, and many that are great year round. Of course the new Designer Series Papers and Embellishments are fabulous as well!
You can go directly to these in my Online Store by clicking HERE
My card to share today is a CASE from fellow demonstrator, and friend, Paula Butler. When we receive a pretty card it is perfectly fine to change a bit and make it your own.
Papers
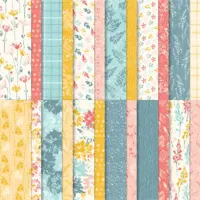
It is really difficult to say what is the most important part of this card. They are all great on their own! But I will begin with the papers. These are strips from three different sheets of the Inked Botanicals Designer Series Paper. I know that I have used this quite a bit. And I will continue to use it! There is not a bad sheet in this pack. And it is currently 15% off!! These strips are each 1 X 4.
The card base is Thick Basic White card stock. I added the thin layer of Lost Lagoon as it is a color in all three of the DSP papers. The gorgeous die cut piece is from the Gorgeously Made Dies. I love that this piece has great detail and it is large enough to stand alone as I have used it. This piece is from Crushed Curry card stock.
Stamps and Other Products
This is a pretty simple card but does include a variety of products. However it could be made utilizing things that you already have. Unless you are like me and want the new things you see!!! To begin this section I will start with the embossed layer of White. The embossing folder is one I really do love! It is one of three that are in the Online Exclusives store. They do not have names other than they are Basics Embossing Folders. The detail on this one is fabulous.
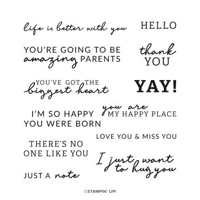
The next extra is the sentiment layer. The sentiment itself is from the Happy Labels stamp set. And it fit perfectly on the rough cut Die cut from the Gorgeously Made Dies. This is the same Die set as the floral piece. I like the jagged edges. With the fairly busy prints of the DSP, I did not need a lot of finishing touches. But again, there must be bling! So there is one small Gold Glossy Dot added next to the sentiment.
Thank you for stopping in today!!!
Designer Series Paper Sale! June 1-30
Click on the photo to see all of the available papers. If you are ready to order please click on the shop button in the menu and you will be taken to my online store! I also have a host code of 34QVEY4F that I would appreciate you using!
New Starter Kit opportunity for the month of June!
If you have a large Wish List, I would love to talk with you about the Starter Kit. It is the Ultimate Bundle!
Online exclusives are here to stay! Click on the photo and be taken directly to them in my online store. If you place an order, please use my Host Code listed just below.
HOST CODE
My June Host Code is 34QVEY4F. Please use this code for orders under $150.00. I will have a small gift for those with orders over $50.00 in addition to the Perk Rewards Program. You can read all of the information at the top of the page in the Menu Bar under SHOP / Perks.
Thank you for stopping by today. I hope you enjoyed today’s project and will come back. I do read and reply to all of the comments individually. They mean a lot to me. Please reach out if you have a question.
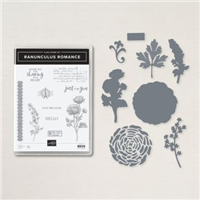
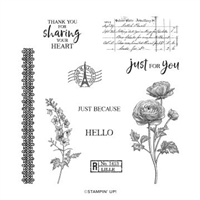
I have a sweet Hello card using the Ranunculus Romance stamp set for my project today. And it includes a Direct To Rubber flower as the star.
Stamp Set
The Ranunculus Romance stamp set is a fun one with beautiful focal stamps as well as background stamps. And it is carrying over to the next Annual Catalog from the Mini! All of the stamps used are from the stamp set. The background stamping on the card base is done Tone on Tone with Soft Succulent Ink.
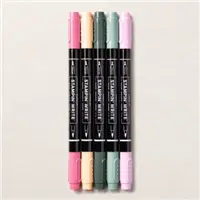
For the flower I used the Direct To Rubber Technique by coloring onto the red rubber with the Soft Succulent and Polished Pink Stampin’ Write Markers. This card is using the 2021-2023 In Colors for paper and inks. To do the Direct To Rubber technique you need the Stampin’ Write Markers. So with there only being five markers in an In Color set, it is a great way to collect these and less expensive than the Color Families.
Paper
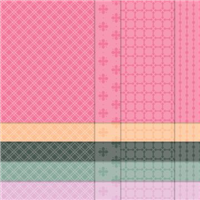
The card base is the soft and elegant Soft Succulent cardstock. As mentioned above, the colors are all from the In Colors. The two paper layers are from the 2021-2023 In Color 6×6 paper stack. These two pieces are the same design front and back. So you are seeing both patterns between the two colors. The green DSP is actually Evening Evergreen. I believe the darker lines are Evening Evergreen and the lighter area is closer to the Soft Succulent. For some added depth, I angled the two pieces of DSP. This allows you to see more of the colors and designs.
Extras
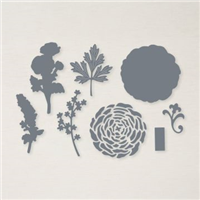
Making the focal point really stand out is not always easy. One of the products I love to use for this is a fun die shape. This one is from the Scalloped Contours Dies. The different scalloped layers in graduating sizes is a great one to have in your stash.
The cute little Hello tag is from the Ranunculus Dies. This is the matching dies to the stamp set and is available as a bundle. The tag is tied on using the wonderful Linen Thread. It is perfect for little tags or adding a masculine touch to a card. However I think it works great with flowers by thinking of it as garden twine. To finish off the card I scattered a few Pearls Basic Jewels around for some bling.
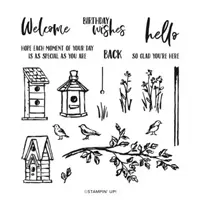
WAVES OF THE OCEAN SUITE …EARLY RELEASE
CLICK ON THE PHOTO TO SEE THE COMPLETE SUITE OF PRODUCTS
ALL TOGETHER … SPECIAL BUNDLE
CLICK ON THE PHOTO TO SEE ALL OF THE PRODUCTS
HOST CODE
My April Host Code is STVD4BDV. Please use this code for orders under $150.00. I will have a small gift for those with orders over $50.00 in addition to the Perk Rewards Program. You can read all of the information at the top of the page in the Menu Bar under SHOP / Perks.
Thank you for stopping by today. I hope you enjoyed today’s project and will come back. I do read and reply to all of the comments individually. They mean a lot to me. Please reach out if you have a question.
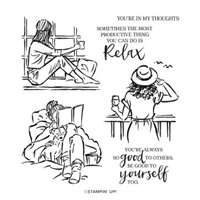
I love to color. The In The Moment stamp set is the perfect set for me to do just that. And pairing it with fun shapes for layers is a great match.
Stamps and Dies
As I said above, I love to color. And these three images in the In The Moment stamp set are made for coloring. They are all about relaxing, and I love them. I made three of the cards as 4X4 cards and will be sharing them over the next few days. All of the stamps for this card are from the stamp set. To get a different “look” I used one of the Hippo & Friends Dies to frame and cut out the image. I adore the fun shapes from these dies.
Paper and Colors
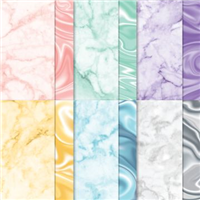
For a bit more of a “fun” look, I chose the Simply Marbleous Designer Series paper from the Sale-A-Bration catalog. The movement in this paper is so beautiful that it could be art itself! So of course my color choices started with the great paper. Although if you look at the card, you see a mix of colors. This is a “lounging around” scene. And when I am doing this, I am never wearing a matcing outfit! LOL!! So I went with a mix of comfy clothing and blankets. And of course, the perfect pet to keep you company.
Sale-A-Bration is the Best Time of Year!!
HOST CODE
My February Host Code is HFEQADCZ. Please use this code for orders under $150.00. I will have a small gift for those with orders over $50.00 in addition to the Perk Rewards Program. You can read all of the information at the top of the page in the Menu Bar under SHOP / Perks.
Thank you for stopping by today. I hope you enjoyed today’s project and will come back. I do read and reply to all of the comments individually. They mean a lot to me. Please reach out if you have a question.
I have realized that in my card making of late that I have been neglecting my Embossing Folders. I decided to go back to what used to be my favorite tool in card making and get back to my roots. In doing this, I found some fun new ones from the current Annual Catalog.
The card I made is a very clean looking card with minimal parts when you first glance at it. Actually there are several layers and different products. However all are simply used. There is zero difficulty in making this card!
Layers
There are a few layers in the layout of this card. It begins with the Calypso Coral card base. I paired it with a reverse side of one of the sheets of DSP from the Pansy Petals Designer Series paper. I cut the polka dot piece of DSP into two strips of 5/8 X 5 3/8. They were each layered at the top and the bottom , watching the margins on the ends and either top or bottom of the card. I also cut a second strip of 5/8 X 4 that I cut in half. Those are used as the flags on the focal layer.
The center embossed layer is made using the new Hello Embossing Folder. The folder comes in a pair with a Thanks folder as well. It is one of the narrow ones, so the Pale Papaya cardstock is 3 1/8 X 5 3/8. This piece was layered slightly over the DSP strips at the top and bottom. I would rather have the little extra coverage from the strips than not quite enough.
I love this folder! It says Hello in a variety of different languages. I placed my focal point to the left side so the English “Hello” is showing in the center. Here is a close up of the embossed image.
Finishing
For the focal point I tried to keep it simple as well. I wanted the embossed layer to not be too overshadowed. To do this I chose the sentiment from Free As A Bird that is another “Hello”. I feel certain my recipient will get the message intended by the card! LOL!!!
The Pansy is cut from a piece of the Pansy Petals Designer Series Paper. I love when the Dies not only cut what is stamped but also matches the images in the DSP. I chose the Pansy that is the same colors as my card choices. The plain White circle was chosen to highlight the single flower. Layering Circles were used to cut the circle.
With the flower added to the stamped circle, it was just a couple of steps to finishing the card. By using the Banner Pick A Punch flag end to cut the two pieces of the DSP I had left, it made a perfect little addition and tied the card together. For the finishing touch I added a trio of Champagne Rhinestones. One is in the center of the flower, one in the upper corner of the circle and the third is the “O” in Hello.
Measurements
card base of Calypso Coral is 5 1/2 X 8 1/2
Pale Papaya embossed layer is 3 1/8 X 5 3/8
DSP strips are 2 @ 5/8 X 5 3/8
DSP flags are 5/8 X 4, then cut in half to 2 @ 5/8 X 2
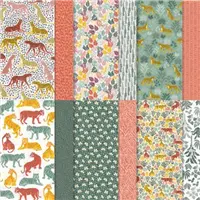
The Pansy Petals Designer Series Paper is one of the packs that is included in the DSP Sale !!! All of the information is just below.
The picture below shows the Designer Series Papers that are included in the Sale. There are 9 to choose from!!
HOST CODE
My July Host Code is 2GKGF4Q7. Please use this code for orders under $150.00. I will have a small gift for those with orders over $50.00 in addition to the Perk Rewards Program. You can read all of the information at the top of the page in the Menu Bar under SHOP / Perks.
Thank you for stopping by today. I hope you enjoyed today’s project and will come back. I do read and reply to all of the comments individually. They mean a lot to me. Please reach out if you have a question.
With Summer in full swing it seems, I decided to do a garden type card using the Garden Birdhouse stamp set. It is paired with the In The Wild Designer Series paper. That sounds appropriate I believe!
Layout
I chose to do a 4 X 4 card with this adorable little birdhouse. The size of the focal layer fits perfectly on the 4 X 4 size. The InThe Wild Designer Series paper is also a good fit and not just the theme. The size of the leaves are not too large for the birdhouse.
The base of the card is one color that it seems has not been shared in quite a while. It is the Merry Merlot. Of course I chose it from the colors in the DSP, but as soon as I placed the two pieces together, I knew it was the right one.
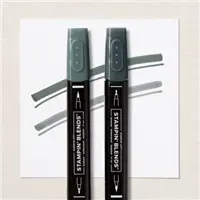
For the focal layer I went with the Crushed Curry to highlight it. It is also used as the joining layer between the Merry Merlot and the DSP. As I said earlier, the birdhouse is from the Garden Birdhouse stamp set. I loved the size of the stamps in this set and thought they would be great for smaller cards. The birdhouse is stamped using Cajun Cruze Ink and then colored with Crumb Cake, Cinnamon Cider, and Evening Evergreen Stampin’ Blends.
Finishing Touches
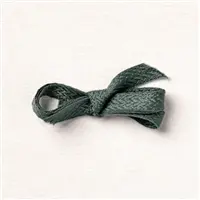
To complete this garden card, I added the Evening Evergreen Open Weave Ribbon off to one side. There was enough room to also add a small bow. I thought I would need to just add the little ribbon knot and was happy for the unexpected space.
To finish the focal layer I stamped the sentiment in Memento Tuxedo Black Ink. The sentiment is also from the Garden Birdhouse stamp set. I “hung” the birdhouse from a 2021-2023 In Color Jewel that matches the greens of the DSP.
Measurements
base card is Merry Merlot cut 4 X 8
Layer is Crushed Curry cut 3 3/4 X 3 3/4
DSP is cut 3 5/8 X 3 5/8
Focal layer is Crushed Curry cut 1 3/4 X 3
Focal White is cut 1 1/2 X 2 3/4
Don’t forget about the Mini Catalog Last Chance Sale. And if you have questions, please reach out to me. I would love to assist you. Also, remember my Rewards Program and my Host Code. They are listed further down and on the right column of the post.
January – June Mini Catalog Last Chance Sale
Click on the image below to get the 4 page pdf of the sale. A reminder, in some cases a Bundle is cheaper to purchase the stamp set and dies individually. Some dies are discounted up to 50% off.
If you order through me, and it is as easy as clicking on the Shop Now button on the Menu Bar, I have a Rewards Program. For every $50.00 in product you purchase, you earn a Blue Star. When you have gathered 10 Blue Stars, you get a $50.00 shopping on me. Plus every time you spend $50.00 I will add a small gift for you. Please use my Host Code listed below.
HOST CODE
My June Host Code is HCX2WT2A Please use this code for orders under $150.00. I will have a small perk for those with orders over $50.00
Thank you for stopping by today. I hope you enjoyed today’s project and will come back. I do read and reply to all of the comments individually. They mean a lot to me. Please reach out if you have a question.
The content in this blog is the sole responsibility of Jackie Beers as an Independent Stampin' Up! Demonstrator. The use of and content of classes, services or products offered is not endorsed by Stampin' Up!