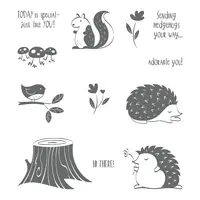
The stamp set I used today is a playful set that is super cute. I did not do it justice. But the sentiments and characters are pure magic. This is a super quick and easy card.
Hedgehugs, 145879
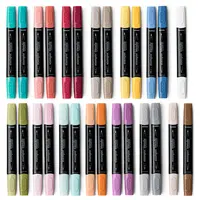
I should have masked the top of the stump, but I hope you can see how cute this little couple is. I stamped them with Soft Suede and then colored with the Stampin’ Blends. The little flower is colored with Stampin’ Write Markers.
Thank you for visiting today! I very much appreciate you checking in. I love to read your comments.
Reminder: There are only two days left to place your reservation for the stamparatus. You will receive it before it goes live in the 2018 Annual Catalog in June.
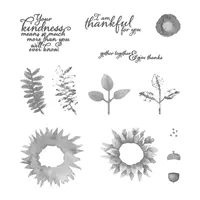
I am still enjoying the new stamp sets awaiting you in the Occasions catalog coming soon. Today I have a simple thinking of you type card. This set is perfect for a little, or a lot, of color and stamping. I went for a little.
Hanging Garden, 146239
I used a mix of greenish colors today. I have been on a sort of monochromatic kick lately. This is just varying shades of green or teal. I colored the succulent plants with the Old Olive Stampin’ Blends. The basket is trimmed in the Pool Party. The DSP is Naturally Eclectic and has Pool Party and Emerald Envy. The ribbon is Emerald Envy and the card layer is Bermuda Bay. A very odd mix, but I think they all work together.
Thank you so much for visiting today! I hope you like the card and maybe will try some unexpected color blends. The supplies I used are listed at the bottom of the post.
Reminder: There are only two more days left to place your reservation for the stamparatus. You will receive it before it goes live in the 2018 Annual Catalog in June.
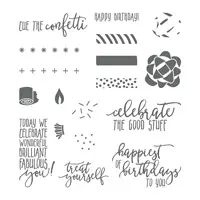
One of the benefits of being a Stampin’ Up! Demonstrator is getting to play with the new products first. Today’s card is one of those sets. When I saw the cards Brian King had made for a Stampin’ Up! event, I couldn’t wait to get my hands on it.
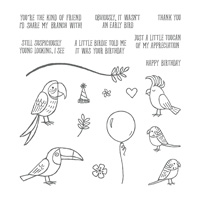
Bird Banter, 145852
I do believe this little guy is precious! The best thing about this stamp set is some of the unusual sentiments. I believe reading this sentiment upon receiving the card would just make me smile. And isn’t that why we make cards? Of Course it is!!
My bird is somewhat colorful I know. I chose the card base to go with the branch so it wasn’t the only brown. But after coloring the bird, I decided he needed a bright color to make him shine. That is the reason for the Pumpkin Pie. And the leafy DSP from Whole Lot of Lovely just seemed to fit perfectly.
The one special item I used for the first time today are the Glitter & Clear Epoxy Shapes. They are tiny little shapes of clear epoxy. You get two sheets. One is clear and the other glitter. I used one of the clear over the bird’s eye. It looks like I added one of the squiggly eyes. I hope you can see it in the photo. I will definitely be using these little guys again soon.
Thank you for visiting with me today! I very much appreciate it. The supplies I used are listed at the bottom of the page. Clicking on any item will take you directly to my online store.
Reminder: There are only a few days left to place your reservation for the stamparatus. You will receive it before it goes live in the 2018 Annual Catalog in June.
I hope all of you have had a great Christmas! We spent the day with friends and just relaxed. And then I came home and made this card for you all.
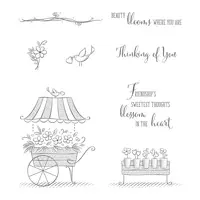
Friendship’s Sweetest Thoughts, 145826
When I first saw this set in the upcoming 2018 Occasions Catalog, I thought it was cute and then passed over it. But on the second go round (2nd of about 100!) I gave it another look and said Yes. I believe it has a lot of possibilities.
This is another fairly monochromatic card. I love doing these. Especially with the beautiful designer series paper that Stampin’ Up! offers. The DSP pretty much makes the card. All I did was stamp the flowers and color them with the Stampin’ Blends. I debated on doing a 4 X 4 card, but I loved the DSP and wanted to have it play a larger role. So I stayed with the regular size A2 card.
Thank you very much for visiting today! I love your comments. And if you have not received one of the Occasions Catalogs, or do not have a demonstrator, I would love to assist you with this. Feel free to comment or contact me.
The supplies I used are listed at the bottom of the page.
Reminder: There are only a few days left to place your reservation for the stamparatus. You will receive it before it goes live in the 2018 Annual Catalog in June.
I hope you are having a Magical, Family, Merriest Christmas!! Hopefully you all received exactly what you wanted for Christmas. As I have gotten older, I enjoy most just being with Friends and Family. So thank you for visiting with me on this special day.
My card is the last Christmas card of the year. I thought it only appropriate for today. It is another simple one, my favorite!!
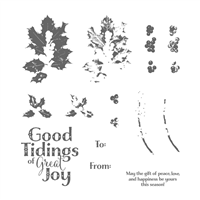
Good Tidings, 144870
For some reason the berries did not photograph well. It may be the operator! But in person they do NOT look like a glob. To very from the total red and green color scheme, I went with the Christmas Around the World DSP and the Pool Party. The reason I love this stamp set, Good Tidings, is that the font and size of the “Good Tidings” is large and a little different. To me that is a stand out on its own. The holly and berries are triple layers and do look beautiful (when photographed properly).
The DSP is one I did not use very much. It is beautiful , it just didn’t fit into the cards I planned. This sheet from the pack reminded me of a snowy sky. Some of you are probably getting a snowy Christmas. But I am in the south and we only get the occasional snow. And yesterday it was 67 here.
Again, I appreciate you every time you visit my blog and view my cards. I hope you are having a wonderful Christmas and have a very blessed new year!
Reminder: There are only a few days left to place your reservation for the stamparatus. You will receive it before it goes live in the 2018 Annual Catalog in June.
I must say that gift boxes are not in my normal realm of creativity. But I found this precious little box when I was looking for a 3-D item for Wednesday’s Inking Royalty Blog Hop. You can see that box HERE. I had made note of this one until I found the wonderful one that I shared for the hop. I think this one is too cute to ignore though. I got the directions from the same person as the blog hop box. It is www.positivelypapercraft.co.uk
Year of Cheer Specialty DSP, 144640
These adorable little guys are 1 1/2 on each side. I could see this hanging on a Christmas tree with a very special gift inside! I envision a little tree or branch with tiny gifts inside each box for a child’s party or a shower. It would also make a great Advent Calendar by stacking the boxes and having the lids open from the side or top to bottom. A very versatile little guy.
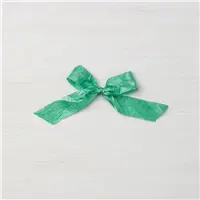
While the Year of Cheer DSP is retiring with the Holiday Catalog, the ribbon I used as a hanger is new. It will debut in the 2018 Occasions Catalog on January 3. It is 1/4″ White Organza Ribbon. And it is a dream to work with. I do love ribbon!
The DSP is the Year of Cheer Specialty DSP, which is a beautiful thicker paper and perfect for boxes. This box requires a 6 3/8 X 4 7/8 piece of card stock. On the 6 3/8 side, score at 1 1/2, 3, 4 1/2, & 6. Turn the paper so that the narrow band from the 6″ score is at the top ( so turn counter-clockwise). Then score the shorter side at 1 1/2, 3, 4 1/2.
Fold and burnish all of the folds. Then follow the diagram for cutting. I did not have a lot of time to make the template. It is very rough, but I believe you can follow along.
HINT: The dot on the left and second from bottom box is where you use the handheld punch to make the hole for the ribbon to hang, if that is your plan. I made a 1 1/2″ square and with my ruler found the center and punched. That way all I have to do is lay it over that panel and punch through the hole in the template. The small section to the left of that square is the flap that holds the box together. It is small enough to just fold under to get the reach you need with the handheld punch.
HINT: This second hint is one of those I learned the hard way! Feed your ribbon through the hold prior to gluing the sides of the box together. It is really hard to get your hand inside the tiny box to feed into that little bitty hole. HaHa!!
Thank you so much for stopping by today! I will be back to cards next week. That is my comfort zone. I very much appreciate the kind comments about the boxes.
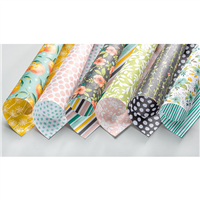
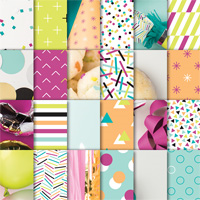
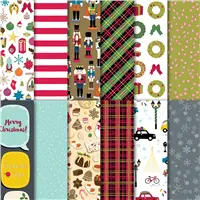
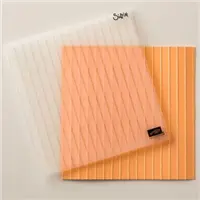
Throughout the making of my Christmas cards I have been sharing I used a lot of Stampin’ Up!’s wonderful designer series paper. I have really gotten into using the paper as a background instead of using an embossing folder. So, I have consciously been trying to not do that for a change of the look of my cards. That idea went out the window when I received my pre-order for the 2018 Occasions Catalog. All of the paper you will see soon is gorgeous!! This is my first card with the new Picture Perfect Party Designer Series Paper.
Picture Perfect Party Designer Series Paper, 145559
Isn’t this DSP just a “WOW” ? I wanted to make some Thank You cards for the Christmas gifts I have/will receive. When I saw this paper, I thought it would be perfect. But then I could not bring myself to cover up that beautiful paper. So I just made a simple banner to run across the center, and decided that was a finished product. So super quick and easy. And since I need several of these, that is an added bonus!!
Thank you so much for visiting today. I hope you have an amazing day and get some stamping accomplished in there. The supplies I used are listed at the bottom of the page.
Welcome to InKing Royalty’s December Blog Hop! We have a fun Blog Hop theme today – Wrap it Up! The hop is filled with projects that are perfect for this time of year – everything from gift-packaging ideas to bundling up to stay warm. We are excited to share our creations with you today. After you read my post, I hope you’ll hop over to the next person on the list at the base of this post.
Thank you for joining me in this blog hop! My wrap it up project is the 3-D gift I made as a gift. This is my first post on a 3-D project. I feel like I was channeling my inner Julie DiMatteo when I made it. HaHa!!!!! Julie is the 3-D Queen, and a great friend. Although this project is from another SU Demonstrator’s YouTube video, www.positivelypapercraft.co.uk Here is a link to her video. Click Here
Here are a couple of pictures of the finished product.
Year of Cheer DSP, 144640
I used the same DSP as the demonstrator did in her video. It was just perfect for what I needed. Any of SU’s thicker DSP would be wonderful. I changed the inner part to just Thick Whisper White card stock. I have already made a few in different colors as gifts. They really are easy to make. I cannot wait to give them out.
I have also made templates for the top and the bottom. I have not braved making a video tutorial yet, but this is one I would love to do. I found a few tricks that worked for me. I also used the 1 3/8″ circle punch instead of the Layering Circles Framelits that the other lady used.
Here are the templates I made. Hopefully they will make sense. If not, please do not hesitate to contact me with any questions.
Thank you for stopping by today. I hope you’ll hop along to the next stop on the blog hop, Shawn de Oliveira at Shawn Stamps.There’s lots of inspiration to be found in this group – and you don’t want to miss it!
Jackie
Thank you for hopping along with us. If you get stuck during the Blog Hop, please use this line-up as a guide:
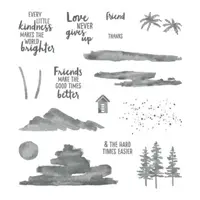
The Waterfront stamp set in the upcoming 2018 Occasions Catalog is quickly becoming a favorite. I shared a woodsy scene the other day and today I have a deserted island look going. I joined it with a sentiment from the Painted Harvest stamp set. I am seriously thrilled that this set is carrying over. Painted Harvest is one of the most versatile stamp sets Stampin’ Up! has. So here is today’s version of a deserted island. HaHa !! I am also playing along with the Global Design Project challenge for this week.
Waterfront, 146386
I have a mixture of old and new in this card. I used the new Simple Stripes Embossing Folder (another win for the upcoming catalog!). When I decided to play along with the GDP challenge, I cut my stamped image into a circle using the layering circles dies. Now it reminds me of looking out of a porthole at the deserted island!
As I said in the opening of my post, the sentiment is from the Painted Harvest stamp set. I have used this sentiment so many times, and I know I will continue doing so. It is just perfect.
Thank you so much for stopping by today! I very much appreciate it and I love to read your comments. Have a great day!!
The supplies I used are listed at the bottom of the page.
My card for today is a birthday card I made for a really nice person. Saturday was Brian King’s birthday. He is not only a friend, but the best Upline you could ask for. So I had to make a special card.
Picture Perfect Birthday, 145519
I wanted to make a card that was bright and shiny and a little bold. The only problem is that Brian hates, and that is putting it mildly, any kind of glitter. So I went with the beautiful Year of Cheer Specialty Designer Series Paper. This has to be one of my all time favorite of Stampin’ Up!’s DSP. It is shiny but not glittery, and is a heavier weight DSP. It is also only one sided as opposed to the normal two sided DSP.
With the paper being just perfect, I could not decide on what kind of stamp to choose. So I decided to go with the simple banner. The sentiment is from the upcoming 2018 Occasions Catalog and part of a great suite of products titled Picture Perfect Party. The stamp set is Picture Perfect Birthday. The inside sentiment , which is not pictured, is from the same set. It says “Happiest of Birthdays to you”, and is done in a really beautiful font. I love the way SU has added some mixtures of fonts on a single stamp lately. The banner font is different on the “you” which really emphasizes it.
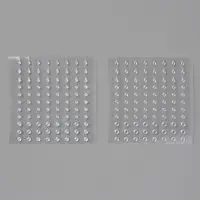
And that is the card! To add a little bling instead of glitter, I added some rhinestones in appropriate places. Even guys can have rhinestones 🙂
Thank you so much for stopping by today! I hope you like my card and please do not hesitate to contact me if you have any questions regarding the products or anything.
The supplies I used are listed at the bottom of the page.
The content in this blog is the sole responsibility of Jackie Beers as an Independent Stampin' Up! Demonstrator. The use of and content of classes, services or products offered is not endorsed by Stampin' Up!