Happy Thanksgiving to all of you. Hoping you are having a wonderful day. Especially for those of you having to work on this holiday. That was me for over 30 years, I know how tough it can be. I am grateful for your staying with me on my stamping journey.
Today’s card is one that expresses gratitude and could be used for any occasion that requires it. We all have the need for these type cards.
STAMPS
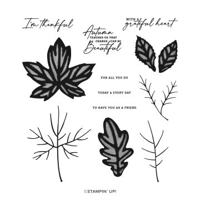
There are a mix of Autumn products used today. The sentiment is from the Autumn Leaves stamp set. This is a stamp set ,with matching dies, that carried over. I was thrilled that it did. The leaves are gorgeous and it has great sentiments.
DIES and EMBOSSING
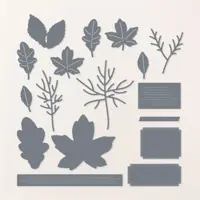
To create the fun focal layer I used a mix of Dies from the Autumn Leaves Die set. The sentiment and the two leaves are from that Die set. There are additional leaves, as well as some detail dies and another sentiment frame.
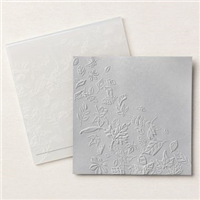
The background of this card has a special feature. Sadly it does not show very well. I used the Changing Leaves Embossing Folder to emboss the DSP. This is the first time I have ever embossed DSP. I have stamped on it , and Die cut it, but never embossed. Woohoo! A new adventure! And to add some additional detail, I used a Blending Brush and Shaded Spruce Ink to go over the embossed leaves to help them stand out. I did not go very dark, just a light color. That may be why it doesn’t show as well in the photo. Sorry about that.
PAPERS
The star paper is this gorgeous background layer. This is from the Splendid Autumn Designer Series Paper. It is one of the reverse sides of the watercolor sheets. I used a layer of Blackberry Bliss to help pull out the darker splotches. To add green to the purple colors I went with a bright, but dark, shade. I chose Shaded Spruce. I love it and Blackberry Bliss together. I will keep this in mind.
EXTRAS
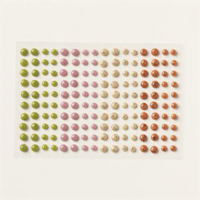
The Die cut pieces are wonderful “extras”. Additionally I have used the Woven Gold Leaves. These are a great standout for any card where leaves work. And there must be more. To add my bling, I opted for the Purple Shimmer Dots. I chose the darkest of the shades. They are scattered around the card.
HOST CODE
My DECEMBER Host Code is SAQE7VYU. Please use this code for orders under $150.00. I will have a small gift for those with orders over $50.00 in addition to the Perk Rewards Program. You can read all of the information at the top of the page in the Menu Bar under SHOP / Perks.
Thank you for stopping by today. I hope you enjoyed today’s project and will come back. I do read and reply to all of the comments individually. They mean a lot to me. Please reach out if you have a question.
Smile and Keep On Stamping,
Jackie
New Scrapbooking Catalog
The newest addition to Stampin’ Up! is an Online catalog of Scrapbooking products. You can see the catalog by clicking the photo below and save it to your computer.
Online Exclusives
New Online Exclusives have dropped. There are Halloween, Fall, Christmas, and many that are great year round. Of course the new Designer Series Papers and Embellishments are fabulous as well!
You can go directly to these in my Online Store by clicking HERE
Happy Thanksgiving to all! I hope you are enjoying spending time with Family and Friends. I am so thankful to be able to share what I love with all of you. Hopefully you can get in some crafting time today.
Stamps and Dies
This card is made with one of my favorite ever leaf sets. I love the shading of the stamped images in the Autumn Leaves set. And being able to add the veining, if desired, really takes it up a notch. For today’s card I opted to keep everything fairly simple. The leaves are stamped with Crushed Curry and Cajun Craze Inks. I added the veining with Basic Gray Ink.
To add a bit more dimension to the card, I die cut two of the small leaves from Old Olive card stock. And used the lovely frame also from the Autumn Leaves Dies. The sentiment is from the set as well and fits perfectly in the space. I am thrilled that this bundle is going to carryover for a bit of time.
Extra Definition
To add some extra definition to this card I used the Leaf Fall 3D Embossing Folder. This one is in the Online Exclusives. It is a great leafy folder and could be used year round. By embossing on White card stock there is a softer look I believe. Plus adding the two die cut leaves adds to the texture also.
Papers
The card stocks used are a mix of what could be considered Fall colors. Old Olive is the card base as well as the focal layer base. But to add a bit of color, I opted to use Crushed Curry for the first layer. It helps to give the embossed White a bit of help, and also brings out the Crushed Curry leaf. I also used it to ground the sentiment . The white on white did not show at all well. But adding that little scrap strip of Crushed Curry was a perfect touch. And the final touch is the scattering of the Speckled Dot Adhesive Back embellishments.
Online exclusives are here to stay! Click on the photo and be taken directly to them in my online store. If you place an order, please use my Host Code listed just below.
HOST CODE
My NOVEMBER Host Code is 626NJVKN. Please use this code for orders under $150.00. I will have a small gift for those with orders over $50.00 in addition to the Perk Rewards Program. You can read all of the information at the top of the page in the Menu Bar under SHOP / Perks.
Thank you for stopping by today. I hope you enjoyed today’s project and will come back. I do read and reply to all of the comments individually. They mean a lot to me. Please reach out if you have a question.
The card I am sharing today is similar to one I did previously. It showcases the gorgeous All About Autumn Designer Series paper and Autumn Leaves stamp set.
Papers
The paper is by far the star of this card. It has been so popular and continues to be. The expected return date is October 9, so keep a check if you are interested. This layout is one I have done several times before. It is a regular side fold card with 1″ cut off of the right front opening. I love how this allows more of the gorgeous paper to show.
The front and strip are both part of the All About Autumn Designer Series Paper. But did you notice the leaves? They also are cut from the DSP. They really pop with the definition in the die cut. And to add some more of the bling from the paper, I used Gold Foil as the background for the sentiment.
Stamps and Dies
The Bundle used is the Autumn Leaves Bundle. I know SU has had some beautiful leaves bundles previously. But these have to be my favorite. And as I mentioned above, the detail in the die cut is awesome. As is the details in the label dies. There are three of those included in the dies. I used the smaller one and simply cut the Basic White to fit inside of it.
The sentiment is from the stamp set. It is definitely a favorite. I am Thankful for so many things, really everything, in my life and this allows me to share that with others. And to add just a touch more bling, I added a single gold from the Adhesive Backed Sparkle Gems.
Thank you for stopping by today!!
Online exclusives are here to stay! Click on the photo and be taken directly to them in my online store. If you place an order, please use my Host Code listed just below.
HOST CODE
My OCTOBER Host Code is NYVXHUMX. Please use this code for orders under $150.00. I will have a small gift for those with orders over $50.00 in addition to the Perk Rewards Program. You can read all of the information at the top of the page in the Menu Bar under SHOP / Perks.
Thank you for stopping by today. I hope you enjoyed today’s project and will come back. I do read and reply to all of the comments individually. They mean a lot to me. Please reach out if you have a question.
I know the Autumn Leaves paper is unavailable but it is returning. And this paper is so gorgeous that it can be used year round. The Autumn Leaves Bundle and all of the other Suite products are available now. So I have a really pretty card to share.
Stamp Bundle
The Autumn Leaves Bundle is a wonderful one! The leaves stamped have a two step look to them, which I love. My leaves are all stamped off before stamping on the Very Vanilla card stock. I wanted a softer look for the leaves. I have also stamped on scrap one of the Blackberry Bliss leaves and the two small green leaves. Those two are connected but I cut them apart for my layout. They give a bit of dimension to the card, especially with the one hanging over a bit.
The leaves all have matching dies. There are both solid and embossed dies for each leaf. And that great sentiment layer is one of the dies as well. I really like the indented corners and stitching around the edge.
Additional Suite Products
This card uses all products in the suite with the exception of the Oxidized Copper Specialty paper. I did use a small strip of the DSP, but you could use any color matching paper there. The stamped leaves panel was embossed using the Distressed Tile 3D Embossing Folder. I love all of the texture of this embossing folder! We have had tile products before but I have to say that this is by far my favorite.
The other products from the suite I used are the Adhesive Backed Speckled Dots. There is a single one of the green on the sentiment layer. There was so much color and texture everywhere already, but that sentiment needed a touch of bling. And the final item is the Copper & Natural Ribbon Combo. I only used the copper ribbon. It is zigzagged behind the sentiment. The ribbon is very easy to work with and adds a great shine and color.
Papers
The paper choices were a problem because there were too many choices! I went with Blackberry Bliss as the card base. I love the deep purple leaves in Fall so I naturally gravitated to that color. It pairs great wit the Copper Clay layers and the touch of the Old Olive of the DSP strip.
The card is a little different from the normal. It is 5 1/2 X 7 1/2 and still scored at 4 1/4. This leaves the 1″ section on the right side for the strip of DSP. And it makes for a pop of pretty DSP without having to use a lot of it. I have a large card club and to only use a strip allows me to spread my paper a bit further. The same may apply when doing multiples of a card!
Thank you for stopping in today!
Online exclusives are here to stay! Click on the photo and be taken directly to them in my online store. If you place an order, please use my Host Code listed just below.
HOST CODE
My September Host Code is 7BSV39GV. Please use this code for orders under $150.00. I will have a small gift for those with orders over $50.00 in addition to the Perk Rewards Program. You can read all of the information at the top of the page in the Menu Bar under SHOP / Perks.
Thank you for stopping by today. I hope you enjoyed today’s project and will come back. I do read and reply to all of the comments individually. They mean a lot to me. Please reach out if you have a question.
Instead of a single card for today, I am sharing several that fall under the Grateful and Thanksgiving theme. I am so very grateful for all the joy and people that Stampin’ Up! has brought into my life!
If you click on the photos you will be taken to that blog post in case it is one you have not seen.
Well Defined stamp set
A Fun Fold with Pretty Pumpkins stamp set
Another Pretty Pumpkins stamp set
A mix of Pretty Pumpkins and Gorgeous Leaves
And one more Pretty Pumpkin paired with the Blackberry Beauty DSP
I hope you have a wonderful Thanksgiving with family and friends. I am thankful for you for sharing my love of paper crafting and following my journey here at Blue Line Stamping. There will be a new project for you tomorrow so I hope you will come back.
Fabulous Stampin’ Up! Join Promotion
Join my team by purchasing the Starter Kit for $75.00 and receive $125.00 of products totally of your choosing! That is a fabulous deal at a $24.00 discount off of the regular Starter Kit price. This is always the Ultimate Bundle of products, and now it is even better! You can simply click on the picture below and Join.
HOST CODE
My November Host Code is M4GF9KZ7. Please use this code for orders under $150.00. I will have a small gift for those with orders over $50.00 in addition to the Perk Rewards Program. You can read all of the information at the top of the page in the Menu Bar under SHOP / Perks.
Thank you for stopping by today. I hope you enjoyed today’s project and will come back. I do read and reply to all of the comments individually. They mean a lot to me. Please reach out if you have a question.
Expressing our Gratitude to someone is always a good thing to do. This time of year makes me especially aware of that. Today’s project is a perfect way to show someone they are appreciated.
Stamp Set
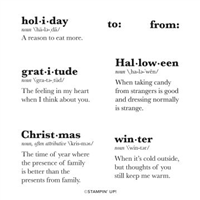
This stamp set is aptly named Well Defined. There are various holidays and similar sentiments that are one word and their definition. These definitions make a wonderful clean and sweet card that is made quickly. The Gratitude was chosen as a nod to Thanksgiving. It is stamped using Cinnamon Cider Ink. As I have stated before, this ink looks a bit metallic when paired with embossed or metallic paper.
Paper
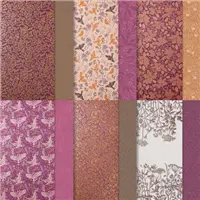
To pair the Cinnamon Cider with this beautiful paper was a given. This is the Blackberry Beauty Designer Series paper. It has been difficult for Stampin’ Up! to keep in stock for that very reason. But I looked and it is in stock now! This paper is paired with Cinnamon Cider cardstock and a layer of Very Vanilla.
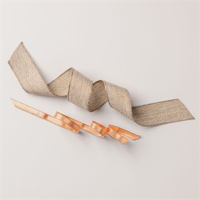
There was a piece of the DSP previously cut. So I just needed a tiny adjustment. That piece I cut off was only 1/4″. Of course I couldn’t bring myself to throw it away. As I was looking for a way to finish the card, I saw that little strip. A bow is born! All it took was a few folds, snips, and several glue dots. This little bow should be called a glue dot bow! I love the little different look to the card.
HOST CODE
My November Host Code is M4GF9KZ7. Please use this code for orders under $150.00. I will have a small gift for those with orders over $50.00 in addition to the Perk Rewards Program. You can read all of the information at the top of the page in the Menu Bar under SHOP / Perks.
Thank you for stopping by today. I hope you enjoyed today’s project and will come back. I do read and reply to all of the comments individually. They mean a lot to me. Please reach out if you have a question.
The content in this blog is the sole responsibility of Jackie Beers as an Independent Stampin' Up! Demonstrator. The use of and content of classes, services or products offered is not endorsed by Stampin' Up!