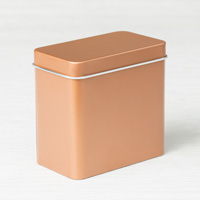
Today I have used the AWESOME Copper Tea Tin as the holder for some gorgeous little cards. I will show the tin today and the main card. Tomorrow I will show all of the 3 X 3 cards I made to go inside.
Copper Tea Tins, 147034
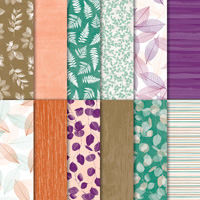
I love little containers! So when I saw these tins in the new catalog I was so excited. They are a perfect size. For today’s project, I decorated with Nature’s Poem Designer Series Paper. I believe I have used more DSP since I got my pre-order than in the last year. This year Stampin’ Up! has outdone themselves with the gorgeous papers they have created. But, back to the tin….. I used a 12″ strip of the DSP towrope around the tin. I think the cajun craze (that is the color listed on the DSP pack) leaf in the DSP matches really well with the copper color of the tin.
The sweet sentiment on the tin is from the Treat Tine stamp set. There are some wonderful sentiments there. I am crazy about sentiments that are special, and I love the different fonts used in this set. Another MUST Have!
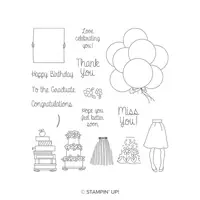
For the main card, which is actually for my friend, I CASED Julie DiMatteo’s Diamond card from her last week Facebook Live. You can see her Friday post of it HERE
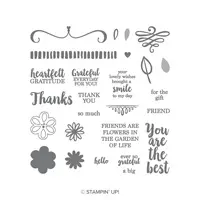
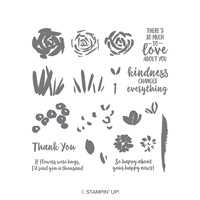
A Big Thank You, 147377
I used Grapefruit Grove instead of Cajun Craze that is listed as the coordinating colors on the DSP. I like it even better! (That is what I used on the sentiment circle for the bellyband of the Copper Tin.) The sentiment is from A Big Thank You. It is a Must Have if you do any Thank You cards. The sentiments are fabulous!!
I hope you will come back tomorrow to see the cards I placed inside the tin and see how many will fit! It is an amazing little guy. Thank you so much for visiting today! All of the supplies I used are listed at the bottom of the page.
It is still a great time to become a Stampin’ Up! Demonstrator. I would love to have you join my team. A great perk for demonstrators this time of year is getting to see the new catalog first. Then we get to order and play with the new products a month early. For me, that is one of the best parts of being a SU Demonstrator. Of course, the discount helps! If you are interested, please contact me and let’s talk.
I am a little late to the game, but when I realized the Global Design Project – 142 was a sketch challenge, I decided I had to play along. I say I am late because it began on Monday! Duh!!
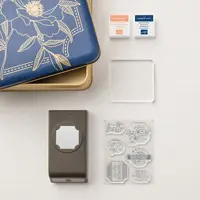
Darling Label Punch Box, 146855
And here is the GDP142 Sketch:
Thankfully you are allowed to deviate somewhat. My sentiment is a bit of a deviation.
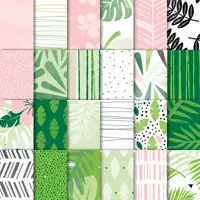
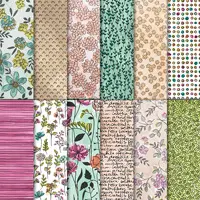
I love Bright colors and my color combination today comes directly from the bottom piece of designer paper. This is the new Tropical Escape 6X6 DSP. It is gorgeous!!! And the sentiment and punch are the new Darling Label Punch Box. The box itself is beautiful and would be a wonderful gift or special storage box. I however LOVE the punch!! I adore the “ticket corner” type punch and this is perfect. There is a stamp set included in the Punch Box, and my sentiment is one of those stamps. They are all great as well. Additionally there is another stamp set in the catalog that coordinates with this punch. A bonus!
Thank you for visiting today. I hope you have a great weekend and will return on Monday. All of the supplies I used are listed at the bottom of the page. I really love to read your comments, so please leave me one if you like this card.
It is still a great time to become a Stampin’ Up! Demonstrator. I would love to have you join my team. A great perk for demonstrators this time of year is getting to see the new catalog first. Then we get to order and play with the new products a month early. For me, that is one of the best parts of being a SU Demonstrator. Of course, the discount helps! If you are interested, please contact me and let’s talk.
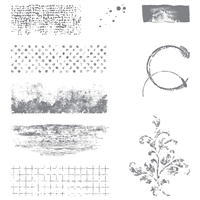
Wasn’t yesterday’s Blog Hop wonderful? There is always a great variety of stamps, colors, and embellishments. Today I have used the same stamp set as yesterday. I am on a more masculine streak it seems. Today’s card would be perfect or Father’s Day.
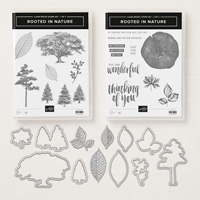
Rooted In Nature, 148353
I made yesterday’s card over a week ago, and as I was writing this post realized how very alike these two cards are. I am not sure if that is good or bad!!
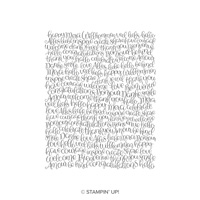
This card is quite a lot of green. I used he Handwritten stamp as the background and stamped in Soft Sea Foam. The sentiment is stamped in Mossy Meadow. I used Stampin’ Write Markers in the Mossy Meadow and Soft Suede for the tree. The leaves/branches are Old Olive both full strength and stamped off.
To give the sentiment layer some depth without trying to cut and piece the punch to create a background, I have a very easy method I use. I simply run my Stampin’ Write Marker around the edge of the punched piece a time or two. My holding the marker almost flat, I touch the fatter part of the large tip end on the edge of the cardstock. Give it a try, I believe you will like the result.
Thank you very much for hopping yesterday and for coming back today. I promise to use a different stamp set tomorrow! LOL… All of the supplies I used are listed at the bottom of the page.
It is still a great time to become a Stampin’ Up! Demonstrator. I would love to have you join my team. A great perk for demonstrators this time of year is getting to see the new catalog first. Then we get to order and play with the new products a month early. For me, that is one of the best parts of being a SU Demonstrator. Of course, the discount helps! If you are interested, please contact me and let’s talk.
Welcome to the Pals June, 2018 Blog Hop. This month we’re going to Pick a “B”. Projects for Babies, Birthdays or Brides, that is. Be on the look out for creations using new products from Stampin’ Up!
You may be starting the hop here or coming from a previous Pal’s blog. Either way, you’ve come to the right place. You’ll find the the full line-up below to help you move, or “hop” along from Pal to Pal.
For today’s Hop, I chose to do a Masculine Birthday. I send more Birthday cards than any other and sometimes masculine ones are just really difficult to get the right look I believe. Well, now that is a little easier! There are a couple of stamp sets in this new SU catalog that are great for anyone, but especially for creating masculine cards. The Rooted In Nature set and bundle is one of those. Here is the card I made.
Rooted In Nature Bundle, 148353
There is quite a lot of background design going on. It seems more in the photo than in person, LOL!!! I was going for a bit of vintage/rustic look. Did you catch my innuendo on the card? The slice of tree with the rings showing which means the age of the tree and then the sentiment “One More Year”. Okay, sometimes I am not as humorous as I think I am 🙂
I did use a great little trick on the sentiment though. The full sentiment is “On one more year” from the Sunshine Sayings , which is a builder type word set. I used masking tape to cover the “ON” while I was inking and then removed it and stamped to get only the wording I wanted.
I will say that this is the first time in ages that I have torn and sponged the edges of the paper. I remember why I like that look and added texture it gives. This was my first time using the Shaded Spruce color from the revamp. I have to say that I love it. It is a deep, but bright, green.
Thank you so much for visiting my page on the Blog Hop. I greatly appreciate it. All of the supplies I used are listed at the bottom of the page.
Now it’s time to use the Blog Hop Line-up below to see which “B” the rest of my Pals are using. Don’t forget to show us some love by commenting on our creations.
Mark your calendars for July 11, 2018 for our annual Pattern Party featuring projects using favorite Stampin’ Up! Designer Series Papers and coordinating embellishments.. Don’t miss it!
Today’s card is a WOW! card. To me it is anyway. I made it using the video from Dawn Griffith. You can see the video HERE. She is a fellow Stampin’ Up! Demonstrator. One of the things that makes this card special for me, is that you are making 2 cards. So many times I make one and then halfway through the process think to myself “why did I not just make 2 of this card?”. I am working on that! So here is the card.
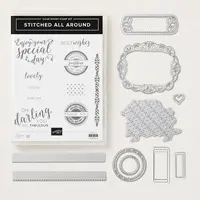
Stitched All Around, 146632
One of the things I love about this card is using both sides of the DSP! The card I made yesterday was using both sides as well. I love that!!! You can see yesterday’s card HERE. And next shows the card with the bellyband removed and the flaps open.
Remember in the top section I said that you automatically make 2 cards in this card making process? The only difference in the two cards is the way they open. So picture the point of the triangle is to the left on this card when totally open. The other piece would be with the point on the right. Or you can fold the sections however you want to!!!
Thank you for stopping by today! I greatly appreciate it. All of the supplies I used are listed at the bottom of the post. And if you do not currently have a Stampin’ Up! Demonstrator you use, I would love to assist you. If you need one of the new catalogs, just contact me from the button up at the top of the page.
It is still a great time to become a Stampin’ Up! Demonstrator. I would love to have you join my team. A great perk for demonstrators this time of year is getting to see the new catalog first. Then we get to order and play with the new products a month early. For me, that is one of the best parts of being a SU Demonstrator. Of course, the discount helps! If you are interested, please contact me and let’s talk.
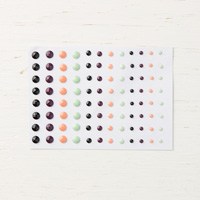
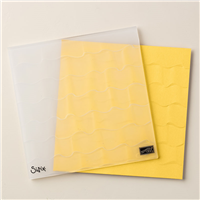
The Stampin’ Up! Share What You Love Designer Series Paper is by far my favorite of all time!! I have used it several times since I received my Pre-Order for the new catalog. And I cannot stop using it. I may need intervention! But in addition to the AWESOME paper, I am showcasing a new fold. Or it could be a new cut, or both! Here it is and then I will explain what I mean.
Abstract Impressions, 147513
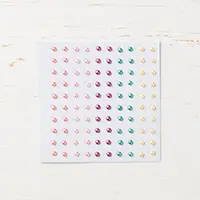
That DSP just shines! Actually it really does shine. This is one of the sheets that has a pearlized look to some of the flowers. The little pearls in the flower centers are the Share What You Love Artisan Pearls. They are just too cute!
The Fold/Cut is a little different. Since the DSP is card stock weight, it can serve as a card base without feeling flimsy. To achieve this look, I cut the Smoky Slate card stock to 5 1/2 X 8 1/2. I scored it at 4 1/4, the normal folding point for an A2 card. But I did not stop there. I went back to my cutter and with the score line at 3/4 on the trimmer ruler , I cut off the rest of the panel. (And I was able to use that cut piece to make the top layer with a bit leftover.)
The DSP is cut to 4 1/4 X 5 1/2. I burnished my fold on the Smoky Slate layer and placed adhesive on the inside of the 3/4 section. Then all I had to do was line up the DSP with the rest of the base and fold the small section over on top of it. Easy Peasy and perfect alignment. An added bonus is that when you open the card, you get to see the other side of this beautiful DSP!! WooHoo!! That is always a problem for me when the DSP is gorgeous on both sides. I hate to hide one of them. With this Cut/Fold, I do not have to hide either side.
Thank you so much for visiting my blog today! I greatly appreciate it and would be happy to answer any questions if I was not very clear on the instructions. I have listed all of the products used at the bottom of the post. I hope you have a great rest of your day!
It is still a great time to become a Stampin’ Up! Demonstrator. I would love to have you join my team. A great perk for demonstrators this time of year is getting to see the new catalog first. Then we get to order and play with the new products a month early. For me, that is one of the best parts of being a SU Demonstrator. Of course, the discount helps! If you are interested, please contact me and let’s talk.
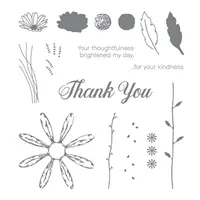
Have you seen all of the NEW Stampin’ Up! Colors? Today I am showcasing the Granny Apple Green. It is AMAZING! And I have paired it with the NEW/Returning Poppy Parade. Both of these are very vibrant colors and just scream SUMMER!
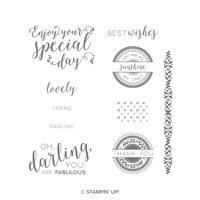
Stitched All Around, 146632
Can you tell how bright this green is? The photograph is pretty close to the true color. It is obviously a pull out type card. I really like these because they are flexible. It can be a quick note of thanks, an invitation, etc.
Here is the inside card pulled out for the sentiment.
Stitched All Around, 146632
I believe this is a sweet little insert sentiment and I know I would love to receive this card. I stamped the outside decoration on the Granny Apple Green with the Granny Apple Green Ink to give it the watermark look. For the insert, I used the same stamp, but I stamped off once before stamping on the Whisper White. I wanted to be able to write over it as well as stamp the Lovely Friend.
The sentiments I used are in the Stitched All Around stamp set. It is one that I looked at a couple of times before I saw the possibilities. (A perk of being a demonstrator is that I received the catalog early!!) The flower is from the Hold On To Hope stamp set, another favorite!!
Thank you for visiting today. If you have any questions please let me know. I have included the measurements below. And the supply list is at the bottom of the page.
MEASUREMENTS:
Card base is Whisper White cut to 4 1/4 X 5 1/2
Granny Apple Green layer is 4 X 8 and is scored at 4 and 6 1/2. The sides are adhered with Tear & Tape.
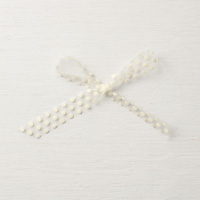
The ribbon is taped under the small flap . The flap is then secured with Tear & Tape as well.
The tied ribbon on the front is a strip that is just slipped under the ribbon and tied into a knot.
The card insert is Poppy Parade cut to 3 5/8 X 3 1/8. The white is 3 1/2 X 3
It is still a great time to become a Stampin’ Up! Demonstrator. I would love to have you join my team. A great perk for demonstrators this time of year is getting to see the new catalog first. Then we get to order and play with the new products a month early. For me, that is one of the best parts of being a SU Demonstrator. Of course, the discount helps! If you are interested, please contact me and let’s talk.
Today I have once again used the Cake Soiree stamp set. I have paired it with the fabulous Gorgeous Grape from the Color Revamp. This is a beautiful color and if you are a fan of purples, then this one is definitely for you.
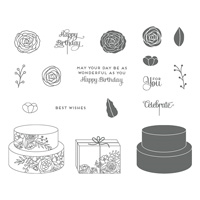
Cake Soiree, 145745
Please forgive the smudge under the cake! Somehow by simply laying on my craft table waiting for me to take the photograph it got a smudge! I cannot even blame it on one of the cats!!
I colored the cake with the Stampin’ Blends. And WOOHOO they are back in stock to catch up on the backorders and I am anxiously awaiting the availability of the additional colors. I do LOVE the Stampin’ Blends. The background layer of Pear Pizzaz is embossed with the Ruffled Impressions Embossing Folder. This gives almost a 3D effect in person.
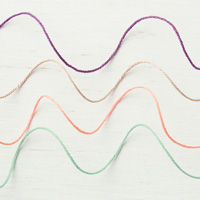
There are three new items on this card as well. The 5/8″ Polka Dot Tulle Ribbon, which comes in Whisper White and Very Vanilla, and the Detailed Trio Punch. Both are awesome! The ribbon is very easy to work with and added just enough of an additional element. The Detailed Trio Punch is super! It punches the little flower you see here. It also punches a ribbon hole as well as is a corner rounder. And it is super easy to use. If you had the trio punch from a few years ago, it might have been a little difficult to actually punch. At least mine was. This one is super easy and I love the little flower! As well as the corner rounder since the old one retired. Oh…..I forgot the 3rd item. It is the Share What You Love Pearls. And they are gorgeous. I added several of them to my cake and the flowers.
Thank you for stopping by today. I hope you like this card. I see it as a birthday or a bridal shower. All of the supplies I have listed at the bottom of the page. I hope you have a great rest of your day!
It is still a great time to become a Stampin’ Up! Demonstrator. I would love to have you join my team. A great perk for demonstrators this time of year is getting to see the new catalog first. Then we get to order and play with the new products a month early. For me, that is one of the best parts of being a SU Demonstrator. Of course, the discount helps! If you are interested, please contact me and let’s talk.
I am Celebrating You for a Birthday Card. But I am really celebrating the Stamparatus! WooHoo!! I really love that Stampin’ Up! made some awesome additions to a stamping tool that we all love. My card today uses the Stamparatus to make a wreath from a regular flower. There are several videos out showing how to make the template. I am not going to recreate the wheel so I will just explain a little and show you my card.
Stamparatus, 146276
Isn’t that Daisy Wreath just adorable? And it only takes a couple of minutes to get it stamped in a perfect circle. The little daisy from the Daisy Delight stamp set is a two-step stamp. I stamped first with Crushed Curry and then did the solid stamp with Flirty Flamingo.
The sentiment is from Hand Delivered. It is my favorite of the new Host Rewards stamp sets. It is extremely versatile and just darn cute! And I am sure you recognize the designer series paper as the Share What You Love Specialty DSP. I see myself going through several packs of this over the upcoming year.
OK to the wreath. I took a piece of Thick Very Vanilla cardstock to make my template. I did not measure it but it was probably 6 X 6. Using the largest of the non scalloped Layering Squares (approximately 2 7/8) I placed it in the center of the 6 X 6 and cut it out with the Big Shot. I then turned it so it was like a diamond and centered it again over the square that I had just cut. Once you have that cut out , you are ready to go.
This card began as just an experiment to see how my lining up of the cuts were. So I used the square that was first cut out. You place the now template on the stamparatus and secure it. Insert the square back into the square hole and place your stamp in the center top of the square. Ink, stamp, turn your square to the diamond position (I rotated counter-clockwise each time) ink, stamp, repeat. And you end up with a perfect circle! Who Knew!!! I am in love all over again with the Stamparatus
Thank you for visiting with me today! I really appreciate it and one of these days I will create my first video and I will not be sending you off to someone else’s video. All of the products I used are listed at the bottom of the page. I hope you will give this a try. If you have any questions, please do not hesitate to contact me!
It is still a great time to become a Stampin’ Up! Demonstrator. I would love to have you join my team. A great perk for demonstrators this time of year is getting to see the new catalog first. Then we get to order and play with the new products a month early. For me, that is one of the best parts of being a SU Demonstrator. Of course, the discount helps! If you are interested, please contact me and let’s talk.
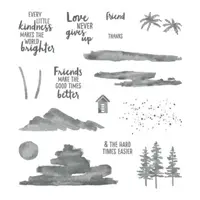
Happy Monday to you! It appears the the storms are finally leaving us here in the south. That is reason enough to celebrate. My thoughts are with other parts of the country that had flooding and other serious events happen. Hopefully my card today will give you a SMILE for a few minutes.
Waterfront, 146386
When I think of Good Times, I think of either the mountains, or the beach. Today I have focused on the mountains. The stamp set Waterfront is the perfect stamp set for those like me who like these two vacation spots. It is a piece of cake to depict either location just by using different colors.
Today’s colors are so rich and beautiful together. I do not believe the photograph really does them justice. The returning Blackberry Bliss is a real jewel! I used the Seaside Embossing Folder for the background layer and it really shows off well in the Blackberry.
Thank you for visiting today. I have used quite a few colors on my card and they are on the supply list at the bottom of the post. Do not forget about the Clearance Rack. Even though technically the Retired List is gone, leftover items will begin showing up on the Clearance Rack pretty soon.
Stay tuned tomorrow and I will try to get a few of the Stampin’ Up! new product videos to link. In the meantime, you can always go to the Stampin’ Up! YouTube site and begin watching. Enjoy!!
It is still a great time to become a Stampin’ Up! Demonstrator. I would love to have you join my team. A great perk for demonstrators this time of year is getting to see the new catalog first. Then we get to order and play with the new products a month early. For me, that is one of the best parts of being a SU Demonstrator. Of course, the discount helps! If you are interested, please contact me and let’s talk.
The content in this blog is the sole responsibility of Jackie Beers as an Independent Stampin' Up! Demonstrator. The use of and content of classes, services or products offered is not endorsed by Stampin' Up!