I have a quick and bright card to share with you today. I inked up the Falling For Leaves stamp set for the first time. I can just imagine several ways of using the large leaf. Oh My!! But today’s is quick, and simple. I am not saying clean though. LOL !! I did the smooshing technique and I usually get a little messy with that.
Falling For Leaves, 147680
As you can see, my smooshing is messy! I intentionally only did it to one side for a bit different look. I used Pumpkin Pie, Mango Melody, and Calypso Coral re-inkers for the technique. I actually made a couple of backgrounds at the same time. This one turned out the best I believe.
Thank you for stopping by today! I greatly appreciate it. All of the supplies I used, as limited as they are, are at the bottom of the post. I hope you will come back tomorrow to see a new project.
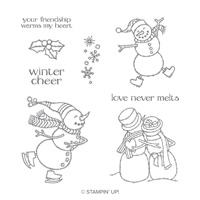
I have another card with the adorable Spirited Snowman stamp set. These little guys are just so cute that I made several on my first play with them. This is the second card.
Spirited Snowman, 148072
He looks like he is having such a good time skating along! I can see this card done in any color. All you have to do is color the scarf and hat to match your card stock or designer series paper. This DSP is the Under The Mistletoe DSP. I know I have used it quite a bit, but it is so wonderful that I cannot resist it.
I know it may look odd, but I debated on using the two different colors of layers. I thought about doubling the Real Red and Old Olive in both places. But then I thought about the “fun” of the DSP and decided to go wild. LOL!!!
Thank you for stopping by today! I appreciate it very much and I love to read your comments. I have the measurements and the supply list below.
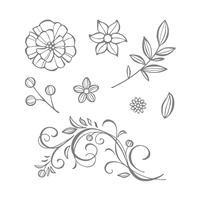
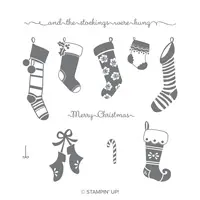
I do not usually do posts using the Host Rewards Stamp Sets, as not everyone can easily purchase them. You need a party, or an individual order, of $150.00 minimum to purchase these sets. But this particular set immediately caught my attention when I first viewed the Holiday Catalog. I just love the sweetness and childhood memories it invokes.
Hung With Care, 147882
Aren’t these little stockings just adorable? They make me smile right away. Even though the layers of this card are very simple, I will admit it took a few minutes to make this card. It was more due to me wanting two tone stockings. I colored each stocking with the Stampin’ Write Markers in Shaded Spruce and Blackberry Bliss. That takes a few minutes to do each one. It would definitely be quicker to do solid color stockings.
The designer paper I chose was for the color, again Blackberry Bliss. It is from the Country Lane Designer Series Paper. You know I love my DSP!!
I have the measurements and the supply list further down for this card. If you would like to try to get this stamp set, I would be thrilled to help you. Please let me know and we can talk about the options. Thank you for stopping by today and I hope you will return tomorrow.
MEASUREMENTS:
Base layer of Shaded Spruce is 5 1/2 X 8 1/2 folded in half
It is so hard to think of Winter and Christmas here in the South when the temperature still acts like it is July! Yikes, I am ready for a little cooler weather. Maybe my card for today will give you a little hint of cooler weather with some Winter Cheer!
Spirited Snowman, 148072
This cute little person looks so happy and cool that I just had to have this stamp set. You can never go wrong with snowmen, or snowwomen, right? They are great for all of the winter, not just for Christmas. At least that is what I told myself! LOL!! Like I need a reason to buy a stamp set.
This is really a quick card. I only colored the snowman’s accessories plus just a touch of the Light Pool Party around the edges of his body to give the illusion of a blueish ice. The designer paper is the Festive Farmhouse DSP. I also added some of the Silver Thread for a touch of texture behind the snowman.
I have all of the measurements and the supplies I used listed as you go down the post. (Oops: I did not list the Cherry Cobbler Ink in the supply list!)
I appreciate you visiting and love to read your comments. Thank you for stopping by today.
I am not the big Halloween person I was in my younger days, but I am a huge fan of cats!! And I love Black Cats. So I have made a cutesy Halloween card featuring a Black Cat and his unexpected little friend.
Cauldron Bubble, 147710
Aren’t these little guys just precious? I based my colors from the Call Me Clover green eyes of the cat. Then I colored his little froggy friend with both shades of the Call Me Clover Stampin’ Blends. Of course I now had to use the green instead of yellow on the hat. But that’s OK. We get to use whatever color we want to use!! LOL!!
I do apologize for the shadows of the ribbon on the card. They did not show up as much until I put the photo into the post. But then you know I am not an expert on the photography!!
There are two things I did a little differently on this card. I masked the hat so that the broom in laying underneath it. I did this by stamping on a post it note (the sticky section beneath the rim of the hat) and cutting it out just inside the lines. The second is that I fussy cut the frog and raised him up with a Mini Stampin’ Dimensional. I especially love that he is looking towards his friend Mr. Cat.
Just to add a little sparkle, I cut three small sections of the Glitter Organdy Ribbon. I wrapped them around a wooden skewer that is one of my pointy tools in my craft space. It gave the ribbon just a little shape.
MEASUREMENTS:
5 1/2 X 8 1/2 scored and folded in half
Basic Black is 5 1/8 X 3 7/8
DSP is 5 X 3 3/4
Basic Black is 2 3/8 X 3 3/8
Whisper White is 2 1/4 X 3 1/4
Thank you once again for visiting my blog today! I hope you enjoyed my whimsical Halloween card. I have listed all of the supplies I used at the bottom of the post.
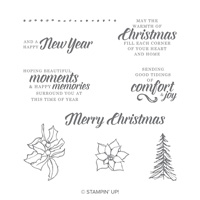
Today I have used a sweet stamp set that you may have overlooked in the Holiday Catalog. It is the Timeless Tidings set from page 33. It can be purchased alone, but it pairs with the Timeless Tidings Project Kit. I chose to use it alone for this card.
Timeless Tidings, 148936
This would be a great card to mass produce. Especially using the Stamparatus. The sentiment and the holly are stamped with Tuxedo Black Memento Ink. The tree is inked in Mossy Meadow and stamped off first. I colored the holly using the Stampin’ Blends in Cherry Cobbler and Old Olive.
The Designer Series Paper is from the Festive Farmhouse package and the Thicker Baker’s Twine is the Festive Farmhouse Twine from that suite of products. It is a great value as you get Cherry Cobbler, Mossy Meadow and Very Vanilla twine in a set.
MEASUREMENTS:
8 1/2 X 5 1/2 scored and folded in half
Whisper White 4 1/8 X 5 3/8
DSP 4 X 5 1/4
Cherry Cobbler 2 5/8 X 4 1/8
Whisper White 2 1/2 X 4
Thank you for visiting today! I very much appreciate you checking my posts and I love to read your comments. Please stop back tomorrow for another new card. As always, the products I used are listed at the bottom of the post.
For today’s card, I am still using scraps of Designer Series Paper. And it is the Frosted Floral DSP again. I just cannot let go of these little pieces. Today I have used them as the focal point by making little banners. Here is the card.
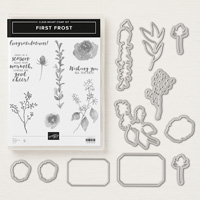
First Frost, 149943
Do you love this Designer paper as much as I do? Wow!! Well now I hope you will add this fabulous stamp set/bundle to that list. It is the First Frost Bundle and headliner of the suite that includes the above mentioned fabulous DSP! I have asked myself why this set is in the Holiday Catalog. At least to me, it is more a year round stamp set. All you have to do is change the colors. And the matching dies, of which there are 11, have the different sprigs, the roses and some frames. I don’t know why it is in this catalog, but I am thrilled that it is!! I love it.
This stamp set is one of the special stamps Stampin’ Up! has created that have this built in depth to them. You get the different texture/softness without two or three step stamping. A definite win!
The background sprigs are inked with Old Olive and stamped off before stamping on the white. I think they sort of mimic the sprigs on the DSP.
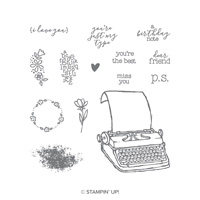
The sentiment is precious and is from the P.S. You’re The Best stamp set in the annual catalog. I hope you will take a look at that set. By using this little sentiment, the card could then have a multitude of different sentiments on the inside. This would be a great one to make using your scraps of DSP to just have on hand. Then you can add the appropriate sentiment needed on the inside.
Thank you for visiting today! I greatly appreciate it. All of the supplies used are listed at the bottom of the page.
I have a quick and easy Thank You card for today. I have used the Whisper White Notecards & Envelopes. They are The Best for quick, easy, and clean cards. Plus they are a great value for your money! I have added a small piece of the Frosted Floral Designer Series Paper and it is finished.
Frosted Floral DSP, 147800
And this is not even the prettiest side of that piece of DSP!! It is still gorgeous, and I love all of the sheets in this pack of paper. I wanted a simple and clean card though. So I cut a piece of Whisper White card stock a 1/4″ smaller than the card. I then layered the DSP strip, added the piece of ribbon, and the sentiment. It was finished very quickly! This would make a great little Hostess type gift. Take several of these and wrap a pretty piece of ribbon around them.
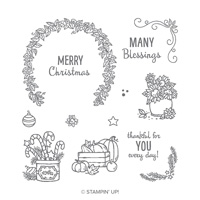
The sentiment is from the Million Dollar set, Many Blessings. As I have said before, that set is a keeper!! I stamped the sentiment in Pear Pizzaz and punched it out using the Darling Label Punch. It is the Punch Box in the current Annual Catalog. Another fabulous punch from Stampin’ Up!’s collection.
I apologize for the little smudge on the picture. I am not sure where that is from. I use my phone for photos and cannot imagine how you would get a smudge on there??? Any thoughts???
Thank you for stopping by today. I appreciate your time. All of the supplies, limited as they are, are listed at the bottom of the post.
I want to apologize if you were looking for a post yesterday. I have been on vacation and though (Haha) that I was scheduled through yesterday. Well , you know how that goes…..I was wrong. But I am back now and with a special card.
Today is our 38th Wedding Anniversary! It really does not seem possible. But here we are. So I made a cute card for my hubby. We are not into gifts anymore and usually go for humor.
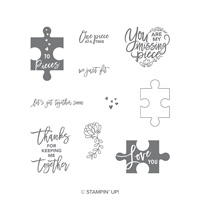
Love You To Pieces, 147392
It is more “cute” than anything, but fits us perfectly. On a side note: How do you lose a complete set of dies? I know I purchased this as the bundle, but the dies are not to be found!! A nice tip though is that it is really easy to fussy cut these puzzle pieces. Although it helps if you do not wait until the very last minute and then realize you cannot find the dies!
I kept the card very plain, only two base colors and then the bit of coloring on the heart shape. I love Night Of Navy with almost anything. This time I have paired it with Gray Granite. A great new gray.
Thank you so much for stopping by today! I appreciate it more than you know. All of the supplies are listed at the bottom of the page.
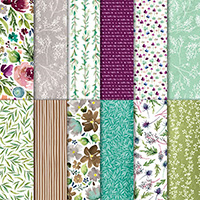
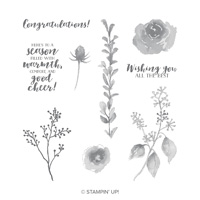
I have used one of the stamp sets from the Holiday Catalog that is not necessarily a holiday set. That sounds confusing! The set is the First Frost Stamp set. It has beautiful floral and sentiment stamps. It also pairs wonderfully and expectedly with the Frosted Floral Designer Series Paper. The paper is shimmery and just gorgeous.
Frosted Floral , 148420
I have an odd, odder than normal, layout and a mixture of colors. All of the colors came from this designer series paper. I love the thistle on here. It reminds me of Scotland. And I unintentionally made a Scottish cross with the glimmer paper. I really did not plan that. I was just trying to add some glimmer but not be just a straight piece and to ground the sentiment.
The colors are all from the DSP. To mimic the thistle on the paper, I colored the stamp with the Night of Navy Stampin’ Write Marker and then used the Blackberry Bliss one to go over the end of the bud and the little side pieces.
Thank you for visiting today! I appreciate it and hope you will return. All of the supplies I used are listed at the bottom of the page. I hope you have a wonderful day!
The content in this blog is the sole responsibility of Jackie Beers as an Independent Stampin' Up! Demonstrator. The use of and content of classes, services or products offered is not endorsed by Stampin' Up!