As usual, I am a day late on getting out information! But this is definitely one of the better late than never scenarios. These new products are fabulous!!! I have included the products as well as some Stampin’ Up! design team samples using them. So sit back and drool over these beautiful stamps and dies.
If you fall in love with these items, please remember that they are While Supplies Last!!!
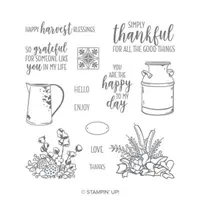
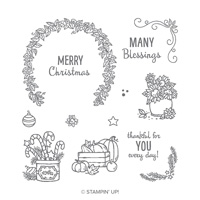
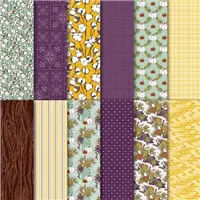
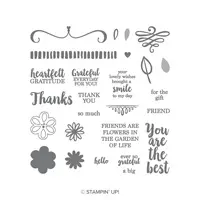
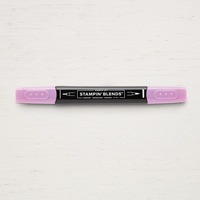
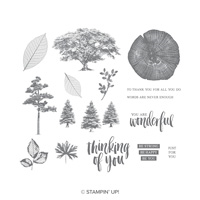
Happiness Surrounds, 149744
I adore these sentiments. And this is a year round stamp set I do believe.
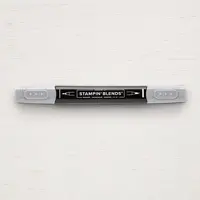
Snow Is Glistening, 149742
I do love these stamps, but the sentiments and fonts are just fabulous!!
Snowfall Thinlits, 149692
What is better than dies for a stamp set? Well, how about one set of dies that fits TWO stamp sets!!!!!
Snowflake Trinkets, 149620
These are just precious! They would be so cute on a small package, gift tags, cards, as earrings!
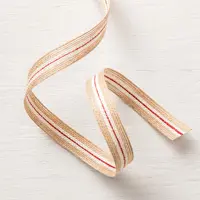
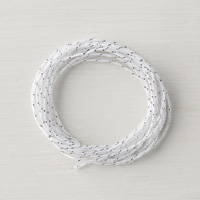
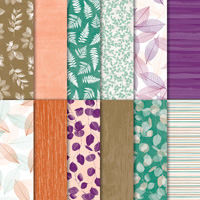
White Velvet Paper, 149619
This is just perfect for the snow theme. So now you have the complete line up! I cannot wait until my order arrives. Since I was on my vacation for two weeks, I waited until I was home to place my order. So stay tuned for my samples.
In the meantime, here are the Stampin’ Up! samples I mentioned at the top of the post.
Thank you for visiting today! I hope you liked this view of the new products. Please contact me if you have any questions. And I hope you will return on Monday for a new project.
I love the Global Design Project challenge and have played along with one of the sketch challenges for today’s card. It is a great way to get a card idea. I love looking at sketches and then figuring out which stamp set will work.
Here is today’s card.
Country Home, 147678
And here is the GDP sketch:
I have used this Country Home stamp set so many times. And I know I will continue to use it. I love the “country / rustic” theme that these stamps seem to showcase. Besides, it is perfect for this Fall time of year.
Thank you very much for stopping by today. I greatly appreciate your checking out my projects. I have included all of the supplies at the bottom of the post.
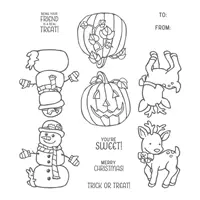
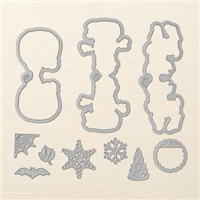
I hope you have time for one more Halloween card idea. This one is not scary and could actually be used for Thanksgiving and Fall as well as Halloween. I used the Seasonal Chums stamp set and Seasonal Tags Framelits Dies. Unfortunately they are not a bundle any longer, but I am thrilled that they carried over.
Seasonal Chums and Seasonal Tags Framelits
Depending on the size of your viewing device, you may not be able to easily read the sentiment. I LOVE this one. It says Being Your Friend Is A Real Treat! I just love that! I believe I could get by with using that year round on little gift boxes/3D items.
I mentioned in the beginning that you could use this for other than Halloween. Just change the colors a bit and do three of the back side of the pumpkin instead of the center carved pumpkin. I used these as place card holders previously. I did the same panel size and used a strip with the name raised up from the pumpkins. Quick and easy as always!
If you are not familiar with this stamp set, it is intended as little gift tags. The front and back of the pumpkin are attached at the top with a tiny strip and have an included ribbon hole. All I did was use my paper snips to cut around the top and cut away that joining piece. (This set includes a reindeer and a snowman, as well as that adorable sentiment)
Thank you for visiting today! I very much appreciate it. I promise I will show a few of my favorite vacation in France pictures soon. All of the supplies are listed at the bottom the page. I hope you have a fun and safe Halloween !!
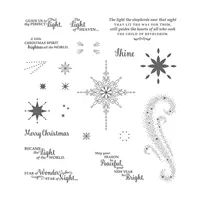
I am showcasing an Oldie But Goodie stamp set. It is a carryover from the last Annual Catalog and has always been a favorite of mine. It is The Star of Light stamp set. I have probably utilized this Christmas set more than any other. And of course it has matching dies. I just did not use them today. For today I went quick and easy.
Star of Light, 142110
As I said above, I kept this card very simple. The swoosh is stamped in Smoky Slate ink, as are the silver stars. The sentiment and focal star is in Merry Merlot. I debated on the focal star being in Crushed Curry, but decided to go with just the two colors.
This card is a 4 X 4, although you could use this same layout and go with any size. My main Christmas card from last year was this layout with the medium star from the dies layered on the center.
I hope you enjoyed today’s card and will join me back here tomorrow for Halloween! All of the supplies are listed at the bottom the page, as few as they are!
I hope I still have my loyal followers here today. I had an awesome two week vacation in France, but now I am back to share new projects with you.
The weather in France was warmer than expected and I came home to a bit cooler temperatures. That was an unexpected pleasure. This put me in the holiday spirits, plus realizing that Halloween is in two days! Yikes!!! So I covered all of the upcoming holidays in one project for you. And it is a quick one as well.
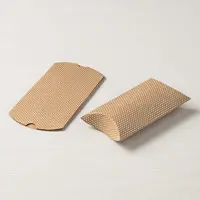
Kraft Pillow Boxes, 147018
I created treat boxes for each of the upcoming holidays. All of these were really quick. I could have kept going on each one of the themes. With the Designer Series Paper, Ribbon, and great seasonal stamp sets, the ideas are just endless for decorating these little boxes.
The great part of these boxes are the price. You get 10 boxes for $5.00. That is an awesome deal! They are large enough to hold a variety of candies or small gifts. These are fairly basic in the designs. I can see the beauty in coming up with a theme and creating a basket of these to have by your door for holiday guests or to take to a gathering.
Thank you for visiting today. I really appreciate you hanging around for my return from vacation. The supplies I used on the boxes are all listed at the bottom of the post.
Before I get started on today’s post I wanted to give you a heads up! I am going to be traveling after today. I will not return until the end of the month. Woohoo for me! A big vacation / girl trip!! But that means that I will not have new blog postings. I just have not had the time to plan ahead. I apologize and I hope you will come back the end of the month when I return.
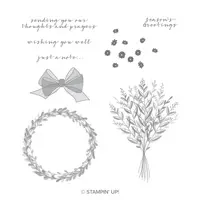
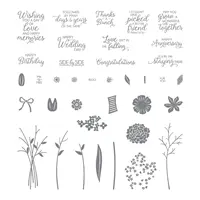
So for today’s card I have another card from the awesome set Wishing You Well. I really do love this set. The card I am sharing today is one I gave for a wedding over the weekend. What better use of “Wishing You Well” than for a bride and groom.
Wishing You Well, 147864
I think of this as a simple elegance. I hope you do as well. I utilized the Subtle Textures Embossing folder on the So Safron layer. The flowers are stamped in Crushed Curry to stand out more. I then topped each one with a small pearl.
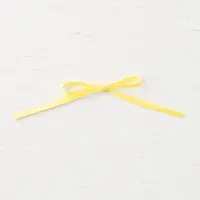
Even though in the picture it looks almost black, the dark layer is Blackberry Bliss which matches the bow. That bow is my favorite stamp in the entire Stampin’ Up! inventory I believe. 🙂
Thank you for visiting today. I apologize for going to be absent for a little over two weeks. I will post some photos when I return.
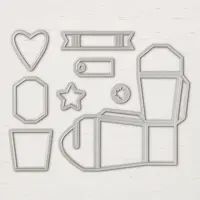
Today is Not a Card. It is the adorable box from Takeout Thinlits. It is shaped like the Chinese takeout containers , but in miniature size. There are quite a few different ones that you can find on Pinterest, etc. I made this one a little bit ago when my Upline, Brian King, had a challenge on our group Facebook page to post every day. Since I do not do a blog post on the weekends, I have a couple of cute little projects left over. But first, I hope you will fall in love with this cute little takeout box.
Takeout Thinlits, 147927
My takeout container is done very simply. I used designer series paper for the entire box. Most of the samples you will see utilize the DSP as the layers for the sides. The dies are awesome for this layering as there is a die that cuts the side layers included in the set. Yay for Stampin’ Up!
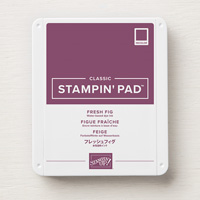
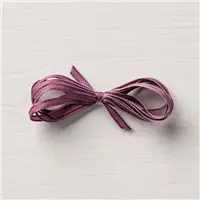
I kept the decoration pretty simple as well. The heart is an included die and the white heart is cut using that. I simply adhered the die cut heart to the Fresh Fig card stock and fussy cut around it. It was not really very fussy cutting! I then used the 1/8″ handheld punch to punch a hole through both layers. The cute little ribbon is the Fresh Fig ribbon also.
This adorable little box would hold a handful of Hershey Kisses or a couple of Lindorf Truffles even. Better yet, a cut little gift!
Thank you for visiting today. I appreciate it very much. All of the supplies I used are listed at the bottom of the post
I have a Halloween card for you that I made using the Sketch Challenge for Global Design Project #158. It is an awesome layout that I believe I will be using quite often. I tweeked it just a bit, and love both of the layouts.
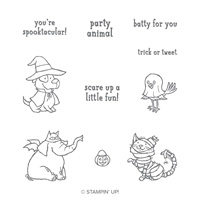
Trick or Tweet, 147722
Nothing is sweeter than dogs and cats together, unless it is them Trick or Treating! Instead of the center animal, I chose to show the love and added a heart. It is from the Takeout Thinlits Dies. I really love this die set. I will share the little box I made at a later date.
This is the sketch from GDP.
The gorgeous purple designer series paper is from the Frosted Floral Specialty DSP. I paired it with Blackberry Bliss card stock and Whisper White to bring out the bright colors. The animals are stamped with Memento Tuxedo Black ink and colored with a variety of Stampin’ Blends. I do LOVE the Stampin’ Blends!!
I have the measurements listed below, as well as the complete supply list at the bottom of the page. Thank you very much for visiting today. I do very much appreciate you checking on my projects.
TMEASUREMENTS:
Base card of Blackberry Bliss is 5 1/2 X 8 1/2, folded in half
I don’t know about you, but it can be difficult for me to make a masculine card. Occasionally they pop right out, but generally I have to really think about it. I have found a stamp set that is a great resource for masculine cards. The Rooted In Nature set is just perfect in my opinion for rugged, nature, masculine cards. Today’s card is for my sweet husband’s birthday. Although I did not put birthday on the front.
Rooted In Nature, 146482
I paired the trees with the Nature’s Poem Designer Series Paper. If you saw yesterday’s post, it was using the Nature’s Poem DSP as well. And it was a totally different look!!
To get the effect I did for the trees, I colored them with the Mossy Meadow and Soft Suede Stampin’ Write Markers. The center front tree is full strength and the others are repeated without re-inking. I did do a second re-ink. You get three stampings with one inking. The third is very light. I hope you will play with this technique and let me know what you think of it.
Thank you for stopping by today. I hope you will come back tomorrow. All of the supplies are listed at the bottom of the page.
The World Card Making Day 10% Off Sale is going on now. You can see the list of products by clicking HERE. This goes to my Online Store and all of the specials are on the home page.
I have a different type post for you today. It is paper crafted table accessories. Wether or not we are ready for the holidays, they are quickly approaching. This means a variety of special dinners or gatherings. For me at least, these tend to be more the buffet style. And that brings me back to the topic.
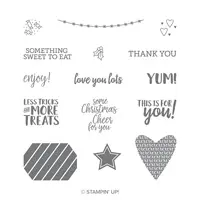
A Big Thank You, 147377
I paired two super projects together. The Hand Sanitizer is from Julie DiMatteo (The Paper Pixie) and the silverware holder is my design. You can see Julie’s post HERE for her fabulous video tutorial. I created the napkin/utensil holder based on something a friend had. I widened it so that it will hold more utensils. My photo has clear plastic utensils (sorry about that in terms of being able to see them!) and a napkin easily.
Obviously you could change up the colors for both of these projects to suit your occasion. The utensil holder is great for buffets as I mentioned earlier. This way everything is together and you do not drop the lose pieces. And of course, we can always use the hand sanitizer!
I have the measurements for the napkin/utensil holder listed below. Again, Julie has a great video on making the hand sanitizer holder if you click the link above. They are both very easy to make and the decorations can be up to you. I hope you will give them both a try.
Thank you for visiting today. I very much appreciate it and hope you will continue to stop by and check out my projects.
MEASUREMENTS:
Crumb Cake base is 4 1/4 X 11, scored at 6 and 10.
Fold and burnish the scorelines. The 1″ piece folds to the front.
Using Tear & Tape, place the tape against the edge of the section between the two score lines. Before adhering, place a folded napkin inside. This gives you room for the napkin, etc without tearing the envelope.
Prior to taping down the little flap, wrap the ribbon and secure it.
The DSP is 3/4 X 4 for the little flap and 3 X 4 for the front
Round the top corners wit the Detailed Trio Punch
World Card Making Day 10% Off Sale:
You can see all of the current specials by clicking on my OnLine Store. The home page shows all of the current specials. Click HERE and you will be taken there.
The content in this blog is the sole responsibility of Jackie Beers as an Independent Stampin' Up! Demonstrator. The use of and content of classes, services or products offered is not endorsed by Stampin' Up!