I generally do not make a lot of Halloween cards. However, you know how much I love the animal stamps from Stampin’ Up!. So today I have a Ghost to share. It may not fall in the “animal” category, but I think you get my idea. Fun and whimsy makes for a happy card.
Stamps
This fun ghost is from the Playful Ghost stamp set in the last new drop of Online Exclusives. The set contains a ghost dracula, one popping out of a pumpkin, and this one on the broom. There are also some small additional images and simple sentiments.
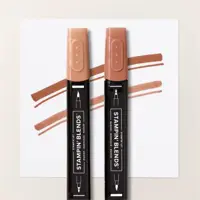
The ghost on the broom is my favorite so I had to start with her. Her because that just seems right!! And I gave her some pink cheeks. The coloring is minimal and was done with Stampin’ Blends. To add a bit more to the front of the card, I added the simple BOO to the corner. This is a fairly clean and simple card for me.
Layout and Papers
This simple layout can be used with so many options with the stripes. It is one of the sketches in the Annual Catalog. They are at the bottom of page 22 in the Annual Catalog. This one is on the bottom row about in the center. And you can see others of these layouts spread out in the catalog. Additionally SU added sketches to the Mini Catalog. They are on page 16 of that catalog. Sketches are such a great way to give you a starting point. At least it works for me.
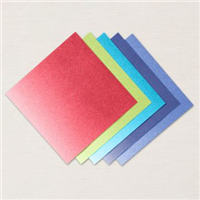
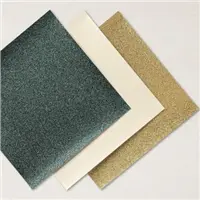
The papers for my flying ghost are very simple. I went for a softer color pallet than bright like I normally do. Peach Pie is my card base with a layer of Basic White. The fabulous glimmer strips are from the Annual Catalog and are the 2024-2026 Glimmer Paper. I cut each strip 1/2″ X 3 1/4″ Peach Pie also layers the ghost. And for the added sentiment I stamped on a little piece of Peach Pie. The card just needed a little something extra and the small BOO was the answer.
Finishes
The glimmer paper added a good bit of my normal Bling to the card. And the addition of the stand out BOO, could have been enough. But you know me. I added a single Faux Glass Dot to the bottom right of the ghost layer. These are new in the Mini Catalog and are somewhat muted like old glass. I chose the light green as I had added a touch of green into the ghost’s hat. It doesn’t stand out a lot but does show more in person.
Thank you for stopping in today!! I hope you have a relaxing weekend.
New Scrapbooking Catalog
The newest addition to Stampin’ Up! is an Online catalog of Scrapbooking products. You can see the catalog by clicking the photo below and save it to your computer.
Online Exclusives
New Online Exclusives have dropped. There are Halloween, Fall, Christmas, and many that are great year round. Of course the new Designer Series Papers and Embellishments are fabulous as well!
You can go directly to these in my Online Store by clicking HERE
HOST CODE
My SEPTEMBER Host Code is S9CRPBZ4. Please use this code for orders under $150.00. I will have a small gift for those with orders over $50.00 in addition to the Perk Rewards Program. You can read all of the information at the top of the page in the Menu Bar under SHOP / Perks.
Thank you for stopping by today. I hope you enjoyed today’s project and will come back. I do read and reply to all of the comments individually. They mean a lot to me. Please reach out if you have a question.
Random Act of Kindness treats are the ones I love to make. And when you find something a little different it makes giving even more fun. The difficulty is trying to figure out a decorative package. That was definitely an issue with today’s treat project!
The Treat Topper
As I said in the beginning, sometimes how to decorate a gift can be the most difficult part. As you can see from the photo, these are chocolate covered pretzel rods. They are about 8″ long. Luckily they are already individually sealed, so that was not a worry. Finally I saw a treat bag top Brian King had made and decided a simple topper was the way to go.
Layers
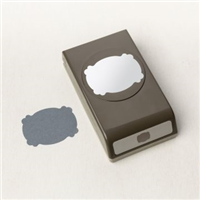
The highlight of the topper is the Witch Hat Punch. And it is so sad that it sold out. Hopefully you were one of the ones who purchased it, as a LOT of people did! The hat from the Bewitching stamp set was stamped with Memento Tuxedo Black on Orchid Oasis cardstock. After punching the hat, a hat band was also punched using a piece of the Orchid Oasis from the 2022-2024 In Color Glimmer Paper. It received a Black Matte Dot to complete the hat portion of the topper.
The base of the topper is simply Basic Black cardstock punched with the Lasting Label Punch. It was folded in half lengthwise and stapled to the top of the bag. Using my faithful Double Oval Punch for the sentiment was a great and quick solution to the sentiment. The sentiment is from the Scary Cute stamp set and is stamped with Memento Tuxedo Black. I used a glue dot to adhere it to the back of the hat brim prior to adhering the hat to the black base. The hat covers the staple on the front so you see a cute tag with no staples showing from the front.
Happy Halloween to all of you….
I hope this gives you an idea for personalizing, and decorating, a quick treat. Hope your Halloween is fun!
Birthday Organizer Kit
DETAILS
Kit includes one 8″ x 10″ (20.3 x 25.4 cm) monthly planner with space to record birthdays each month as well as a pocket sleeve to hold birthday cards.
Includes 12 full-size birthday cards, 6 of 2 designs, and 12 coordinating envelopes.
Includes Glue Dots, Stampin’ Dimensionals, Adhesive-Backed Embellishments, and Tear & Tape Adhesive
Includes die-cut florals and pieces ready for you to use—no prep work required!
Includes sticker sentiments and die-cut labels in Dutch, English, French, and German
Now is the perfect time to Join Stampin’ Up! and my Team. This is a great promotion with a very good “Bang for your Buck ” deal. There is not obligation to ever place another order as a demonstrator. I would love to talk with you if there are questions or concerns.
HOST CODE
My October Host Code is R26UJTTW. Please use this code for orders under $150.00. I will have a small gift for those with orders over $50.00 in addition to the Perk Rewards Program. You can read all of the information at the top of the page in the Menu Bar under SHOP / Perks.
Thank you for stopping by today. I hope you enjoyed today’s project and will come back. I do read and reply to all of the comments individually. They mean a lot to me. Please reach out if you have a question.
Today’s card is another Halloween and is part of the Make My Monday Challenge. As part of the design team, we hope to inspire your card making. Today’s card is very much out of my normal range and is covered in Glitter!! Not the loose kind. Glimmer Paper and tape are the stars.
You can join in the fun of the Make My Monday Challenge too. Just click on the icon and you will be taken to the blog where you can see cards from the other designers as well as add your own version.
Glimmer and Shine Paper
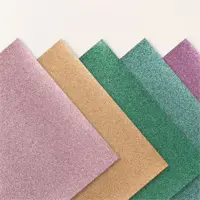
My version of a fun Halloween card is cute and not scary. And to be a little different from some of my others I decided to make this one a sparkly Halloween. The Glitter Washi Tape from the Mini Catalog was the inspiration for the card design. And with those pretty colors it also became the basis of the colors I chose to use. The washi tape colors are Black, Highland Heather, Old Olive, and Pumpkin Pie. However, I used similar colors to create my little scene.
From the sparkle of the Old Olive tape, I changed to Parakeet Party for the card base. The layer of Glimmer Paper is from the 2022-2024 Glimmer Paper and I chose Orchid Oasis for the purple hue. And the top layer is Night of Navy to depict the night of Trick or Treating. After adding the tape across the bottom to ground the sentiment, I decided the card needed a bit more and used different strips with the children images.
Stamps and Layers
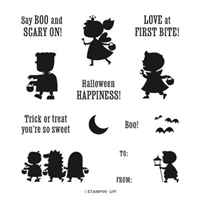
The Scary Cute stamp set is my Halloween set of choice. I love the images and the sweet sentiments. Choosing this set was the easy part. The difficult decision was how to showcase the different images. To create the background I stamped the bats using Memento Tuxedo Black Ink on the Night of Navy cardstock. Then stamped the images and sentiment on scraps of Basic White. The sentiment was punched using my favorite the Double Oval Punch. With the strips of Washi to ground it, I did not need the layer behind the sentiment.
For the trick or treater images I used the Layering Circles Dies. The images are fairly small and I did not want to cover too much of the background. But to give the children some bling, I did add the strips of Glitter Washi Tape to tie in to the other colors. As a Tip for you, I used the Stamparatus to get the dark solid images of the children. Being able to stamp a couple of times really makes a difference on these solid images. 🙂
Hope you have an awesome Fall day!
Jackie
Birthday Organizer Kit
DETAILS
Kit includes one 8″ x 10″ (20.3 x 25.4 cm) monthly planner with space to record birthdays each month as well as a pocket sleeve to hold birthday cards.
Includes 12 full-size birthday cards, 6 of 2 designs, and 12 coordinating envelopes.
Includes Glue Dots, Stampin’ Dimensionals, Adhesive-Backed Embellishments, and Tear & Tape Adhesive
Includes die-cut florals and pieces ready for you to use—no prep work required!
Includes sticker sentiments and die-cut labels in Dutch, English, French, and German
Now is the perfect time to Join Stampin’ Up! and my Team. This is a great promotion with a very good “Bang for your Buck ” deal. There is not obligation to ever place another order as a demonstrator. I would love to talk with you if there are questions or concerns.
HOST CODE
My October Host Code is R26UJTTW. Please use this code for orders under $150.00. I will have a small gift for those with orders over $50.00 in addition to the Perk Rewards Program. You can read all of the information at the top of the page in the Menu Bar under SHOP / Perks.
Thank you for stopping by today. I hope you enjoyed today’s project and will come back. I do read and reply to all of the comments individually. They mean a lot to me. Please reach out if you have a question.
Today’s project is a quick and easy Treat Holder. It is similar to the old time “sour cream” holders. All you need is a bit of pattern paper.
Paper and Holder
This treat holder came about from necessity! Having purchased some long chocolate covered pretzel treats for some special Halloween friends, I could not decide how to decorate it. What I am sharing was my first idea and is based on the old Sour Cream Container idea. If you are unfamiliar with that it is basically like a tube of paper, think toilet paper roll, and you then secure the ends in opposite directions to make a triangle shape.
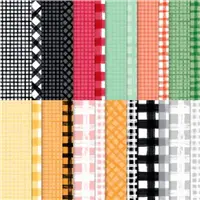
Since these pretzels were so long, I went with only securing the bottom end and leaving the top open. By using the Gingham Cottage Designer Series Paper I could make lots of treat holders in the same pattern. This pack of papers is one of the larger ones, and has multiples of each pattern. For this holder I used a piece that is 4 X 9 3/4. It is scored 1/2″ across the bottom of the 4″. Add some Tear & Tape at that score line and then down one side. Roll it up and secure the side and then pinched the bottom closed. This would work on any similar treat. All you need is enough paper to go around the treat and then an inch longer than the treat. As I said, Easy Peasy!!
Stamps, Punch, and Finishes
For the tag I used the Scary Cute stamp set. These sentiments are so sweet. And that is what I like. The sentiment and the bats were stamped on a scrap of Basic White using Memento Tuxedo Black Ink. For the shape I used the Label Me Fancy Punch. The shape reminds me of military dog tags with the rounded ends. Also, the punch has a ribbon slot as well as a circle hole. After punching the shape, I then punched the hole in the end to run my ribbon through.
To finish the treat I went with Baker’s Twine. My plan was the Bakers Twine Essentials Pack, which contains a solid Black roll of twine. But in my ribbon drawer was this piece of Black and White twine. This was a look I preferred. But ended up using both. We all have leftovers of ribbon and twine that still work on our projects don’t we! The twine was wrapped around a couple of times and then tied in a simple knot. I hope you will use this quick and easy way of decorating some treats for Halloween or any occasion.
Birthday Organizer Kit
DETAILS
Kit includes one 8″ x 10″ (20.3 x 25.4 cm) monthly planner with space to record birthdays each month as well as a pocket sleeve to hold birthday cards.
Includes 12 full-size birthday cards, 6 of 2 designs, and 12 coordinating envelopes.
Includes Glue Dots, Stampin’ Dimensionals, Adhesive-Backed Embellishments, and Tear & Tape Adhesive
Includes die-cut florals and pieces ready for you to use—no prep work required!
Includes sticker sentiments and die-cut labels in Dutch, English, French, and German
Now is the perfect time to Join Stampin’ Up! and my Team. This is a great promotion with a very good “Bang for your Buck ” deal. There is not obligation to ever place another order as a demonstrator. I would love to talk with you if there are questions or concerns.
HOST CODE
My October Host Code is R26UJTTW. Please use this code for orders under $150.00. I will have a small gift for those with orders over $50.00 in addition to the Perk Rewards Program. You can read all of the information at the top of the page in the Menu Bar under SHOP / Perks.
Thank you for stopping by today. I hope you enjoyed today’s project and will come back. I do read and reply to all of the comments individually. They mean a lot to me. Please reach out if you have a question.
Welcome to InKing Royalty’s October Blog Hop! Boo! Today we are sharing scary and sweet projects perfect for Halloween. We are excited to share our creations and hope you love them! After you read my post, I hope you’ll hop over to the next person on the list at the base of this post.
Halloween to me is all about the fun side and none of the scary. My card is about Halloween Happiness and a sparkly “good” witch.
Stamps and Punches
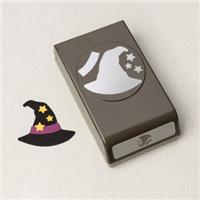
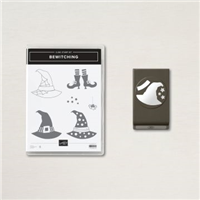
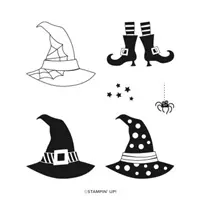
Today’s card could have been made with one stamp set, but I let my mind wander and ended up expanding on the original idea. The Bewitching Bundle was the beginning of this one. The witch’s hat and feet were stamped and then colored with Stamping Blends. For the hat, it was then punched using the matching Witch’s Hat Punch. The glimmer hat band is part of the punch as well as the scattering of little stars.
For the “body” of the witch the Alphabest Bundle was used to create the BOO body parts. The letters from the Alphabest stamp set were stamped onto the 2022-2024 In Color Glimmer Paper of Orchid Oasis. They were punched using the matching Best Label Punch. To save this beautiful Glimmer Paper, I stamped and punched from the already cut layer. By punching in the center no one knows that it has holes in it!
Open View
The sentiments on the inside of the card are from the Scary Cute stamp set. As I said in the beginning, I like Happy and not scary. So both of the sentiments are along the Happy line. The center sentiment has more of the little stars to give it some color. And for the lower sentiment I went with my favorite punch, the Double Oval Punch, to give some more of the Orchid Oasis Glimmer Paper.
Papers
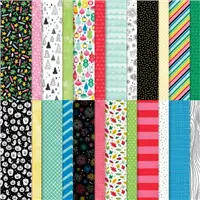
The In Color Glimmer Paper has been mentioned and is the bling on this card. But the other colors and DSP carry a lot of the weight as well. The two pieces of DSP, actually three if you count the inside bottom flap, are from the Host rewards Paper named Celebrate Everything Designer Series Paper. This is the same paper that I used on Monday’s card. Believe me when I say that you really want this pack of paper!!
This fun fold card is one from The Paper Pixie that she calls a Joy Fold. I tweaked her measurements a little by adding the layer of glimmer paper. Between the two photos you should be able to see how it goes together.
Thank you for stopping by today. I hope you’ll hop along to the next stop on the blog hop, Sue Jackson at Just Peachy Stamping. There’s lots of inspiration to be found in this group – and you don’t want to miss it!
Thank you for hopping along with us. If you get stuck during the Blog Hop, please use this line-up as a guide:
My October Host Code is R26UJTTW. Please use this code for orders under $150.00. I will have a small gift for those with orders over $50.00 in addition to the Perk Rewards Program. You can read all of the information at the top of the page in the Menu Bar under SHOP / Perks.
Thank you for stopping by today. I hope you enjoyed today’s project and will come back. I do read and reply to all of the comments individually. They mean a lot to me. Please reach out if you have a question.
Welcome to our Fun Fold Blog Hop! All of the Stampin’ Up Demonstrators involved love Fun Folds and sharing them with all of you. Once you have finished my blog post there is a list at the bottom for you to continue Hopping along to see the other creations. We are hoping you love them and will leave some comments.
The Fun Fold that I have chosen to share with you today is a Buckle Fold. It has been around for quite a while and is a variation of a Double Fold that has even more variations. That is what is so fun about card making! For a Fun Fold, I went with a fun holiday and chose Halloween.
Fun Fold
If you are a regular follower of my blog, I always say I begin with the paper. Since this was a Fun Fold Hop, I decided on the fold and then went looking for everything else that would fit. So I am going to begin with the fold basics.
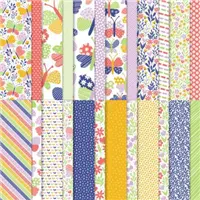
The card base is Gorgeous Grape cardstock that is cut 4 1/4 X 8 5/8 and scored at 3 1/8. And the beautiful DSP is from the Butterfly Kisses Designer Series Paper cut to 2 7/8 X 4, Those colors are what decided the Gorgeous Grape and the layer of calypso Coral. The Calypso Coral layer is cut to 3 3/4 X 3 3/4. And the White layer is cut to 3 1/2 X 7 and scored at 3 1/2.
To make the Buckle, I used the Sending Dies. There is a long and narrow sentiment die which fit perfectly. Actually It was the longest die that is narrow I have in my collection! After measuring the die length, the height of the White piece was determined and that my focal images would fit on it. Adhere the DSP piece prior to die cutting the slit. Layer the folded white onto the Calypso Coral layer and hold in place to ensure the “buckle” works. Here is a closeup view of the buckle part.
The white piece easily slips through the slit to hold the card closed. Other than getting the die centered on that front piece of the card, this is a simple card to make.
Stamps
Now that the card is basically complete it is all down to the fun decorations. The Bewitching Bundle, stamp set and Witch Hat Builder punch, are so cute. One of the hardest things was choosing which hat to use! By going with the mostly solid hat, I could just punch the hat using Basic Black cardstock. Stamping the hat on scrap in Gorgeous Grape and punching it out only the hat band gave a more colorful one. It is colored with Stampin’ Blends. The leggings and shoes are stamped and colored with Stampin’ Blends also.
The front of the card sentiment is the little “BOO”. It was stamped and die cut with the smallest of circles. Both the Boo and the inside sentiment are from the second cute Halloween stamp set. This one is the Scary Cute (how appropriate) set.
Embellishments
By raising the hat with Stampin’ Dimesnionals, it gives a bit of depth to the card. And did you notice all of the stars? Those are on the punch as well. The black ones came when I punched out the black hat. And the purple ones were made with just a corner of a scrap of Gorgeous Grape cardstock. They are all adhered around but needed something. So all but the smallest received a Rhinestone, including the little BOO. Even witches need bling!
Thank you for reading my post today! It is very much appreciated. Below is the list of other designer who have more Fun Folds for you to check out.
Click on either catalog photo and you will be taken to my Online Store where you can download either or both catalogs.
HOST CODE
My August Host Code is H9KF4JUC. Please use this code for orders under $150.00. I will have a small gift for those with orders over $50.00 in addition to the Perk Rewards Program. You can read all of the information at the top of the page in the Menu Bar under SHOP / Perks.
Thank you for stopping by today. I hope you enjoyed today’s project and will come back. I do read and reply to all of the comments individually. They mean a lot to me. Please reach out if you have a question.
The content in this blog is the sole responsibility of Jackie Beers as an Independent Stampin' Up! Demonstrator. The use of and content of classes, services or products offered is not endorsed by Stampin' Up!