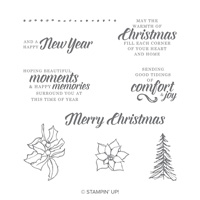
I have another Christmas card today. This one is a square card and clean / simple type. I paired the Timeless Tidings with Many Blessings.
Timeless Tidings, 148936
I can envision this card made even smaller and used as a gift card or a RAK card. For this one I used Thick Whisper White as the base and then just layered a piece from Under The Mistletoe DSP.
The stamped wreath image is from Many Blessings. It is stamped in Shaded Spruce Ink and colored with the Light Old Olive Stampin’ Blend. The sentiment is stamped in Shaded Spruce Ink as well. It s punched with the Tailored Tag Punch. The only extra step was rounding the corners of the wreath layer with the Detailed Trio Punch.
As I said, this is just a quick and easy card. I appreciate you visiting today and hope you will return. All of the supplies are listed at the bottom of the post.
For today’s card I have made one with the sweetest sentiment! Not candy cane sweet like Wednesday’s card. This one has a very nice and loving type sentiment. This sentiment is what originally sold me on the set. That and the wreath. I love wreaths!!
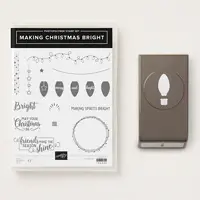
Making Christmas Bright Bundle, 149947
Did you read the sentiment? I am totally in love with this one. I have for many years considered several long time friends as family. So to me this sentiment is especially true! Friends make every season shine.
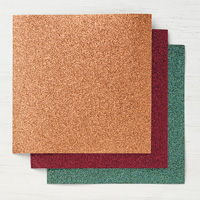
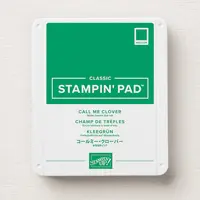
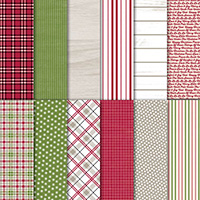
Once again I have a funky layout and bright designer series paper. I am a creature of habit. The designer series paper is from the 2018-2020 In Color 6 X 6 paper stack. It is Call Me Clover. I have paired it with one of my favorite new colors, Mango Melody. I can almost see you shaking your heads because I use it fairly often! LOL !!
To add a touch of “shine” to the card, I used the Joyous Noel Glimmer paper in Copper. It was the closest to the colors I used. This pack of Glimmer paper also is a 6 X 6 stack. I like to add anywhere from 1/4″ to 1″ of the glimmer paper to a card to just add a touch of sparkle.
Thank you very much for stopping by today. I greatly appreciate it and love to read your comments. The supplies I used are all listed at the bottom of the page. I hope you have an awesome day!
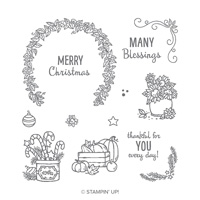
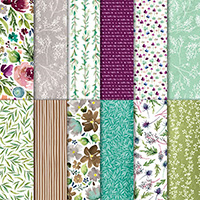
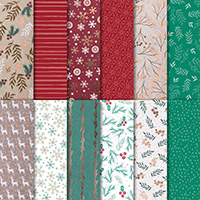
Today’s card is another quick and easy card that could have a variety of sentiments attached when needed. It showcases the gorgeous Frosted Floral Designer Series Paper and the Many Blessings stamp set.
Many Blessings, 147775
This versatile and gorgeous stamp set is inspired by Million Dollar Sales Achiever Ruth Snyder. It covers Christmas, Fall, and Spring/Summer. Also, since it is a special set, you can assume it will be carrying over after the Holiday Catalog is completed. WooHoo!! I know I will be utilizing it often. Actually I already have used it several times.
My photograph does not do the DSP justice. It is a frosted glimmer in gray. I apologize that it doesn’t really look that way in the picture. I made the focal point small to optimize the beautiful DSP. I love this type layout for small and mighty stamps!
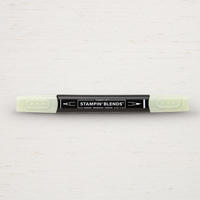
I used Stampin’ Up!’s little trick from the Blends video. I stamped the image in Smoky Slate. By stamping in a softer color, when you apply your colors it looks like a “no line” picture. I also used the color lifter on the center of the pot to lighten the color somewhat. I am not a great blender, but these Stampin’ Up! blends make it so easy.
Thank you very much for stopping by today! I do really appreciate it. All of the products I used are listed at the bottom of the page.
Welcome to the Pals September, 2018 Blog Hop. The 2018 Holiday Catalog from Stampin’ Up! Is out and the Pals are excited! Sit back while we share creations from “Our Favorite Holiday”.
You may be starting the hop here or coming from a previous Pal’s blog. Either way, you’ve come to the right place. You’ll find the the full line-up below to help you move, or “hop” along from Pal to Pal.
My Favorite Holiday is Christmas! I love the spirit of the season with happiness, gifts, and spending time with family and friends. What is not to love? For me, I love the giving part. And I like to make things, wether it be paper crafted or baked. With that in mind, I came up with this card.
Candy Cane Season Bundle, 149927
Aren’t those candy canes the cutest? The candy cane banner could easily be a tag attached to a gift or better yet, some sweet baked goods! I had that in mind when I first created the card. I shared it with my Stamp Club on Sunday with a different look to the tag. Here is that card.
This banner is much brighter! Because of the business of the banner, I used a brighter green for the bow and sentiment. This version uses Shaded Spruce where the first version uses Mossy Meadow. My Stamp Club loved the beautiful Designer Series Paper. As do I ! However, I think the solid background on the banner makes the candy canes, and the sweet sentiment, really pop. I love both though!
I have the measurements listed for you below, as well as the supplies I used. A little TIP for the candy canes: I cut a strip of Very Vanilla card stock 3 X 6. Stamp three of the candy cane outlines beginning from left to right, and then stamp the bow on the far right end. When you punch, because the bow and candy cane are both on the punch, start with the far left candy cane and move to the right. Punch the bow last. That way the bow is punching nothing for the first candy cane and then scraps after that. It really is pretty impossible to line up the bow and candy cane to work in one punch. I hope that helps you.
Thank you so much for stopping by my blog today. I very much appreciate it and I love to read your comments. Please continue on and see all of the great projects my fellow Pals have created..
MEASUREMENTS:
The Cherry Cobbler base is 4 1/4 X 11, scored and folded in half
The Very Vanilla layer is 4 1/8 X 5 3/8
The DSP layer is 4 X 5 1/4
The tag base layer of Cherry Cobbler is 2 X 5
The Mossy Meadow layer is 1 7/8 X 4 7/8
Now it’s time to use the Blog Hop Line-up below to see what the rest of my Pals have created to inspire you.. Don’t forget to show us some love by commenting on our creations.
Mark your calendars for Wednesday, October 10, 2018 for the next Pals Blog Hop. October is time for some wicked fun with “Wicked Folds” where the Pals will show you creations that are anything but a standard card fold. Don’t miss the fun.
My card today began as an for a tag to go with some Christmas baking. Yes, I am actually trying to plan ahead a little bit. However, it quickly morphed into a card. I will try again another time for the tag, but it did make a really cute card.
So Santa, 147821
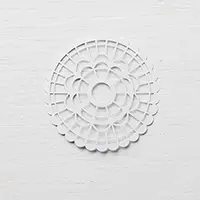
I am so in LOVE with these little Santas in this So Santa stamp set. They are just precious. Can you see why I thought this would make a great tag for some baked goods? The doily was the reason a tag became a card. I liked it but it was too large for the tag. So I continued playing around and ended up with this odd layout.
The gorgeous DSP is the Under The Mistletoe Designer Series Paper. And the doily is one of the Pearlized Doilies, although I used the reverse side which is simply white. The green I chose to marry with the bright Red is the Call Me Clover. I did not envision it as a Christmas Green. Now I do!
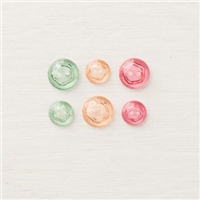
To tie the two layers together, the sentiment and the Santa, I used one of the Tinted Faceted Buttons. I have not used buttons in quite some time. They really are a great way to add just a bit to a card. And they are somewhat different as well.
Thank you for visiting today! I greatly appreciate it and hope you will come back tomorrow for the Pals Blog Hop. They are a lot of very talented folks in this group. I have included all of the measurements from today as well as the supplies I used.
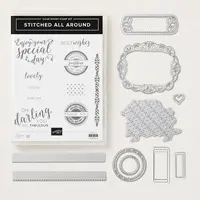
I have been showcasing products from the Holiday Catalog, and I will get back to that tomorrow. For today, I am back in the Annual Catalog and showing a really lovely set / bundle. The Stitched All Around Bundle. This is the card I made for some Thank You notes to some friends.
Stitched All Around Bundle, 148374
I consider this sort of a “collage” type card. In other words, just a mix of things! This is also another one of the examples I have mentioned before about not throwing away your scraps too quickly. The DSP piece and the little card stock piece were both laying next to my paper trimmer.
The background stamps are from the Touches of Texture Stamp set. I love this set for just such occasions. I use the speckled stamp quite often. The green leafy stamp is also from that stamp set.
The main piece is the intricate Thank You of course. And it is Oh So Easy!! I stamped the image, cut the piece out with the dies from Stitched All Around, and TahDah!! That is all it takes. So a little solid stamping, a die cut, and some paper scraps is all that was needed. I love these type cards.
I hope you will look a second time at the paper scraps you have! Thank you for stopping by today. I very much appreciate it. I have listed all of the products I used at the bottom of the page.
Today’s card is one of those “It could be for any occasion” type cards. All you do is change the colors and the sentiment. It is fairly plain, but sometimes that is what we need. Especially when you need several of one kind or are in a hurry.
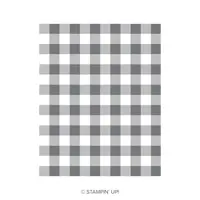
Buffalo Check, 147794
I used two different stamps from the Holiday Catalog. The Buffalo Check….Oh My!!! It is a must have for year round use. And a sentiment from the Flourish Filigree that I showcased on Wednesday. You can see that card here. The sentiments from that set pair with the Pretty Label Punch, which is one of our beautiful punches.
I went fairly monotone as well on this card. It is all various uses of Grapefruit Grove. The Buffalo Check is done in Grapefruit Grove and the card base is that as well. The Designer Paper is from the 2018-2020 In Color 6X6 paper stack of Grapefruit Grove as well as the 1/8″ Grosgrain Ribbon.
The sentiment is punched with the Pretty Label Punch. I used the 1/8″ Handheld Circle Punch to run the ribbon through the sentiment layer.
A helpful note on using a large background stamp: The Stamparatus is awesome for large stamps and easy to get the pressure all over that you need. And I hope if you have not done so already that you will purchase this awesome tool. BUT…if you do not have this, then there is another way. I learned this years ago when I first began stamping. Place the stamp on your table with the rubber up. Ink up the stamp very well by holding the ink pad in your hand instead of the stamp. Then lay your card stock down on the stamp. Try not to let it slide. Now take a piece of copy paper or notebook paper and place over top of your card stock. Run your hand all over the top so that all parts of your card stock are pressed onto the stamp. Now lift off the scrap paper and your card stock. You should have a very clean and good impression. That is so much easier than trying to handle the large stamp.
Thank you for stopping by today. I very much appreciate it. I hope you will return on Monday for some of the cards I made with my Stamp Club this weekend. The supplies I used today are located at the bottom of the page.
Are you in Love with the Holiday Catalog already? I want it all! I have made a fair dent in that list already. I like “Cute” and the stamp set So Santa definitely fits that bill. The Santas are so cute and there is one for almost any one on your Christmas card list. Even a beachy Santa! Here is the first of my Santa cards.
So Santa, 147821
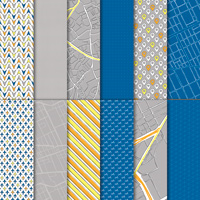
My Santa is a little wacky! But I wanted him to be that way. Did you notice the DSP? It is from the Best Route Designer Series Paper and is a close up of a street grid. How appropriate for a Santa that is delivering presents on his scooter!! I would never have thought of that as a background for a Christmas card but I discovered it as I was searching for DSP with blue in it. I think it is just perfect.
I broke out my Watercolor Pencils for this card. I have been coloring mostly with Stampin’ Blends lately so decided to use a different technique on this one. My preference is watercolor pencils and the blender pen. I feel like I have more control than with the aqua painter. We each have our preferences so you use whichever is most comfortable to you!
Thank you for stopping by today! I very much appreciate it. I have listed all of the supplies I used at the bottom of the page. I hope you have a great rest of your day!
Today is the unveiling of the 2018 Holiday Catalog!! WooHoo!! And instead of the using a set that you have probably seen numerous cards made from, I went with a more non-holiday set. The card I have made today is very simple and very flexible. It can be made in any color and most any sentiment added to it. In fact, you could make quite a few of these very quickly. I know it is pretty plain but I believe it is also super cute.
Flourish Filigree, 147870
This stamp set is not quite as noticeable in the Holiday Catalog as all the beautiful Christmas sets. Please give it a second look. It also coordinates with the Pretty Label Punch with the sentiments in the set. I chose to leave it blank. This way I can add the appropriate sentiment on the inside of the card as needed.
I used the Stamparatus to make this card to insure that I got complete coverage for a somewhat large stamp. Also I made several cards at the same time. The Stamparatus is perfect for that as well.
I wanted to have a little bit of Wow! So I used the Trio Punch to make the little see-through flower in each corner of the main layer. I love anytime you can see the card stock beneath.
Thank you for stopping by today! I very much appreciate it.
I have showcased the Joyous Noel Suite today! And it is an awesome Suite of products. The colors are traditional with a bit of a twist. Merry Merlot and Tranquil Tide are the main two I focused on. They are more of a jewel tone than a bright Red and Green of traditional Christmas Colors. After seeing these on today’s card though, I believe I will be using them for non-holiday cards as well.
Peaceful Noel, 147694
To go with the Merry Merlot and TranquilTide, I added Sahara Sand as a soft blending color. The DSP includes Sahara Sand and Gray Granite as the soft colors. Either would be perfect and are equally gorgeous.
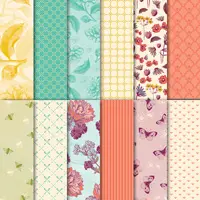
The Joyous Noel Specialty Designer Series Paper has copper foil details on one side and more traditional paper on the other. For this card I went with the not coppered side. I love the softness of the colors on this particular sheet.
When I noticed the different shades of green in the evergreen sprigs of the paper, I wanted to mimic that as a detail on the focal layer. I inked the stamp with Tranquil Tide, stamped in the corner, then stamped again on each side without re-inking the stamp. I repeated this on opposite corners. I stamped the star design on the opposing corners. I thought it was very cool the dramatically different shades of green from doing that technique. I hope you will give it a try. A note though….it requires a darker color to be able to stamp three times without reinking.
Thank you for stopping by today! I very much appreciate you visiting my blog. And if you do not have a current demonstrator, I would love to assist you. Also, please let me know if you need a new catalog. I have listed the measurements and the supplies I used on this card for you. Please stop back tomorrow for a new card.
The content in this blog is the sole responsibility of Jackie Beers as an Independent Stampin' Up! Demonstrator. The use of and content of classes, services or products offered is not endorsed by Stampin' Up!