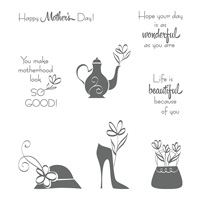
I have another card made with the beautiful A Mother’s Flair stamp set. It is not a Mother’s Day card, just a focus on one of the stamps. And it is a really quick one as well.
A Mother’s Flair, 145905
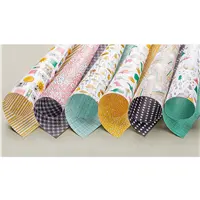
This card is a great way to utilize the left over strips of Designer Series Paper. On this card I have used Naturally Eclectic. The arrows are just one of the strips of arrows. The blue piece is 2″ wide.
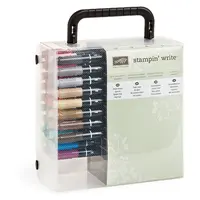
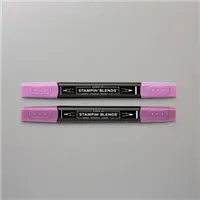
I used the Stampin’ Write Markers to color the stamp. I then took lighter shades of pink and green to fill in the flower stamped image. It is punched with the 2 ” circle punch and the Starburst punch.
Thank you very much for visiting today. I hope you will stop back tomorrow, as I will be participating in the Stampin’ Pretty Blog Hop. There will be a large number of great cards / 3-D for you to check out.
Have you ever thought about becoming a Stampin’ Up! Demonstrator? During Sale-A-Bration is the perfect time to join. Not only are you getting the Ultimate Bundle ($125.00 worth of product for $99.00) but you also get to choose 2 additional stamp sets, up to $25.00 each. Additionally you will receive a 20% discount on any future purchases. Or, if you are just wanting to test drive the idea, you would not be required to make another purchase until July! There is no pressure for you to continue as a demonstrator. And there is no penalty if you decide not to continue. Please contact me and let’s talk about it. You can review the documents by clicking on the picture below.
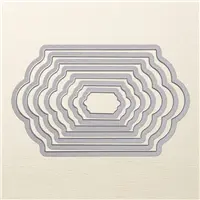
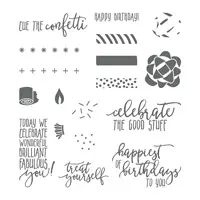
This is my first time using the Bubble Over Bundle. I really wish I had played with it sooner. It is perfect for layering. There are dies for almost every piece of the stamp set, plus a few extras. I made a simple card with a little twist to the fold. It is sort of a side/gate fold card.
Bubble Over Bundle, 146082
Please excuse my finger! The card did not want to stay closed to have it’s picture made. It is propped up and was misbehaving! I made the card pretty plain, with the bottle as the focal point. I had intended to clear emboss the bottle label, but then glued it down before I remembered to do it. Duh!!
I have the measurements for this off center fold further down in the post. I used several products, but they are not necessary. The Ticket Tear Border Punch could easily be a straight piece of card stock. I added it to mimic the edge of the bottle cap. That was my thoughts on using the scalloped ovals instead of straight ovals.
If you have any questions about this card, please do not hesitate to contact me. I love to hear from you! And I would especially like to talk with you about joining my Stampin’ Up! Team!! There are great incentives right now.
MEASUREMENTS:
Base card of Island Indigo is cut 4 X ll
Score the base card at 2, and & 1/2, fold and burnish
The layer is cut to 5 X 3 3/4
Emboss the layer, then cut it to 3 3/4 X 1 3/4 and 3 3/4 X 3 1/4
The focal point is adhered to the right half of the front
Have you ever thought about becoming a Stampin’ Up! Demonstrator? During Sale-A-Bration is the perfect time to join. Not only are you getting the Ultimate Bundle ($125.00 worth of product for $99.00) but you also get to choose 2 additional stamp sets, up to $25.00 each. Additionally you will receive a 20% discount on any future purchases. Or, if you are just wanting to test drive the idea, you would not be required to make another purchase until July! There is no pressure for you to continue as a demonstrator. And there is no penalty if you decide not to continue. Please contact me and let’s talk about it. You can review the documents by clicking on the picture below.
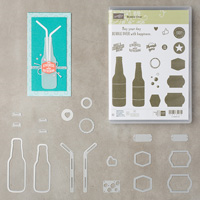
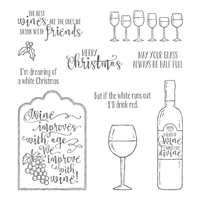
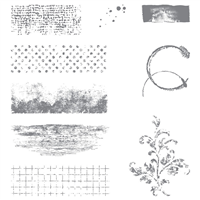
I am thrilled that this stamp set, Half Full, carried over from the Holiday Catalog! I really hope it is in the next Annual Catalog. Fingers Crossed !! The set includes some Christmas sentiments, and also some everyday sentiments. I love that. I have quite a few friends who like wine, and I sort of do as well !
Half Full, 144999
The “color of my wine” defined my color choices for this card. This is a muscadine wine, so I went with Rich Razzleberry and Old Olive. The splatter is from the Timeless Texture stamp set. Red Wines tend to end up on my white countertop for some reason, so splatter was appropriate.
The tag is cut with the Scallop Tag Topper Punch. The Ribbon is Berry Burst Metallic Edge Ribbon in the Occasions Catalog. It is so versatile and easy to work with.
I hope you enjoyed today’s card. I very much appreciate you visiting my blog. If you have any questions or are thinking of becoming a demonstrator, I would be thrilled to talk with you. During Sale-A-Bration is the best time of year to join my team!!
Have you ever thought about becoming a Stampin’ Up! Demonstrator? During Sale-A-Bration is the perfect time to join. Not only are you getting the Ultimate Bundle ($125.00 worth of product for $99.00) but you also get to choose 2 additional stamp sets, up to $25.00 each. Additionally you will receive a 20% discount on any future purchases. Or, if you are just wanting to test drive the idea, you would not be required to make another purchase until July! There is no pressure for you to continue as a demonstrator. And there is no penalty if you decide not to continue. Please contact me and let’s talk about it. You can review the documents by clicking on the picture below.
I saw the layout from the current Global Design Project Challenge yesterday and decided I really liked the layout. So of course I will be submitting a card at the last minute. The story of my life lately! This card is super cute and SWEET though!
Fruit Basket, 145833
Who doesn’t love strawberries??? I even have a strawberry birthmark (thankfully very faded now). So when I saw this set, I knew I had to have it. These berries are extremely easy to line up the berry and the cap. The set is photopolymer which makes it match perfectly. I added some Wink of Stella to the single berry on the left, but it doesn’t show in the photograph.
I did stamp what I think would be called a “reverse mask” to do the berries outside the basket. I stamped the basket on scrap card stock and then cut it out. That way I could have some berries on the table in front of it.
I hope you will give this set a try. The little fruit pieces have a matching punch set! Woohoo! I will definitely be using that in my next card. The supplies I used are listed the bottom of the page. If you have any questions, please contact me. I love hearing from you.
Have you ever thought about becoming a Stampin’ Up! Demonstrator? During Sale-A-Bration is the perfect time to join. Not only are you getting the Ultimate Bundle ($125.00 worth of product for $99.00) but you also get to choose 2 additional stamp sets, up to $25.00 each. Additionally you will receive a 20% discount on any future purchases. Or, if you are just wanting to test drive the idea, you would not be required to make another purchase until July! There is no pressure for you to continue as a demonstrator. And there is no penalty if you decide not to continue. Please contact me and let’s talk about it. You can review the documents by clicking on the picture below.
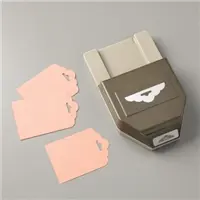
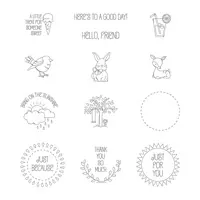
Here is another of my cards that are inspired by my cleaning out my craft room. I have a Love/Hate relationship going on with it right now!! I am enjoying looking through the old cards. Today’s idea came from a gift tag and I scaled it down to fit the Everyday Label Punch.
A Good Day, 145873
And here is the little insert :
A Good Day, 145873
When I was trying to resize the little envelope to fit the Everyday Label Punch, I realized I need to challenge myself in math more often. Oh My!!! It took quite a bit longer than was necessary. In the long run, I believe the time was well spent. I am happy with how this card came out.
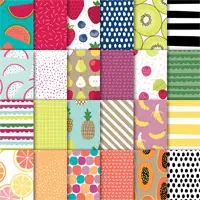
The color inspiration was the Tutti-Fruitti 6 X 6 DSP. Although I used Pacific Point instead of Night of Navy, the strawberry DSP was my inspiration. The little ice cream cone on the note is (at least in my mind) strawberry ice cream. HaHa!
MEASUREMENTS:
Base card is 11 X 4 1/4 scored and folded in half
The strips of Pacific Point are 1/4 X 5 1/2 each
The DSP is 3 X 5 1/2
The envelope is 5 X 2 3/4, score at 1/2″ down each long side, and at 2 3/8 across the center.
Fold and burnish all the lines.
When folded in half, one side is longer than the other. Cut each 1/2 side scores off of the longer end.
Miter the corners on the 1/2 sides that are left
Use the 1/2″ circle punch to make the little half notch for easier tag removal
Add Fast Fuze on the sides. Place the punched piece inside as you close so that you have easy sliding room.
Use the hand held 1/8″ punch to punch a hole in the end of the tag and add the desired ribbon.
Thank you very much for visiting today! I hope you enjoyed this little card. If you have any questions, please do not hesitate to contact me. The supplies I used are listed at the bottom of the page.
Have you ever thought about becoming a Stampin’ Up! Demonstrator? During Sale-A-Bration is the perfect time to join. Not only are you getting the Ultimate Bundle ($125.00 worth of product for $99.00) but you also get to choose 2 additional stamp sets, up to $25.00 each. Additionally you will receive a 20% discount on any future purchases. Or, if you are just wanting to test drive the idea, you would not be required to make another purchase until July! There is no pressure for you to continue as a demonstrator. And there is no penalty if you decide not to continue. Please contact me and let’s talk about it. You can review the documents by clicking on the picture below.
I have quite a different fold for today’s card. It has a pull out insert instead of opening to the inside. This type fold/card is great for invitations.
Hanging Garden, 146239
I have spent the last couple of days rearranging my craft space. OMG!!! But I did find some old cards that have layouts which I have not used in quite a while. This is one of them. There will be more coming soon. There are many ways this can be changed up. And here is a look at the inside slide out for your sentiment and signature. There is actually room for a gift card to fit if you so desired.
This card is very quick and easy to make. I will give you all of the measurements and supplies. I hope you will take a shot at something similar.
Thank you for visiting with me today! I hope you have a great day. And stay tuned for tomorrow and the InKing Royalty Blog Hop.
Island Indigo base layer is cut to 4 1/4 X 11. It is scored at 1 1/4 & 5 1/2
Fold the card in half with the 5 1/2 score and then fold back the short score.
Soft Sky front layer is cut to 4 X 2 3/4
Whisper White front layer is cut to 3 3/4 X 2 1/2
DSP strip is cut to 4 1/4 X 1
Inside Soft Sky layer is cut to 4 3/4 X 3
Inside Whisper White layer is cut to 4 1/2 X 2 3/4
Scraps for the Circle Tab punch and circle punch
If you prefer to run a ribbon through the fold over instead of using DSP, do it before adhering the sides.
Place the pull out card inside the holder as you adhere the sides together. It leaves a nice, but not too tight fit.
Adhere the sides with Tear & Tape for a sturdier hold
Adhere the Circle Tab Punch with a bit of Tear & Tape on each side for a sturdier hold
Have you ever thought about becoming a Stampin’ Up! Demonstrator? During Sale-A-Bration is the perfect time to join. Not only are you getting the Ultimate Bundle ($125.00 worth of product for $99.00) but you also get to choose 2 additional stamp sets, up to $25.00 each. Additionally you will receive a 20% discount on any future purchases. Or, if you are just wanting to test drive the idea, you would not be required to make another purchase until July! There is no pressure for you to continue as a demonstrator. And there is no penalty if you decide not to continue. Please contact me and let’s talk about it. You can review the documents by clicking on the picture below.
The content in this blog is the sole responsibility of Jackie Beers as an Independent Stampin' Up! Demonstrator. The use of and content of classes, services or products offered is not endorsed by Stampin' Up!