Even without having a lot of children to make cards for, I still love the fun stamp sets. Or in today’s case, fun DSP. I believe we are never too old for whimsical things. A quick card with a touch of whimsy is right up my alley.
Partial Matchbook Fold
I started to call this Fun Fold a Matchbook Fold, but it is only held together at the bottom by the Happy Birthday circle. So I renamed it a Partial Matchbook Fold. This one could not be any easier to do. And would work in landscape mode as well.
The card base is 4 1/4 X 9 1/4 and scored at 5 1/2. The front flap DSP is 4 X 3 3/4 and is in landscape if it is a directional paper as I used. For the bottom small section I chose to simple use the back side of the bugs. The little grass goes perfectly with them. The bottom DSP is 3 X 1 1/8. And to ensure the inside White layer does not show from the bottom, it is 4 X 3 5/8.
Designer Paper
This adorable critter covered DSP is the Cute As A Bug Designer Series Paper. There is a stamp and Die set available to complete this fun whimsical bug theme. I personally loved the bugs and the colors used. Almost any of the Stampin’ Up! colors would work with this paper in the varying bug details.
The card base is simple in Old Olive. This is a fabulous green that has been around for many years which proves it’s use and love. The ink on the Happy Birthday is Poppy Parade. Of course it is pulled from the mushrooms and pops against the green.
Stamps
As a demonstrator we get to pre-order upcoming products. I have purchased several items from the March OnLine Exclusives. And I used one today in the sentiments for this card. So you are getting a sneak peek at the Cutest Crew stamp set. The mixed fonts of the Happy Birthday are always one thing I love. The inside is all from that stamp set. Here is an inside view:
The inside sentiment is using Daffodil Delight along with Poppy Parade for the butterflies. And to do a simple splash of color to the butterflies I used a Blender Pen. I love, when I think to do this, to add some color or shading to an image. In this case I wanted the shadowed look instead of just a light color. It could be done however you like. The Blender Pen uses the image’s ink to color. Although you need to do it fairly soon after stamping.
Extras
There are two extras today. The circle of the front sentiment is from the Stylish Shapes Dies. And the bling is a 2025-2027 In Color Flat Pearl in Darling Duckling. It does have the pearly sheen which is very pretty and noticeable.
STAMPIN’ REWARDS
You will earn rewards on all orders over $20.00 in products The system will track your rewards for you. And they will be available for use on your next order, or you can save up for a larger purchase. All you need to do is on your first order is agree to participate. You will then begin receiving rewards on qualifying orders.
Orders of $50.00 or more you will still receive an appreciation gift from me. I appreciate you choosing me as your demonstrator!
COMMENTS
Please know that I love to hear from you and answer any questions you may have. My responses generally are not done here on the post. They are made using my phone as I have found it is easier to answer a question for you personally. So you will be receiving an email from me if you make a comment.
Thank you for stopping by today. I hope you enjoyed today’s project and will come back. I do read and reply to all of the comments individually. They mean a lot to me. Please reach out if you have a question.
Smile and Keep On Stamping,
Jackie
Online Exclusives
New Online Exclusives drop every other month. These are amazing products and are a supplement to the Annual and Mini Catalogs. This way you have access to even more New and Awesome products!
You can go directly to these in my Online Store by clicking HERE
I love fun cards! And this Turtle-y Awesome stamp bundle, matching DSP, etc. is just Totally Fun! When it was first shown last year at the Stampin’ Up! OnStage Event, I thought it was just for children. But the more it was shown I was in love. It made me Smile! And that is what I hope my card making does for you as it does for me. So I have brought it forward once again.
Isn’t it Smile worthy???
Turtle-y Awesome
All of the stamped images are from the Turtle-y Awesome stamp set. There are matching Dies, but I did not need them for this project. I stamped the sentiment and the little cake and fussy cut them. Actually I believe there is a Die for the cake, but it was quick to fussy cut as I was going along.
The cake is colored using Stampin’ Blends. The candles are the Darling Duckling of the paper, and the decoration is Flirty Flamingo. There was not a lot of decoration needed as the DSP is quite busy with the partying turtles running around.
Turtle-y CuteDesigner Series Paper
The name of the DSP fits perfectly. It is so Turtle-y Cute! All of the pages have turtles in an activity on one side and then fun, but more neutral, designs on the reverse. Since this is a birthday card I opted for the turtles partying with ice cream, cake, and balloons.
Extras
There are a couple of additions to the card for added depth and of course bling. The bow is made using Darling Duckling Faux Linen Ribbon. It is a thin ribbon and worked underneath the sentiment. The trick is to not pull very tight on the knot. That way it lays flatter. Of course there must be bling! There are a trio of the Shades of Green Hexagon embellishments. These are also part of the turtle suite of products. I use them often as there are not very many “greens” in the embellishments section.
Measurements
The card base is Darling Duckling cardstock cut to 4 1/4 X 11. (If you have followed me for any time at all then you know I love the top fold cards. They stand up so well for display.) I added a layer of Garden Green behind the DSP that measures 3 5/8 X 4 7/8. Next is the DSP which is 3 1/2 X 4 3/4. Finally I add a strip of a different sheet from the DSP pack measuring 3 5/8 X 3/4. This is to ground all of the decorations.
STAMPIN’ REWARDS
You will earn rewards on all orders over $20.00 in products The system will track your rewards for you. And they will be available for use on your next order, or you can save up for a larger purchase. All you need to do is on your first order is agree to participate. You will then begin receiving rewards on qualifying orders.
Orders of $50.00 or more you will still receive an appreciation gift from me. I appreciate you choosing me as your demonstrator!
COMMENTS
Please know that I love to hear from you and answer any questions you may have. My responses generally are not done here on the post. They are made using my phone as I have found it is easier to answer a question for you personally. So you will be receiving an email from me if you make a comment.
Thank you for stopping by today. I hope you enjoyed today’s project and will come back. I do read and reply to all of the comments individually. They mean a lot to me. Please reach out if you have a question.
Smile and Keep On Stamping,
Jackie
Online Exclusives
New Online Exclusives drop every other month. These are amazing products and are a supplement to the Annual and Mini Catalogs. This way you have access to even more New and Awesome products!
You can go directly to these in my Online Store by clicking HERE
My project to share with you is a seriously quick and a bit of the unusual for me. I have only the sentiment as the stamping on the front of the card.
PAPERS
The Wildflower Birthday Specialty Designer Series Paper is the reason for so little actual stamping. Not only is the striped DSP from that pack, but so is the colorful balloon bundle. There are actually two options for this DSP. One is only the DSP and the other is the DSP plus the sticker sheet. This is from the sticker sheet. I normally prefer to do my stamping instead of precut / colored images. However the sticker sheet in this pack of paper is over the top in terms of color and beauty. In fact the entire pack of paper is probably the prettiest I can remember in a while.
This background sheet of DSP, along with the balloons could be for a birthday, baby shower, or any celebration. I love the soft colors even though I am a Brights person normally. For this card I paired the stripes with the Soft Sea Foam card base and then added the sentiment on a strip of Pretty In Pink.
STAMPS
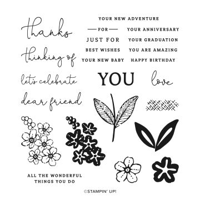
The sentiment is from the Sentimental Park stamp set. With the smaller size of the fonts here I think it is a good one for inside and front sentiments. To draw a little more attention to the sentiment I flagged the ends with my Paper Snips. I actually raised it with Mini Stampin’ Dimensionals and placed it over the knot in the strings of the balloons.
EXTRAS
To compliment all of the soft colors already existing on the card I kept the bling soft as well. These are from the Party Dots embellishments. They actually are part of the suite of products this DSP is included in. There are three different colors of dots with two different sizes of each. I did one of each color in the larger size.
HOST CODE
My FEBRUARY HOST CODE is S2EYAW9N. Orders of $50.00 or more will receive an appreciation gift from me. I appreciate you choosing me as your demonstrator!
Thank you for stopping by today. I hope you enjoyed today’s project and will come back. I do read and reply to all of the comments individually. They mean a lot to me. Please reach out if you have a question.
Smile and Keep On Stamping,
Jackie
New Scrapbooking Catalog
The newest addition to Stampin’ Up! is an Online catalog of Scrapbooking products. You can see the catalog by clicking the photo below and save it to your computer.
Online Exclusives
New Online Exclusives have dropped. There are Halloween, Fall, Christmas, and many that are great year round. Of course the new Designer Series Papers and Embellishments are fabulous as well!
You can go directly to these in my Online Store by clicking HERE
I am channeling my favorite racing series today. I love Formula 1 Racing and when I saw the Racing By stamp set, I knew it was for me. And I have a sweet little friend that just turned 4 who loves race cards as well.
Stamp Sets
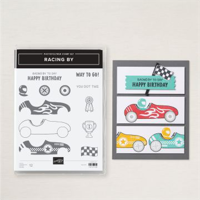
The Racing By stamp set includes the cards, driver, flag, and sentiment. I love being able to make a card from one stamp set. The only extra are the stars. I felt it needed a touch more for the victory. These come from the Merriest Trees stamp set.
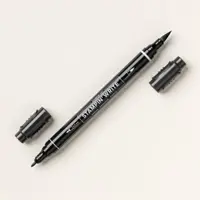
The cards are Blueberry Bushel and Poppy Parade. With the drivers in Crushed Curry. To make the flag pole, I used a ruler and the Basic Black Stampin’ Write Marker to simply draw the line. I went over it twice to give a bit more darkness.
Papers and Punch
There are no DSP on this card. I know that is amazing to those who follow me regularly! Sometimes it just happens. LOL!!! The card base is Blueberry Bushel with a layer of Poppy Parade. The sentiment is stamped on Crushed Curry card stock and then punched using the Happy Labels Punch.
Thank you for stopping by today!!
Online Exclusives
New Online Exclusives have dropped. There are Halloween, Fall, Christmas, and many that are great year round. Of course the new Designer Series Papers and Embellishments are fabulous as well!
You can go directly to these in my Online Store by clicking HERE
Bonus Days are winding down……
Do you have a wish list? I always have one on my desk. Bonus days are a good time to get some of those items. You then have a discount for next month’s order of a few more from that list. I call that a Win!
HOST CODE
My JULY Host Code is 2GCQ4HB6. Please use this code for orders under $150.00. I will have a small gift for those with orders over $50.00 in addition to the Perk Rewards Program. You can read all of the information at the top of the page in the Menu Bar under SHOP / Perks.
Thank you for stopping by today. I hope you enjoyed today’s project and will come back. I do read and reply to all of the comments individually. They mean a lot to me. Please reach out if you have a question.
Welcome to InKing Royalty’s August Blog Hop! Can you believe it’s already time for schools to start back up?! The return to school after summer vacation is a really big deal for students, teachers, school workers and the parents who are left home alone. To honor this big event, we have created projects with a back to school theme. We are excited to share our creations and hope you love them! After you read my post, I hope you’ll hop over to the next person on the list at the base of this post.
This has been one of the hardest themes for me to wrap my head around! Celebrating Back To School is not anything I have ever participated in since I do not have children. However, I love seeing the creative photos taken each year to document back to school. And that is what I based my card on.
Stamps
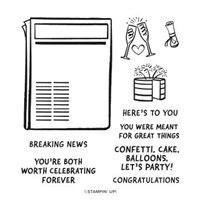
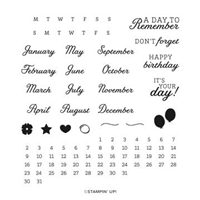
Considering the theme, I was concerned I did not have appropriate stamps for this card. Hopefully what I created fits the idea! Since back to school is a big deal, especially the first year of school, I thought that was Headline worthy. So out came the Breaking News stamp set. The large newspaper is stamped and then cut out. For the sentiment I went with the Days To Remember stamp set. It is the one like a calendar builder. And the sentiment from the set seemed a good fit, as it is a Day To Remember.
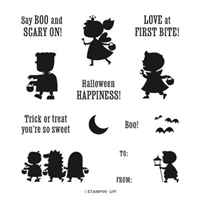
To add to the “newspaper article”, I went back to my first day of school. Apparently I was very hard headed and only wanted to wear my cowgirl outfit! So seeing the little princess in the Scary Cute stamp set seemed appropriate. This same card could work for an invitation or even baby shower with these same images. But I hope it works in your imagination for First Day of School.
Colors and Paper
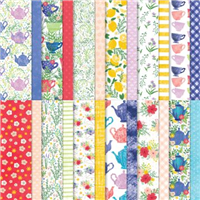
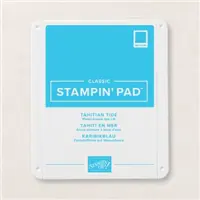
To coordinate with the little princess, I needed bright female colors. Thee were found in a piece of the Tea Boutique 6X6 Designer Series Paper. From there it progressed to the card base of Polished Pink and layer of Tahitian Tide. This resulted in the little girl being pretty in pink. And to add more to the newspaper article, I added a few balloons to continue the celebration.
A finishing touch is Tahitian Tide Metallic Ribbon for a layered bow. It was wrapped twice around the card and then a double bow was added. The last touch is a few embellishments. To keep the colors equal I went with two each of the 2022-2024 Matte Dots in both Tahitian Tide and Sweet Sorbet, alternating size and color.
Thank you for stopping by today. I hope you’ll hop along to the next stop on the blog hop, Pam Morris at Tap Tap Stamp. There’s lots of inspiration to be found in this group – and you don’t want to miss it!
Thank you for hopping along with us. If you get stuck during the Blog Hop, please use this line-up as a guide:
Click on either catalog photo and you will be taken to my Online Store where you can download either or both catalogs.
HOST CODE
My August Host Code is H9KF4JUC. Please use this code for orders under $150.00. I will have a small gift for those with orders over $50.00 in addition to the Perk Rewards Program. You can read all of the information at the top of the page in the Menu Bar under SHOP / Perks.
Thank you for stopping by today. I hope you enjoyed today’s project and will come back. I do read and reply to all of the comments individually. They mean a lot to me. Please reach out if you have a question.
The card I have to share with you today is for a little boy’s birthday. This is definitely not a normal card need for me. So it took mixing a few things to hopefully get an acceptable child’s card.
Stamps
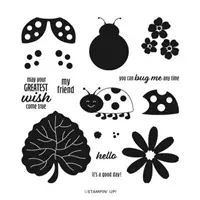
There were two stamp sets used for this card. The first is the Hello Ladybug set. Since most little boys like bugs, I assumed a ladybug was a safe bet. Choosing the solid ladybug over the stamp, which fits the punch, was fairly easy. A multiple legged little bug won over the wings of the other bug. And to give the little bug a place to land, I stamped and fussy cut the large leaf. Fussy cutting the ladybug was also fairly simple with just a bit of extra care around those little legs.
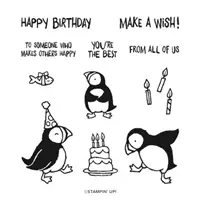
Another fun set that works well for children is the Party Puffins. These fun guys would work for anyone actually. This is the set the sentiment came from. And to help it stand out a bit, I stamped it on the Sweet Sorbet, same as the color of the ladybug, and then heat embossed it using Black Embossing Powder. For an added element, the end of the Happy Birthday strip was cut in a banner tip using the Paper Snips.
Paper and Embellishments
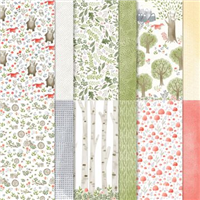
Adding to the woodsy, little boy look is the DSP I chose. This tree piece of paper is from the Happy Forest Friends Designer Series Paper. The leaf of the Ladybug doesn’t really match the trees, but that is a bit of creative license.
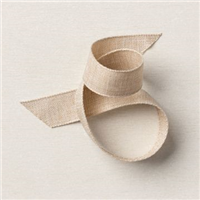
Assisting with grounding the ladybug and the sentiment is a strip of the Natural Finish Ribbon. This ribbon is really pretty and has the extra width to be used as a layer. By cutting the sentiment strip a bit narrower than the ribbon, it allows the ribbon to really shine as well as tie everything together. For the finishing touch there has to be a bit of bling. Although black is not really classified as bling, I added a single Matte Black Dot to the sentiment piece.
HOST CODE
My July Host Code is ZMG9Q7EX. Please use this code for orders under $150.00. I will have a small gift for those with orders over $50.00 in addition to the Perk Rewards Program. You can read all of the information at the top of the page in the Menu Bar under SHOP / Perks.
Thank you for stopping by today. I hope you enjoyed today’s project and will come back. I do read and reply to all of the comments individually. They mean a lot to me. Please reach out if you have a question.
The content in this blog is the sole responsibility of Jackie Beers as an Independent Stampin' Up! Demonstrator. The use of and content of classes, services or products offered is not endorsed by Stampin' Up!