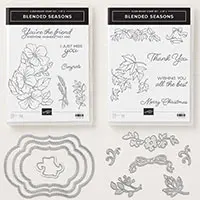
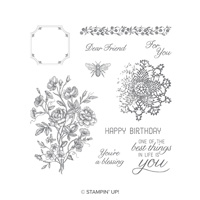
I debuted the Blended Seasons Bundle during the July InKing Royalty Blog Hop. You can see that card HERE. This stamp set is only available during August and While Supplies Last! The stamps are perfect for Spring/Summer, Fall, and Christmas. But the Framelits are spectacular. They match a few of the stamps but the best part are the three layers that are stitched! They are stitched inside the cutting line and leave stitching around the outside of the cut out. It’s a super look! Take a look at today’s Fall inspired card.
Blended Seasons Bundle, 149894
I used one of the layering dies from the matching framelits so you can see the stitching. The background is the Subtle Embossing Folder. The leaves are part of the Blended Seasons set as well as the Die Cut leaf.
I stamped the leaves in Cherry Cobbler Ink and then used the Watercolor Pencils and a Blender Pen to color the leaves. The sentiment is from the precious Host Stamp Set – Very Vintage.
Thank you for stopping by today. I hope you have a great weekend and will return to see my Monday project. All of the supplies are listed at the bottom of the page.
Don’t forget about Bonus Days!!! For every $50.00 you spend (at one time) during August, you will receive a coupon code worth $5.00 to use in September. It’s like getting paid to shop!
Welcome to our Pals Blog Hop, May 2018. This month we’ll be “Stepping Up with Textures or Techniques.” What’s that? Projects that are “stepped up” by using textures or fun techniques. Who knows, maybe both! Join us in the fun while we inspire you to “step up” your creations.
You may be starting the hop here or you may be coming from a previous Pal’s blog. Either way, you’ve come to the right place. You’ll find the full line-up below to help you move or “hop” along from Pal to Pal.
For an old but goody technique, I have done a negative sponging technique. It is one of the simplest techniques to do and always gives surprising and beautiful results.
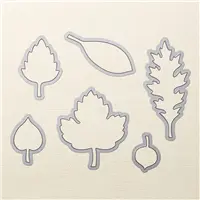
Leaflets Framelits, 138283
I have used the Leaflets Framelits (on the retiring list 🙁 ) to make a template. And it’s a 2 for 1, you get a leaf already cut out for a future project. I centered the negative of the leaf on my Whisper White card stock and secured it with some Washi Tape. You do not want the template to move while you are sponging. To begin, I colored the entire leaf with Calypso Coral, then went over all but the center with Cherry cobbler. I then went around the edges with Cajun Craze for a little more depth. Now just lift up the template and you have a beautiful stenciled Leaf.
The sentiment is from an old favorite the Work of Art stamp set. I next die cut another leaf from a layer cut for my card. There are two ways to attach the stenciled leaf. It can be adhered to the top layer from underneath. Or it can be adhered to the base card and then the top layer attached over top with Stampin’ Dimensionals. That takes a bit of aligning, but I love the look.
To finish off my card I stamped the little corner decoration in Cherry Cobbler. I love the simple little addition. It is from the Not Retiring new set Hold On To Hope. Although, this is a bundle and the 10% discount for the bundle will end when the Occasions Catalog ends. So jump on it now!
Thank you so much for visiting today! I appreciate your stopping by my blog during the hop. I would love to read comments from you. The supplies I used are listed at the bottom of the page. Remember the Retiring List and Clearance Rack are “While Supplies Last”. The leaf framelits and Work of Art set are both on that list.
Now it’s time to see how the rest of the Pals are Stepping up with Textures or Techniques. Please use the Blog Hop Line-Up below to move from blog to blog. Don’t forget to show us some love by commenting on our creations.
Mark your calendars for June 13, 2018 where we feature projects for Babies, Birthdays and Brides. You’ll probably even see products from Stampin’ Up!s new 2018-2019 Annual Catalog. Don’t miss it!
Another Paper Pumpkin Special: The March PP was so popular due to the special gift that it sold out. So Stampin’ Up! has offered a great deal to replace that. New Subscribers who sign up before April 10, will receive April and May for half price. So 2 months for the price of 1. A great deal. Use my link HERE, and enter the code: SAVEFIFTY0418
It is still a great time to become a Stampin’ Up! Demonstrator. I would love to have you join my team. A great perk for demonstrators this time of year is getting to see the new catalog first. Then we get to order and play with the new products a month early. For me, that is one of the best parts of being a SU Demonstrator. Of course, the discount helps! If you are interested, please contact me and let’s talk.
Before I get to the card for today. I apologize for being late with my post. Goodness, sometimes life just gets in the way!!
Also, I want to let you know that my next post will not be until Thanksgiving. I am going on a wonderful trip to Europe with friends. I return on the 20th and I know will be seriously jet lagged. I do not seem to bounce back from these as quickly anymore. Can you relate??? Anyway, I wanted to let my regular followers know not to expect me for the next two weeks. The hubby will be home with the animals , but unfortunately neither he or the four legged children care about keeping the blog going. I know it is shocking!!
So now on to the card. As I mentioned on the Gate Fold card I did earlier in the week, my club did a card swap with a fold challenge. This is another one of the folds that was shared. I have cased it and made my own version. This one is from Velda North.
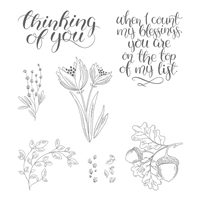
County My Blessings, 144790
I love the acorns in the diamond shape as the focal point. I do have to say that the DSP and the Lemon Lime Twist around the acorns are the stars of the show. It looks like a normal card (if there is such a thing) but it opens only partially. Here is the inside view.
Even with the somewhat partial opening of the card, this is another super easy to make. And I can think of a lot of cute DSP to use for the front. Even using two different patterns would be great I do believe.
I have added measurements and directions under the measurements. The supply list is at the bottom of the page.
Thank you so much for visiting today, Especially since it is this late post. And remember to check back the week of Thanksgiving to see more of my creations.
MEASUREMENTS:
Card base is 5 1/2 X 8 1/2, score at 1 1/4 and 4 1/4 on the 8 1/2 ” side
Fold back the 1 1/4 and tape down.
the DSP on the left is 1 3/4 X 5 1/2
The DSP on the right is 1 1/4 X 5 1/2
The center strip is 7/8 X 5 1/2
The inside white piece is 2 3/4 X 5
The acorn white piece is 2 1/8 X 2 1/8 of the layering squares
The Lemon Lime Twist scalloped is from layering squares as well.
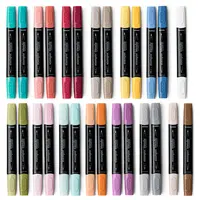
The acorns are colored with the new Stampin’ Blends
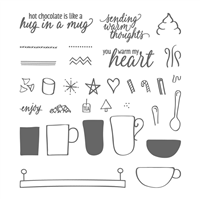
The Hug In A Mug stamp set is sort of a “sleeper” in the Holiday Catalog. I looked at it but passed it by in all of my flips through the catalog. That changed when I was given the set as part of the festivities at Brian King and Pam Morris’s World Card Making Day in Atlanta. After the hot chocolate treat favor we made with the set, I was definitely in love. So I have made some hot chocolate for you today.
Hug in a Mug, 144933
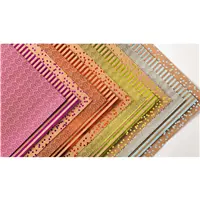
I apologize for my poor photography. The foil in this Foil Frenzy DSP is hard to photograph. It just wants to shine!! Today’s card is a 4 X 4 card. I can see making a lot of these for the winter months (or when Mother Nature decides to stay cold here in the south!).
I hope this card will give you incentive to check out this stamp set. It is on page 42 of the Holiday Catalog. It is a set that would be perfect year round.
Again, the DSP was my color chart. The Foil Frenzy paper is wonderful. It is more of a Craft than Crumb Cake but it all works together. I added the white layer to tie in to the stamped layer. But it is super quick and easy card.
I hope you enjoyed today’s card. I appreciate your visiting and hope you have a fun and safe Halloween.
Reminder: The last day for the DSP sale…………
The supplies I used are listed at the bottom of the page. By clicking on any item you will be taken directly to my online store.
There are three wonderful Stampin’ Up! Specials in October………
Designer Series Paper Sale October 1-31, Buy 3 Get 1 FREE! See details HERE.
Paper Pumpkin Kits for October and November will coordinate!! They will be great individually, but will work together in a special release. You must be signed up by November 10th for the November PP. It is ok that you missed the October PP. The November will still work on its own.
Merry Patterns Stamp Set is an exclusive Host set available during October. With a 300.00 order it is FREE and does not deduct from your other Host Rewards. See the Flyer HERE.
I began today’s card thinking really simple and quick. Then I kept adding this and that. And you know how it goes when that happens. But I hope you can see the simplicity underneath my add ons.
County My Blessings, 144790
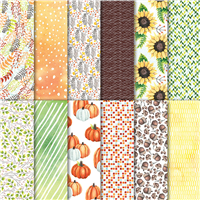
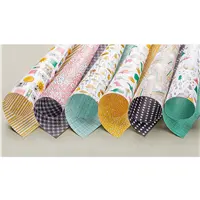
Fall colors was the first thought I had for this card. I wanted it to be a little on the soft side though. So I started with Old Olive , added Peekaboo Peach, and decided to stop there. The peekaboo peach is from the Painted Autumn DSP.
I stamped with old olive and colored the leaves with the old olive Blends. But then I thought it had too much green. So I went back and added the falling leaves and colored them with the pumpkin pie light blends. Except it still did not feel just right. So I added Julie DiMatteo’s patented marker flicking technique to get the little flecks of color to break up the stark white. That seemed to tie in with the DSP a little better. Finally I decided it was finished! Yay!!
I cannot believe that I did not add any kind of accessory. That is a first for me!!
Thank you for visiting today! I very much appreciate your taking time to check my blog and especially for the nice comments.
Remember that the DSP special expires at the end of October, so only a few days left. Also the supplies I used are listed at the bottom of the page. By clicking on any item you will be taken directly to my online store.
There are three wonderful Stampin’ Up! Specials in October………
Designer Series Paper Sale October 1-31, Buy 3 Get 1 FREE! See details HERE.
Paper Pumpkin Kits for October and November will coordinate!! They will be great individually, but will work together in a special release. You must be signed up by November 10th for the November PP. It is ok that you missed the October PP. The November will still work on its own.
Merry Patterns Stamp Set is an exclusive Host set available during October. With a 300.00 order it is FREE and does not deduct from your other Host Rewards. See the Flyer HERE.
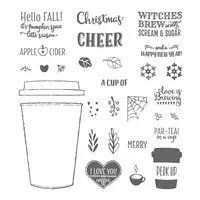
I have a cute little card that would be perfect for a Just Because type card! It is the Merry Cafe and Coffee Thinlits. And even though there is no pumpkin color to the card, it says that it is “pumpkin spice season”. Actually it is starting to get there here in the south. Although to me any time is pumpkin spice time!! I love the stuff. But as I have said before, I do not drink coffee. I just get the pumpkin spice in everything else…..
Merry Cafe, 144965
This card base is the “Z” Top Fold card that I have done previously. I had a nice lady ask me for a link and I didn’t really have one. I just sort of did it myself. So I have made another with that fold and will give a little better direction on how I did it.
MEASUREMENTS & DIRECTIONS:
The card base is cut to 4 1/4 X 11. It is scored at 2 3/4 & 5 1/2
Fold and burnish on the score lines. Fold the 2 3/4 score line under so that the fold is against the 5 1/2 score line. But Do Not secure it yet
The first layers are: 3 3/4 X 5, 3 5/8 X 4 7/8, 3 1/2 X 4 3/4
Top layers re 2 5/8 X 3 3/4, 2 1/2 X 3 5/8
Adhere the bottom layers with the DSP together and secure to the base card.
Adhere the top layers together and lay them on the DSP layer to see where your ribbon will be. (I do not adhere this layer until after I secure the ribbon.
Choose your ribbon and cut a strip wider than your card. Use Fast Fuse or glue dots to adhere the ends between the folded “Z” top. Now tape or glue that top section closed , with your ribbon in between it. (This allows for a clean looking inside flap when the card is opened)
Now attach your focal point layer.
For added touch to the ribbon, I cut a strip, or 2 in this card’s case, and tie them around the attached ribbon at the top.
A NOTE about my ribbon today. I used the 5/8″ Burlap Ribbon for this card. However it was too thick for the amount of room I had at the top. So I cut it in half lengthwise. I then cut two individual strips from the leftover half and used them as the tie.
REMINDER: The Designer Series Paper Sale is almost over. I hope you will not let this great offer get away from you.
Thank you for visiting today!! If you have any questions, please do not hesitate to ask. Also the supplies I used are listed at the bottom of the page.
There are three wonderful Stampin’ Up! Specials in October………
Designer Series Paper Sale October 1-31, Buy 3 Get 1 FREE! See details HERE.
Paper Pumpkin Kits for October and November will coordinate!! They will be great individually, but will work together in a special release. You must be signed up by November 10th for the November PP. It is ok that you missed the October PP. The November will still work on its own.
Merry Patterns Stamp Set is an exclusive Host set available during October. With a 300.00 order it is FREE and does not deduct from your other Host Rewards. See the Flyer HERE.
The content in this blog is the sole responsibility of Jackie Beers as an Independent Stampin' Up! Demonstrator. The use of and content of classes, services or products offered is not endorsed by Stampin' Up!