Welcome to InKing Royalty’s August Blog Hop! Can you believe it’s already time for schools to start back up?! The return to school after summer vacation is a really big deal for students, teachers, school workers and the parents who are left home alone. To honor this big event, we have created projects with a back to school theme. We are excited to share our creations and hope you love them! After you read my post, I hope you’ll hop over to the next person on the list at the base of this post.
This has been one of the hardest themes for me to wrap my head around! Celebrating Back To School is not anything I have ever participated in since I do not have children. However, I love seeing the creative photos taken each year to document back to school. And that is what I based my card on.
Stamps
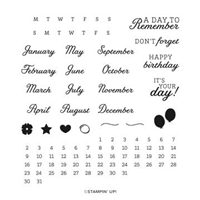
Considering the theme, I was concerned I did not have appropriate stamps for this card. Hopefully what I created fits the idea! Since back to school is a big deal, especially the first year of school, I thought that was Headline worthy. So out came the Breaking News stamp set. The large newspaper is stamped and then cut out. For the sentiment I went with the Days To Remember stamp set. It is the one like a calendar builder. And the sentiment from the set seemed a good fit, as it is a Day To Remember.
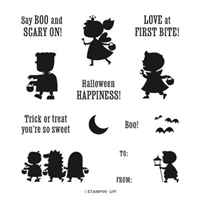
To add to the “newspaper article”, I went back to my first day of school. Apparently I was very hard headed and only wanted to wear my cowgirl outfit! So seeing the little princess in the Scary Cute stamp set seemed appropriate. This same card could work for an invitation or even baby shower with these same images. But I hope it works in your imagination for First Day of School.
Colors and Paper
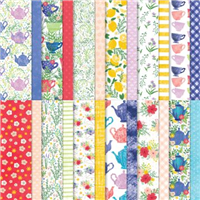
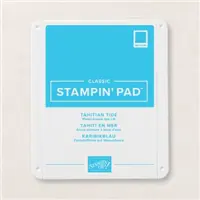
To coordinate with the little princess, I needed bright female colors. Thee were found in a piece of the Tea Boutique 6X6 Designer Series Paper. From there it progressed to the card base of Polished Pink and layer of Tahitian Tide. This resulted in the little girl being pretty in pink. And to add more to the newspaper article, I added a few balloons to continue the celebration.
A finishing touch is Tahitian Tide Metallic Ribbon for a layered bow. It was wrapped twice around the card and then a double bow was added. The last touch is a few embellishments. To keep the colors equal I went with two each of the 2022-2024 Matte Dots in both Tahitian Tide and Sweet Sorbet, alternating size and color.
Thank you for stopping by today. I hope you’ll hop along to the next stop on the blog hop, Pam Morris at Tap Tap Stamp. There’s lots of inspiration to be found in this group – and you don’t want to miss it!
Thank you for hopping along with us. If you get stuck during the Blog Hop, please use this line-up as a guide:
Click on either catalog photo and you will be taken to my Online Store where you can download either or both catalogs.
HOST CODE
My August Host Code is H9KF4JUC. Please use this code for orders under $150.00. I will have a small gift for those with orders over $50.00 in addition to the Perk Rewards Program. You can read all of the information at the top of the page in the Menu Bar under SHOP / Perks.
Thank you for stopping by today. I hope you enjoyed today’s project and will come back. I do read and reply to all of the comments individually. They mean a lot to me. Please reach out if you have a question.
A great way to let someone know we are thinking of them is by sending a card. And today’s card is Sending Love & Hugs! What a great combination.
Stamps and Dies
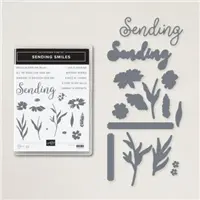
This card is one that I consider a Smile card. It brings a smile to my face with the fun colors and sentiment. Hopefully it does to you and the recipient as well. Plus it has SMILE in the name. The Sending Smiles Bundle is a die bundle. It includes the flowers and sentiments I used with additional pieces as well. Another nice thing about this card is that it was made using only the one stamp set. All of the sentiments which pair with the “Sending” are just as cute as this one is.
For the Dies used, most are from the Bundle. This includes the flowers, stems, sentiment shape, and the double layer of “Sending”. Additionally I used one of the Scallop Contours Dies for the shape of the background. Those scallops fit the personality of the other pieces.
Paper and Color
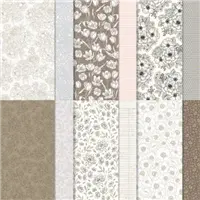
Strangely enough for me, the stamp set came before the DSP this time. But in deciding what colors to use for the flowers, I looked at different DSP to get them. And I found this sweet piece from the Butterfly Kisses Designer Series Paper. The bold hearts are a perfect match.
The flowers are Fresh Freesia stamped onto Fresh Freesia cardstock. The leaves and stems are Parakeet Party, as is the sentiment layer. Since these colors are softer, I wanted a bolder color for the large layer. And the Starry Sky fit perfectly. Again, I chose that from looking at which color stood out the most on the DSP piece.
Extra Touches
The two layers for the “sending” sentiment are what really makes this card I believe. And I will admit to having had to die cut two of the top layer. The first time I failed to add some of the Adhesive Sheets to the cardstock prior to cutting. Those letters are really too fine, and it’s a long word, for me to attempt to add liquid glue. So an adhesive sheet is a time and sanity saver for me!!
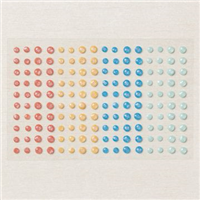
The final touch for the card was adding a little bit of bling. This time I used a couple of the Glossy Dots. They come in a variety of colors on one sheet and a variety of sizes. There are two of the small ones one each end of the sentiment and a large one on the largest flower.
Mini Catalog and Sale-A-Bration
Click on either catalog photo and you will be taken to my Online Store where you can download either or both catalogs.
HOST CODE
My August Host Code is H9KF4JUC. Please use this code for orders under $150.00. I will have a small gift for those with orders over $50.00 in addition to the Perk Rewards Program. You can read all of the information at the top of the page in the Menu Bar under SHOP / Perks.
Thank you for stopping by today. I hope you enjoyed today’s project and will come back. I do read and reply to all of the comments individually. They mean a lot to me. Please reach out if you have a question.
Today’s card is an early Christmas card for the Make My Monday Challenge. It consists of a mixture of stamp sets and Die sets to create a Cup of Christmas.
Today’s card is Christmas in August for the Make My Monday Challenge. As a member of the Design Team, I try to make cards that can inspire you. This one is two fold. It contains pieces from a variety of die sets for the sprigs. And begins with the tea cup, which is not at all Christmas. Hopefully you will be inspired and join this challenge. At least go to the blog and take a look at everyone’s creations. Simply click on the picture below.
Stamps
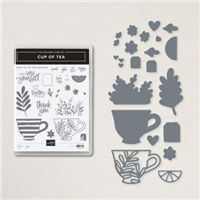
As I said above, this is definitely a “parts” card. The beginning was the idea of sprigs of evergreen, etc in a container. But what container was the question. The answer came in the form of this cup from Cup of Tea. After stamping and coloring it, the fun began. However, the second question was how to add a sentiment to the cup and little scene I was creating. After trying a few different things, I remembered the little tea bag, or tag in my case, in the Tea Cup Dies. With the tag ready to go all I needed was a sentiment. It was found in the Leaves of Holly stamp set. The simple “Joy” was a perfect match for this scene.
Dies
With the container taken care of with the cup from the Cup of Tea stamp set and Tea Cups Dies, I moved on to the sprigs and leaves. A little confession is in order here. Over the last year I have found myself pulled to quite a lot of the Stampin’ Up! Die sets. The change is that I look at them for overall content and not simply that they cut out a stamped image. It is more of what else is included and other uses. And for that reason, I have more die sets than ever! (Both good and bad news)
With seeing quite a few Christmas cards being shared of late, I have begun looking at my dies for pieces that would be background or additions for Christmas cards. And that has paid off hugely on this card. Best of all is that I have cut a few in traditional colors when I am using the dies for other cards. Having these on hand made this card go much quicker. The harder part was remembering where the little pieces came from!
Fill Pieces
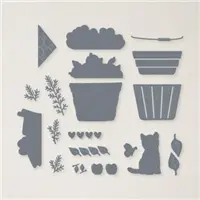
Here is a list of the various pieces. Hopefully you have some of these in your Die library! Maybe an unexpected one is the Old Olive stem in the center. It is from the Organic Beauty Die set. As is the Poppy Parade piece depicting holly berries. The Fir pieces are from the Full Basket die set. That is the one with the cute basket and kitten. And the white piece is from the Splendid Stems dies.
DSP and Finishes
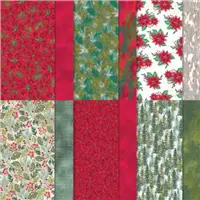
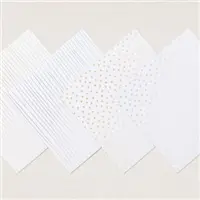
Of course the DSP is what prompted my color choices all the way around this card. This beautiful piece is from the Boughs of Holly Designer Series Paper. The colors are really stunning in person. And the choices for all of the stems were due to the DSP piece as well. Additionally, the silver dotted piece of DSP is from the Sale-A-Bration 6×6 pack of Silver & Gold Foil. It adds a touch more bling to the card.
There are two things added for finishes to the card. First is the gorgeous Parakeet Party Metallic Ribbon to hold the tag. This ribbon is so sparkly and very easy to work with. And last but not least are the Rhinestones. Just one on the tag was not enough. So there are a couple placed on a few of the silver dots in the paper. More bling is best!
Mini Catalog and Sale-A-Bration
Click on either catalog photo and you will be taken to my Online Store where you can download either or both catalogs.
HOST CODE
My August Host Code is H9KF4JUC. Please use this code for orders under $150.00. I will have a small gift for those with orders over $50.00 in addition to the Perk Rewards Program. You can read all of the information at the top of the page in the Menu Bar under SHOP / Perks.
Thank you for stopping by today. I hope you enjoyed today’s project and will come back. I do read and reply to all of the comments individually. They mean a lot to me. Please reach out if you have a question.
Today’s card is using the sweet paper from the Happy Forest Friends. This is a Smile card from that happy paper, but also a Fun Fold.
Paper
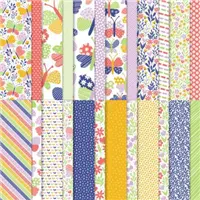
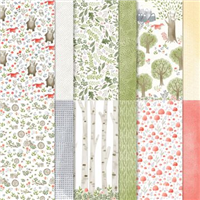
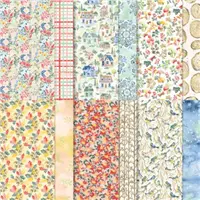
This card is a Fun Fold and actually the paper is more the star of the show. So I am starting with the beautiful Happy Forest Friends Designer Series Paper. As I show the open view, you will see that the same pattern carries across the entire card. The only different piece is the one showing on the left above. That space needed to be a complimentary pattern, instead of the same.
All of the colors used are pulled from the woodsy piece of the DSP. Soft Suede, the rarely used So Saffron, and Poppy Parade all work so well together. Here is a view of the open card.
Stamps, Dies & Embossing
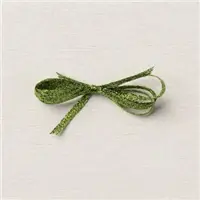
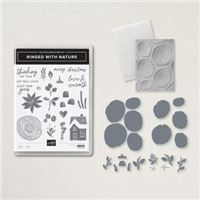
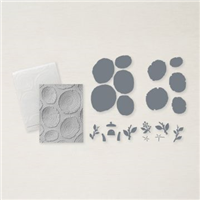
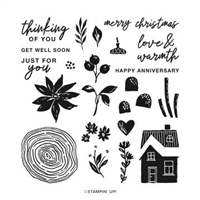
It took a variety of products to get the details on this card that I was looking for. The stamps used are from the Ringed With Nature stamp set. Even the little leaf on the inside writing section is from the set. And those tree rings are so fun! They are part of the Tree Rings Hybrid Embossing Folder. This includes the embossing folder, along with ten tree rings that create five double layer rings like I used.. But also includes little twigs and leaves dies. It is an awesome set of Dies and can be bundled with the Ringed With Nature Stamp Set.
The focal layer is two of the tree rings, which fit perfectly together. Sadly you must zoom in on the photo to the great details of the rings, but in person it is easy to see. The sentiment is from the stamp set as well. It was stamped using Poppy Parade for a bit more Pop! For the final touch I added one of the 2021-2023 Opal Rounds for a touch of bling and to show a bit more of the “yellow” look.
Measurements:
This is a FunFold that is super easy to make. For the base card you need a piece of 5 1/2 X 8 1/2 cardstock that is scored at 1 1/2 and 4 1/4. Fold and burnish to a Z fold. The focal layer So Saffron is cut to 2 3/4 X 5 1/4 with DSP at 2 1/2 X 5. The left side front has So Saffron at 2 3/8 X 5 1/4 with complimentary DSP at 2 1/8 X 5. There is an inside narrow piece that has layer as 1 1/4 x 5 1/4 and the DSP at 1 X 5. And the back section has So Saffron cut to the standard inside size of 4 X 5 1/4. Then there is a DSP on the left cut to 1 7/8 x 5 and a White at 1 3/4X 5.
Mini Catalog and Sale-A-Bration
Click on either catalog photo and you will be taken to my Online Store where you can download either or both catalogs.
HOST CODE
My August Host Code is H9KF4JUC. Please use this code for orders under $150.00. I will have a small gift for those with orders over $50.00 in addition to the Perk Rewards Program. You can read all of the information at the top of the page in the Menu Bar under SHOP / Perks.
Thank you for stopping by today. I hope you enjoyed today’s project and will come back. I do read and reply to all of the comments individually. They mean a lot to me. Please reach out if you have a question.
The Charming Sentiments Bundle is such a wonderful set and dies to have on hand. The outlined sentiments are different and stand out so well. Today’s card showcases a sentiment from the bundle.
Stamps and Dies
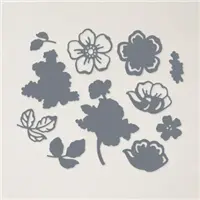
The sentiment standing out so beautifully is what I mentioned in the beginning of the post. This is a sentiment from the Charming Sentiments Bundle. And no, I did not have to fussy cut around the sentiment. The matching Dies fit each one perfectly. This is a game changer in my book! The little details of cutting around each end of “Everything” and especially the bottom of the “y”. That is just so cool!! Best of all is that there are a variety of sentiments in the set.
DSP
Are you questioning where the DSP is? There is none showing on the front of the card. But yes there is! The floral arrangement is a piece of the Abigail Rose Designer Series Paper. If you follow me regularly, you may remember that I have posted two other cards using a cut out arrangement of this paper. After starting with a 6X6 piece and coloring all of the flowers, this is the third card created from that square of DSP. And shockingly there is a small piece leftover for another card in the future. Plus, there is an edging piece on the inside of the card. How cool is that? Here is the inside.
Colors
All of the colors used on the card came from my imagination in coloring the DSP piece. The previous cards had the brighter colors showcased. So for this one I went with the more subtle colors. Balmy Blue and So Saffron are calm colors. Plus the Balmy Blue Double Stitched Ribbon was a great addition to ground the sentiment. All of the colors of Stampin’ Blends used are in the Supply List at the bottom of the page.
If you want to see the previous cards using the other pieces from the DSP square, you can see them HERE and HERE.
Mini Catalog and Sale-A-Bration
Click on either catalog photo and you will be taken to my Online Store where you can download either or both catalogs.
HOST CODE
My August Host Code is H9KF4JUC. Please use this code for orders under $150.00. I will have a small gift for those with orders over $50.00 in addition to the Perk Rewards Program. You can read all of the information at the top of the page in the Menu Bar under SHOP / Perks.
Thank you for stopping by today. I hope you enjoyed today’s project and will come back. I do read and reply to all of the comments individually. They mean a lot to me. Please reach out if you have a question.
This month, the theme is Seasons’ Greetings. This month’s design team members showcase projects inspired by their favorite seasonal time of the year. We really hope that you will be inspired by all the amazing creations the Pals are sharing with you! As you hop from blog to blog, we would love for you to leave a comment. You will find the lineup at the end of my post to help you “hop” along from Pal to Pal.
Choosing a favorite season is really difficult. All are great for very different reasons. But to only choose one, I have to go with Christmas. The Love, Family, Decorations all joined together make it the best time of year. So I created a “Joined Together” card for today’s theme with Wishes & Kisses.
Stamp and Die Bundles
As soon as I saw the sentiment used today, I knew this was going to be a combined card. That sentiment of “Candy Cane Wishes and Mistletoe Kisses” is so sweet! And I happened to have both stamp bundles to make that work.
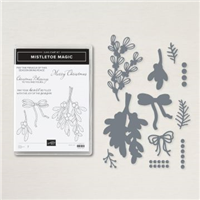
The candy cane and sentiment are from the Sweet Candy Canes Bundle which includes the Candy Canes Dies. There are two candy canes facing opposite directions included. But I only needed one for this. And to pair it with some mistletoe, I pulled out the Mistletoe Magic Bundle. That bundle includes the Mistletoe Dies.
For the sentiment you may be surprised as where that Die is from. It is a part of the All That Die set that pairs with the masculine He’s All That set. The oval with a bit of embossed inner ring seemed to fit perfectly with the size of the sentiment.
Paper and Color
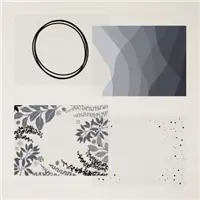
The colors on this card are not exactly pulled from the DSP as is usual for me. For the candy cane, it is stamped using Cherry Cobbler Ink. The Mistletoe is stamped using Shaded Spruce for a bit brighter look. However it is colored using Soft Succulent, which is a color from the DSP piece.
The DSP is the Texture Chic Designer Series Paper. The opposite side of this piece is Evening Evergreen with Gold designs. But this side had snowflakes which goes with my Christmas Theme. The card base of Shaded Spruce also pulls the brighter colors together. And the White layer helps bring out the white snowflakes of the DSP.
Finishes
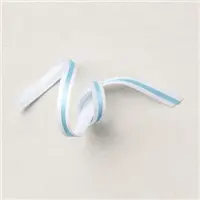
To “hang” my mistletoe required some ribbon strong enough to hold the candy cane as well. LOL!! This was achieved using the Evening Evergreen Open Weave Ribbon. This ribbon makes a beautiful bow. And the tag fits perfectly on the ribbon as well. The final touch is the Red Pearl from Festive Pearls embellishments. Also there is a bit of Wink of Stella on the candy cane and mistletoe for a little shine and sparkle.
More inspiration awaits, so use the lineup below to visit the rest of the Design Team. The Pals are excited to show you what they’ve created! Then, please mark your calendars for our next blog hop on [second Wednesday]. Our theme will be Focus on the Sentiment, when the design team will showcase a sentiment as the focal point of their project.
Click on either catalog photo and you will be taken to my Online Store where you can download either or both catalogs.
HOST CODE
My August Host Code is H9KF4JUC. Please use this code for orders under $150.00. I will have a small gift for those with orders over $50.00 in addition to the Perk Rewards Program. You can read all of the information at the top of the page in the Menu Bar under SHOP / Perks.
Thank you for stopping by today. I hope you enjoyed today’s project and will come back. I do read and reply to all of the comments individually. They mean a lot to me. Please reach out if you have a question.
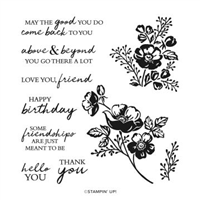
One of the main things I love about Stampin’ Up! is the friendships I have made. And the products are a close second. Today’s card is a fun and quirky way of saying Thank You and showing Love using one of the Funny and Whimsical stamp sets.
Stamps
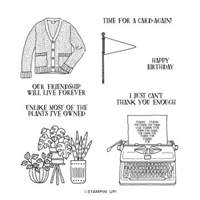
This adorable typewriter is from the Forever Friendship stamp set. It has fun images with witty sentiments as well as this Thank You shared with Love in the shape of the heart. Here is a closer view of the typewriter.
Is that not the sweetest little included sentiment? Sadly the typewriter may seem antique to the younger generations now. (Maybe even to ones who are middle aged now! YIKES!!) Regardless, it is a fun image and a very sweet way of saying Thank You to someone.
Paper
If you noticed the paper the typewriter is stamped on is a bit darker than usual, that is because it is a piece of DSP. Sometimes I remember that it is OK to stamp on the DSP, and I always love the results. This is a piece from the Sun Prints Designer Series paper. As is the Navy and White speckled piece. Night of Navy and Basic White are a combination that you cannot go wrong with. They give a very crisp and clean look.
Dies and Embellishments
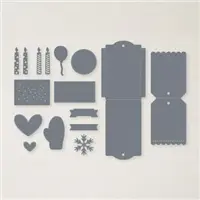
In place of a bit of bling or different embellishments, I used Dies and Ribbon for the Pop of extra on this card. The two heart Dies are from the Celebration Tags Die set. This is one that is so fun and handy to have. If you remember a card I did a few weeks ago with a gift card holder on the front, then you saw one of the tags. You can see that card HERE
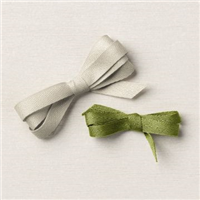
In the second photo you can see the details on the White heart with the stitching on the inside. The larger blue one is the same, it just doesn’t show well in the photo. Layering the hearts was not quite enough of a finish when I realized I needed to add some Sahara Sand. Out came the Sahara Sand and Old Olive Ribbon Combo. These cotton ribbons make beautiful bows! So a small bow sandwiched between the two hearts was the finish. And they are not raised when applied to the card to keep them from being thicker than they already are. It could still be mailed easily if you are careful of the orientation of this layer when putting in the envelope.
Mini Catalog and Sale-A-Bration
Click on either catalog photo and you will be taken to my Online Store where you can download either or both catalogs.
HOST CODE
My August Host Code is H9KF4JUC. Please use this code for orders under $150.00. I will have a small gift for those with orders over $50.00 in addition to the Perk Rewards Program. You can read all of the information at the top of the page in the Menu Bar under SHOP / Perks.
Thank you for stopping by today. I hope you enjoyed today’s project and will come back. I do read and reply to all of the comments individually. They mean a lot to me. Please reach out if you have a question.
A Happy Halloween is my choice for any item related to Halloween. No scary things are allowed. And good surprises are always welcome. Today’s card is a Fun Halloween Surprise with a fun fold and cute paper.
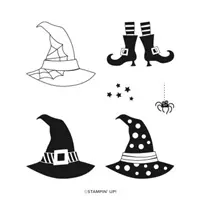
Stamps and Punch
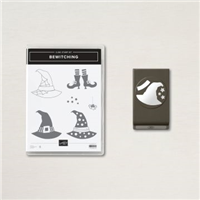
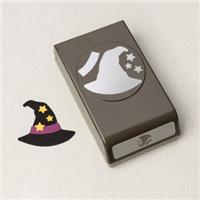
For a fun and pretty quick Halloween card I used the Bewitching Bundle of products. Best of all is that it is a Punch Bundle. You know how I love punches! This stamp set has a variety of Witch’s Hats and the punch will easily cut them out. Also there are additional stars and a hat band included on the punch.
The additional stamp from the set used on the front of the card is the little spider. Now I am definitely NOT a fan of real spiders. Just Yuk!!! But this one is acceptable. Plus he looks perfect hanging off of the hat. There is not a punch for little spider. But he is easy to fussy cut around.
Here is the inside View:
Those adorable Witch’s legs and boots are included in the Bewitching Stamp set also. Personally I love the leggings!! LOL!
Paper
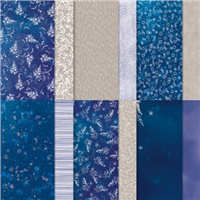
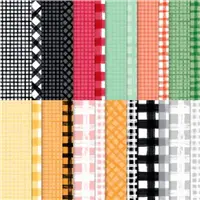
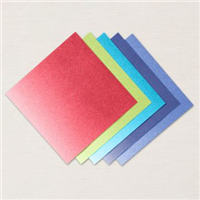
There are a variety of papers used on this fun card. On the front there is the cardbase of Pumpkin Pie cardstock along with a thin layer of Basic Black cardstock. The pretty orange check is from the Gingham Cottage Designer Series Paper. The different shades of orange are a nice touch. For the layer behind the hat ,and the inside thin DSP piece, I used the 2022-2024 In Color 6X6 Designer Series Paper pack. The dots on the DSP paired well with the dots on the hat.
The last piece of “paper” is the hat band. It is punched using the Witch Hat Punch from a piece of the In Color Glimmer Paper. These sheets are variegated from light to dark on each 6X6 piece. The one used is on the lighter end. But the little bit of sparkle is a great “bling” addition.
Surprise Fold
Hopefully you noticed the different open view on the card. There is not really a name I am aware of for this fold. So I called it a Surprise. It could be done vertically or horizontally, it would just be a paper width adjustment.
To create this fold begin with two pieces of Pumpkin Pie cardstock. Both pieces are cut to a size of 4 1/4 X 5 1/2. A White piece of cardstock is cut to 3 3/4 X 11 and scored at 5 & 10. Fold and burnish the folds with the small section, the 10″ score, on top. Lay down the bottom piece of Pumpkin Pie and adhere the White section to it as you would a layer. (The larger 3 3/4 X 5 section) Next, add adhesive only to the small 1 ” scored section. Lay the top piece of Pumpkin Pie and line it up with the bottom Pumpkin Pie sandwiching the white in between the two.
The added strip of DSP on the inside was simply for some additional color. However I believe you could place a gift card pocket there for special occasions. If you have any questions, please reach out to me and I will be happy to try to explain better.
Mini Catalog and Sale-A-Bration
Click on either catalog photo and you will be taken to my Online Store where you can download either or both catalogs.
HOST CODE
My August Host Code is H9KF4JUC. Please use this code for orders under $150.00. I will have a small gift for those with orders over $50.00 in addition to the Perk Rewards Program. You can read all of the information at the top of the page in the Menu Bar under SHOP / Perks.
Thank you for stopping by today. I hope you enjoyed today’s project and will come back. I do read and reply to all of the comments individually. They mean a lot to me. Please reach out if you have a question.
Thank You cards are always needed and today’s is a quick one. Using the Shaded Summer stamp and matching Die set it came together easily.
Colors
It is very unusual for me to say a color choice came from anywhere other than some designer paper. But today’s card color choice came from the stamp and me wanting a Red Rose! Then it became a pretty simple and quick card by stamping tone on tone for the base. Which is another unusual technique for me because I tend to have a few layers. But today’s card is mostly Sweet Sorbet all the way!
Stamps
The stamp set for this sweet flower, I believe it is a rose???, is the Shaded Summer stamp set. The Tone On Tone was done using Sweet Sorbet Ink on the Sweet Sorbet card base using the smaller flower stamp. Then using the larger one I stamped on a scrap of White and fussy cut only the flower. With not wanting the card totally one color, I opted for stamping the large image using Pale Papaya. The softness blends well with the Sweet Sorbet, even if it is not a green as expected.
Adding the sentiment took a bit of thought. In trying something different, I stamped the sentiment and then did a bit of fussy cutting around it. Most of the edges are straight lines, but I did go around the Y and u on each end.
Dies and Vellum
A matching Die set for the Shaded Summer stamp set is the Summer Shadow Dies. They are not a bundle however. The dies were released as a special edition last year and then added to the Annual Catalog in June. Personally I was thrilled because dies for flowers are awesome! So the large Pale Papaya flower was Die cut and then the fussy cut Sweet Sorbet flower was layered in to place.
The second Die is the Deckled Rectangles Dies. It was used on the Vellum layer. And it may be a bit difficult to see in the photo, but is very noticeable in person. The Third largest die was used for this piece. Lovely Layers Vellum is a package of Layer Sized pieces of vellum. Some are printed and most are the same as I used.
Finishes
To give the card a bit of bling and shine, there are three different elements. First is the Wink of Stella on the red flower. That leaves a very subtle bit of shine. Secondly is the beautiful Sweet Sorbet Metallic Ribbon bow. This ribbon is available in all of the new In Colors and is a dream to tie bows with. And the metallic shine is a perfect touch. Finally there are three of the 2021-2023 Opals in the Pale Papaya scattered around.
Mini Catalog and Sale-A-Bration
Click on either catalog photo and you will be taken to my Online Store where you can download either or both catalogs.
HOST CODE
My August Host Code is H9KF4JUC. Please use this code for orders under $150.00. I will have a small gift for those with orders over $50.00 in addition to the Perk Rewards Program. You can read all of the information at the top of the page in the Menu Bar under SHOP / Perks.
Thank you for stopping by today. I hope you enjoyed today’s project and will come back. I do read and reply to all of the comments individually. They mean a lot to me. Please reach out if you have a question.
Today’s card is a different layout for a Gatefold Card. Turning the orientation really changed the look. A layered sentiment joins the fold together.
Stamps and Dies
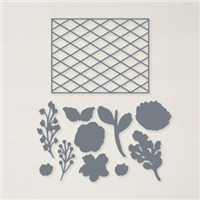
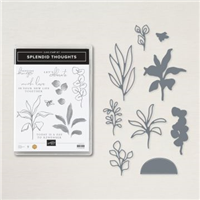
The Splendid Thoughts Bundle includes the Splendid Thoughts Stamp set and the Splendid Stems Dies. The Dies are wonderful and I have used them more than the stamp set. My favorite is the sentiment Die used here. That taco shape with some added definition is great for a lot of sentiments in the catalog.
And the Splendid Stems Dies include a variety of flower and stems. Two of the images above are stamped and then Die cut. But the third Crushed Curry piece is simply Die cut. This more open stem adds quite a lot of texture.
Last, but not least, is the Deckled Rectangles Dies. The NIght of Navy layer is cut using one of those and the edge is very different from any other of the current Dies in the catalog.
Inside View
The inside sentiment is from the Peaceful Moments Stamp set. There is an added touch of one stem of flowers. On the front I stamped the same image on Sweet Sorbet cardstock and then die cut. For the inside one, I stamped on the White and then colored with Sweet Sorbet Stampin’ Blends.
Paper
Stampin’ Up!’s DSP is one of my most favorite things in the catalog. This paper is from the Sale-A-Bration catalog and is FREE with a qualifying order. It is the Rings of Love Designer Series Paper. All of the colors in this sheet are wonderful. And I probably used the majority of them in either cardstock or coloring. The combination of the Night of Navy and Sweet Sorbet are perfect I believe.
Measurements:
The Sweet Sorbet card base is cut to 5 1/2 X 8 1/2 and scored at 2 1/8 and 6 3/8. It may be a bit difficult to see in the photo, but there is a White layer under the DSP. It is two pieces that are each cut 5 1/4 X 1 7/8. And the DSP layers are two pieces cut at 5 1/8 X 1 3/4.
Inside is a regular size White layer cut to 5 1/4 X 4. For the front, theNight of Navy Deckled layer is cut from a piece of scrap that is 2 1/2 X 4. And the Crumb Cake layer is from a piece measuring 2 3/4 X 3 1/2. The Sweet Sorbet image truly was a narrow scrap that was approximately 1 X 3. And and even smaller scrap was used on the Crushed Curry piece.
The stems were adhered to the Night of Navy layer only at the bottom. By leaving the upper parts free it gives a touch more dimension. And the sentiment is adhered with Stampin’ Dimensionals. The whole sentiment / stems layer was centered on the right side of the card with only the upper half adhered to the top flap by using Stampin’ Dimensionals also.
Mini Catalog and Sale-A-Bration
Click on either catalog photo and you will be taken to my Online Store where you can download either or both catalogs.
HOST CODE
My August Host Code is H9KF4JUC. Please use this code for orders under $150.00. I will have a small gift for those with orders over $50.00 in addition to the Perk Rewards Program. You can read all of the information at the top of the page in the Menu Bar under SHOP / Perks.
Thank you for stopping by today. I hope you enjoyed today’s project and will come back. I do read and reply to all of the comments individually. They mean a lot to me. Please reach out if you have a question.
The content in this blog is the sole responsibility of Jackie Beers as an Independent Stampin' Up! Demonstrator. The use of and content of classes, services or products offered is not endorsed by Stampin' Up!