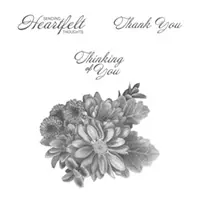
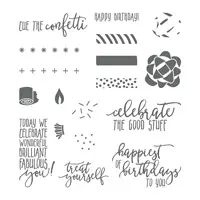
Today I have used the Sale-A-Bration stamp set that I have probably seen the most cards from. It is the Heartfelt Blooms. Like many of you comment, “this wasn’t on my radar until I began seeing such beautiful examples”. Well, that was me in this case. And I went pretty monochromatic with my color. The stamp is perfect for this type stamping.
Heartfelt Blooms, SAB, 147202
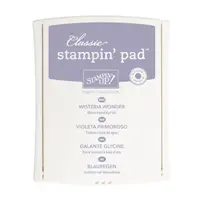
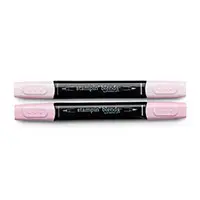
This is one card that is probably the simplest and quickest I have made. I wanted something soft for a change and the Wisteria Wonder fits that bill perfectly. The Petal Burst Embossing Folder really flatters the flowers. I flicked the Wisteria Wonder marker against the lid for the speckles of color. I would love to receive this card!!
A quick card and a short and sweet post, what a combination! Thank you very much for visiting today. I appreciate you checking my posts and your kind comments. If you ever have any questions, or would like to inquire about joining my team, please contact me. I would love to talk with you.
Have you ever thought about becoming a Stampin’ Up! Demonstrator? During Sale-A-Bration is the perfect time to join. Not only are you getting the Ultimate Bundle ($125.00 worth of product for $99.00) but you also get to choose 2 additional stamp sets, up to $25.00 each. Additionally you will receive a 20% discount on any future purchases. Or, if you are just wanting to test drive the idea, you would not be required to make another purchase until July! There is no pressure for you to continue as a demonstrator. And there is no penalty if you decide not to continue. Please contact me and let’s talk about it. You can review the documents by clicking on the picture below.
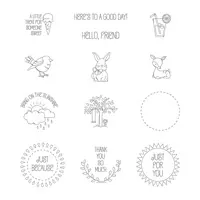
Here is another of my cards that are inspired by my cleaning out my craft room. I have a Love/Hate relationship going on with it right now!! I am enjoying looking through the old cards. Today’s idea came from a gift tag and I scaled it down to fit the Everyday Label Punch.
A Good Day, 145873
And here is the little insert :
A Good Day, 145873
When I was trying to resize the little envelope to fit the Everyday Label Punch, I realized I need to challenge myself in math more often. Oh My!!! It took quite a bit longer than was necessary. In the long run, I believe the time was well spent. I am happy with how this card came out.
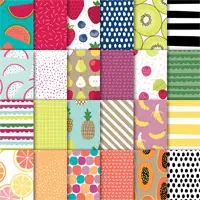
The color inspiration was the Tutti-Fruitti 6 X 6 DSP. Although I used Pacific Point instead of Night of Navy, the strawberry DSP was my inspiration. The little ice cream cone on the note is (at least in my mind) strawberry ice cream. HaHa!
MEASUREMENTS:
Base card is 11 X 4 1/4 scored and folded in half
The strips of Pacific Point are 1/4 X 5 1/2 each
The DSP is 3 X 5 1/2
The envelope is 5 X 2 3/4, score at 1/2″ down each long side, and at 2 3/8 across the center.
Fold and burnish all the lines.
When folded in half, one side is longer than the other. Cut each 1/2 side scores off of the longer end.
Miter the corners on the 1/2 sides that are left
Use the 1/2″ circle punch to make the little half notch for easier tag removal
Add Fast Fuze on the sides. Place the punched piece inside as you close so that you have easy sliding room.
Use the hand held 1/8″ punch to punch a hole in the end of the tag and add the desired ribbon.
Thank you very much for visiting today! I hope you enjoyed this little card. If you have any questions, please do not hesitate to contact me. The supplies I used are listed at the bottom of the page.
Have you ever thought about becoming a Stampin’ Up! Demonstrator? During Sale-A-Bration is the perfect time to join. Not only are you getting the Ultimate Bundle ($125.00 worth of product for $99.00) but you also get to choose 2 additional stamp sets, up to $25.00 each. Additionally you will receive a 20% discount on any future purchases. Or, if you are just wanting to test drive the idea, you would not be required to make another purchase until July! There is no pressure for you to continue as a demonstrator. And there is no penalty if you decide not to continue. Please contact me and let’s talk about it. You can review the documents by clicking on the picture below.
Welcome to InKing Royalty’s January Blog Hop! This year’s Blog Hop themes will be inspired by popular songs – the first is “I Think I Love You.” Our Blog Hop today is jam-packed with projects that are perfect for Valentine’s Day or that showcase love. How sweet is that?! We are excited to share our love-themed creations with you today. After you read my post, I hope you’ll hop over to the next person on the list at the base of this post.
I went a little “Love You” crazy on my card! This week I have been making cards using ideas and layouts from cards that are several years old. I found the idea for today’s card in a box of old swap cards. I loved the idea, so I recreated it with LOVE in mind.
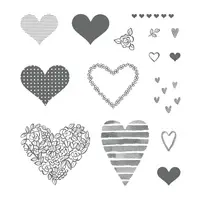
Sure Do Love You Bundle, 145653
I have been going a little overboard with the bright colors lately. This is another one. It didn’t start out that way, but sort of evolved. Hopefully you can see that it would be cute in more subdued, and maybe less, colors!
The paperclip is the focal point of the card and can be used as a bookmark or attach a magnet for a totally different purpose. To make the paperclip heart, I cut a solid heart and the stamped heart using the Lots To Love Box Framelits. I placed several stampin’ dimensionals between the two hearts and around the paperclip. The two Lemon Lime Twist hearts are cut using the same set of framelits as well.
The measurements will be at the bottom of the post after the blog hop list. There are also some hints to make the paperclip fit better.
Thank you for stopping by today. I hope you’ll hop along to the next stop on the bloghop, Shawn de Oliveira, https://www.shawnstamps.com/
Jackie
Thank you for hopping along with us. If you get stuck during the Blog Hop, please use this line-up as a guide:
The card base is 5 1/2 X 8 scored and folded in half
The next layer is 5 1/4 X 4
The DSP layer is 5 X 3 3/4
The larger Pocket layer is 2 1/2 X 4 1/2
The next layer is 2 1/4 X 4 1/4
The DSP strip is 1 1/8 X 2 1/4
Hint: I used the 3/4 ” Circle Punch and punched in the center of the top pocket layer. I then punched again just a little on each side of that to allow the paperclip to slide in.
When you are taping the pocket layers together, have the paperclip through the slit. Otherwise the pocket is too flat and may pull away from the card. The same when applying the pocket to the card.
I suggest using Tear & Tape, or a similarly strong tape and go around the edges of both layers. (Adhering to the bottom pocket layer and the card itself.
ENJOY!!!
If you have any questions about today’s card, please do not hesitate to contact me !
Have you ever thought about becoming a Stampin’ Up! Demonstrator? During Sale-A-Bration is the perfect time to join. Not only are you getting the Ultimate Bundle ($125.00 worth of product for $99.00) but you also get to choose 2 additional stamp sets, up to $25.00 each. Additionally you will receive a 20% discount on any future purchases. Or, if you are just wanting to test drive the idea, you would not be required to make another purchase until July! There is no pressure for you to continue as a demonstrator. And there is no penalty if you decide not to continue. Please contact me and let’s talk about it. You can review the documents by clicking on the picture below.
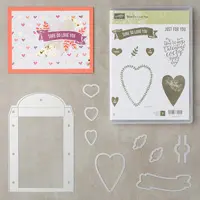
I have quite a different fold for today’s card. It has a pull out insert instead of opening to the inside. This type fold/card is great for invitations.
Hanging Garden, 146239
I have spent the last couple of days rearranging my craft space. OMG!!! But I did find some old cards that have layouts which I have not used in quite a while. This is one of them. There will be more coming soon. There are many ways this can be changed up. And here is a look at the inside slide out for your sentiment and signature. There is actually room for a gift card to fit if you so desired.
This card is very quick and easy to make. I will give you all of the measurements and supplies. I hope you will take a shot at something similar.
Thank you for visiting with me today! I hope you have a great day. And stay tuned for tomorrow and the InKing Royalty Blog Hop.
Island Indigo base layer is cut to 4 1/4 X 11. It is scored at 1 1/4 & 5 1/2
Fold the card in half with the 5 1/2 score and then fold back the short score.
Soft Sky front layer is cut to 4 X 2 3/4
Whisper White front layer is cut to 3 3/4 X 2 1/2
DSP strip is cut to 4 1/4 X 1
Inside Soft Sky layer is cut to 4 3/4 X 3
Inside Whisper White layer is cut to 4 1/2 X 2 3/4
Scraps for the Circle Tab punch and circle punch
If you prefer to run a ribbon through the fold over instead of using DSP, do it before adhering the sides.
Place the pull out card inside the holder as you adhere the sides together. It leaves a nice, but not too tight fit.
Adhere the sides with Tear & Tape for a sturdier hold
Adhere the Circle Tab Punch with a bit of Tear & Tape on each side for a sturdier hold
Have you ever thought about becoming a Stampin’ Up! Demonstrator? During Sale-A-Bration is the perfect time to join. Not only are you getting the Ultimate Bundle ($125.00 worth of product for $99.00) but you also get to choose 2 additional stamp sets, up to $25.00 each. Additionally you will receive a 20% discount on any future purchases. Or, if you are just wanting to test drive the idea, you would not be required to make another purchase until July! There is no pressure for you to continue as a demonstrator. And there is no penalty if you decide not to continue. Please contact me and let’s talk about it. You can review the documents by clicking on the picture below.
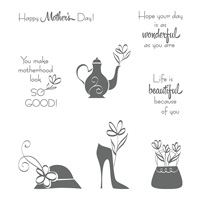
The blog title says it perfectly!! Why else would we send someone a card than to “Hope your day is wonderful”. This is another great sentiment from the A Mother’s Flair stamp set.
A Mother’s Flair, 145905
I hope you didn’t do a double take and think this is the same card I posted last Thursday. It is very similar and actually has the leftover parts I played with on that card. I love utilizing pieces that did not fit exactly on one card into another card where they work perfectly.
When you look at these colors together, they do not seem to work all that well. But when the Designer Series Paper has all of those colors in it, then it does. They go from “No Way!” to “Oh , that is cute”.
I have been boxing up part of my craft space to put in a new desk. In doing so, I failed to make a few cards ahead of time. Oops!!! That is why today’s post is a little late. Now I have to get back to it and clean up the rest so I can make cards for the rest of the week. There is also an InKing Royalty Blog Hop on Wednesday. Stay tuned for that because they are always fun and full of awesome ideas!
I realized during my boxing up that I have WAY TOO MUCH stuff!!! But I did get my new desk up and now have to put that section back together and then try to clean out the rest. I have a ton of craft supplies to donate to a Special Needs business near me.
Thank you so much for visiting with me tomorrow. I hope you enjoyed this sort of “Take Two” card using the same products. The supplies I used are listed at the bottom of the page.
Have you ever thought about becoming a Stampin’ Up! Demonstrator? During Sale-A-Bration is the perfect time to join. Not only are you getting the Ultimate Bundle ($125.00 worth of product for $99.00) but you also get to choose 2 additional stamp sets, up to $25.00 each. Additionally you will receive a 20% discount on any future purchases. Or, if you are just wanting to test drive the idea, you would not be required to make another purchase until July! There is no pressure for you to continue as a demonstrator. And there is no penalty if you decide not to continue. Please contact me and let’s talk about it. You can review the documents by clicking on the picture below.
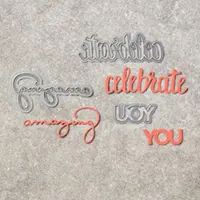
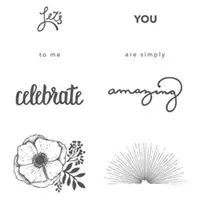
The Amazing You and Celebrate You in the Sale-A-Bration catalog are both fabulous items. They work wonderfully together or seperatly . I have joined them on today’s card.
Celebrate You Thinlits, 146840
The Amazing You stamp set is free with a $50.00 order and the Celebrate You Thinlits are free with a $100.00 order. I know that for me, meeting these order qualifications was not at all difficult to do! HaHa…. I hope seeing them together will excite you about getting one or both of them.
I was trying to do a different layout for today’s card, and I did manage that. I also rarely use all Subtle family colors. I may use one and pair it with a Bright or Regal, but this is the first totally soft color card I have made in a very long time. It makes me wonder why that is????
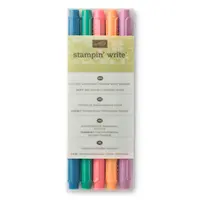
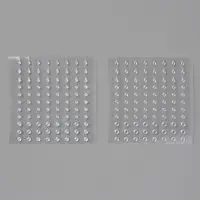
I want to point out the Glittery & Clear Epoxy Shapes that are on the upper part of the card. This is the first time I have used the tear drop shaped ones. I wanted to give the upper section a little something and I believe these fit the bill.
The supplies I used are all listed at the bottom of the post. Thank you for visiting with me today. I really appreciate your visit and comments. I hope you have a wonderful day and a great weekend!
Have you ever thought about becoming a Stampin’ Up! Demonstrator? During Sale-A-Bration is the perfect time to join. Not only are you getting the Ultimate Bundle ($125.00 worth of product for $99.00) but you also get to choose 2 additional stamp sets, up to $25.00 each. Additionally you will receive a 20% discount on any future purchases. Or, if you are just wanting to test drive the idea, you would not be required to make another purchase until July! There is no pressure for you to continue as a demonstrator. And there is no penalty if you decide not to continue. Please contact me and let’s talk about it. You can review the documents by clicking on the picture below.
Life is indeed beautiful. It snowed here in the Atlanta area yesterday for the third time this winter. That is extremely unusual for us. And when I woke up and looked out the window it was just beautiful. Of course I did not have to get out in it since I am retired! I am sure some of my friends had a different viewpoint. So when I made this card the sentiment reminded me of my feelings earlier in the day.
A Mother’s Flair, 145905
I hope you love that sentiment as much as I do! It is perfect for so many occasions. I had to consider this stamp set for a bit, but I am so happy that I purchased it. On first glance it is a Mother’s Day set, and my Mom passed away many years ago. But I kept being drawn to the individual stamps. I finally gave in and I am so now in love with it. I already have a couple more cards planned using individual stamps.
I may have gone a little overboard with the different shapes. I tried just using the Stitched Shapes Framelits. But it made the pieces too large. So I had to rethink it and ended up using a variety of the layering pieces. I hope it gives you ideas for different cards though.
I hope you enjoyed my very bright card. Thank you very much for visiting today! The supplies I used are listed at the bottom of the page.
JOIN MY TEAM
Have you ever thought about becoming a Stampin’ Up! Demonstrator? During Sale-A-Bration is the perfect time to join. Not only are you getting the Ultimate Bundle ($125.00 worth of product for $99.00) and you also get to choose 2 additional stamp sets, up to $25.00 each. Additionally you will get a 20% discount on any future purchases. Or, if you are just wanting to test drive the idea, you would not be required to make another purchase until July! There is no pressure for you to continue as a demonstrator. And there is no penalty if you decide not to continue. Please contact me and let’s talk about it. You can also click on the photo below to see the documents.
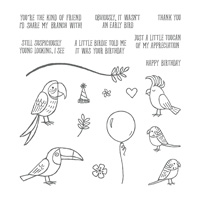
I am back again with the Bird Banter stamp set. I know I have been using this set and the Painted With Love DSP quite a bit. But they are both awesome products that I just love. Today is a bird birthday.
Bird Banter, 145852
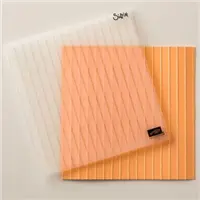
This card focuses on the bird and the new Simple Stripes Embossing Folder. I love the dimension that embossing folders give to a card. You have the raised embossed layer, which is used here. But you can also turn it over and have the debossed look which is great as well.
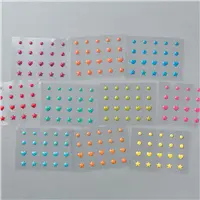
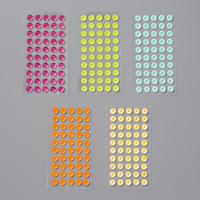
Another focal layer is the new Tutti Fruitti Adhesive Sequins. These little guys are super as they come with a glue dot attached. You just pick them up with your paper piercing tool and place them on the card. So easy and it adds such a great touch. Also, it is a little hard to tell but the party hat is fussy cut and raised with a mini dimensional.
Thank you very much for visiting today! I hope you have enjoyed my card and will consider the Bird Banter for your collection. Please contact me if you have any questions.
Have you ever thought about becoming a Stampin’ Up! Demonstrator? During Sale-A-Bration is the perfect time to join. Not only are you getting the Ultimate Bundle ($125.00 worth of product for $99.00) but you also get to choose 2 additional stamp sets, up to $25.00 each. Additionally you will get a 20% discount on any future purchases. Or, if you are just wanting to test drive the idea, you would not need to make another purchase until July! There is no pressure for you to continue as a demonstrator. And there is no penalty if you decide not to continue. Please contact me and let’s talk about it.
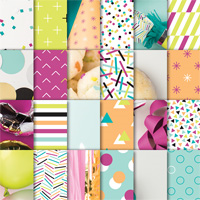
Today’s card is from the Picture Perfect Party Suite of products. I love all of these items. They are great together or separate. My card is only using a few of the items.
Picture Perfect Birthday, 145519
I did uneven layering to balance out the white areas for this card. The DSP is from the Picture Perfect Party 6 X 6 Designer Series Paper. What you normally see is the photography side being used. But this is the other side. I tend to use the other sides of the paper more than the more popular side.
I have two tricks that I will share from this layout. First: The Stitched Shape Circle is the 2nd largest. I die cut it before I stamped. To me anyway, it was easier to line up the three candles with the smaller area. The fact that the candles are photopolymer makes a big difference as well. I love that you can see through and around them! Second: To have the banner cuts line up, I used a tiny bit of adhesive and lined up the white at the right end of the other, with proper spacing top to bottom. I then punched both pieces together. Separate the two and move the white back even with the left end of the other piece. You now have perfectly lined up banner tips!
Thank you so much for visiting today. I really appreciate you stopping by and leaving comments. If you have any questions please do not hesitate to contact me.
Have you ever thought about becoming a Stampin’ Up! Demonstrator? During Sale-A-Bration is the perfect time to join. Not only are you getting the Ultimate Bundle ($125.00 worth of product for $99.00) but you also get to choose 2 additional stamp sets, up to $25.00 each. Additionally you will get a 20% discount on any future purchases. Or, if you are just wanting to test drive the idea, you would not need to make another purchase until July! There is no pressure for you to continue as a demonstrator. And there is no penalty if you decide not to continue. Please contact me and let’s talk about it.
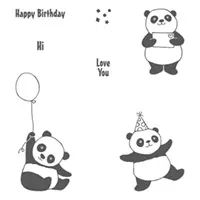
I have a warm and fuzzy Panda Love for you today. These little guys are so cute and so easy to work with that I could not resist another quick card.
Party Pandas, 147221
The Party Pandas set is a Sale-A-Bration set. You can get it FREE, with the purchase of $50.00 from the Annual or Occasions Catalogs. Besides the panda, the second star of the card is the Painted With Love Designer Series Paper. I could use this paper every day! It is beautiful on each side of every sheet. I don’t think I have ever said that before.
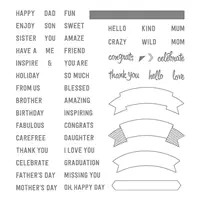
The “Love” on the envelope is from the Thoughtful Banners stamp set. There are a couple of small words from that set that fit perfectly on the little envelope. Obviously the color inspiration came from the DSP. I love Rich Razzleberry and Melon Mambo would not normally put the two together. But WOW!!, I love them together with this small piece of paper that combines both.
The other highlight of the card is the Glitter & Clear Shapes. I used the small round ones for the Panda’s eyes. It gives it a 3-D look and makes the stand out. The hardest part of this card is cutting all the layers. I have provided the measurements that I used below.
Thank you so much for visiting today! I appreciate the lovely comments and am happy to answer any questions you have.
MEASUREMENTS:
Rich Razzleberry base is cut to 11 X 4 1/4 and folded in half for a top fold card
The two larger pieces (Melon Mambo and DSP) are cut to 2 1/2 X 4 each
The two larger Basic Black pieces are cut to 2 5/8 X 4 1/8
The Whisper White piece is cut to 1 7/8 X 2 5/8
The small Basic Black piece is cut to 2 X 2 3/4
Have you ever thought about becoming a Stampin’ Up! Demonstrator? During Sale-A-Bration is the perfect time to join. Not only are you getting the Ultimate Bundle ($125.00 worth of product for $99.00) but you also get to choose 2 additional stamp sets, up to $25.00 each. Additionally you will get a 20% discount on any future purchases. Or, if you are just wanting to test drive the idea, you would not need to make another purchase until July! There is no pressure for you to continue as a demonstrator. And there is no penalty if you decide not to continue. Please contact me and let’s talk about it.
The content in this blog is the sole responsibility of Jackie Beers as an Independent Stampin' Up! Demonstrator. The use of and content of classes, services or products offered is not endorsed by Stampin' Up!