I am sharing with you today the card that I made for a card swap with other demonstrators over the weekend. I received a similar card several years ago in a different swap and have used variations of it several times. I love it and I hope you will see the versatility of it as well.
Beautiful Bouquet, 143666
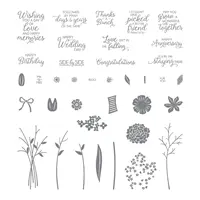
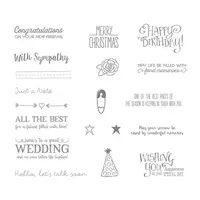
This stamp set has such gorgeous and sweet sentiments. The entire stamp set is wonderful, from the different fonts of the sentiments, the variety of flowers, and of course…..the matching framelits! It is definitely a keeper. The sentiment I used here is my favorite though. Who would not feel extra special receiving a card with that sweet thought on the front.
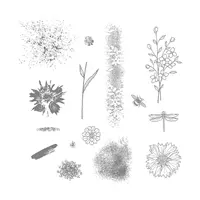
I went a little over my norm in terms of the amount of layers and embellishments. The embossed background is the Petal Burst Embossing Folder. It is a great folder in that the impression is great on either side. The splatter on the Wild Wasabi layer is from Touches of Texture stamp set. I used it again beneath the flowers on the top layer. The edge of the white layer is the Ticket Tear Border Punch. This is an awesome punch that I need to use more often. The ribbon is from the Occasions Catalog and is the Whisper White Organza Ribbon. And of course the elegant pearls at the bottom just finish it off.
Since this is a CASE card, I would love to see a CASE that you do of my card! I think that would be so fun. If you will send them to me, I will add them to a post.
Thank you for visiting today and I hope you have a good week ahead. The supplies I used are all listed at the bottom of the page.
Another Paper Pumpkin Special: The March PP was so popular due to the special gift that it sold out. So Stampin’ Up! has offered a great deal to replace that. New Subscribers who sign up before April 10, will receive April and May for half price. So 2 months for the price of 1. A great deal. Use my link HERE, and enter the code: SAVEFIFTY0418
It is still a great time to become a Stampin’ Up! Demonstrator. I would love to have you join my team. A great perk for demonstrators this time of year is getting to see the new catalog first. Then we get to order and play with the new products a month early. For me, that is one of the best parts of being a SU Demonstrator. Of course, the discount helps! If you are interested, please contact me and let’s talk.
As part of the Stamping Event I am enjoying today, we are doing a Shoebox Swap tonight. I decided to make a versatile card. My card is designed for a baby/Mom & Dad card. However, by simply changing one stamp it would be changed for almost any occasion. The Designer Series Paper would work for almost any reason as well.
Better Together, 141736
I know you have seen this card before either from me or others. It is such a useful and pretty card that it needs repeating periodically I do believe!
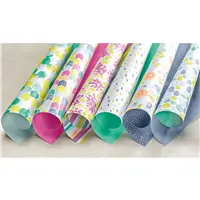
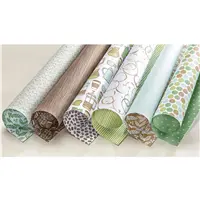
With using this beautiful Naturally Eclectic Designer Series Paper, I really did not want to cover it up. So I went with simplicity in the focal point on the front which allows the DSP to shine.
And here is a view of the inside and the gift card slot.
Now you see the gift card slot and will understand the directions listed under Measurements below. Be sure and add the Tear & Tape close to the edge so you have plenty of room for your gift card. Although if you do make it too tight, it is not the end of the world….. There is plenty of room for the card to slide in long way also. Not planned, but a nice unexpected find!!
NOTE: If you are like me and really love this paper, buy morel now!!! As it gets closer to the new catalog this, and other items, may sell out. And they will definitely be retired when the current catalog ends. Sad, but happy to see what new papers are revealed!
Thank you so much for visiting today! If you have any questions or comments, I would love to hear from you. And if you do not currently have a SU Demonstrator, I would love to send you a catalog and help you with any future purchases.
The measurements and the supplies are listed further down. I hope you have an awesome weekend!!
Fold and burnish the score lines. Fold the smallest section to the inside.
Place Tear & Tape on each side of the small section close to the edges. Your gift card slides in here.
Cut 2 Whisper White pieces at 3 3/4 X 4 (1 is the inside layer)
Cut 1 Whisper White piece at 1 1/4 X 4 for the side piece
Cut DSP at 3 1/2 X 3 3/4 and 1 X 3 3/4
Sentiment layers are: Soft Sky = 1 3/4 X 2 1/4, and Whisper White = 1 5/8 X 2 1/8
Another Paper Pumpkin Special: The March PP was so popular due to the special gift that it sold out. So Stampin’ Up! has offered a great deal to replace that. New Subscribers who sign up before April 10, will receive April and May for half price. So 2 months for the price of 1. A great deal. Use my link HERE, and enter the code: SAVEFIFTY0418
It is still a great time to become a Stampin’ Up! Demonstrator. I would love to have you join my team. A great perk for demonstrators this time of year is getting to see the new catalog first. Then we get to order and play with the new products a month early. For me, that is one of the best parts of being a SU Demonstrator. Of course, the discount helps! If you are interested, please contact me and let’s talk.
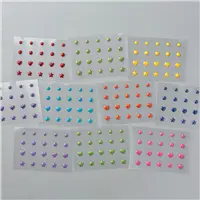
One of the Stampin’ Up! Demonstrator perks is attending the Fun, Exciting, and Informative Stampin’ Up! events each year. This year there is one here in Atlanta on Saturday. To add to the exciting weekend, my spline Brian King, is hosting a Spring event the day before. My post for Friday will be the card I have made to use to swap with other demonstrators. But today’s post is a simple Treat Holder that I have made for the other demonstrators I will be sharing a table with. (Ssshhhh Don’t tell them!) If you have been stampings and papercraftingl for several years you will probably remember the old Sour Cream Container Treat Holders. That is what I have made. If you are relatively new, then you will have the directions for a quick and easy treat holder. A win/win.
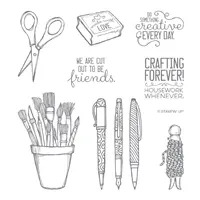
Crafting Forever, 143958
I made these very plain on purpose. I wanted to show you a great treat holder that can be done very inexpensively. These are made with Whisper White, not the think, card stock. I stamped the “stamp” from Crafting Forever in Sahara Sand and then colored the little hearts in various pinks from the Stampin’ Write Markers.
As long las you begin with a square piece of card stock or DSP, you can make almost any size of these. I used a piece that is 5 1/2 X 5 1/2. That way I could get 2 holders out of each sheet of paper. There is a good sized piece leftover that can be used for tags to add to the holder, or scraps stamping. Another advantage to the Whisper White card stock is that if I wanted to tie on a tag, I could easily punch through one end with a circle punch. Since the white is thinner, it would not be as difficult to punch trough two layers.
To make the treat box, I stamped and then added Tear & Tape to one end of the front side. I then turned it over and added the tape to each side that is adjacent to the tape on the front. Here are pictures.
Hopefully you can see the tape. In retrospect the white was not the best choice to use for the photos. Sorry about that! However, these are showing the tape placement. To close the container, remove all of the tap covers. Then roll the paper in your hand and overlap the opposite side of the front onto the taped edge. I place the tape very close to the edge and that helps in adhering straight. Once that is secure, you will have a small roll, like a toilet paper cardboard tube. Or if you want to think in nicer terms, 1/2 of a paper towel tube ! 🙂 Now squeeze one end and it will stick the together. Fill the tube with candy or a small gift and then squeeze the other end together, BUT in the opposite direction of the first one. You can see what I mean from the original post picture hopefully!
These really are easy and fun to make and can be personalized for any type event. I hope you will give them a try if you have not seen them before.
Thank you for stopping by and I hope you have a great day! The supplies I used are at the bottom of the page. And if you have any questions about these little holders, please do not hesitate to contact me. Have fun!!
Another Paper Pumpkin Special: The March PP was so popular due to the special gift that it sold out. So Stampin’ Up! has offered a great deal to replace that. New Subscribers who sign up before April 10, will receive April and May for half price. So 2 months for the price of 1. A great deal. Use my link HERE, and enter the code: SAVEFIFTY0418
It is still a great time to become a Stampin’ Up! Demonstrator. I would love to have you join my team. A great perk for demonstrators this time of year is getting to see the new catalog first. Then we get to order and play with the new products a month early. For me, that is one of the best parts of being a SU Demonstrator. Of course, the discount helps! If you are interested, please contact me and let’s talk.
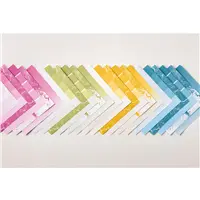
Do any of you remember Crazy Quilts? It was a frequently made quilt made by using leftover scraps of other quilting pieces. That is what today’s card reminds me of. Although I did it on purpose. The idea came to me when I saw the card I made in the last week or two that was a CASE of Brian King’s patented leftover strips of card stock card. You can see my card HERE. Then I saw the Tailored Tag Punch, and this is the result of that combination.
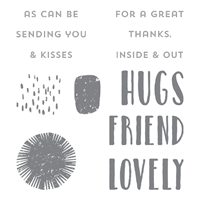
Lovely Inside & Out, 144011
It is Crazy!! I punched several pieces of the Color Theory Designer Series Paper Stack with the Tailored Tag Punch. The two different papers you see are actually both sides of one sheet. I then just taped them to a piece of Whisper White card stock. When I got to the edges, I merely turned it over and trimmed the pieces off with my Paper Snips. Some of those pieces were then reused to fill in gaps. It was actually fun, and quite quick to make.
For the sentiment, I decided to make it like a crooked sign to go along with the Crazy theme. It is taped down and has an Enamel Shape to replace the nail or tack. How fun is this?? Now I want to make a bunch more in different colors and different designer series papers.
Thank you for stopping by today. I hope you enjoyed this card and will let me know what you think. I love reading your comments.
The supplies I used are listed the bottom of the page. Today there are not that many! That is a good thing in my opinion!!
Another Paper Pumpkin Special: The March PP was so popular due to the special gift that it sold out. So Stampin’ Up! has offered a great deal to replace that. New Subscribers who sign up before April 10, will receive April and May for half price. So 2 months for the price of 1. A great deal. Use my link HERE, and enter the code: SAVEFIFTY0418
It is still a great time to become a Stampin’ Up! Demonstrator. I would love to have you join my team. A great perk for demonstrators this time of year is getting to see the new catalog first. Then we get to order and play with the new products a month early. For me, that is one of the best parts of being a SU Demonstrator. Of course, the discount helps! If you are interested, please contact me and let’s talk.
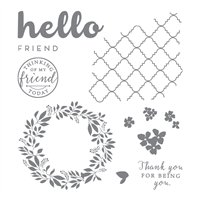
The card I have today is made using the stamp set that coordinates with a kit. It is Hello Friend and is on page 17 of the annual catalog. I think of it as a “sleeper” stamp set. It really has great pieces that work great together and separately.
Hello Friend, 144059
I love this wreath. It is a 4 Season type wreath I believe. You could add the flowers, as I have, or leave plain, add berries, etc. I chose a wreath for Spring. The base and flowers are stamped in Melon Mambo and the wreath is Wild Wasabi.
The designer series paper I used is from the Color Theory paper stack. It is a variegated green. I cut off the lightest color in making it fit the card. I wanted a simple way to add texture or more emphasis without really adding anything. ( I know that sounds crazy!) Between the variegated DSP and by placing the wreath over to the side, I think I succeeded. It also allowed me to wrap a piece of the beautiful Whisper White Organza Ribbon and add a bow.
This is a layout that can definitely be used quite often. I love versatile layouts, cards, etc. Thank you so much for visiting today! If you have any questions, please do not hesitate to contact me. The supplies I used are listed at the bottom of the page.
Another Paper Pumpkin Special: The March PP was so popular due to the special gift that it sold out. So Stampin’ Up! has offered a great deal to replace that. New Subscribers who sign up before April 10, will receive April and May for half price. So 2 months for the price of 1. A great deal. Use my link HERE, and enter the code: SAVEFIFTY0418
It is still a great time to become a Stampin’ Up! Demonstrator. I would love to have you join my team. A great perk for demonstrators this time of year is getting to see the new catalog first. Then we get to order and play with the new products a month early. For me, that is one of the best parts of being a SU Demonstrator. Of course, the discount helps! If you are interested, please contact me and let’s talk.
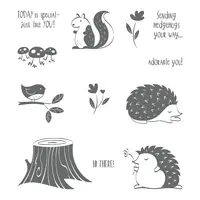
I am late to the discovery as usual. But I found a beautiful piece of “wood” designer paper on the back of the Coffee Break DSP. I paired my discovery with the Hedgehugs stamp set for a little bit cutesy card.
Hedgehugs, 145879
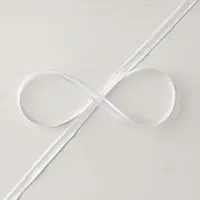
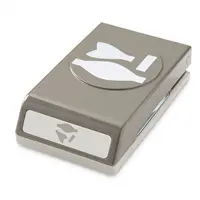
I made another happy discovery in completing the card. I was wishing for the old oval punches to use for the sentiment and trying to find a punch to use in place of that. I found the Build a Bow punch. Yes, the unusual shape the sentiment is punched out with is the loop from the Build a Bow punch. I debated on cutting off the ends, but decided to make them banner points instead. It made for a very unusual , but unique, shape. Remember, good or bad, you saw it here first !!
I paired Soft Sky with the Early Espresso and then added Rose Red as the highlight. The squirrel is stamped in Early Espresso and colored with the Light Crumb Cake Stampin’ Blend. I added the loops of Linen Thread beneath the sentiment layer to add a little more texture.
This is a little bit different card than I normally do but I am glad I made the discovery of the wooden DSP. Thank you for stopping by today. I hope you will continue to check out my cards. I love to hear from you and please do not hesitate to contact me if you have any questions.
The supplies I used are listed at the bottom of the post.
Another Paper Pumpkin Special: The March PP was so popular due to the special gift that it sold out. So Stampin’ Up! has offered a great deal to replace that. New Subscribers who sign up before April 10, will receive April and May for half price. So 2 months for the price of 1. A great deal. Use my link HERE, and enter the code: SAVEFIFTY0418
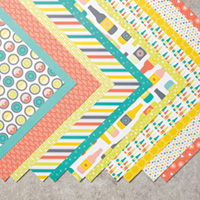
Today’s card is a bright and happy card. The designer series paper and the little stamp are the stars. I also made it a 4 X 4 card. It would be perfect to give as a Random Act of Kindness. You could also use the same items and make it a 3 X 3.
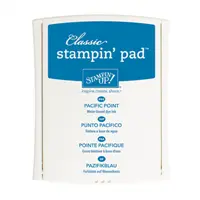
I have recently used quite a bit of Night of Navy as a grounding color. Today though I have changed it up a bit and gone with Pacific Point. It is definitely another of my favorites. And of course, who doesn’t love Calypso Coral. This beautiful DSP is one of the Sale-A-Bration FREE items. It is on the reverse side of a piece from the Bubbles and Fizz Designer Series Paper. I fell in love with it immediately.
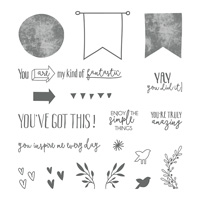
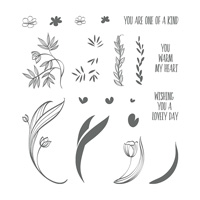
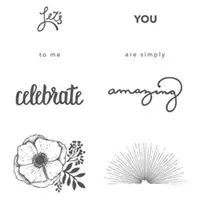
The stamp set is one of the Host sets from the Occasions Catalog , called Yay You! It has Amazing sentiments. I have used one of the others and this one a couple of times. I believe this is the first time I have used other stamps though. It will be a keeper for me, even after it retires. I love good sentiments. And to finish it off, I added a matching heart from the Metallic Shapes Embellishments.
Remember that there are only two days left on Sale-A-Bration! If thee are still items on your Wish List, now is the time to order. And think of the retiring In-Colors as well. They usually go out of stock before the new catalog arrives. That means stock up on them now and reward yourself with FREE product at the same time.
Thank you for visiting today! I hope you have a great rest of the day and weekend. Please stop back on Monday to see what I have for you.
Another Paper Pumpkin Special: The March PP was so popular due to the special gift that it sold out. So Stampin’ Up! has offered a great deal to replace that. New Subscribers who sign up before April 10, will receive April and May for half price. So 2 months for the price of 1. A great deal. Use my link HERE, and enter the code: SAVEFIFTY0418
Have you ever thought about becoming a Stampin’ Up! Demonstrator? During Sale-A-Bration is the perfect time to join. Not only are you getting the Ultimate Bundle ($125.00 worth of product for $99.00) but you also get to choose 2 additional stamp sets, up to $25.00 each. Additionally you will receive a 20% discount on any future purchases. Or, if you are just wanting to test drive the idea, you would not be required to make another purchase until July! There is no pressure for you to continue as a demonstrator. And there is no penalty if you decide not to continue. Please contact me and let’s talk about it. You can review the documents by clicking on the picture below.
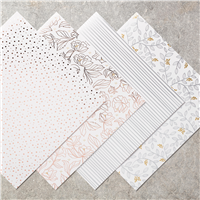
I am in love with the second Sale-A-Bration release Designer Series Paper named Springtime Foils. It is probably one of the most beautiful ever. And if you are into 3-D it is the perfect weight for boxes, etc. I have simply used one of the pretty pieces and lightly colored sections with the Stampin’ Blends in Light Old Olive. It colors wonderfully as well.
Lovely Wishes, 145924
Isn’t that paper gorgeous?? It comes with the silver embossed stems and leaves and the addition of the gold touches. I merely colored the leaves with the Light Old Olive Stampin’ Blends. The sentiment is from Lovely Wishes. I gold embossed it over the stamp, which seemed to mimic the paper design. Metallic paper is difficult to photograph. Especially when you do not have really good lighting. It is Gold Foil DSP behind the sentiment. And to finish it off, I added a Gold Metallic Shape.
I always feel like I am cheating a little bit when I do not stamp very much on a card. However, there is no way I could stamp and have it as beautiful as this DSP. This was a second release of SAB. Please do not forget that SAB ends on the 31st!! You don’t want to miss out on some of these great products.
I hope you hav a great day and will stop back tomorrow to see what I have for you. The complete supply list is at the bottom of the page.
Another Paper Pumpkin Special: The March PP was so popular due to the special gift that it sold out. So Stampin’ Up! has offered a great deal to replace that. New Subscribers who sign up before April 10, will receive April and May for half price. So 2 months for the price of 1. A great deal. Use my link HERE, and enter the code: SAVEFIFTY0418
Have you ever thought about becoming a Stampin’ Up! Demonstrator? During Sale-A-Bration is the perfect time to join. Not only are you getting the Ultimate Bundle ($125.00 worth of product for $99.00) but you also get to choose 2 additional stamp sets, up to $25.00 each. Additionally you will receive a 20% discount on any future purchases. Or, if you are just wanting to test drive the idea, you would not be required to make another purchase until July! There is no pressure for you to continue as a demonstrator. And there is no penalty if you decide not to continue. Please contact me and let’s talk about it. You can review the documents by clicking on the picture below.
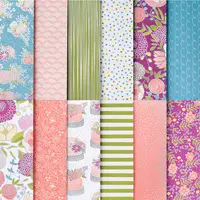
Today’s card has the Sweet Soiree Designer Series Paper as the star of the show, or card ! This paper is so beautiful and the colors in it are fabulous. I hated to cover up the DSP, so I went with a little stamping and left most of it uncovered.
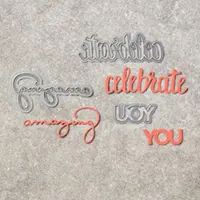
Celebrate You Thinlits, 146840
I chose Marina Mist and Rich Razzleberry to focus on the DSP. As I said at the top, I wanted to leave most of the DSP uncovered. I simply cut an oval from the Stitched Shapes Framelits, stamped and snipped the flower from Amazing You ,and layered them with half of a white doily.
The die cut sentiments are the perfect size for the front of a regular A-2 card. I added the fabulous Multi-Purpose Adhesive Sheet to the card stock prior to die cutting the words. This way all I have to do is peel off the backing and I have a sticker than easily sticks to even this slick DSP. The adhesive sheets are a must have in your stamping supplies if you have words or intricate dies to use.
And that is all it took! What a cute, but quick card. The longest time was taken paper cutting the flower.
Thank you for checking my post today. I very much appreciate it. The supplies I used are listed at the bottom of the post.
Another Paper Pumpkin Special: The March PP was so popular due to the special gift that it sold out. So Stampin’ Up! has offered a great deal to replace that. New Subscribers who sign up before April 10, will receive April and May for half price. So 2 months for the price of 1. A great deal. Use my link HERE, and enter the code: SAVEFIFTY0418
Have you ever thought about becoming a Stampin’ Up! Demonstrator? During Sale-A-Bration is the perfect time to join. Not only are you getting the Ultimate Bundle ($125.00 worth of product for $99.00) but you also get to choose 2 additional stamp sets, up to $25.00 each. Additionally you will receive a 20% discount on any future purchases. Or, if you are just wanting to test drive the idea, you would not be required to make another purchase until July! There is no pressure for you to continue as a demonstrator. And there is no penalty if you decide not to continue. Please contact me and let’s talk about it. You can review the documents by clicking on the picture below.
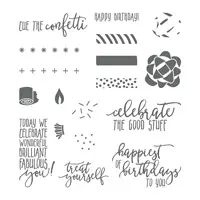
I have a bright Birthday card for you today! What is better than Celebrating the Good Stuff?? I love that sentiment. I put together some bright colors to match the cheery sentiment.
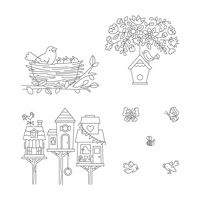
I love Night Of Navy and believe it pairs with most other colors. Even though it is a dark color, it seems bright when paired with this Daffodil Delight. Making the bird blue tied the colors all together in my crazy mind. (The Bluebird of Happiness even 🙂 )
I have discovered that you can use the Stampin’ Blends with almost any base color for the outline. I stamped the birdhouse and flowers with Soft Suede Ink and then colored with the Stampin’ Blends. A nice surprise. And I am really disappointed along with you that the Blends being not orderable right now. But I know once the Chinese New Year is over and everything is back to running order, that they will be back. They are awesome tools to have !!
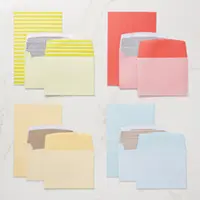
The base of this card is the Tutti Frutti Cards and Envelopes from Sale-A-Bration. I love these great cards with beautiful matching envelopes. I tend to not decorate envelopes too often and these are already decorated for you. To finish the card, I just add the birdhouse layer with a strip of ribbon.
NOTE: I am sure you know this trick, but in case you do not…..the ribbon is simply a strip that is taped down on the back. I then take a small strip and slide it under the front and tie a knot. It allows the knot and tips to lay perfectly. If I try tieing the ribbon all the way around with a knot in front, it is very lose. This is much neater and super easy.
Thank you for checking my post today. I greatly appreciate it. Remember that there are only 5 days left of SAB. I know you have some items you need to order. Why not do it before the end of the month and get FREE items to go with your order.
The supplies I used are listed at the bottom of the page. I hope you have a great rest of your day.
Another Paper Pumpkin Special: The March PP was so popular due to the special gift that it sold out. So Stampin’ Up! has offered a great deal to replace that. New Subscribers who sign up before April 10, will receive April and May for half price. So 2 months for the price of 1. A great deal. Use my link HERE, and enter the code: SAVEFIFTY0418
Have you ever thought about becoming a Stampin’ Up! Demonstrator? During Sale-A-Bration is the perfect time to join. Not only are you getting the Ultimate Bundle ($125.00 worth of product for $99.00) but you also get to choose 2 additional stamp sets, up to $25.00 each. Additionally you will receive a 20% discount on any future purchases. Or, if you are just wanting to test drive the idea, you would not be required to make another purchase until July! There is no pressure for you to continue as a demonstrator. And there is no penalty if you decide not to continue. Please contact me and let’s talk about it. You can review the documents by clicking on the picture below.
The content in this blog is the sole responsibility of Jackie Beers as an Independent Stampin' Up! Demonstrator. The use of and content of classes, services or products offered is not endorsed by Stampin' Up!