I hope you have noticed the Red and Green Foil Paper in the Mini Catalog! I worked with it for the second time on today’s card. It is so very nice! The first project with it was the Christmas Tree I used last week on the Pals Blog Hop. I added a Green Foil Tree to the Hand Sanitizer and the matching Gift Tag. Today I have chosen to use it on some Jingle Bells.
Those bells look amazing in the Green and Red Foil paper. I stamped the greenery from the tree in Shaded Spruce and then just glued the bells to the branches. It was really easy to make the “tree” branches using the stamp of two stems. And I really love Shaded Spruce for the tree color.
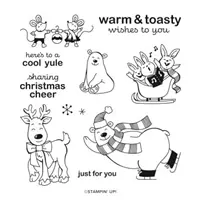
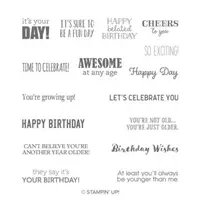
The sentiment is from the set Christmas Means. Those are all adorable sayings from different Christmas Movies.
Measurements:
Card base in Shaded Spruce cut 4 1/4 X 11 and scored at 5 1/2
Real Red layer cut to 4 X 5 1/4
Tis The Season DSP cut to 3 3/4 X 5
Shaded Spruce center piece cut to 2 3/8 X 4 1/2
Whisper White stamped layer cut to 2 1/4 X 4 3/8
Thank you for stopping by today! Please come back tomorrow for another new project. I have all of the products I used listed in the Supply List at the bottom of the page.
HOST CODE
My October Host Code is SXDVJZF3 Please use this code for orders under $150.00. I will have a small perk for those with orders over $50.00
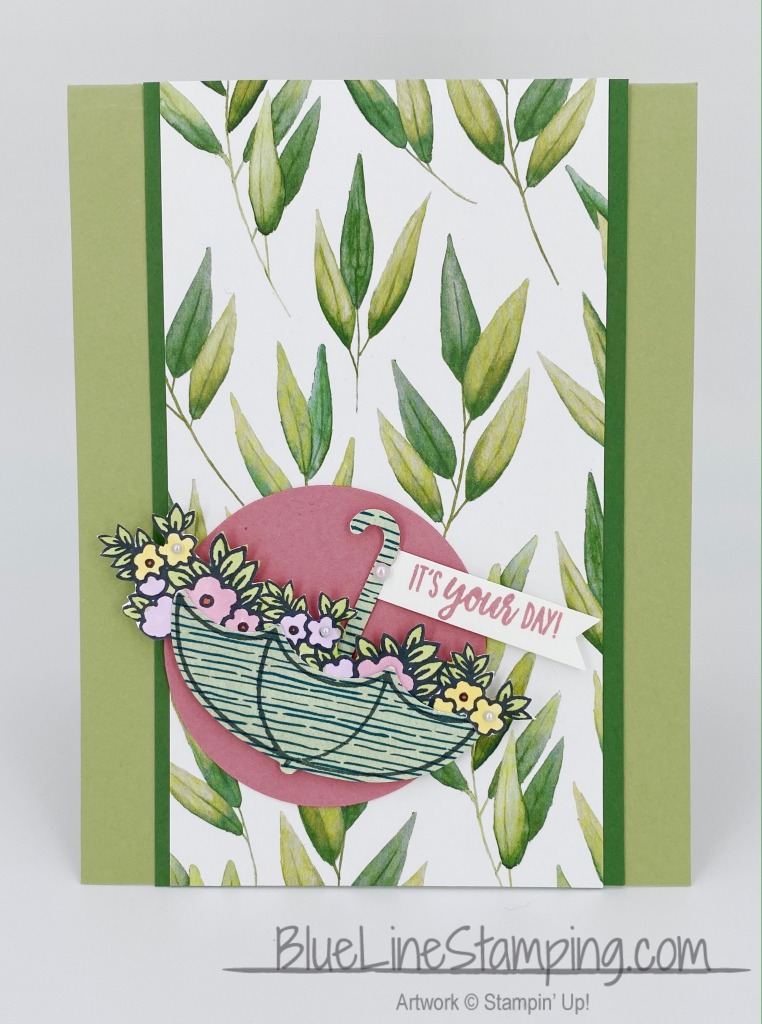
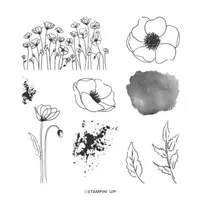
I have a birthday card to share with you today. It is almost out of season in regard to more summer type flowers, but here is to one last card. Here in the South, summer lasts quite a bit longer than other parts, so I still have some flowers blooming. And I love this stamp set that I used today!
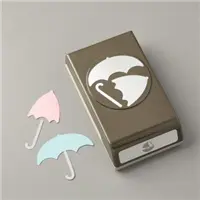
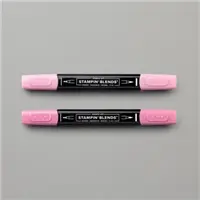
I paired Under My Umbrella stamp set with the Forever Greenery Designer Series Paper. To create the flowers I stamped along the bottom edge of a scrap of paper. I used two different flower stamps from the set to create this little uneven line. I colored them using Stampin’ Blends and then fussy cut them along the ends and top.
The umbrella is stamped directly onto the sheet from Forever Greenery DSP and punched using the Umbrella Builder Punch. I added some dimensionals to the base and then tucked the flowers behind and over the ends.
The Rococo Rose circle is cut using the 2 1/4″ Circle Punch. I wanted the umbrella and flowers to Pop a bit off of the green background. I chose the color from the flowers. When layering everything together, I wanted the umbrella and flowers to spill over the edge a bit. Plus it left a little more room for the tag. I like seeing the flowers hanging over the center panel and onto the card base. It shows the flowers a bit extra.
The tag sentiment is from the stamp set as well. I used the Classic Label Punch to punch it out. I then put the one end back into the end of the punch to make the banner tip. The other end I cut off straight and tucked behind the umbrella handle. I also added a few small pearls to a couple of the flower centers for a bit more dimension and a touch of bling!
Thank you for stopping by today! I do appreciate your visits and comments very much. I have all of the supplies I used at the bottom of the post. Don’t forget about the 15% OFF DSP Sale! We have a little under two weeks to go.
HOST CODE
My October Host Code is SXDVJZF3 Please use this code for orders under $150.00. I will have a small perk for those with orders over $50.00
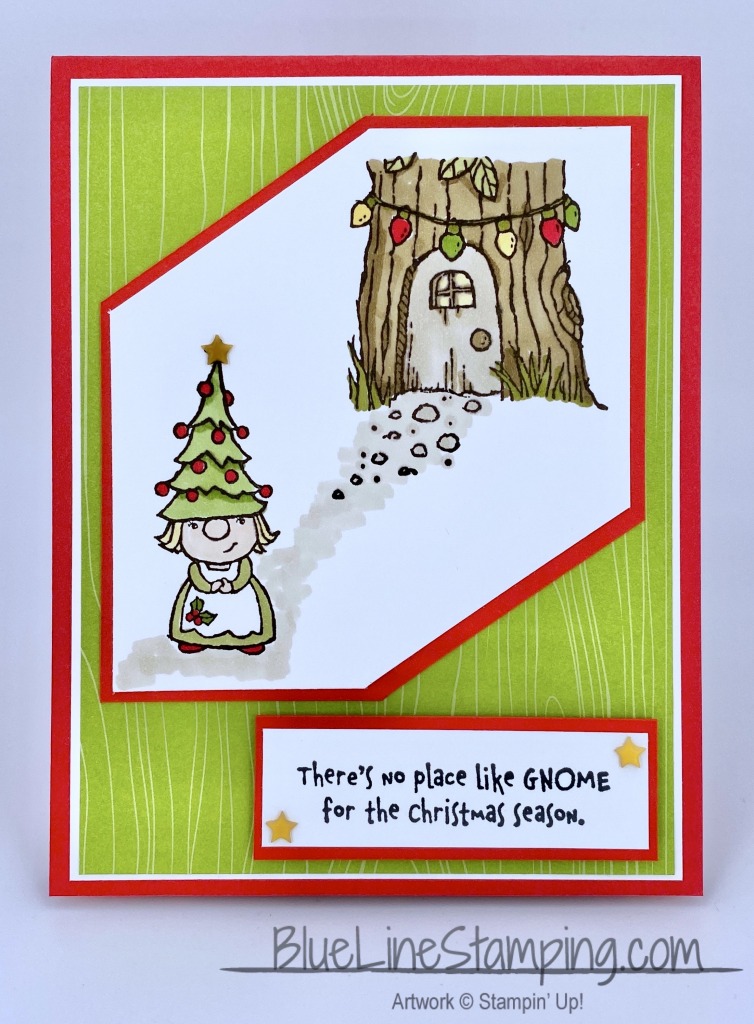
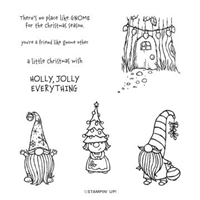
I don’t know about you, but I see some stamps or other products and say to myself that I don’t think I would use that. The stamp set I am showcasing today is one of those. When I first saw it in the Mini Catalog, I thought it was adorable, but didn’t think I would really use it. And I can imagine that you know where this is going!!!! Yes, after seeing everyone’s creation, I had to have this set.
I have already used this set twice and just received it on Monday! The other project is for a class I am having on Saturday. So I cannot share it until next week. The stamped images are exactly what I envisioned for this card. But the layout gave me fits!
I tend to stamp images and then cut them down to a smaller size. I could not decide how to best cut this one. And I thought it was too large with too much white space to leave it square. In comes the handy dandy Paper Trimmer.
I played around with how to cut the angles. And was afraid I was going to totally mess up my work. All I can say is Go For It!!! After I got the first cut completed, I was happy. It is different and I am good with that.
Oops, I never told you what colors I used! The background is Poppy Parade and the DSP is Granny Apple Green. I wanted this one to POP! Other than the funky cutting, I added a some extras to create the picture I wanted. The Granny Apple wood grain DSP is from the Brights 6X6 Designer Series Paper. I thought it went perfectly with the tree. I also added the stars from the All The Trimmings embellishments. There was already a star on top of the lady’s hat. I just covered it with one of the embellishments. And since I didn’t want the sentiment to feel neglected, I added a star on each end of that layer.
Thank you for stopping by today! I hope you like my angles on today’s card. Yesterday was the Pals Blog Hop and it was FULL of Awesome Projects. If you didn’t see it, you can go back there fromHERE.
I have all of today’s supplies listed below the DSP Sale information. You have about two weeks of the sale, so don’t miss out.
HOST CODE
My October Host Code is SXDVJZF3 Please use this code for orders under $150.00. I will have a small perk for those with orders over $50.00
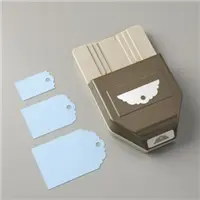
Hello, welcome to the Stampin’ Pretty Pals’ Blog Hop! This month our Design Team’s theme is “Tag, You’re It” – tags or 3D projects to get you inspired for the upcoming gift season. We hope you enjoy and will be inspired by them! Don’t forget to leave comments! We love hearing from you. At the end of my post, you will find the full line-up to help you “hop” along from Pal to Pal.
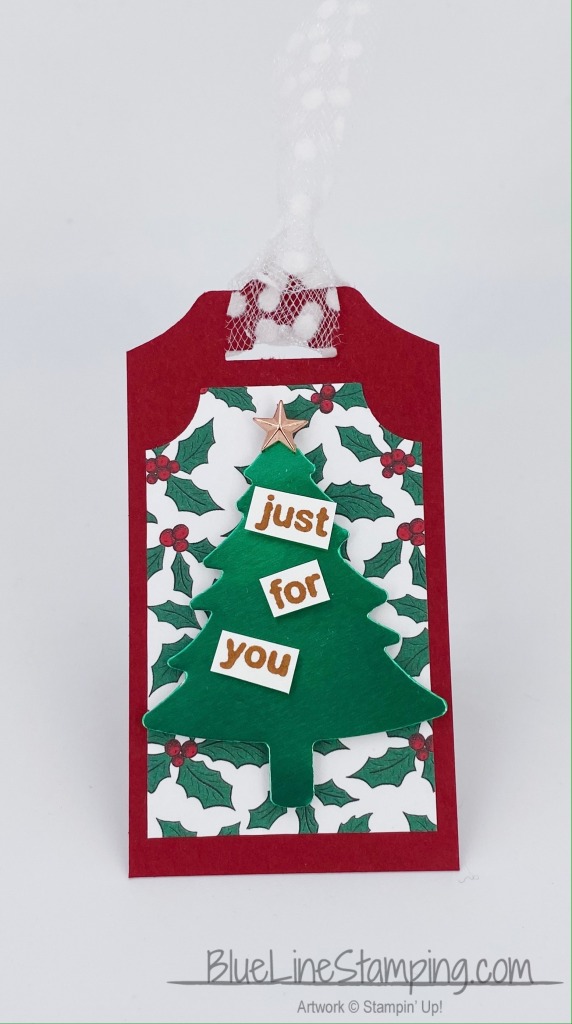
I decided to go with a Tag and a 3D Project. I made a tag and a box that holds a Bath & Body Hand Sanitizer. And who doesn’t need that right now!
This is the box which holds the hand sanitizer. I adapted it from The Paper Pixie’s Tombow Glue Box, with Julie’s permission. The tree is using the beautiful Green Foil. The “garland” is from the Peace & Joy Stamp set. I used my paper snips to trim the two words, they are separate anyway. I decided they would work perfectly for the garland on the tree. Plus they coordinate with the Bronze Star.
You can see from this photo how the front flap tucks behind the top of the Christmas tree to close. The bottle fits easily inside of the box. You can also see the White Polka Dot Ribbon. LOL!! It cannot be seen in the first picture due to the white background. There is actually a bow on the top of the lid.
And here is the matching Tag. Both items use Cherry Cobbler card stock along with the Tis The Season Designer Series Paper, as well as the White Polka Dot Ribbon. Also…..the “bronze” or metallic look to both of the “garlands” stamping is not a metallic ink. It is the Cinnamon Cider Ink!! That is an amazing find to me.
The garland phrase on this tree is from the Warm & Toasty stamp set. I have actually made a dozen of these tags for a friend to use. I added a white layer, the same size as the DSP layer on the front, to the back with a “To / From” stamp. She fell in love with my prototype for this. That was nice!
I hope you like today’s projects. I would love it if you left a comment. And I have added the template and measurements for the box just below. Then please continue on to the Blog Hop Lineup.
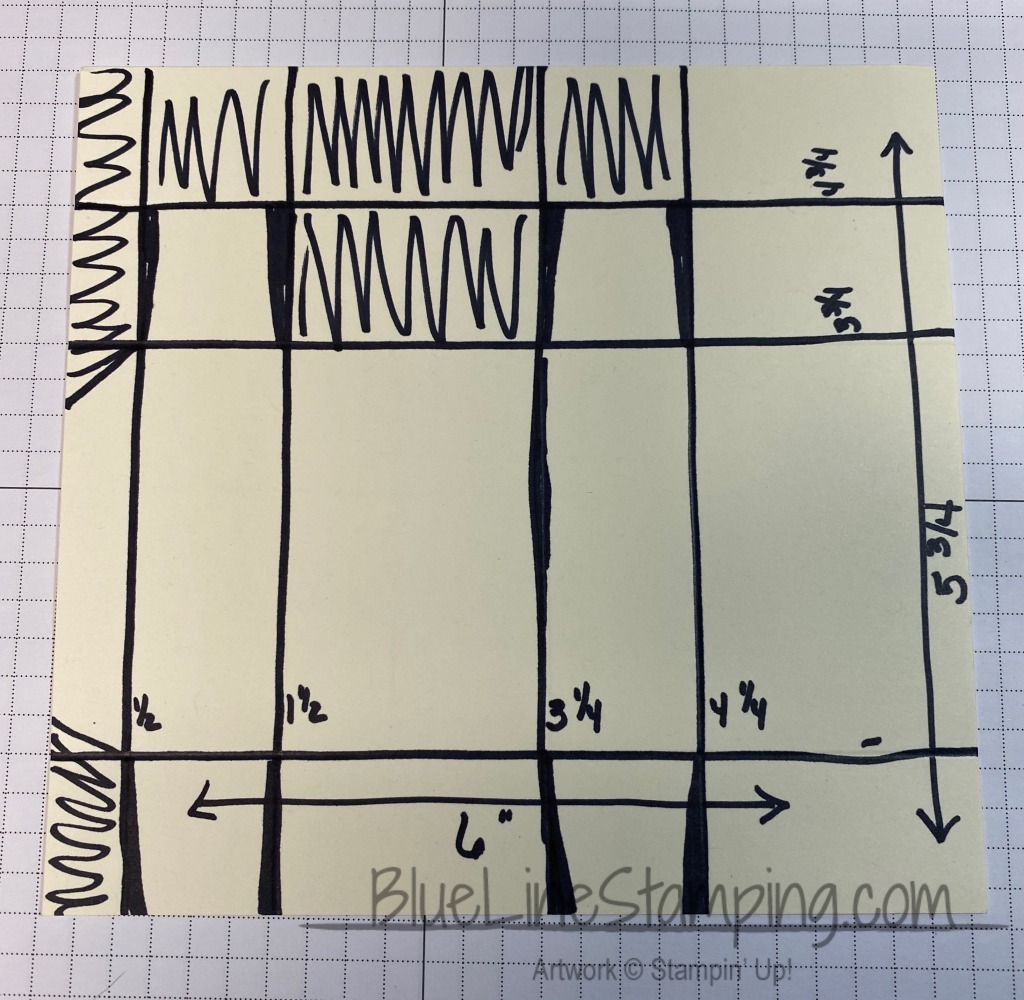
Box Template and Measurements:
Measurements for the Box:
The card stock is cut 6 X 5 3/4
Score the 6″ side at 1/2, 1 1/2, 3 1/4, 4 1/4
Score the 5 3/4″ side at 1, 3 3/4, 4 3/4
Follow the templates below for cutting
DSP is : 2 @ 1 1/2 X 2 1/2, 2 @ 3/4 X 2 1/2, 2 @ 3/4 1 1/2
More inspiration awaits! Use the Blog Hop Line-up below to visit the rest of this month’s Design Team. My fellow Pals are excited to show you what they’ve created! Mark your calendars for our next blog hop on November 11th when our theme is “Pile It On!” Participants will showcase projects with lots of layers, embellishments and/or texture. Don’t miss the fun! Until then, please stay safe and have fun in your craft space.
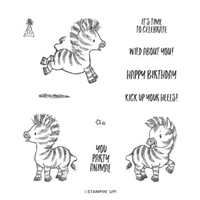
One set that was extremely popular on debut of the Annual Catalog was the Zany Zebras stamp set. I did not get it immediately but after all of the cute cards, decided it needed to come to me. So today I have a bright and fun card.
I love the face on this precious zebra! So I took some creative license and decided she needed to be spruced up for the birthday party. She was given a Magenta Madness Manicure and Pedicure, along with some new Magenta Madness Lipstick. LOL!!! It is my world and I can be as crazy , or creative, as I want.
Really this card was so quick and simple. You can see there is only a little bit of stamping and coloring. I took my color choices from the Artistry Blooms Designer Series Paper. ( Yes, it is one of the DSP packs that are included in the 15% OFF Sale!) I added the touch of matching Ribbon in Magenta Madness, as well as die cutting the focal point using the Stitched So Sweetly Dies.
Thank you for stopping by today. I hope my spiffy Zebra gave you cause to smile!! Please come back tomorrow for the Pals October Blog Hop. You will see quite a few great projects.
HOST CODE
My October Host Code is SXDVJZF3 Please use this code for orders under $150.00. I will have a small perk for those with orders over $50.00
I have a little different Fun Fold to share with you today. It isn’t new by any means, it is an old one that I found when cleaning out. I love when I find older styles and folds that I have not seen in quite a while. Today’s find is a Matchbook fold. The most recent Matchbook fold I have used was with a little Life Saver Candy that I made in a Matchbook last year. I handed them out during the Holidays.
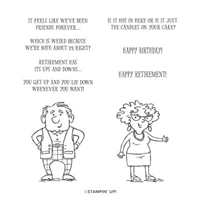
I think this stamp set, Senior Years, is a hoot!! But then I qualify as a Senior, so best to just laugh about it, Right???
The man and the sentiment are both from the Senior Years set. I colored the man thinking of Sheldon on Big Bang Theory and his plaid pants. I added the background colors based off of the pants.
The card is a pretty quick one in terms of the fold. It is a 4 1/4 X 11, scored at 1″ and 6 1/4″. The 1″ is the matchbook part. I still have the old Stampin’ Up! stapler. But any little stapler will do the trick. Just fold the 1″ section up and staple it equal distance apart, like 1/3 in from each end. But staple it a bit below 1/2″. That way your card has room to get behind the fold and not hit the staples.
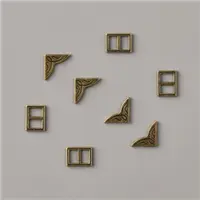
To Dress Up the card, I added four of the Antique Corners from the Antique Corners and Slides accessories from the World Of Good Suite in the Annual Catalog. They seem very “manly” when placed with these colors and the “senior” man.
Thank you for stopping in today. I greatly appreciate it. If you have any questions regarding the card, do not hesitate to reach out. I will gladly explain more or answer a question.
HOST CODE
My October Host Code is SXDVJZF3 Please use this code for orders under $150.00. I will have a small perk for those with orders over $50.00
As I said yesterday, I am sharing a Slim Line Card today. I was late getting on the wagon for these cards, but have made quite a few now. This one is a favorite, as I love the DSP in it. Sadly, this is a DSP that is not included in the sale 🙁 But the paper is wonderful and really shines on the card.
I believe this paper is gorgeous!! It is the Gilded Autumn Designer Series Paper. The gold in the pumpkins really shines. I did not want to cover up that paper, so went with as small of a stamped layer as possible. This is probably a first for me in that I did not add a layer beneath the focal layer! A testament to the beauty of the DSP!
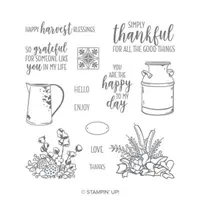
The stamped image is from the Country Home stamp set. I do love this set. The Milk Can and the Pitcher that the different flowers fit on top of are both favorites. They remind me of my younger growing up time. I actually have a milk can that was my Mom’s.
That sweet sentiment is also from the stamp set. I stamped it in the Mossy Meadow that is predominant in the flower arrangement. To finish it off, I added a single Gold Glitter Enamel Dot beneath the sentiment.
Thank you for visiting today. I very much appreciate your support. Monday I will have another new project and hope will you stop by.
HOST CODE
My October Host Code is SXDVJZF3 Please use this code for orders under $150.00. I will have a small perk for those with orders over $50.00
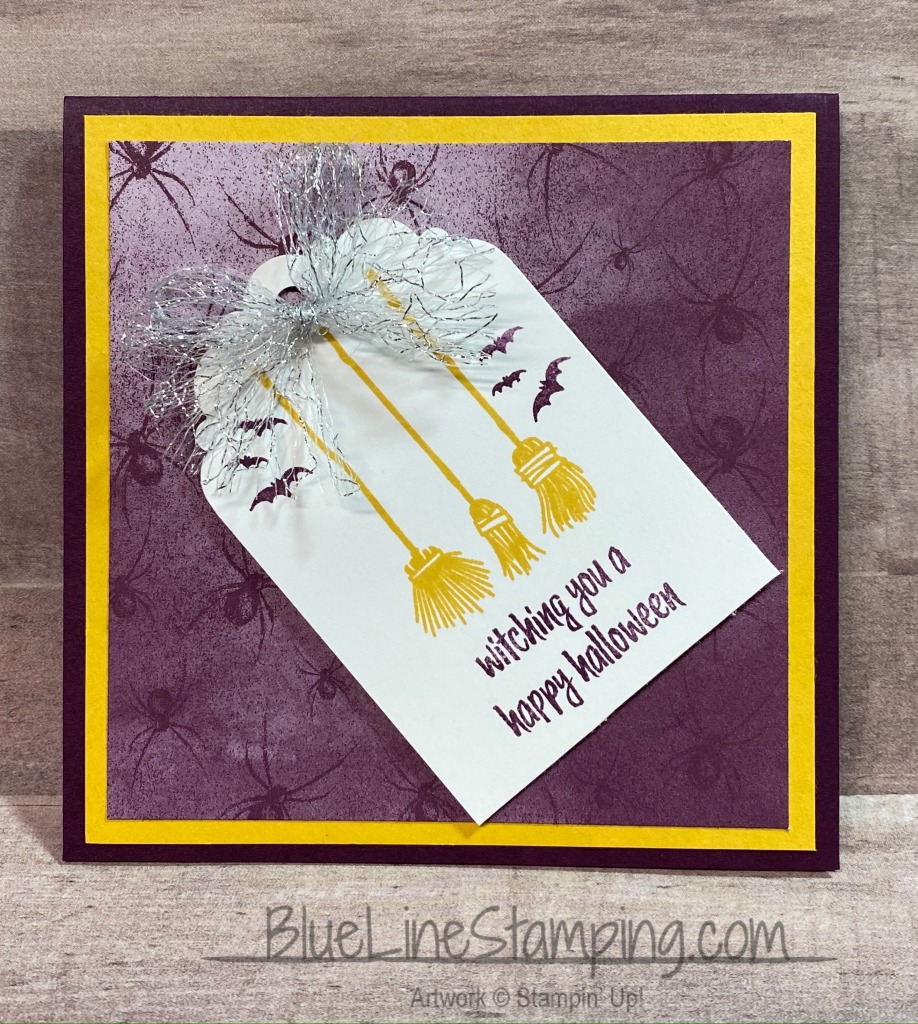
Today’s card is another quick Halloween card. I made several to use with my Drop Off type Halloween gifts to my service providers. I love giving the people I see at my local businesses, like my pharmacy, little treats as a Thank You for being so awesome! And it just so happens to include another of the 15% OFF DSPS. They are all shown at the bottom of the narrative.
This card is very similar to one I did about a month ago. I just love the 4 X 4 and simple layouts for cards I am making multiples of. And a purple with Halloween is my favorite color to work with. For this card I paired the Blackberry Bliss spider paper from the Magic In This Night Designer Series paper, with Bumblee card stock and ink.
The stamp set is the Festive Post set. It includes stamps for the next several upcoming holidays. Plus it pairs with the Rectangular Postage Stamp Punch. Although I did not use the postage stamp punch, I did pair it with a tag punch. I used the Delightful Tag Topper Punch on this card. I completed the tag with a bow made using the Metallic Mesh Ribbon.
Thank you for stopping in today. I have one of my Slim Line Cards to share with you tomorrow.
HOST CODE
My October Host Code is SXDVJZF3 Please use this code for orders under $150.00. I will have a small perk for those with orders over $50.00
I mentioned yesterday that I was behind on Birthday cards. So I have another one to share today. I also used another of the DSP that are included in the 15% OFF Sale. This one is a favorite of almost everyone in terms of the texture it gives to a card. Can you guess which one that is?
If you guessed In Good Taste Designer Series Paper as the DSP, you are correct! This piece is my favorite of all of the ones in the pack. Misty Moonlight is my favorite of the new In Colors, and this piece has a touch of Misty Moonlight in the folds on the paper.
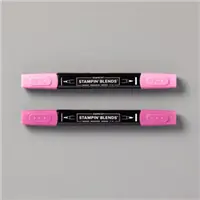
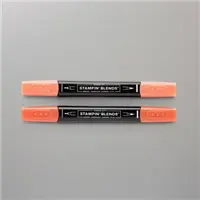
A little bit of a different touch to this card is that I stamped directly onto the DSP. I love how the texture shows through these poppies. I still colored them using the Stampin’ Blends in Just Jade and Purple Posy.
For the focal point, I stamped the single flower image and then die cut using the Stitched Nested Labels Dies. I used the 4th from largest die. I colored this flower using the same Stampin’ Blends. Then to give it a little background, I used the marker flick to give the splatter look. I used the Misty Moonlight Stampin’ Write Marker and flicked the brush tip against the inside of the lid to “splatter” the card stock. I wanted to tie in that piece to the DSP without doing a background layer.
The focal flower is raised with Dimensionals. I also added a bow tied using the blue and white baker’s twine from the Flowers For Every Season Ribbon Combo. It was just enough of an extra touch.
Thank you for stopping by today. Please return tomorrow and I will have another new project to share.
HOST CODE
My October Host Code is SXDVJZF3 Please use this code for orders under $150.00. I will have a small perk for those with orders over $50.00
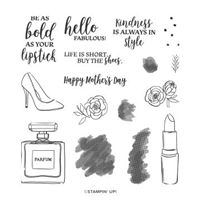
I have been focusing on holiday cards lately and now find I need quite a few birthday cards. So I have a really cute one for you today. It contains a fun stamp set and gorgeous DSP!
I really like all of the Green in the Forever Greenery Designer Series Paper. (And YES, it is one of the papers that are included in the 15% OFF Sale. I have all of them listed below!) The different greens were the basis of the card. I paired Pretty Peacock with Just Jade for the main colors.
All of the stamps I used are from the Dressed To Impress stamp set. For the perfume bottle, I stamped it using Just Jade Ink. I then added the squiggly to the bottle in Pretty Peacock Ink. To finish it off, I colored the remaining parts of the bottle with the Dark Pool Party Stampin’ Blend. As I said, I LOVE how all of the greens work together! I also stamped it again on some scrap paper and fussy cut the perfume label. It is raised with a dimensional for a bit of definition. I added a few Rhinestones for some Bling! A girl definitely needs bling!
Today’s Measurements are:
4 1/4 X 11 card base
4 X 5 1/4 for white layer
Jade is 3 1/4 X 4 3/4
DSP is 3 X 4 1/2
Perfume base layer is 2 1/8 X 2 5/8
Perfume white layer is 1 7/8 X 1 3/8
sentiment base layer is 1 1/4 X 3 1/4
sentiment white layer is 1 X 3
Thank you so much for stopping by today! I hope you like today’s project and will return tomorrow for another new card idea.
HOST CODE
My October Host Code is SXDVJZF3 Please use this code for orders under $150.00. I will have a small perk for those with orders over $50.00
The content in this blog is the sole responsibility of Jackie Beers as an Independent Stampin' Up! Demonstrator. The use of and content of classes, services or products offered is not endorsed by Stampin' Up!