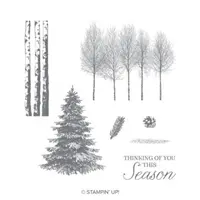
I have a quick and easy Christmas card to share with you today. I have combined the Winter Woods stamp set with some matching DSP for a cute Christmas Tree card.
The beautiful tree is from the Winter Woods stamp set and stamped using Shaded Spruce Ink. I love the detail in the stamp! I paired it with a similar looking tree on the DSP from the Tis The Season Designer Series Paper.
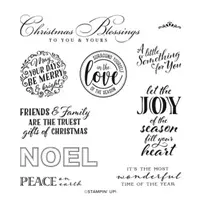
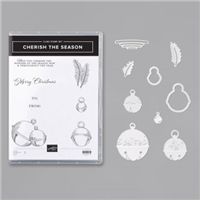
The sentiment is from the Cherish The Season stamp set. I love the beautiful script of the sentiment. The ground beneath the tree is stamped in Pool Party. For the finishing touch I added the darker red rhinestones from the Holiday Rhinestones.
Today’s measurements:
base of Shaded Spruce is 4 1/4 X 11
Cherry Cobbler is 4 1/8 X 5 3/8
DSP is 4 X 5 1/4
Whisper White is 3 3/8 X 4 7/8
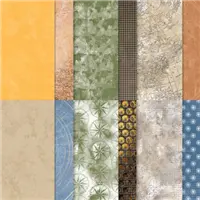
Thank you for stopping in on this last Friday of October. Wow, where has the month gone!! And as it is almost the end of the month, the DSP Sale is almost over. The 15% off Designer Series Paper sale ends tomorrow night. The Tis The Season I Used today is one of the packs included. All of the ones included in the sale are shown below.
HOST CODE
My October Host Code is SXDVJZF3 Please use this code for orders under $150.00. I will have a small perk for those with orders over $50.00
I love little 3 X 3 cards to have as Random Act of Kindness cards. I have handed out quite a few during this crazy year. A friend of mine loves them as well. So I keep her supplied, which in turn inspires me to use them. Here are the latest ones I made for her to use.
I made five of each version. There are only two versions, I just liked the picture with the three. LOL!
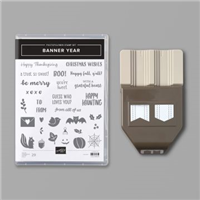
I used the Banner Year stamp said and paired it with the Plaid Tidings Designer Series Paper. REMINDER: That is one of the DSP in the 15% Off Sale at the bottom of the post. It ends on Saturday!!!
The base of the card is Thick Whisper White card stock cut to 6 X 3 and folded in half. The DSP is cut 2 7/8 X 2 7/8. The stamped piece is regular Whisper White and is cut 2 X 2. I placed those on the diamond shape just as a contrast to all the plaid.
All of the stamped images are from the Banner Year stamp set. This is a wonderful set that has greetings and images for most times of the year, but especially the Fall through Valentine.
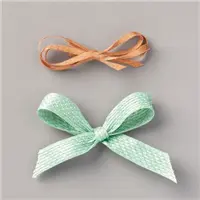
As a finishing touch, I used the Daffodil Ruched Ribbon on the Pretty Peacock Plaid and Cinnamon Cider Ribbon for the bolder pattern. The gold heart at the top is a retired item. I felt that because of the sentiment , With A Grateful Heart, I needed a heart!
Thank you for stopping by today. I appreciate your visits and your comments. Please come back tomorrow for another new project.
HOST CODE
My October Host Code is SXDVJZF3 Please use this code for orders under $150.00. I will have a small perk for those with orders over $50.00
Last Wednesday I shared a great Fun Fold card for the InKing Royalty Blog Hop. I made a slim card using the same fold that I am sharing with you today. This fold is a CASE from Paula Butler and a card I received in a swap we were part of. I LOVE this fold and all of it’s possibilities.
And here is the open view:
As you can see from this open view, it is also a gift card holder! WooHoo. This version of the card has the top focal layer pushed to the left. This allows room for the sentiment, which is a bit long, to go to the right side. One of the things I love about this fun fold is that you can move that center section to wherever you want it to accommodate different elements. And you could eliminate the gift card slot as well.
This gorgeous DSP is the Snowflake Splendor Designer Series Paper. I think having the various shades of blue along with the Highland Heather makes it very special! I love traditional Christmas colors, but I also like “different” some times. This definitely fits that bill!
The snowman and sentiment are from the Snowman Season stamp set. It is in the Annual Catalog and was a carry over from last year. There is a matching punch as well. The inside sentiment is from the Wrapped In Christmas stamp set.
I have the measurements for this card just below. You can click HERE to see the slim line card I did using the same Fun Fold.
Measurements:
Base card of Highland Heather is 4 1/4 X 5 1/2
Center folded / gift card layer is 3 1/8 X 10 1/2, scored at 4 1/4 and 8 1/2
Fold the 8 1/2 score line to the inside for the gift card pocket
Inside Whisper White layer , and front stamped layer, are 2 7/8 X 4
Left side DSP is 3/4 X 4
Right side DSP is 1 1/4 X 4
Gift slot DSP is 2 7/8 X 1 3/4
Sentiment layers are 1 1/4 X 3, and 1 X 2 3/4
Regarding assembly: For me, it was easiest to apply to DSP pieces on each side allowing the same spacing on the outsides. Then simply fit the center piece into place. The center piece fits flush with the top and bottom of the base card.
Thank you for stopping by today! Please come back tomorrow for another new project.
HOST CODE
My October Host Code is SXDVJZF3 Please use this code for orders under $150.00. I will have a small perk for those with orders over $50.00
You all know that I LOVE Gift Card Holders. I have one to share today that I have made several variations of for classes this year. The one I am showing you is made with two of my favorite products from the Mini Catalog.
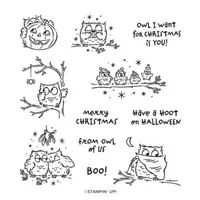
I paired the super cute Have A Hoot stamp set with one of my all time favorite DSP, the Heartwarming Hugs Designer Series Paper. I also used the Wrapped In Christmas stamp set as well.
Somehow I failed to take a picture of the inside of this version! DUH!!! But I have a picture of one of the other versions. Other than the DSP, it looks the same. So here is the inside view.
The only difference on this inside view, is that I added the Circle Die cut to the top. This allows the gift card section to tuck underneath it for a closure.
I love this fold and layout. It allows quite a lot for your stamped and written sentiments, as well as the gift card slot.
Here are a few different versions of the same fold.
Here are the measurements for the top photo and the inside.
base card is Whisper White Thick cardstock cut 4 1/4 X 11, scored at 1 1/2, 5 1/2
Fold and burnish the score lines. The 1 1/2 is the gift card holder. Fold it to the inside. Place a gift card or business card into the slot as you secure it with Tear & Tape. This allows a bit of extra room so that the card does not tear the paper when added later.
When closed, the fold of the card (the 5 1/2 score line, is at the bottom.
The DSP is cut to 4 X 1 1/2 and 4 3 3/4 for the front. The gift card slot DSP is 4 X 1 1/4
The front layer is 2 X 3 1/8 and 1 3/4 X 2 7/8 for the owls.
The inside sentiment layers are 4 X 3 3/4 and 3 3/4 X 3 1/2
The top circles are cut using Layering Circles Dies. It is added with dimensionals that are placed center and top. This allows the bottom portion of the card to tuck underneath.
Reminder that the Designer Series Paper sale is almost over. It ends of the 31st!! This is a great deal on the papers shown below.
Thank you for stopping by today. I very much appreciate it and love to get your comments. I do respond individually to each response. Please come back tomorrow for another new project.
HOST CODE
My October Host Code is SXDVJZF3 Please use this code for orders under $150.00. I will have a small perk for those with orders over $50.00
If you follow my blog, and I hope you do!!, then you know how much I love different folds. I have a couple of new ones to share this week. I had a doctor’s appointment last week and forgot my book. So I spent quite a while looking at Pinterest and seeing different ideas to CASE. I generally case layouts and folds, but as stampers we are always getting ideas from different places and things. Today’s Fun Fold is a Case of fellow Demonstrato Patty Bennett. She actually shared her version of this card last Tuesday.
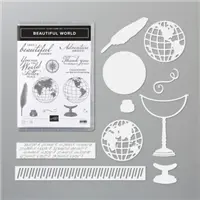
For my version of the Fun Fold, I used the Beautiful World Bundle, and paired it with the World of Good Designer Series Paper. The left side of the front is a new Sneak Peek DSP it is the Classic Christmas Designer Series Paper. It paired perfectly with the other DSP.
Actually the Classic Christmas DSP is part of a bundle of products that will be available for purchase in November.
Here is another view of the Fun Fold.
I love how this fold allows the continuity of this gorgeous DSP. It would work with any paper, but a pattern, that is cut correctly, really looks great. And it is simple to cut once you see the card. I chose the map and the simple black globe from the Beautiful World for a clean and masculine look. The globe layer is a Crumb Cake layer cut using the Stitched Rectangle Dies.
Here is a totally opened up view.
There is not a lot of room to write your note, but I believe it is adequate. This sentiment seems just perfect for the narrow piece of Whisper White.
Here are the measurements for the card and the cutting.
Base of card is 5 1/2 X 8 1/2 scored at 1 1/2 and 4 1/4
Fold and burnish all of the score lines. The short fold, folds backwards onto the front.
Cut the DSP to the proper orientation. In this case to landscape (sideways) and cut to 6″.
Then cut the height to 5 1/4.
Now place back in landscape mode and cut at 2 3/4, and 1 1/8. This leaves the last piece at 2 1/8. All are 5 1/4 high.
Look at the closed photo. You will see that the front DSP goes from the small folded flap over to the right edge of the card. It does not just fit on that narrow flap.
Adhere the pieces beginning with the 2 3/4. Open the card and adhere the 1 1/8 on the right side of the center section. Adhere the last piece to the left side of the back section.
The Whisper White layer with the sentiment is 1 7/8 X 5 1/4.
I added the front left DSP because my focal layer was the same as the base layer. It is the Classic Christmas DSP and is cut 2 1/2 X 5 1/4
Thank you for visiting today. I hope you enjoyed this new fun fold and will do a CASE yourself.
HOST CODE
My October Host Code is SXDVJZF3 Please use this code for orders under $150.00. I will have a small perk for those with orders over $50.00
I have fallen in love with the Gnome For The Holidays stamp set after passing it by a few times in the catalog. Today I have paired a sweet little gnome with the Snowflake Splendor Designer Series Paper. And yes, it is one of the DSP that are on SALE for 15% Off. You can see all of the ones that are on sale at the bottom of the post.
I think this little guy is just too cute!! And matching his clothing with the gorgeous colors from the DSP is a perfect pairing. All I did as an add on are to add a few of the Adhesive Backed Snowflake accessories.
This card is a quick one. A couple of layers of paper, two stampings, a little coloring, and finished card! This will probably be one of my mail out Christmas cards for this year.
Here are the measurements for this little card.
Base card is Thick Whisper White cut 4 1/4 X 11
Pacific Point layer is 3 1/4 X 5 1/2
DSP layer is 3 X 5 1/2
Highland Heather layer is 2 1/4 X 3 1/2
Stamped layer is 2 X 3 1/4
I have all of the supplies used listed at the bottom of the page. And just below here are all of the DSP that are on sale through the end of this month.
Thank you for stopping by today! I hope you have a great weekend. Please come back on Monday for another new project.
HOST CODE
My October Host Code is SXDVJZF3 Please use this code for orders under $150.00. I will have a small perk for those with orders over $50.00
I have a cute card with a small extra fold for you today. This is one that I have done previously. Just not recently. It is a way to show off both sides of Stampin’ Up!s gorgeous Designer Series Paper.
I love just the corner turned down to give you a view of the other side of the DSP. This is of course the Tis The Season Designer Series Paper. And it is part of the 15% OFF Sale through the end of the month. All of these sheets are beautiufl!
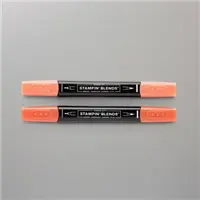
I used the Tag Buffet Stamp Set for the Ornament. I thought a pretty ornament hanging from the folded edge would make a nice, clean looking card. I colored the ornament with Stampin’ Blends to match the two colors of the card. Shaded Spruce and Cherry Cobbler are these gorgeous colors.
For the sentiment I went with the A Merry Hello Stamp set. It is a Host Rewards set from the Mini Catalog. As I was deciding on the sentiment to use, I noticed the “2020”. I have always been a huge fan of Christmas Ornaments! The Hallmark ones were always special. And I always got one with the year on it. When I saw the year, that is what I thought of. So of course I made a special year ornament. This year will definitely be one to remember!
Here is a quick view of the inside as well. I showcased the Cherry Cobbler side of the DSP using the strip I cut off. I also used an additional sentiment from the A Merry Hello Stamp set.
Measurements:
Base card is 5 1/2 X 8 1/2 scored and folded at 4 1/4
Whisper White layer is 5 1/4 X 4
DSP layer is 5 1/8 X 3 7/8, folded at top right corner enough to show sentiment
Inside Whisper White is 5 1/4 X 4
Inside DSP is 3 7/8 X 7/8 ( piece cut from 6X6 for front)
Thank you for stopping by today! I will have another project to share tomorrow, so I hope you will check in then.
HOST CODE
My October Host Code is SXDVJZF3 Please use this code for orders under $150.00. I will have a small perk for those with orders over $50.00
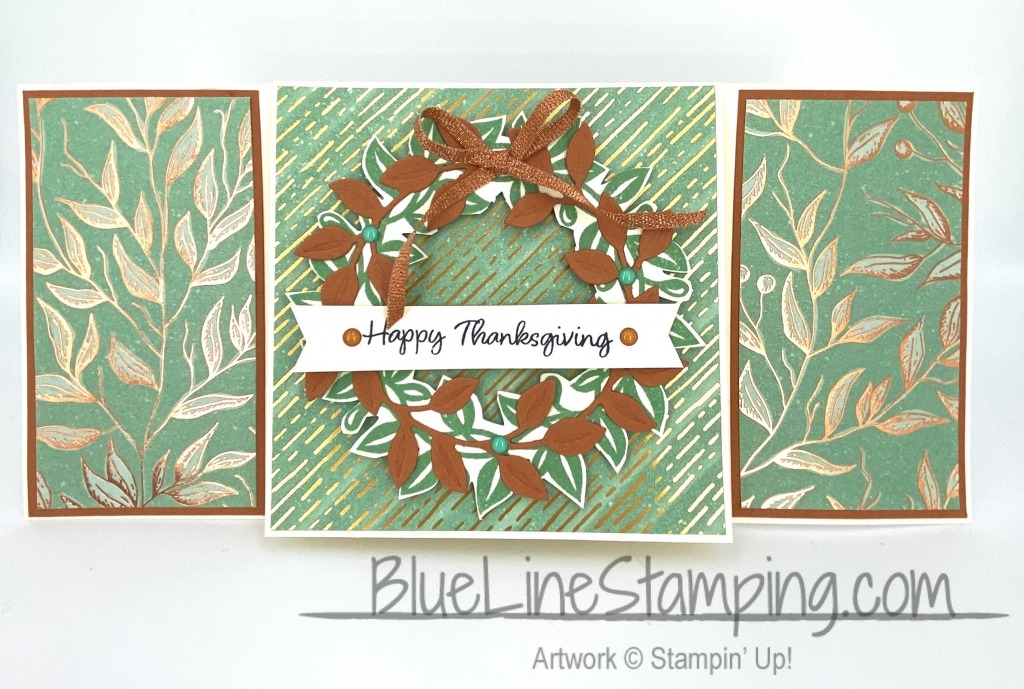
Welcome to InKing Royalty’s October Blog Hop! During this year’s blog hops, we are enjoying a year of celebrations. This month’s projects celebrate Thanksgiving, so prepare yourself for Autumn landscapes, warm colors and sweet reminders of all the reasons we have to be grateful this time of year. We are excited to share our creations with you today! After you read my post, I hope you’ll hop over to the next person on the list at the base of this post.
This month’s theme is right up my alley. Every year I really enjoy making Fall Cards and those that say we are Grateful. I also tried a new card layout.
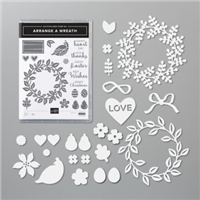
The Focal point of the card is the Wreath! I love the Arrange a Wreath Bundle. I feel it is really showcased here. The background of the wreath is stamped using Mint Macaron on Very Vanilla card stock. I sort of fussy cut around the outside of the wreath, but not overly detailed. I then did the same for the inside. The Cinnamon Cider wreath is not stamped on. It is only die cut using the wreath die. The embossing of the leaves is part of the die! I love that.
The banner across the wreath made me very happy! I played with different versions for getting the sentiment. I used the Banner Year Bundle for the sentiment. It does not really show in the picture, but I used my bone folder to curve the banner just a little. So it looks wavy across the front of the wreath.
The finishing touch to the wreath is the bow. It is the Metallic Ribbon from the Basket Weave and Metallic Ribbon Combo. And it pairs beautifully with the gorgeous DSP. This is one of my all time favorite DSP. It is the Gilded Autumn Designer Series Paper.
And here is the inside of the card . This also shows the different fold I mentioned at the beginning. I have made a couple of regular size cards with this fold. (I got the fold from fellow Demonstrator Paula Butler in a beautiful card for a card swap) I just stretched it out quite a bit for this Slim card.
You can see that only the center raises up. To finish the inside I stamped the Mint Macaron Wreath again and then added the sentiment. The sentiment is also from the Banner Year set.
Measurements: This card fits into a regular A10 Envelope
Thick Very Vanilla card stock base is 4 X 8 3/4
Very Vanilla center layer is 4 X 8, scored at 4 and folded
Center DSP is 3 7/8 X 3 7/8
Cinnamon Cider side layers are 3 7/8 X 2 1/8 (need 2)
DSP side layers are 3 3/4 X 2 (need 2)
I could not get the pictures to look as it should. I am still playing with new photography and the Slim Line Cards are an added challenge in this! So I apologize for my larger than necessary watermark.
Thank you for stopping by today. I hope you’ll hop along to the next stop on the blog hop, Candy Ford at Stamp Candy. There’s lots of inspiration to be found in this group – and you don’t want to miss it!
Thank you for hopping along with us. If you get stuck during the Blog Hop, please use this line-up as a guide:
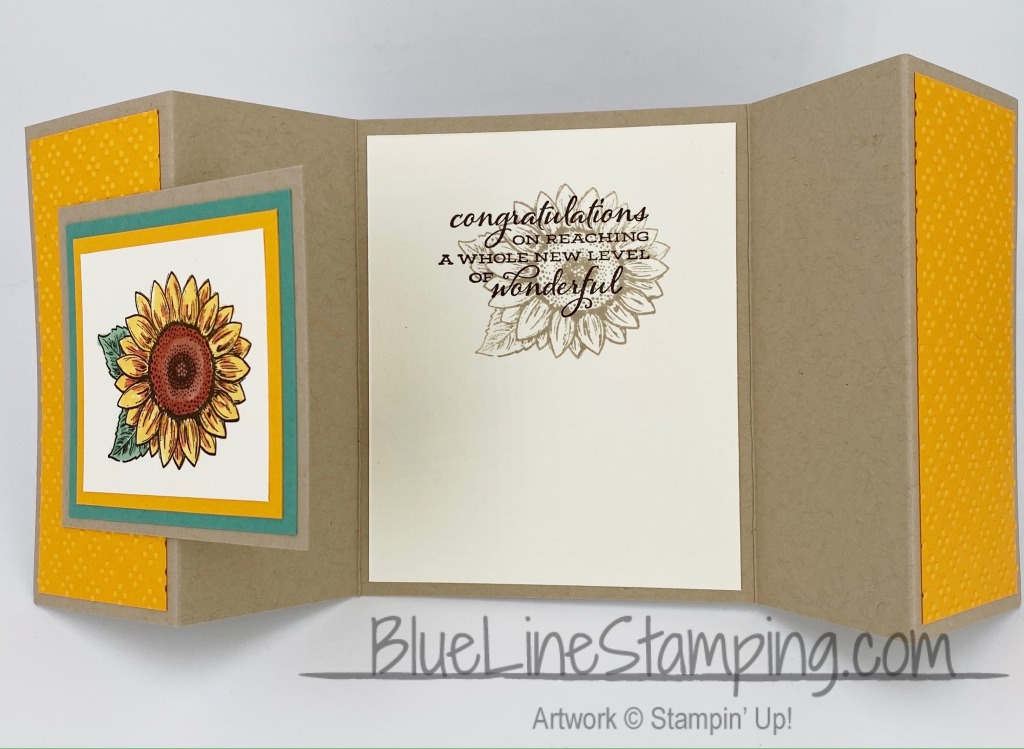
My Fun Fold today is another find in my craft room. This fold was one I had done many years ago. So now it is new again! I called it a Tri-Fold. Although I am sure it had a better name at one time.
I adore this Celebrate Sunflower stamp set. I have used it many times. And since I love coloring, as you can tell if you follow me, It is perfect for coloring. I used a variety of Stampin’ Blends and will have all of them listed in the Supply List. But I stamped the flower using Early Espresso Ink and colored the petals with Mango Melody. The highlights are Calypso Coral.
I feel like I sometimes use too much Designer Series Paper. And then I think there is no such thing!! Before I got so attached to the DSP, I previously used a lot of different Embossing Folders for my backgrounds. For this card, I decided to go with the embossing. This is one of the two folders in the Wrapped In Texture Embossing bundle. They are both wonderful, but I thought the little dots went with the center of the sunflower. Note: These embossing folders are the narrower ones and will work in the Mini Cut & Emboss Machine when it becomes available.
Here is a look at the inside and how it opens.
As you can see, I stamped the sunflower on the inside as well. This time I used Crumb Cake and then stamped the sentiment in Early Espresso. All of the stamps are from the Celebrate Sunflower set. The only difficult thing about this card, Is remembering to only add adhesive to half of the back of your focal layers! It only attaches to one side. Ask me how I know this !!!!!!! 🙂
Measurements:
base of Crumb Cake is 4 1/4 X 11, scored at 2, 3 3/4, 7 1/4, 9
Fold and burnish all score lines and then fold into mountains on each side of the square center.
the Inside Very Vanilla layer is cut to 3 1/4 X 4
The front embossed areas are Mango Melody cut to 1 3/4 X 4 (need 2)
The center layers are largest to smallest: 3 X 2 5/8, 2 3/4 X 2 3/8, 2 1/2 X 2 1/8, 2 1/4 X 1 7/8
Thank you for visiting today! Please come by tomorrow. I will be participating in the InKing Royalty Blog Hop. There will be great projects for you to see.
HOST CODE
My October Host Code is SXDVJZF3 Please use this code for orders under $150.00. I will have a small perk for those with orders over $50.00
I hope you have noticed the Red and Green Foil Paper in the Mini Catalog! I worked with it for the second time on today’s card. It is so very nice! The first project with it was the Christmas Tree I used last week on the Pals Blog Hop. I added a Green Foil Tree to the Hand Sanitizer and the matching Gift Tag. Today I have chosen to use it on some Jingle Bells.
Those bells look amazing in the Green and Red Foil paper. I stamped the greenery from the tree in Shaded Spruce and then just glued the bells to the branches. It was really easy to make the “tree” branches using the stamp of two stems. And I really love Shaded Spruce for the tree color.
The sentiment is from the set Christmas Means. Those are all adorable sayings from different Christmas Movies.
Measurements:
Card base in Shaded Spruce cut 4 1/4 X 11 and scored at 5 1/2
Real Red layer cut to 4 X 5 1/4
Tis The Season DSP cut to 3 3/4 X 5
Shaded Spruce center piece cut to 2 3/8 X 4 1/2
Whisper White stamped layer cut to 2 1/4 X 4 3/8
Thank you for stopping by today! Please come back tomorrow for another new project. I have all of the products I used listed in the Supply List at the bottom of the page.
HOST CODE
My October Host Code is SXDVJZF3 Please use this code for orders under $150.00. I will have a small perk for those with orders over $50.00
The content in this blog is the sole responsibility of Jackie Beers as an Independent Stampin' Up! Demonstrator. The use of and content of classes, services or products offered is not endorsed by Stampin' Up!