For those of you who follow me each day, I apologize for missing yesterday’s post. I did not have internet!! Isn’t it crazy how we are so used to having this cyberspace wonder? So funny !! Anyway, all is well in my world again. So here is a big Thank You card.
One Big Meaning, 139420
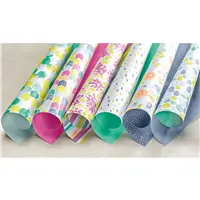
This Designer Series Paper, Naturally Eclectic DSP, is so bold that it wanted to be the star of the show. So I said okeedokee and let it have it’s way. This made for a super quick and easy card.
I pulled the colors from the DSP, Night of Navy, Lemon Lime Twist, and a touch of Whisper White. I used the, new to the 2017 annual catalog, Starburst punch as the surround for the sentiment. And that is all there was to it.
Thank you so much for visiting today! I have listed the upcoming specials that Stampin’ Up! has ready for October 1st. Please take a look and let me know if I can answer any questions or be of assistance.
The supplies I used are listed below. You can click on any item and be taken directly to my online store.
There are two wonderful Stampin’ Up! Specials in October………
World Card Making Day Sale October 1-10, 15% off select card making essentials. See details HERE.
Designer Series Paper Sale October 1-31, Buy 3 Get 1 FREE! See details HERE.B3G1DSP_Flyer_US
This card is my first using the Year of Cheer Specialty Designer Series Paper. Oh My !! This paper is gorgeous. The picture of my card, and the photos in the catalog, do not do it justice. It is awesome !
Labels to Love, 144967
My plan was to showcase the beautiful DSP and the oversized banner was what I chose. Because of the gold, I could not decide on a base color. By going with the white, it keeps it clean, but I needed something to highlight the gold. So I decided to add the little bit of black.
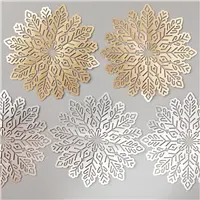
I have been trying to use these beautiful Foil Snowflakes since I got them before the catalog even went live. And all of a sudden there it was, the perfect spot for the snowflake! I added the strip of black as if the snowflake is a wreath or a hanging ornament. I am not sure which idea I prefer.
The sentiment is from the “must have” set Labels To Love. The set covers several holidays. This sentiment I believe can be used at any time. I rarely heat emboss, ( maybe once a year! ). However with the gold in the DSP and the snowflake, I had to emboss the sentiment. I am so proud of myself that it turned out well.
Thank you so much for stopping by today! I very much appreciate you looking at my creations and for the nice comments.
The supplies I used are listed below. You can click on any item and be taken directly to my online store. Thank you again!
I showed a Smooshing technique card a few days ago. And now I have tried it with a little bit of a twist. The results may be questionable !!
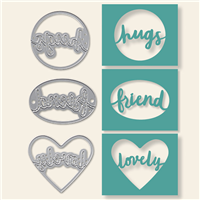
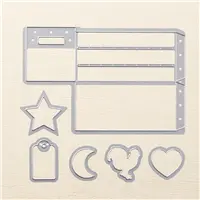
Lovely Words Thinlits Die, 143733
You can see my first attempt using the original method by clicking HERE. Julie DiMatteo was who I copied in my previous card and her video is wonderful. You can see her video HERE on the original Smooshing Technique. This one sort of looks like a child’s fingerprinting gone bad!! But it was fun to make, and for me that is what matters.
The “Take Two” is that instead of putting the ink refill drops on a plastic sheet and then touching the other plastic to it, I just dropped the ink refill droplets onto the Glossy card stock. I did not add water. I simply touched a acetate sheet to the drops and spread it around.
I chose the Thinlit Die Lovely Words to use as the focal point on my card instead of covering up the Smooshing I did. This is such an easy and quick way to add words to a card. And the Multi-purpose Adhesive Sheets are a must. I would have glue everywhere if that was how I tried to adhere this. Thank You Stampin’ Up! for bringing these back in the catalog!!!
Thank you for visiting today! I appreciate you stopping and checking out my cards. The supplies I used are listed below. You can click on any item and be taken directly to my online store.
I seem to be on a Fall card making theme. Today’s card is from one of the most versatile stamp sets, or the entire suite, that Stampin’ Up! has. It is the Color Theory Suite and the Colorful Seasons Bundle. I love everything in this suite, but especially the bundle.
I just adore these delicate leaves from the Seasonal Layers Thinlits part of the bundle. And with the Multipurpose Adhesive Sheets they are a piece of cake to adhere. After I placed the leaves it seemed like I really didn’t need anything else!
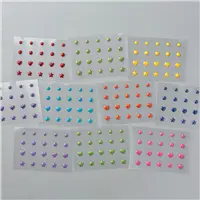
I sponged the background of the leaves and then splattered the open space. I know technically you are supposed to do things in 3’s, but I only added 2 of the Enamel Shapes. I just wanted to highlight the sentiment. I say “rules are meant to be broken” …..in some cases!!
Thank you for visiting today! I appreciate your comments very much.
Please do not forget to look at this Awesome special for Paper Pumpkin. New Subscribers can try their first month for 50% off. That means it is only $10.00 to get the first box. The contents are worth well over that amount. There is no obligation to continue the subscription. But I hope you will fall in love with it as I have. If you decide that you do not want it after the first, or even the tenth, you simple go to the website and cancel. It is that easy. So give it a try at this half price rate.
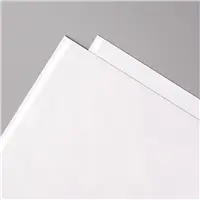
I did a technique on today’s card instead of a lot of stamping. The Direct To Paper Technique has been around forever. It works best on Glossy card stock, and SU has recently brought Glossy back to our catalog. YAY!! So I thought I would share the technique with you. I have added a little twist to it. I have the spotlighted the first card and then the three in a group photo are further down.
Glossy Card Stock, 144240
The Direct To Paper technique is like making your own Designer Series Paper. You simply swipe the ink pad across your card stock. I used just the edge of the pad and made a random swoosh. How easy is this???
The twist I mentioned is that instead of using the regular ink pads, I used the Stampin’ Spots. The ones I used are from my Paper Pumpkin kits. (Yet another reason to join the Paper Pumpkin monthly kit club!!) Although you can purchase Uninked Stampin’ Spots in the catalog and ink them using your Classic Stampin’ Ink Refills. I prefer the spots as it gives me a little more control. But it is personal preference and depends on the look you want to achieve. This is another technique that will never look the same way twice! Love that !!
Island Indigo has always been a favorite of mine, and when I added these two colors with it I was in Love!. FYI, if you are unfamiliar with Glossy card stock, it does make the colors look a little dull instead of bright.
I made two 1/4 sheet backgrounds, and then cut one into two squares for the 4 X 4 cards. Here are the three cards I made while I was playing.
Glossy card stock, 144240
I apologize for the glare on the full size card, my lighting is not great. But I hope you will give this technique a try again ,or for the first time.
***This is a great time to remind you of the Paper Pumpkin Special. Try your first month for only $10.00 !! You can cancel at any time. Besides the cute stamp sets that you get in the monthly box, you will also get at least one (and sometimes more) Stampin’ Spots in each month’s kit. I have a link below where you can order the next Paper Pumpkin.
MEASUREMENTS:
Full size card is 4 1/4 X 11 folded in half, and the layers are 4 X 5 1/4, and 3 3/4 X 5
The two smaller cards are 4 X 4 with the base 8 X 4, the layers are the largest scallop and largest straight from the Layering Squares Framelits. The glossy is 2 1/2 X 2 1/2
Please do not forget to look at this Awesome special for Paper Pumpkin. New Subscribers can try their first month for 50% off. That means it is only $10.00 to get the first box. The contents are worth well over that amount. There is no obligation to continue the subscription. But I hope you will fall in love with it as I have. If you decide that you do not want it after the first, or even the tenth, you simple go to the website and cancel. It is that easy. So give it a try at this half price rate.
Today’s card is for the Global Design Project’s 100th Challenge. I accepted Brian King’s challenge to CASE his card. You can go HERE to see all of the designer’s cards and play along as well. My card is made using the Daisy Delight Stamp set.
Daisy Delight, 143669
Most of the cards made with the Daisy Delight set have been with yellow daisies. So I wanted to be a little different! I used Peekaboo Peach and paired it with Wild Wasabi. However, to make a softer color I stamped off with the Peekaboo Peach for the flowers. The flower centers are Enamel Shapes in Regals (Cajun Craze).
The embossed background is the Petal Burst Embossing Folder. And the focal point is cut with the Stitched Shapes Framelits and then the Layering Circle Framelits. The sentiment is flagged by using the Banner Triple Punch and just barely inserting the strip of card stock.
Thank you for stopping by today. I hope you enjoyed the card and will go over to the Global Design Project to view others that have been CASED. Have a great day !
Please do not forget to look at this Awesome special for Paper Pumpkin. New Subscribers can try their first month for 50% off. That means it is only $10.00 to get the first box. The contents are worth well over that amount. There is no obligation to continue the subscription. But I hope you will fall in love with it as I have. If you decide that you do not want it after the first, or even the tenth, you simple go to the website and cancel. It is that easy. So give it a try at this half price rate.
The content in this blog is the sole responsibility of Jackie Beers as an Independent Stampin' Up! Demonstrator. The use of and content of classes, services or products offered is not endorsed by Stampin' Up!