I have a candy bar holder to share with you. This can easily be adapted to any size candy bar. I found these large Hershey candy bars on clearance at my local grocery store.
You can see this is a fairly large candy bar. I started with an idea from a pull out type holder I had received at a swap last year. The bottom on that one was closed just by pressing together with Tear & Tape. This is a hefty bar of chocolate, and I didn’t believe that would be sturdy enough. So I went with a more regular box closure. I did keep the pull out idea though.
Here is a picture of the pulled out candy bar.
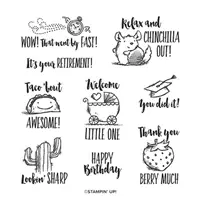
The Witty-cisms stamp set, new in the Mini Catalog 2020, was a must have for me. I love the cute stamps and sentiments. The strawberry and sentiment are one stamp and I stamped it three times to get the extra strawberries for decoration.
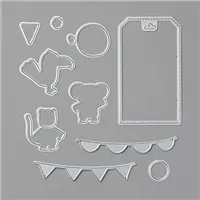
I die cut the tags using the Bonaza Die set tag. I cut one from Thick Whisper White and one from Cherry Cobbler. You could also use one of the tag punches from SU if you prefer.
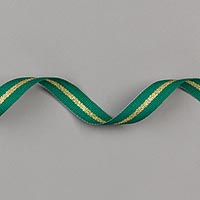
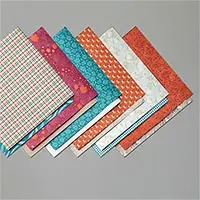
The background paper was a leftover piece of Come To Gather DSP. The ribbon is on the retiring list as well.
The measurements are as follows:
7 1/2 X 8 card stock
On 7 1/2 side, score at 1/2″, then rotate paper counter-clockwise
On the 8 side, with 1/2 score at the bottom, score at 3, 3 1/2, 6 1/2, 7
Fold and burnish on all the score lines
The 1/2″ score line is the bottom. Cut off the small right edge piece next to the 7″ score line
Cut up the scores up to the 1/2 ” mark. taper the small ones as tabs
Place Tear & Tape along the inside of the larger outside section as well as the bottom adjacent to it
Place Tear & Tape on the back of each tab.
Lay the paper down and fold the small section over, remeove the T&T from the large section and when folded over it should line up perfectly.
remove the T&T from the tabs and the bottom section. Square up the box, fold in the tabs, the flap without T&T and then the one with tape. once aligned stand it up on the table and use a ruler to go down and press on that bottom flap.
Use a hand held punch to center a hole through both layers near the top.
It took 17 ” of ribbon for this. So it is a good way to use up some retired ribbon. Run the ribbon from one side, through the other side and even it out. Place the candy bar into the top of the box and push down while trying to keep the ribbon even on each side. You should have enough ribbon left to tie a nice bow at the top.
Thank you for looking in today. I hope this gives you ideas for dressing up a candy bar. If you have any questions, please contact me and I will be happy to assist you.
HOST CODE
My January Host Code is X3U7BR2N. Please use this code for orders under $150.00. I will have a small perk for those with orders over $50.00.
The list below is the CARRYOVER List. Items from the Holiday Catalog that will carry over to the 2020 Holiday Catalog. They will not be orderable between the two catalogs however.
Welcome to InKing Royalty’s November Blog Hop! This year’s Blog Hop themes are inspired by a single word – and this month our projects are centered around GRATEFUL. Thanksgiving is tomorrow, and we are grateful you’ve stopped by. We are excited to share our Thanksgiving-themed or grateful-centered projects with you! After you read my post, I hope you’ll hop over to the next person on the list at the base of this post.
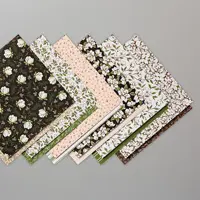
The card I made is definitely a “grateful” card, but with a more monotone look to it. My colors came from probably my most favorite designer series paper of all time, The Come To Gather DSP.
I have probably used every single piece of this DSP. Today I paired two that are both of the same tone. Maybe I misspoke on them being monochromatic. Whatever they are, I love them!!
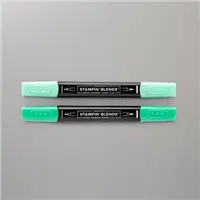
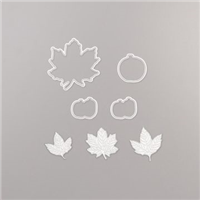
I die cut leaves using the Gathering Leaves Dies from Mint Macaron and Pretty Peacock. The die both embosses and cuts the leaves. I then added Clear Wink of Stella to the leaves for some sparkle. I decided to add a touch more and went with the Leaf Punch and punched two leaves using the Mercury Glass Designer Acetate.
The sentiment is from A Big Thank You stamp set and is stamped using Pretty Peacock Ink. It was then cut with the Stitched Rectangle Dies. The background sentiment layer is cut with these dies as well. The sentiment layer was shortened using the technique of matching up the “stitched lines”. I completed the card with a Whisper White Baker’s Twine bow.
For me It was very difficult to leave all of that open space. But I sat on my hands and wouldn’t allow myself to add more! LOL!!!
Thank you for stopping by today. I hope you’ll hop along to the next stop on the blog hop, Brian King at Stamp With Brian. There’s lots of inspiration to be found in this group – and you don’t want to miss it!
Thank you for hopping along with us. If you get stuck during the Blog Hop, please use this line-up as a guide:
REMINDER: The time is running out for the Christmastime Is Here suite of products, which includes the Christmas Rose Bundle. They will be gone after November 30th.
HOST CODE
My November Host Code is BT4ZSDCJ. Please use this code for orders under $150.00. I will have a small perk for those with orders over $50.00.
UPDATES:
The new Stampin’ Up! Paper Trimmer has been revealed!! It is available for order by Demonstrators on October 1. Here is a picture of it. I will be giving you my opinion after the beginning of the month. I cannot wait and I hope you will be just as excited! The trimmer will be available for customer orders beginning on November 1st. WooHoo!!
CHRISTMASTIME IS HERE SUITE BUNDLE: This can be ordered as a Suite Bundle with everything pictured, or individually to get just the pieces you want. The products will be available on November 1 for customers to order.
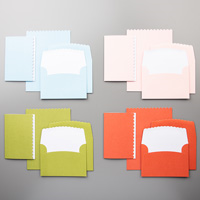
I adore the Scallop Notecards from Stampin’ Up! They are right up there with the Whisper White Notecards for my quick and easy Thank You cards. I needed one yesterday and was able to make a really cute one in no time.
Yes, I am still using the Magnolia Lane Designer Series Paper. It was on my desk and I only needed a strip. I backed the DSP with a piece of Early Espresso card stock. The sentiment is from the Goof Morning Magnolia stamp set. The flower is from that set as well. I stamped the flower in Smoky Slate Ink that was “stamped Off” once.
This Petal Pink notecard plays perfectly with the Magnolia Lane DSP. This would be a great little gift of several Thank You cards that are just so darn cute.
Thanks for coming by today. I hope you will return on Monday.
HOST CODE
My November Host Code is BT4ZSDCJ. Please use this code for orders under $150.00. I will have a small perk for those with orders over $50.00.
UPDATES:
The new Stampin’ Up! Paper Trimmer has been revealed!! It is available for order by Demonstrators on October 1. Here is a picture of it. I will be giving you my opinion after the beginning of the month. I cannot wait and I hope you will be just as excited! The trimmer will be available for customer orders beginning on November 1st. WooHoo!!
CHRISTMASTIME IS HERE SUITE BUNDLE: This can be ordered as a Suite Bundle with everything pictured, or individually to get just the pieces you want. The products will be available on November 1 for customers to order.
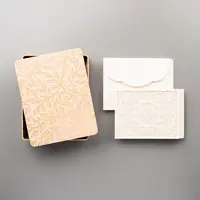
I have used the Bird Ballad Laser-cut cards previously. They come in a gorgeous metal tin, which is a gift in itself. I received one of the tin of cards at Brian King’s Fall event over the weekend and wanted to share the beautiful cards once again.
Brian had a Magnolia theme going at his event, and it rubbed off on me. That is what I used as well.
I think these cards are so pretty on their own. I added a piece of the Magnolia Lane Designer Series Paper behind the laser cutting. The DSP is cut to 4 1/8 X 5 3/8 and has a rolled up glue dot in each corner to secure it. The center decoration has Stampin’ Dimensionals behind it and they secure the DSP as well.
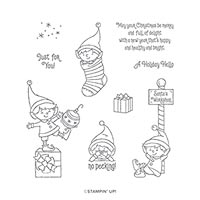
The center layer is a 2″ circle of the Magnolia Lane DSP that is layered on a Starburst punched piece of Petal Pink card stock. The sentiment is from #Elfie and is punched with the 1″ circle punch. It is backed by a piece of Mossy Meadow card stock punched with the 1 1/8″ scallop circle punch.
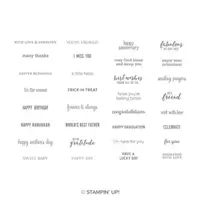
The couple of Thank you’s are from the Itty Bitty Greetings stamp set. They are punched using the Classic Label punch . To get the flagged tip, I re inserted the end into the edge of the punch and punched again.
Thank you for stopping in today. I hope you are having a great day.
HOST CODE
My November Host Code is BT4ZSDCJ. Please use this code for orders under $150.00. I will have a small perk for those with orders over $50.00.
UPDATES:
The new Stampin’ Up! Paper Trimmer has been revealed!! It is available for order by Demonstrators on October 1. Here is a picture of it. I will be giving you my opinion after the beginning of the month. I cannot wait and I hope you will be just as excited! The trimmer will be available for customer orders beginning on November 1st. WooHoo!!
CHRISTMASTIME IS HERE SUITE BUNDLE: This can be ordered as a Suite Bundle with everything pictured, or individually to get just the pieces you want. The products will be available on November 1 for customers to order.
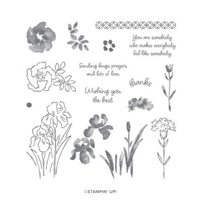
The card I am sharing today is quick, easy, and adaptable. I made a couple of this card with different occasions. I only put the sentiment on the outside for this one. It is the Thank You card. I also used it as a Birthday and a Sympathy card. This stamp set is simply a wonderful set to have in your stash.
This stamp set is Inspiring Iris. It is a two step stamp. Which makes giving it the color you want so very easy. I stamped the image three times in Memento Tuxedo Black Ink. I then stamped the flower in Highland Heather and the leaves and stems with Old Olive. And that is it!
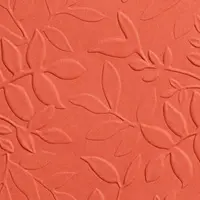
For the background I used the Layered Leaves Embossing Folder on Old Olive card stock. I thought it paired perfectly with the flowers. I love using an embossing folder in place of Designer Series Paper as a change up of my cards. I know I have been overwhelming you with DSP lately.
The “Thanks” in the upper left corner is a stamp in the Inspiring Iris stamp set. I added a pearl by the sentiment and on the center of the flowers just for a bit of extra texture and a little bling.
Thank you for stopping by today. Please come back tomorrow for another new project.
UPDATE: I updated my text with the new paper trimmer below, but I am mentioning here as well. Stampin’ Up! has announced that it will be available for customer orders on November 1st! WooHoo!! I have been using mine for all of my cutting as a test of the blades. I love it and it is still cutting beautifully!
HOST CODE
My October Host Code is BD2FGFTK. Please use this code for orders under $150.00. I will have a small perk for those with orders over $50.00.
UPDATES:
The new Stampin’ Up! Paper Trimmer has been revealed!! It is available for order by Demonstrators on October 1. Here is a picture of it. I will be giving you my opinion after the beginning of the month. I cannot wait and I hope you will be just as excited! The cutter will be available for customer order on November 1st.
CHRISTMASTIME IS HERE SUITE BUNDLE: This can be ordered as a Suite Bundle with everything pictured, or individually to get just the pieces you want. The products will be available on November 1 for customers to order.
A challenge I recently participated in was to do a Single Layer Card. That means to stamp directly on the folded base of the card. You can add an embellishment, but no other layers. These can be hard to do when you are accustomed to multiples layers plus a sentiment layer. I found a great stamp set to use though.
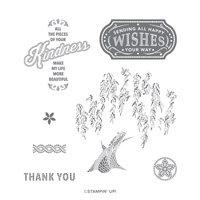
I chose the Memorable Mosaic stamp set and used the Weeping Willow looking tree. I love the definition these stamps give. I stamped the top with Mint Macaron Ink and it looks like it is two different shades of color. It is not, it is the stamp itself. LOVE!!!! The tree trunk is the same way. It is stamped in Soft Suede Ink.
The sentiment is from the stamp set Here’s A Card. I love that wording. I believe I will turn this card into a 3 X 3 with the same sentiment and use them as Random Acts of Kindness cards to hand out.
The only embellishments are the Noble Peacock Embellishments. The color compliments the Mint Macaron of the leaves.
Thank you for stopping by today! Don’t forget the Flash Sale that is today only!!! You can go directly to my online store HERE.
HOST CODE
My October Host Code is BD2FGFTK. Please use this code for orders under $150.00. I will have a small perk for those with orders over $50.00.
UPDATES:
The new Stampin’ Up! Paper Trimmer has been revealed!! It is available for order by Demonstrators on October 1. Here is a picture of it. I will be giving you my opinion after the beginning of the month. I cannot wait and I hope you will be just as excited! There is not a date yet as to when it will be available for customer orders. However, you can place it on a Starter Kit!! Hint, Hint !!
CHRISTMASTIME IS HERE SUITE BUNDLE: This can be ordered as a Suite Bundle with everything pictured, or individually to get just the pieces you want. The products will be available on November 1 for customers to order.
The content in this blog is the sole responsibility of Jackie Beers as an Independent Stampin' Up! Demonstrator. The use of and content of classes, services or products offered is not endorsed by Stampin' Up!


 UPDATES: