Happy New Catalog Day!! I made that up of course, but I am so thrilled to be able to order more new products. And I am sure you are as well.
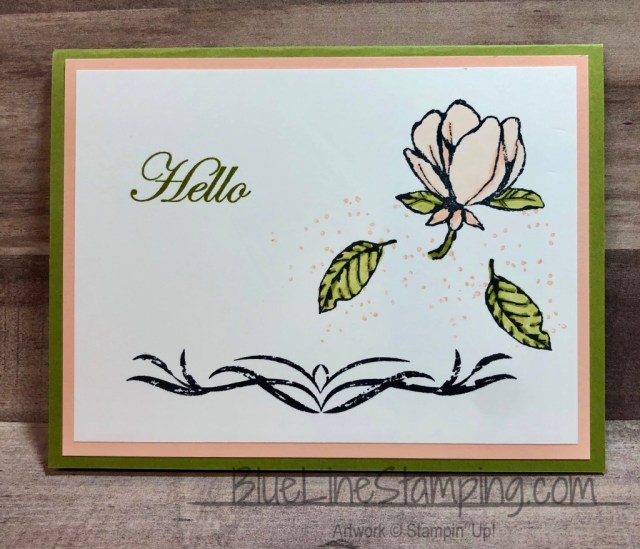
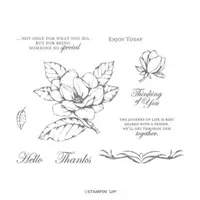
There have been quite a lot of samples of this Good Morning Magnolia stamp set. Last night I only had a few minutes to get today’s project ready. So I tried to do a quick and versatile card. I am very happy with what I came up with.
I see this layout as a group of Thank You , and just Hello type cards for a nice gift. I already have that picture in my mind with a cute decorative box to match.
I went with subtle colors for the magnolia to pair with. The speckle around the magnolia is, surprisingly, from the Birthday Backgrounds stamp set. I stamped off in Petal Pink to get the really soft splatter look. I felt that it needed just a bit of “something else”. So I added the two falling leaves. I like the way it turned out.
Thank you for stopping by today. I hope you will return tomorrow. The complete list of products is at the bottom of the post. There are not very many items used on this one though!
My June Host Code is M2PNZPVT . Please use this code for orders under $150.00. I will have a small perk for those with orders over $50.00.
Click on the Last Chance icon to go to my Online store. This will give you up to date what is left on the retiring lists. And if you would like to place an order, I have a Host Code just below the icon.
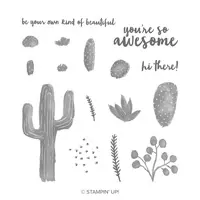
Today’s card is a CASE of a card I received in a swap with other PALs at OnStage in Charlotte. Unfortunately the maker’s card was not in the envelope, so I do not know who to give credit to for this cute card.
Flowering Desert, 148700
I gave the cactus a little flower on it’s head and added a touch of bling. Looking at it now though, it almost looks like a much too small little hat!! LOL!! I am going to stick with it being a flower.
The background is the Subtle Embossing Folder which gives just enough texture without overdoing it. I love the embossing folder for a variety of reasons. The cactus , flowers, grass are a variety of greens and Mango Melody.
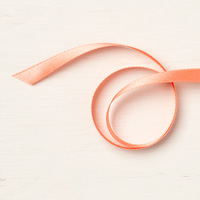
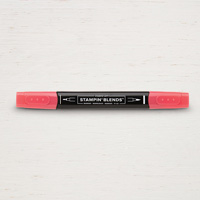
I added the ribbon in Calypso Coral with the layered sentiment for some depth. The sentiment received a flower and bling to match the cactus. This was a fun card to make!
Thank you for stopping by today. I really like this stamp set and think it was under showcased. It has the potential for some really sweet cards. Unfortunately it is on the retiring list.
I have included all of the supplies used today at the bottom of the post. Thanks again for visiting.
My May Host Code is XKQZNUBZ . Please use this code for orders under $150.00. I will have a small perk for those with orders over $50.00.
Click on the Last Chance icon to go to my Online store. This will give you up to date what is left on the retiring lists. And if you would like to place an order, I have a Host Code just below the icon.
If you place an order with me, please use the April Host Code of 3KNKXJFH. If your order is $75.00 (of product) or more, I will send you a small gift. If it is over $150.00 (of product) I will send you a small gift, but DO NOT use the code. 150.00 is the minimum host rewards so you get the host rewards.
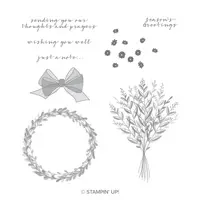
I know I say I love a stamp set quite often, and I do love so many of the sets. The one I am using today is the first of the “distinctive” type stamps that I fell for. It is the Wishing You Well stamp set. It was in the Holiday Catalog and carried over to the Occasions Catalog. Unfortunately it did not make the cut for the upcoming new Annual Catalog. (Insert Sad Face!)
So I had to make a quick and easy #simplestamping card with it. The set is just perfect for the simple stamping. The #simplestamping is a challenge that Sara Douglass (SU CEO) did back in November. It is going back to basics with Stamps, Paper, Ink. Sometimes I think we get carried away with the embellishments and layers. This is a great way to get back to basic stamping. Here is my card for today.
Wishing You Well, 147864
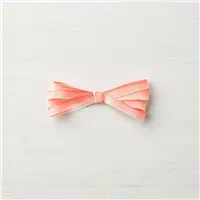
I have to say, my most favorite stamp in this set is the bow. It is so delicate looking but the shading the stamp gives is remarkable. Plus it is very easy to fussy cut if you wanted to raise it for another look.
I made this card with my Stamp Club yesterday. The only thing I did differently is add a couple of the Share What You Love Artisan Pearls to a few flowers. It draws your eye more to the flower. But I wanted to share with you the simpler version. All this card took was some card stock, two ink pads, and one stamp set. This would be a great one to make multiples of.
Thank you for visiting today. As always, the complete supply list is at the bottom of the post.
Click on the Last Chance icon to go to my Online store. This will give you up to date what is left on the retiring lists. And if you would like to place an order, I have a Host Code just below the icon.
Before I get to the project for today……There have been quite a few messages from Stampin’ Up! in the last couple of days. Some are well received and other not so much. One thing I have tried to tell myself is that change is good. Wether it is family, work, or fun, there will be change. So please do not panic over the discontinuing of the Stampin’ Trimmer and the Big Shot. My hopes are that the replacements will be even better!
The good and bad of the reception to the latest news is what inspired today’s card. Crafting is my hobby and I plan on doing it until I simply cannot get the body to work that way. So I was thinking of the “Keep Calm, and Craft On” sentiment and wished I had it. LOL!!! Here is today’s card.
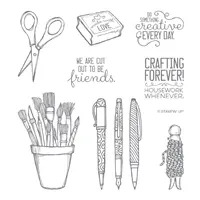
Crafting Forever, 143958
I used the Whisper White notecards and envelopes for the project today. No cutting or measuring, just stamp on the pre-scored card! It could not be easier to do.
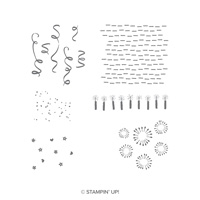
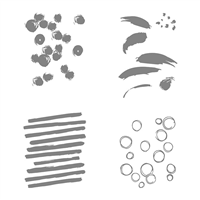
The two stamp sets I used here are from the annual catalog. The Crafting Forever is so great for quick cards for crafting friends. And the Playful Backgrounds goes with so many stamp sets as a subtle background. For this background, I stamped off one time for the stripes and then stamped full strength for the circles or bubbles (I’m not sure which they are?).
The stamp itself was stamped on a scrap, colored with Stampin’ Blends and then cut out. I raised it with a couple of dimensional. The final touch is the Calypso Coral Ombre Ribbon. I would love for SU to do more of this type ribbon. The subtle variations make it match so many more colors than the name itself.
Thank you for visiting today! I hope you enjoyed yesterday’s Pal’s Blog Hop and please come back tomorrow. All of the supplies, as limited as they are, are listed at the bottom of the page.
I have a card to share today that is pretty much an “any occasion” type card. It was really quick and easy to make. And it is almost a one stamp set card. At the last minute I decided to use a background stamp instead fo leaving the card base plain. Either would work wonderfully.
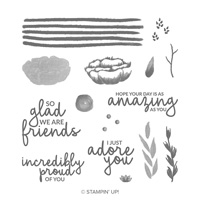
Incredible Like You, 148708
I love the sentiment, “You Are amazing”. Anyone would love to receive a card with that as the sentiment. I know I would. It may not show well in the photo, but the ends of the sentiment are torn instead of cut. It looks very nice in person but may not show well in the photo. I have been into “tearing” this week. Remember my card from Tuesday? LOL!
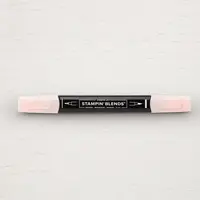
Other than the sentiment, the stamps are all from the Incredible Like You stamp set. I have a tip for you in stamping the flower. Normally I stamp the solid image first and then the definition image second. With the photopolymer stamps lining these two step images up is a piece of cake. Until I tried this very light color of Blushing Bride!! I could not really see the solid stamped image. So I tried it in reverse and stamped the dark definition stamp first. That worked amazingly! All I had to do was line up the bottom of the stamp and it was perfect. Please keep that little tip in your tool bag when using a very light color.
I found another unexpected result with the Granny Apple Green stamping. I stamped the stripes in Granny Apple Green and looked for a different green for the leaves I wanted to add to the flowers. None seemed to work without really standing out. So I tried the Granny Apple again and stamped off once . It was perfect. Well, actually it would have been perfect had I stamped the leaves full strength and the stripes lighter I think. Regardless, I was pleased with the result. It is the exact tone of color and shows up surprisingly well without contrasting with the stripes. Who Knew???
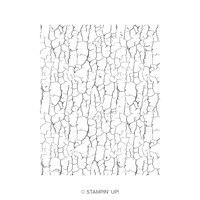
The background is made using the Crackle Paint background stamp. I love the look this gives. Background Stamps are so unique and give such different looks depending on the ink you use. I love using the same Ink as Card stock, like I did today. But I also like just using Versamark to do a light image. Although Versamark leaves a darker image on very light card stock. Another of those anomolies!
Thank you for stopping by today. Please come back on Monday for another project.
JOIN PROMOTION:
The Ultimate Shopping Experience is to purchase the Starter Kit. Please read through the next items and think about it. If you love paper crafting as much as I do, I believe you will want to talk with me. I hope you will consider it.
There are 2 Starter Kit choices:
You create your own kit. You get to choose ANY Stampin’ Up! products (includes bundles) However, SAB and Host stamps are excluded from the Starter Kit (but not your next order)!
You will receive a 20% discount on all future purchases through July 31, 2019. But there is no obligation to ever order anything else.
It’s a great way to Get Your Feet Wet, so to speak. Just see if you like being a demonstrator.
Hobby Demonstrators are welcome. I was one for about ten years, and really still am!
You will be the first ones to see the new catalog when it debuts in June, plus preorder from it.
There are NO OBLIGATIONS to continue or ever place another order.
The First Bonus is that you become part of my Team. I would love to have you and enjoy sharing my love for stamping and paper crafting with you.
You become a member of my Upline, Brian King, and his InKing Royalty group. There are great ideas and thoughts shared on our Facebook page.
Now for the 2 options and the Bonuses:
The first option costs $99.00 and you get the usual $125.00 worth of products (of your choice) PLUS an additional $50.00 of product for a total of $175.00 at a cost of only $99.00 to you. And did I mention FREE shipping on that order? That is another 10% off.
The second option costs $129.00. You get the same amount of products as the first choice, ($125.00 worth of your choice of products, Plus the additional $50.00 of Free Products, FREE Shipping) and the AWESOME new Craft & Carry Tote which is valued at $50.00. Basically you are paying an added $30.00 for the Craft & Carry Tote.
(I had the option to purchase, and of course I did. It is well worth the $50.00 and is a Fabulous deal for $30.00)
Here is the Tote. It is a great size, has dividers that can be moved for whatever products you are carrying each use. There are two outside pockets that are large enough to hold punches, and much more. There is a zipper outside pocket. It has regular straps as well as a shoulder strap. It has the Stampin’ Up! logo. It is made of a great heavy weight canvas. And it is so Pretty!!
Welcome to InKing Royalty’s March Blog Hop! This year’s Blog Hop themes are inspired by a single word – and this month our projects are centered around GREEN. We are excited to share our creations with you today. There’s a wonderful variety of styles and occasions celebrated in this hop! After you read my post, I hope you’ll hop over to the next person on the list at the base of this post.
For my take on our Hop Theme, I took the name seriously!!! I went with GREEN, GREEN, and more GREEN. It is nice to get outside of your normal comfort zone. I hope you like it.
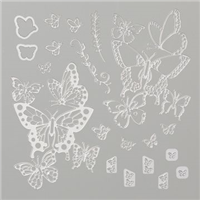
Butterfly Bounty Thinlits, 148536
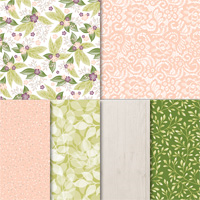
I used three shades of green for this project. The base is Mossy Meadow, the background layer is Pear Pizzaz and the top layer of the butterflies is Soft Sea Foam. The designer series paper is the Floral Romance DSP. It contains both the Mossy Meadow and the Pear Pizzaz. So instead of trying to decide which piece to use, I opted for both of them.
Of course the star of the show is the Butterfly Bounty Thinlits. They are fabulous. There are 20 dies in the set! The large one I used is actually two. They could be used individually or layered on top of one another like I did here. An almost “must have” is the Multi-purpose adhesive sheets to easily adhere these two pieces together, and add it to the card as well. It makes life much less frustrating!!
The die is actually two butterflies larger than the three that are attached together. The one on the bottom and one extra were attached also. I decided it was too large and cut the two off. Then I decided I needed the smaller of the two to hold my little sentiment banner.
The sentiment is from the second butterfly bundle in the Occasions catalog, Butterfly Gala. It is punched out with the Classic Label Punch. Of course I needed to add just a touch of bling to my card. Butterflies are so elegant that I knew pearls were the proper accessory for these beauties !
I have included all of the products I used at the bottom of the post.
Thank you for stopping by today. I hope you’ll hop along to the next stop on the bloghop, Sue Jackson at Just Peachy Stamping. Just Peachy Stamping
There’s lots of inspiration to be found in this group – and you don’t want to miss it!
Thank you for hopping along with us. If you get stuck during the Blog Hop, please use this line-up as a guide:
The Ultimate Shopping Experience is to purchase the Starter Kit. Please read through the next items and think about it. If you love paper crafting as much as I do, I believe you will want to talk with me. I hope you will consider it.
There are 2 Starter Kit choices:
You create your own kit. You get to choose ANY Stampin’ Up! products (includes bundles) However, SAB and Host stamps are excluded from the Starter Kit (but not your next order)!
You will receive a 20% discount on all future purchases through July 31, 2019. But there is no obligation to ever order anything else.
It’s a great way to Get Your Feet Wet, so to speak. Just see if you like being a demonstrator.
Hobby Demonstrators are welcome. I was one for about ten years, and really still am!
You will be the first ones to see the new catalog when it debuts in June, plus preorder from it.
There are NO OBLIGATIONS to continue or ever place another order.
The First Bonus is that you become part of my Team. I would love to have you and enjoy sharing my love for stamping and paper crafting with you.
You become a member of my Upline, Brian King, and his InKing Royalty group. There are great ideas and thoughts shared on our Facebook page.
Now for the 2 options and the Bonuses:
The first option costs $99.00 and you get the usual $125.00 worth of products (of your choice) PLUS an additional $50.00 of product for a total of $175.00 at a cost of only $99.00 to you. And did I mention FREE shipping on that order? That is another 10% off.
The second option costs $129.00. You get the same amount of products as the first choice, ($125.00 worth of your choice of products, Plus the additional $50.00 of Free Products, FREE Shipping) and the AWESOME new Craft & Carry Tote which is valued at $50.00. Basically you are paying an added $30.00 for the Craft & Carry Tote.
(I had the option to purchase, and of course I did. It is well worth the $50.00 and is a Fabulous deal for $30.00)
Here is the Tote. It is a great size, has dividers that can be moved for whatever products you are carrying each use. There are two outside pockets that are large enough to hold punches, and much more. There is a zipper outside pocket. It has regular straps as well as a shoulder strap. It has the Stampin’ Up! logo. It is made of a great heavy weight canvas. And it is so Pretty!!
The content in this blog is the sole responsibility of Jackie Beers as an Independent Stampin' Up! Demonstrator. The use of and content of classes, services or products offered is not endorsed by Stampin' Up!