Welcome to the Pals March 2018 Blog Hop. Our theme this month is “Spring has Sprung”. The Stampin’ Pretty Pals will inspire you with Spring or Spring-related projects. You may see floral, Easter or other general Spring-inspired designs. You may be just starting or hopped over from another Pal. In either case you’ll find the line-up toward the end of my post to help you move along.
I decided to make an Easter card for today. Although my card without the added bunny would be great for many occasions. I think I just have chocolate bunnies on my mind 🙂
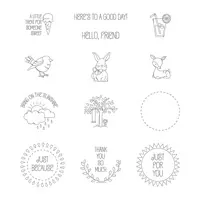
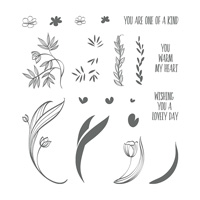
Blossoming Basket, 147124
My little bunny is sort of tucked into the flowers, but he was what I wanted for Easter. And it is not too far out there to imagine receiving a basket of flowers with a chocolate bunny mixed in.
I used a couple of stamp sets to get this card completed. The basket of flowers is from Blossoming Basket, a SAB item. The Happy Easter sentiment is from You’re Inspiring, and the bunny is from A Good Day. However, I could have made the exact same card, minus bunny, with just the Blossoming Basket as there are two great sentiments in that set.
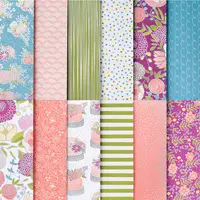
I pulled my color combination from the beautiful DSP. It is the Sweet Soiree Specialty Designer Series Paper. It is definitely a WOW. I could have added the Peekaboo Peach to the combination as well. I chose that instead of yellow for the flowers. Using the Stampin’ Blends are so addicting and just down right FUN !!
I separated the basket and the sentiment to allow more of the beautiful colors from the DSP to show. But because the white space is pretty big on the basket and sentiment, the business of the DSP does not overpower. I hope you like this layout.
I appreciate you visiting today. The supplies I used are listed at the bottom of the post.
Thank you so much for hopping with the Stampin’ Pretty Pals today. Please take a minute to mark your calendar for our next hop on April 11, 2018 for our Family First Hop. Now hop along using the Blog Hop Line-up below. Don’t forget to leave us a comment. We really like that.
Another Paper Pumpkin Special: The March PP was so popular due to the special gift that it sold out. So Stampin’ Up! has offered a great deal to replace that. New Subscribers who sign up before April 10, will receive April and May for half price. So 2 months for the price of 1. A great deal. Use my link HERE, and enter the code: SAVEFIFTY0418
Have you ever thought about becoming a Stampin’ Up! Demonstrator? During Sale-A-Bration is the perfect time to join. Not only are you getting the Ultimate Bundle ($125.00 worth of product for $99.00) but you also get to choose 2 additional stamp sets, up to $25.00 each. Additionally you will receive a 20% discount on any future purchases. Or, if you are just wanting to test drive the idea, you would not be required to make another purchase until July! There is no pressure for you to continue as a demonstrator. And there is no penalty if you decide not to continue. Please contact me and let’s talk about it. You can review the documents by clicking on the picture below.
I met with my monthly card club yesterday and we made a card with the wonderful Stamparatus. I believe it was a hit! I showed the versatility of the design of the Stamparatus by doing a 3 step stamp. We used the Amazing Congratulations stamp set from the Occasion Catalog. None of the other stamp positioning tools are able to do a three step stamp without removing stamps. Due to the two plates , you can use three or even four stamps with no problem. One of the many reasons I LOVE the Stamparatus !!
Amazing Congratulations, 145938
I love the variegated look of the stamps as well as the outline. The ladies commented how many occasions this card could be used for. (babies, weddings, etc.) I love that it is quick, easy, simple, and most of all pretty.
As I mentioned at the top, having the two stamping plates made this card work perfectly. I placed one of the partial congratulations on one side and the other on the opposite side. By turned the plate around it lined up without being in the way. On the second plate I placed the outline and the “to my friend” stamp just below it. It was especially easy to align with the photopolymer stamp set. Woohoo!!
A Stamparatus Tip:
I saw this somewhere else and I apologize to whoever it was that I cannot give them credit! .. Because the Congratulations is almost as long as the card, you would need to place a shim up against the left hand hinge area to get a clear stamped image. To alleviate this, I cut a piece of SU grid paper to fit the inside of the Stamparatus. I then aligned my white card stock in the top/center of the Stamparatus. By taking a pencil and marking the bottom corners, I could then easily place the next piece of card stock in the correct place. Easy Peasy for making multiples.
Special Mention: The Stampin’ Up! Grid Paper. Oh My!! I hope you use the SU grid paper. A pad of it lasts what seems like forever. It is a great “PAD” for cushioning the stamping with photopolymer. It has a built in ruler. And the grid marks have a 101 uses. I find myself finding new uses all the time. I could do a blog post on just all the uses for this item. And now is a great time to add the additional item to get you to the next SAB item!!
Thank you for visiting today! I hope you liked this card and my tips. Please come back tomorrow for the Pals Blog Hop. It is a Spring Theme.
Another Paper Pumpkin Special: The March PP was so popular due to the special gift that it sold out. So Stampin’ Up! has offered a great deal to replace that. New Subscribers who sign up before April 10, will receive April and May for half price. So 2 months for the price of 1. A great deal. Use my link HERE, and enter the code: SAVEFIFTY0418
Have you ever thought about becoming a Stampin’ Up! Demonstrator? During Sale-A-Bration is the perfect time to join. Not only are you getting the Ultimate Bundle ($125.00 worth of product for $99.00) but you also get to choose 2 additional stamp sets, up to $25.00 each. Additionally you will receive a 20% discount on any future purchases. Or, if you are just wanting to test drive the idea, you would not be required to make another purchase until July! There is no pressure for you to continue as a demonstrator. And there is no penalty if you decide not to continue. Please contact me and let’s talk about it. You can review the documents by clicking on the picture below.
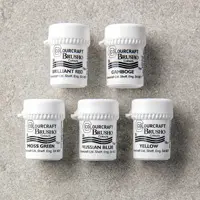
I have tried the Brusho Crystal Colour a couple of times (And yes that is how it is spelled in the catalog) but this is the first time I was fairly happy with the results. I used the great Beautiful Day stamp set, which is on the same page in the Occasions Catalog (page26). All I used with the two was an Aqua Painter and a spritzer
.
Beautiful Day, 145915
I stamped and embossed the butterfly first. I then spritzed the paper with water and sprinkled two of the Brusho colors. This is something that you just have to try. It is a fine line, at least for me, with not enough water or too much water. I did get it to where I liked it and then took a fairly dry Aqua Painter to “paint” the butterfly wings.
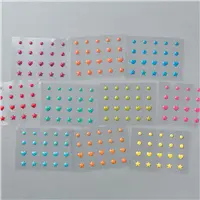
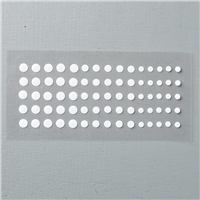
My banner blue dot was a pleasant surprise. I used the White Accents. They come in a variety of sizes on one sheet. And I colored it with the Night of Navy Stampin’ Blends. It only took a minute to dry and I am in love with it! I tried the Stampin’ Write Marker and it would not stick to the glossy surface. So skip that step and go straight to the Stampin’ Blends.
Public Service Announcement: Sort of 🙂
We are in the final couple of weeks of Sale-A-Bration. With that I wanted to let you know a great tip. If you think you would like to try the Brusho, and it is a lot of fun to play with, now is the time. With the purchase of the Brusho Crystals, Aqua Painter, and Spritzer…..you are at $50.00. And these items are not use a couple of times and you are out. Oh No! These items will last you forever!! So they are great investments for your stamping/crafting years to come.
Thank you very much for visiting today! I greatly appreciate it. And I love to hear your comments. As always, please do not hesitate to contact me if you have a question.
Great Deal : 2 for 1 Paper Pumpkin……
Another Paper Pumpkin Special: The March PP was so popular due to the special gift that it sold out. So Stampin’ Up! has offered a great deal to replace that. New Subscribers who sign up before April 10, will receive April and May for half price. So 2 months for the price of 1. A great deal. Use my link HERE, and enter the code: SAVEFIFTY0418
Have you ever thought about becoming a Stampin’ Up! Demonstrator? During Sale-A-Bration is the perfect time to join. Not only are you getting the Ultimate Bundle ($125.00 worth of product for $99.00) but you also get to choose 2 additional stamp sets, up to $25.00 each. Additionally you will receive a 20% discount on any future purchases. Or, if you are just wanting to test drive the idea, you would not be required to make another purchase until July! There is no pressure for you to continue as a demonstrator. And there is no penalty if you decide not to continue. Please contact me and let’s talk about it. You can review the documents by clicking on the picture below.
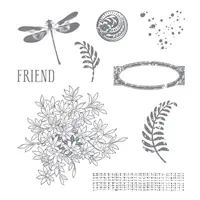
The title of my post is a bit misleading! I am NOT Awesomely Artistic. I wish!!! But it is the name of the stamp set I used today. It is an oldy but goody. It features great stamps for a variety of background and collage type cards. Here is how I used it.
Awesomely Artistic, 139950
This is another of my quick and easy card. My intent is for it to look like a wreath. I am not sure it made that, but I still like it. It was stamped by punching a piece of copy paper with the 2 1/4″ circle punch. I temporarily adhered it to the center of the card. Then it was just a mater of stamping around.
The center is the sentiment from the Fabulous Host Rewards Set – Yay You! I love this sentiment. It will be in my keeper stamp box. The ones that you just cannot get rid of. The butterfly is from Awesomely Artistic as well, and was for the added color and dimension.
Thank you so much for visiting today. The supplies I used are listed at the bottom of the post. I hope you have an Awesome Weekend! Please stop back here on Monday for a new project.
Have you ever thought about becoming a Stampin’ Up! Demonstrator? During Sale-A-Bration is the perfect time to join. Not only are you getting the Ultimate Bundle ($125.00 worth of product for $99.00) but you also get to choose 2 additional stamp sets, up to $25.00 each. Additionally you will receive a 20% discount on any future purchases. Or, if you are just wanting to test drive the idea, you would not be required to make another purchase until July! There is no pressure for you to continue as a demonstrator. And there is no penalty if you decide not to continue. Please contact me and let’s talk about it. You can review the documents by clicking on the picture below.
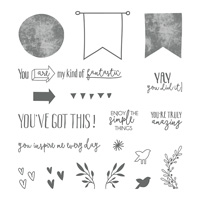
I received my Stampin’ Up! Stamparatus the other day ! Yay me!! I have been playing with it just to see the many different ways it will work. This is an AWESOME product !! The possibilities are many and my card today is one that none of the other stamp positioning tools will allow you to do.
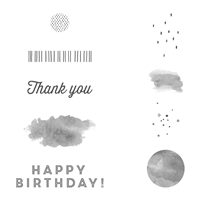
Eclectic Expressions, 147338 with Stamparatus
I kept the card very simple to showcase the stamping placement. This was done simply by stamping and then moving the Stamparatus plate down a notch each time. For the Thank You it was the same. I placed it in the appropriate spot and once again moved the plate down each stamping. That is it! How awesome to so easily get this type look. The possibilities are endless.
The stamp set I used is one of the Sale-A-Bration second release sets. It is a great set for backgrounds and is perfect for this type of card as well. Of course, the best part is that it is FREE with a $50.00 purchase.
The only highlights I added were the Brights Enamel Shapes in Bermuda Bay. The two strips down the edge are the 1/4″ pieces that I cut off of the layers. I hope this is a tip you will try for using all of those little strips that seem to multiply every day!
Thank you for stopping by today! I very much appreciate it and your comments. Don’t forget that now is a perfect time to try Paper Pumpkin and receive a special 5th Anniversary gift in the box as well. You must sign up by March 10 at 1159pm. You can click on the link below and be taken to my online store to sign up. Also, it gets you almost half way to a FREE SAB item!!
Have you ever thought about becoming a Stampin’ Up! Demonstrator? During Sale-A-Bration is the perfect time to join. Not only are you getting the Ultimate Bundle ($125.00 worth of product for $99.00) but you also get to choose 2 additional stamp sets, up to $25.00 each. Additionally you will receive a 20% discount on any future purchases. Or, if you are just wanting to test drive the idea, you would not be required to make another purchase until July! There is no pressure for you to continue as a demonstrator. And there is no penalty if you decide not to continue. Please contact me and let’s talk about it. You can review the documents by clicking on the picture below.
I have another alternative for the Lots To Love Box framelits. There are quite a few varieties out there. Mine is very simple, and easy to make. I dressed it up as a masculine gift. Although after you look at it, think of a baby crib. I cannot get that thought out of my head and will have to give that a try next.
Lots to Love Box Framelits, 145653
My little box fits four of the Merci Chocolates. It is made from one cutting of the Lots To Love Box. To make the intended box you need to make two cuts with the framelits. I used the True Gentleman Designer Series Paper and the Tailored Tag Punch to create the belly band for my treat holder. The sentiment is from the Southern Serenade stamp set.
Fold and burnish on the score line, EXCEPT the one closest to the rounded end
Cut the flap pieces at the straight end to match the ones on the rounded end.
Tape box together.
Belly Band is 8 X 2, and scored at 2 78, 3 1/2, 6 1/2 ,7 1/8.
Fold and burnish the lines and dry fit it around the box.
Secure the ends on the back since the front decoration is not large enough to cover the seam.
Decorate as you like
I hope this is easy to understand. If not, please do not hesitate to contact me. I am definitely not my friend Julie DiMatteo when it comes to 3-D items!!
I hope you have an AWESOME rest of your day!
Have you ever thought about becoming a Stampin’ Up! Demonstrator? During Sale-A-Bration is the perfect time to join. Not only are you getting the Ultimate Bundle ($125.00 worth of product for $99.00) but you also get to choose 2 additional stamp sets, up to $25.00 each. Additionally you will receive a 20% discount on any future purchases. Or, if you are just wanting to test drive the idea, you would not be required to make another purchase until July! There is no pressure for you to continue as a demonstrator. And there is no penalty if you decide not to continue. Please contact me and let’s talk about it. You can review the documents by clicking on the picture below.
The content in this blog is the sole responsibility of Jackie Beers as an Independent Stampin' Up! Demonstrator. The use of and content of classes, services or products offered is not endorsed by Stampin' Up!