The card I have to share today is a fun little Easter bonnet. I paired Deckled Circles with Petal Park for a cute hat.
Circles
This little hat was cased from Sue Campfield and is very simple to make. Actually when cutting parts of the hat you only use half. So making at least two is pretty quick. Almost the entire card is made from the Deckled Circles Dies. The brim is the 2nd largest of the dies. After cutting the Lemon Lolly card stock, simply fold in half. For the crown I used the 9th largest and then cut it in half. This is one of the parts for a second card. I added Tear & Tape across the flap edge and placed it on the front of the brim fold
The DSP is cut using the 3rd largest Die. Again, cut it in half for another card. This piece also goes flush across the flat folded edge. And it covers the bottom of the crown where it was added. Also it allows for even margins around the curve. Not shown is the inside. But I used the same die to cut Basic White. Again cut it in half and adhere to the inside for your Happy Easter or other sentiment. Be sure to not put it all the way to the fold for easier folding of the card. Now your bonnet is bult.
Stamps
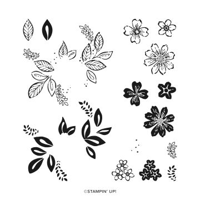
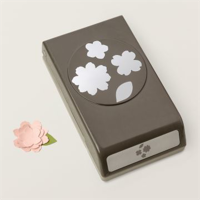
The inside of the card is not shown, but I used the Happy Easter from the Happy Easter stamp set for the inside sentiment. To decorate the crown of my hat, I went to the Petal Park stamp set and Punch. The flowers are stamped using Gorgeous Grape and then filled using Highland Heather. As I have said a few times, purple was my Mom’s favorite color and I especially think of that at Easter. The leaves are from the same set and are Garden Green for the outline with Old Olive as the fill.
Finishes
To complete the card I added the DSP on the brim. I failed to say that it was from the Lighter Than Air Designer Series paper. It was chosen for the touch of purple! The other halves of the DSP, crown, and inside Basic White will finish a second card when you cut another full circle for the base. That is a Win in my book.
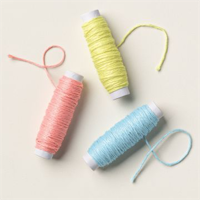
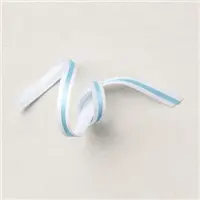
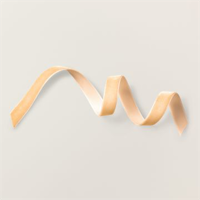
The final touches are the ribbon and bling. The ribbon is the yellow from the Sheer Ribbon Combo. Have you noticed that I used all three of those ribbons on cards this week? It was not intentional, but what was the best fit. In this case I double the ribbon and then simply tied a knot. The ribbon is very sheer and I wanted it to look denser. I have never done that before and now love the idea. Of course the final touch is bling. The centers for each of the flowers is from the Rainbow Dots. It is a soft yellow that seemed perfect.
Thank you for stopping by today! I hope you have a wonderful Easter.
Both of the Last Chance Lists are listed below. Click on either the Mini or Annual Catalog list and you will get a PDF of the full list.
HOST CODE
My MARCH Host Code is GBUE3X7H. Please use this code for orders under $150.00. I will have a small gift for those with orders over $50.00 in addition to the Perk Rewards Program. You can read all of the information at the top of the page in the Menu Bar under SHOP / Perks.
Thank you for stopping by today. I hope you enjoyed today’s project and will come back. I do read and reply to all of the comments individually. They mean a lot to me. Please reach out if you have a question.
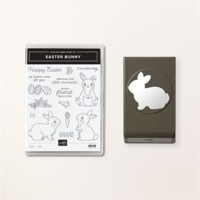
Today’s card is using the precious Easter Bunny stamp set. This set has great versatility for any occasions that bunnies are good. The matching punch is simply a wonderful bonus!
Stamp Set
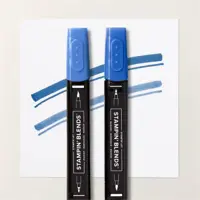
The Easter Bunny stamp set has a mix of Spring items included. All of the stamped images are from the stamp set. I love them all, but especially the sentiment. When I see that sentiment I think of baby showers for some reason. But the images would be great for any type of Spring or child occasion. My stamping of the Easter eggs was a tad high on the grass, but I am good with that! All of the images are colored using Stampin’ Blends.
Punch
The Bunny Punch is still available. It was originally part of the Easter Bunny Bundle. But when they carried over to the Annual Catalog, the Bundle price went away. However it is still a wonderful price point. As I said above, all of the images are from the stamp set. But the punch only works on this one bunny. There is a second bunny stamp. So I stamped the bunny with Pecan Pie Ink and colored him with Crumb Cake Stampin’ Blends. The butterfly is also colored using Stampin’ Blends. I punched out the bunny, and then fussy cut the butterfly. They just seem to go together.
Paper and Finishes
The paper for this card is simply card stock. I know it is shocking for me not to have at least some Designer Series Paper. With the stamping and coloring of everything, more color was not really needed. So we have Blueberry Bushel card stock as the base with the layer of Basic White that is stamped. To complete the little scene, I added one of the larger Rainbow Dots in a matching Blue.
Thank you for stopping in today!! I hope you have a fabulous weekend.
HOST CODE
My MARCH Host Code is GBUE3X7H. Please use this code for orders under $150.00. I will have a small gift for those with orders over $50.00 in addition to the Perk Rewards Program. You can read all of the information at the top of the page in the Menu Bar under SHOP / Perks.
Thank you for stopping by today. I hope you enjoyed today’s project and will come back. I do read and reply to all of the comments individually. They mean a lot to me. Please reach out if you have a question.
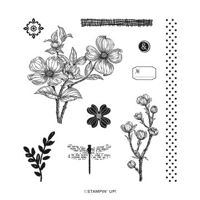
We are nearing the end of Sale-A-Bration. There are only 8 days left to get your FREE items with qualifying orders. I tend to find products that I wish I had used sooner. Today’s card includes the Detailed Dogwood set. And it is definitely one of those.
Stamps
This dogwood stamp from the Detailed Dogwood is perfect. It looks just like a photograph. All of the details of the branch and leaves are there. The set includes several small companion images as well. I added the little extra dogwood flower as part of my bling.
The sentiment used is not from the stamp set. Actually there are no sentiments in this set. I went to the Annual Catalog and the Easter Bunny stamp set for the sentiment. Although this dogwood image would be great for so many things.
Papers
There are no designer papers used on this card! That is so unusual for me. Instead I went to soft colors, which also is unusual. It seemed the dogwood liked the softer colors for the petals and I went that direction. Actually the Petal Pink and Soft Sea Foam are two I rarely use, yet were perfect companions here.
Finishes
The coloring is another “different” for me. I used Watercolor Pencils and a Blender Pen to color the image. These are great for the softness. The extra dogwood petal is from the Petal Park Punch. One of the flowers in the punch matches the single dogwood. I also added some of the Opaque Faceted Gems. These are another FREE Sale-A-Bration item. It is one you can choose for a $50.00 purchase. They seemed to fit the colors well. And to finish off, I added the Coral of the Bakers Twine 3 Color Pack from the Mini Catalog. It is wrapped around a few times and then a separate trio of twine strings was used to simply tie a not around the wrapping. An easy version of a bow.
Thank you for stopping by today!!
HOST CODE
My FEBRUARY Host Code is PR4KTFTS. Please use this code for orders under $150.00. I will have a small gift for those with orders over $50.00 in addition to the Perk Rewards Program. You can read all of the information at the top of the page in the Menu Bar under SHOP / Perks.
Thank you for stopping by today. I hope you enjoyed today’s project and will come back. I do read and reply to all of the comments individually. They mean a lot to me. Please reach out if you have a question.
My card today is made with the Easter Bunny stamp set. And I am thinking of it as an Easter Card. However I hope you will see the versatility it has for other uses. The Little Moments are wonderful moments in my book.
Stamp set
All of the images and sentiment are from the Easter Bunny stamp set. I was quite surprised how flexible this set is and am thrilled that it is carrying over to the next Annual Catalog. The simple eggs and sweet sentiment are fun next to the paper. And here is a look at the inside of the card.
Inside View
I thought this was just a precious little image! All of the images were stamped with Memento Black Ink and colored using Stampin’ Blends. The bunny was stamped using Soft Suede for a softer looking outline.
Papers
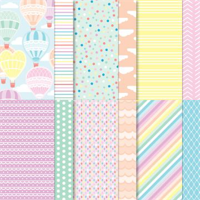
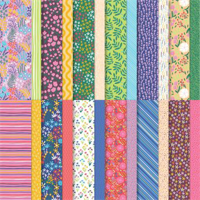
Both of the front papers are from the Flowers & More Designer Series Paper Pack. It is a Host reward in the Mini Catalog and will be going away at the end of the month with the catalog. It is an awesome pack of bright colors and designs. These touched my humor with the leaves being grass and the stripes being sky for my little scene. I pulled the balmy blue for the card base as a neutral and softer color.
Extra Elements
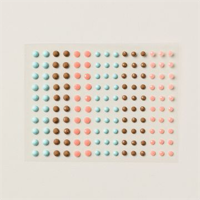
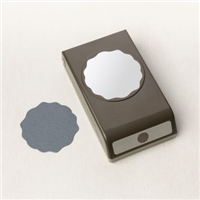
To give some extra pizzaz to the front focal layer, I used the Decorative Circle Punch. I do really love this punch as an alternative to a plain circle. Or a layer for a circle since we are getting some circles returning to the store!! Additionally, I added a strip of the Balmy Blue Double Stitch Ribbon as a joiner for the two DSP pieces. And to finish the card of course there has to be some bling! This was accomplished with a mix of the blue and pink Adhesive Backed Pastel Sequins! There are a lot of sequins in this pack and in different sizes.
Thank you for visiting today!!
RETIRING LISTS. CLICK ON THE ICON TO GET THE FULL PDF.
Online exclusives are here to stay! Click on the photo and be taken directly to them in my online store. If you place an order, please use my Host Code listed just below.
HOST CODE
My APRIL Host Code is ZE6UJ4TF. Please use this code for orders under $150.00. I will have a small gift for those with orders over $50.00 in addition to the Perk Rewards Program. You can read all of the information at the top of the page in the Menu Bar under SHOP / Perks.
Thank you for stopping by today. I hope you enjoyed today’s project and will come back. I do read and reply to all of the comments individually. They mean a lot to me. Please reach out if you have a question.
The Easter Bunny is coming on today’s card. Who doesn’t love a quick and easy card that is most definitely Spring inspired.
Stamps
The stamping on this card could not be easier! And the focal Bunny stamp is stamped on some fun mosaic paper using Basic Gray Ink. I love when I remember that it is perfectly fine to stamp on DSP. When you do that, there is no need to color the image as the paper gives it the color and design.
The grass stamp is a small one. But being Photopolymer, it is very easy to line it up going across the page.I stamped with Granny Apple Green and then colored with Light Granny Apple Green Stampin’ Blend. And the Happy Ester was a quick stamp using Memento Tuxedo Black Ink.
Punch
Sadly the Easter Bunny Punch is out of stock right now. The Chinese New Year does cause issues with our stock. But it will be back before the catalog ends. Luckily the bunny images are all easy to cut out and the punch only fits this one I used. Personally I believe this card would be an adorable Welcome Baby or Baby Shower card simply by changing the sentiment.
Paper
I have to say that this fun polka dot paper makes me think of colored Easter Eggs. That makes it perfect for this card. And easy to pull a variety of colors from it for the other pieces. Both the layer and Bunny DSP pieces are from the Dandy Designs Designer Series Paper. It is the Free with a $100.00 qualifying order with Sale-A-Bration. Using the polka dot piece, I pulled the Bunny sheet and then matched them to Granny Apple Green, Coastal Cabana, and Fresh Freesia.
Embellishments
To complete this card I needed just a bit of bling. I found that with the Glossy Dots on page 143 of the Annual Catalog. Placing the dot on the grass makes it seem like an egg waiting to be found. (At least my imagination says that!) And to give the Bunny his bow, I used the Fresh Freesia Stampin’ Blend to color the White Bakers Twine from the Bakers Twine Essentials Pack. Using the Silicone Mat, I layed the string out and held one end while drawing the Blend across it. This goes very quickly and dries almost immediately.
Thank you for stopping by today!!!
Please let me know if you have any questions. And have you looked at the awesome Join Promotion during Sale-A-Bration? I would love to have you join my team!
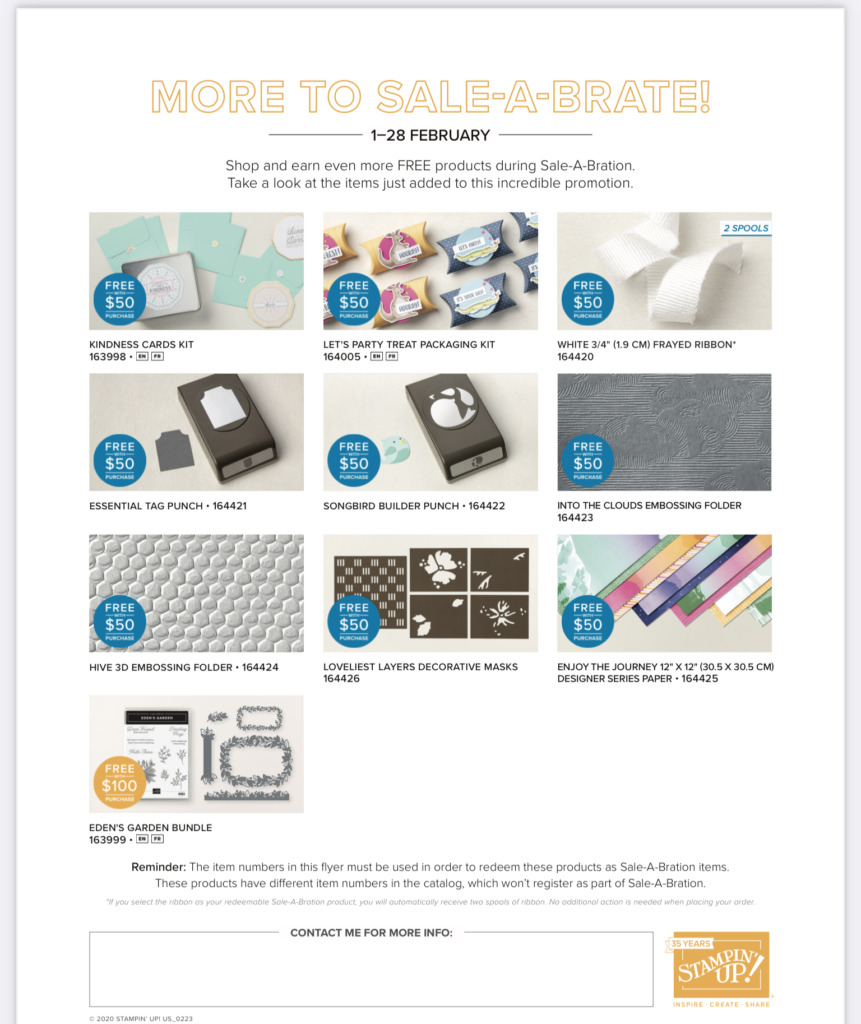
Additional FREE Sale-A-Bration Items for February…..
Sale-A-Bration and Join Promotion
Not only is SAB all about Free Products, but Stampin’ Up! has really upped the rewards if you choose to join my team.
The regular Starter Kit, I call it the Ultimate Bundle, is 125.00 in product for 99.00. You get to choose all of the products yourself. For these two months of SAB, there are three options for you to choose and the rewards are amazing!
Option 1: The exclusive Boho Blue Mini Machine ($63 ) + your choice of $175 of Stampin’ Up! products for only $129 .
Option 2: The original white Mini Machine ($63 ) + your choice of $175 of Stampin’ Up! products for only $129 .
Option 3: Your choice of $175 of Stampin’ Up! products for only $99 .
Options 1 and 2 offer you 50.00 more in product and the Mini Machine for only 30.00 above the regular price.
Option 3 offers you $50 more product than the standard Starter Kit offer for the regular price!
These are the best deals I have seen. If you are interested, please reach out to me and let’s chat about it.
HOST CODE
My February Host Code is FCF2FJVJ. Please use this code for orders under $150.00. I will have a small gift for those with orders over $50.00 in addition to the Perk Rewards Program. You can read all of the information at the top of the page in the Menu Bar under SHOP / Perks.
Thank you for stopping by today. I hope you enjoyed today’s project and will come back. I do read and reply to all of the comments individually. They mean a lot to me. Please reach out if you have a question.
I am hopping a holiday ahead with today’s card. Instead of Valentine, I have an Easter card to share. This one is a cute little bunny with a treat for you.
Stamps
The adorable little bunny with his carrot treat is from the Easter Bunny Bundle. This bundle is a punch bundle. However, I have used one of the bunnies that does not fit the punch. The carrot was the layout idea. I wanted him to hold a carrot and the punch bunny is a side view. All of the stamps used are from the stamp set.
The bunny is stamped with Crumb Cake Ink and colored with Stampin’ Blends. For the carrot I still stamped with Crumb Cake, colored with Stampin’ Blends, and then fussy cut it. The adorable sentiment is from the stamp set as well.
Dies
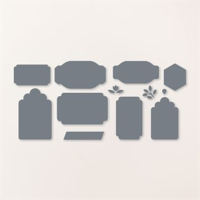
Since I did not utilize the Bunny Punch, I searched through my Die sets for one that would work with the little scene I created. This Die set is amazing and I see a lot of uses in my future cards. The tag die used for the bunny scene is from the Something Fancy Die set. This is also a bundle with the Something Fancy stamp set. The stamp set is an awesome sentiment set. And one I will fully use I am sure, but not today!
For the sentiment used here I wanted a shape that was a bit different from the usual. Once again I found it in the Something Fancy Die set. This little hexagon shaped die fit the sentiment perfectly. And I really love that it is a different shape!
Paper and Embellishments
Today’s paper is a bright and cheery one that fits in with my bunny perfectly. It is from the Dandy Designs Designer Series Paper. This is one of the Sale-A-Bration paper packs. I love the brightness and the little designs of green and white.
To play off of the carrot I wanted some additional orange. The Pale Papaya Faux Velvet Trim is gorgeous and really soft. But when placed on this bright paper I felt like you could see the design through the velvet. With a quick look at the SU colors, I decided Pumpkin Pie was a perfect background. It is a little deeper orange than the Pale Papaya but they really compliment each other. Adding that strip of card stock really made the orange work. And to finish off with some bling, I added a few of the Champagne Rhinestones to the sentiment layer and top of the tag.
Thank you for stopping by today!!!
Sale-A-Bration and Join Promotion
Not only is SAB all about Free Products, but Stampin’ Up! has really upped the rewards if you choose to join my team.
The regular Starter Kit, I call it the Ultimate Bundle, is 125.00 in product for 99.00. You get to choose all of the products yourself. For these two months of SAB, there are three options for you to choose and the rewards are amazing!
Option 1: The exclusive Boho Blue Mini Machine ($63 ) + your choice of $175 of Stampin’ Up! products for only $129 .
Option 2: The original white Mini Machine ($63 ) + your choice of $175 of Stampin’ Up! products for only $129 .
Option 3: Your choice of $175 of Stampin’ Up! products for only $99 .
Options 1 and 2 offer you 50.00 more in product and the Mini Machine for only 30.00 above the regular price.
Option 3 offers you $50 more product than the standard Starter Kit offer for the regular price!
These are the best deals I have seen. If you are interested, please reach out to me and let’s chat about it.
HOST CODE
My January Host Code is HEMUVZZK. Please use this code for orders under $150.00. I will have a small gift for those with orders over $50.00 in addition to the Perk Rewards Program. You can read all of the information at the top of the page in the Menu Bar under SHOP / Perks.
Thank you for stopping by today. I hope you enjoyed today’s project and will come back. I do read and reply to all of the comments individually. They mean a lot to me. Please reach out if you have a question.
The content in this blog is the sole responsibility of Jackie Beers as an Independent Stampin' Up! Demonstrator. The use of and content of classes, services or products offered is not endorsed by Stampin' Up!