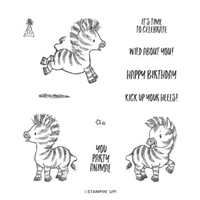
I adore all of the cute animal stamps that Stampin’ Up! continues to create. I suppose I am a kid at heart, but I always pick those stamps. Sadly, it is that time of year with the catalog retiring. And we are losing one of the energetic ones. It is the Zany Zebras. I had to share one more card with you using these cute critters!
I made a Double Z Fold card to show off these sweeties. Here is an open view.
I paired the Zany Zebras with the Forever Greenery Designer Series Paper. This wild pattern seemed to pair perfectly with the frolicking zebras. My background is Garden Green, followed by Soft Sea Foam. The Soft Sea Foam matches the light parts of the DSP perfectly. I love one set cards, and this is definitely one of those. I used all but two of the stamps in the set on this card!
I stamped the zebras with Memento Tuxedo Black Ink and then highlighted the darker areas with Smoky Slate Stampin’ Blend. I decided the zebras would look best cut out, so I lightly fussy cut them with the wonderful Paper Snips. I did not get into too much detail with my trimming.
The White panels are all cut using the Stitched So Sweetly Dies. I used the largest and the 3rd smallest ones. The panels are not perfectly centered. I tried to center them from the top and sides of each panel. Since the Z strip is across the bottom I believe it was okay to move them up a bit.
Thank you for stopping by today. I hope you have a wonderful day!!
Measurements:
4 1/4 X 11, scored at 2 3/4 and 5 1/2
1 X 11, scored at 2 3/4 and 5 1/2
Soft Sea Foam, cut 2 pieces measuring 2 1/2 X 4 and 1 piece 5 1/4 X 4
DSP cut 2 pieces measuring 2 3/8 X 3 7/8, and 1 piece 5 1/8 X 3 7/8
For the strip: cut Soft Sea Foam 2 pieces of 2 1/2 X 3/4 and 1 piece 5 1/4 X 3/4
For the strip: cut DSP 2 pieces of 2 3/8 X 5/8 and 1 piece 5 1/8 X 5/8
Click on the picture to get the PDF of the retiring products.
HOST CODE
My April Host Code is QGPT9TJG Please use this code for orders under $150.00. I will have a small perk for those with orders over $50.00
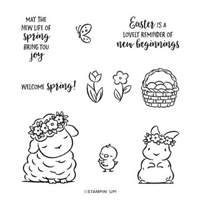
Today’s card is similar to one I did previously using the Springtime Joy stamp set. This is such a sweet set that I have actually used it several times on cards not posted. So today you get to see a second one with this set.
I love this adorable little lamb! I kept all of the colors very soft. The base card is Thick White cardstock and the stamping is done on a White cardstock piece cut 4 X 5 1/4 that is layered using Dimensionals. I like the white on white look plus the depth it gives.
The lamb is stamped on a circle that I used Blending Brushes and a mask. It is the 2″ circle from Layering Circles Dies. The ink is Mint Macaron and kept pretty light. The lamb is just highlighted with Smoky Slate Stampin’ Blends. I did use Just Jade and Flirty Flamingo Stampin’ Blends for the little flowers. The butterfly is colored using the same blends and then fussy cut with my Paper Snips. It has a Mini Stampin’ Dimensional to give it a little elevation.
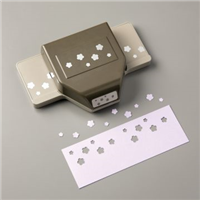
The sentiment is a strip of Soft Sea Foam cardstock cut 3/4 X 4. The little flower added is from the Confetti Flowers Punch. I punched just a small strip, enough to get two flowers, and layered them together. This flower and one on the lamb have an added Pearl for a highlight.
This card was a fun one to make and could be cased using any number of stamp sets. If you didn’t want to using the Blending Brushes, you could simply cut a circle and stamp on it.
I appreciate you coming by today. Please come back tomorrow for another new project.
HOST CODE
My March Host Code is: B6JC9CHE Please use this code for orders under $150.00. I will have a small perk for those with orders over $50.00
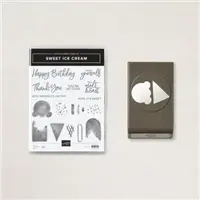
I very much enjoy making Fun Fold cards. Today I have one to share that I have done once previously. It is maybe more of a Fun Cut, than a Fun Fold. But I enjoyed making it.
This card is made using the Sweet Ice Cream Bundle, as well as the matching Ice Cream Corner Designer Series paper. The ice cream is cut using the Ice Cream Cone Builder Punch. I really enjoy punches for quick cards. They are great when making multiples as well.
The cut of the paper is my Fun Fold. I have made the same Fold / Cut for a card once before when I used the Donkey stamp set during Sale-A-Bration. You can see that card HERE.
A Bonus Tip for you : Even though the cards look very similar, they are actually quite different. For the donkey card I used a 4 1/4 X 5 1/2 piece of cardstock for the base and then added a 2 3/4 X 5 1/2 piece (scored at 1 1/4 on the 5 1/2 side) and then layered to the bottom front and covered the small folded section with a piece of Smoky Slate cardstock. That added piece makes the barn door.
For this Ice Cream card, I began with a 5 1/2 X 8 1/2 piece of cardstock and scored it at 4 1/4. I then used my Paper Trimmer to cut down the scored line 2 1/2. I turned the paper and cut across the front panel. This cuts off the top section of the front panel. I used the cut off section and cut it down to 2 X 3 1/2 for the backing of the ice cream layer. Two cards that look the same, but are created very differently. Each method would work perfectly for the two cards.
Here is a view of the card open.
Here are all of the measurements for today’s card.
Base card of Blackberry Bliss is cut 5 1/2 X 8 1/2, scored at 4 1/4
Cut down the scored line 2 1/2 and then across the front panel. This cuts away the top right section 2 1/2 X 4 1/4. Cut this section to 2 X 3 1/2 for the ice cream layer
Inside White layer is 4 X 5 1/4
Front bottom flap White layer is 2 3/4 X 4
Front bottom flap DSP layer is 2 5/8 X 3 7/8
Ice Cream White layer is 1 7/8 X 3 3/8
Thank you for visiting today! I believe most everyone loves ice cream and think this is such a fun card to make as well. I hope you will give it a try.
Click on the below picture for a PDF of the retiring products. They are going quickly!
HOST CODE
My March Host Code is: B6JC9CHE Please use this code for orders under $150.00. I will have a small perk for those with orders over $50.00
I am really happy to share today’s card with you. It is a quick, but really cute card. It is also one that you could easily make multiples of and have on hand to add whatever sentiment is needed for the occasion. My sentiment is a sweet one that I love.
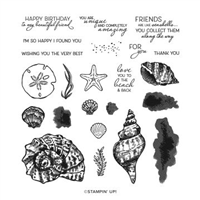
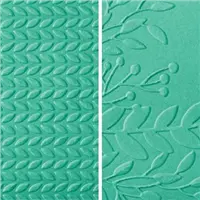
I love every layer of this card. I paired the In Good Taste Designer Series Paper with the Greenery Embossing Folder, and Stitched So Sweetly Dies. The sentiment is from the Friends Are Like Seashells stamp set. I think this is such a sweet sentiment. And I love the font!
The base card is Crumb Cake with a wider than normal border before the Seaside Spray layer. I am SO going to miss the Seaside Spray! It is a perfect blue. The DSP piece has just a touch of the Crumb Cake in it, and that is all it needed. (There is a similar pieces that has a touch of Misty Moonlight in place of the Crumb Cake!!)
The banner is first cut using the Banner Triple Punch and then embossed with one of the two Greenery Embossing Folders. These folders are designed for the Mini Cut & Emboss Machine. But they work perfectly in the regular size as well. Tip: I recommend to punch before embossing. The embossing softens the paper, and that could cause issues getting your perfect banner.
The top layer is the sentiment. It is stamped onto the Crumb Cake piece and then die cut. The Stitched So Sweetly Dies are probably my most used ones. I love the rectangles as well as the fun shapes, like this one. The finishing touch is a simple bow made with the Blue & White twine from the Flowers for Every Season Ribbon Combo.
Thank you for stopping by today. I hope you like this sweet card and will maybe try this layout. I got the idea from the Annual Catalog. There is a card on page 69 in the upper right corner. You never know where your inspiration will come from.
Here are the measurements for today’s card.
Card base is 5 1/2 X 8 1/2, scored and folded at 4 1/4
Seaside Spray layer is 5 X 3 3/4
DSP layer is 4 7/8 X 3 5/8
Banner is 2 X 3 1/4
Don’t forge the Retiring Annual Catalog Products!!! Click on the picture and you will open a PDF of the list. Please let me know if I can answer any questions or assist you with an order. Remember that I have Reward Points for each order of $50.00 or more in product.
HOST CODE
My March Host Code is: B6JC9CHE Please use this code for orders under $150.00. I will have a small perk for those with orders over $50.00
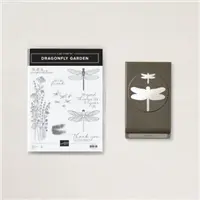
I have a cute card to share for a Thank You card using the Dragonfly Garden Bundle.
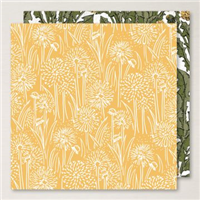
I combined several of the Garden products to make this card. I started with the DSP. As you know, I Love layers! And what is better than layering DSP. I used Four different sheets of the Dandy Garden Designer Series Paper. That may be a new record for me!
I started with the base card that I chose from the DSP. It is Terracotta Tile Cardstock. I then added the Bumblebee DSP layer and topped it with the Mossy Meadow DSP layer. That is all my “base” layer.
For the focal layer, I added yet another DSP piece that is a Terracotta Tile color and layered it onto Bumblebee cardstock. That was the #3 layer!! For the 4th layer, I simply used the Dragonfly punch and punched one of the beautiful dragonflies on one of the sheets of DSP. How easy is this? Have you realized that I have not stamped yet? I am just layering paper! LOL!!!!
I did finally stamp using the sweet sentiment from the stamp set. I stamped and layered that piece on a strip of Bumblebee cardstock. For the finishing touch, I added a couple of the Holiday Rhinestones that are a gold/orange color. I could have used the 2020-2022 In Color Enamel Dots of Cinnamon Cider. It is wonderful that some of these product types tend to change a bit when placed near a similar color. What a great advantage.
I hope you enjoyed this many layer card. I really enjoyed making it and combining the various colors and layers. I hope you will give one of these type cards a try. How many strips of DSP can you use?
Here are all of my measurements:
5 1/2 X 8 1/2 base
1st DSP layer 5 1/4 X 4
2nd DSP layer 4 3/4 X 3 1/2
2 7/8 X 2 7/8 Bumblee
2 3/4 X 2 3/4 3rd DSP layer
1 1/4 X 2 1/2 Bumblee
1 1/8 X 2 1/8 sentiment
Thanks for stopping in today! I hope you have a fun and safe weekend!I want to tell you a bit more Retiring Product news. Below is the link to the Annual Catalog List just click on the picture.
HOST CODE
My March Host Code is: B6JC9CHE Please use this code for orders under $150.00. I will have a small perk for those with orders over $50.00
I added an extra post last night with some information regarding the Retiring List. If you missed that one, I have the same information below. But first, lets get to today’s card.
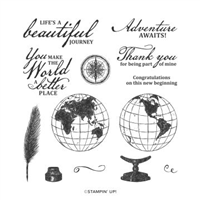
I say I love a lot of the stamps and paper Stampin’ Up! carries. But this is a wonderful one. It has really nice sentiments and is wonderful for graduations , travel, and masculine cards. This one is geared more towards a graduation or birthday for a certain age.
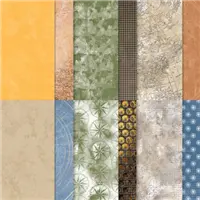
I paired the gorgeous World Of Good Designer Series paper with Gold Foil for the main part of the card. My little gap between the two pieces of DSP was an accident that I was thrilled with. I love when that happens. I had intended for the pieces to touch. But I believe that little gap just lets all the gold shine even more.
This was a really quick card with the exception of cutting paper. I have all of the measurements for you just below. The sentiment is stamped in Misty Moonlight and is finished off with the 2020-2022 In Color Dots. The world is stamped in Basic Gray with the circles for it and the background cut using Layering Circles Dies.
Measurements:
Card base of Misty Moonlight cut to 4 1/4 X 11 and scored at 5 1/2
Gold Foil layer cut to 4 X 5 1/4
Left side DSP strip cut to 3/4 X 5
Right side DSP cut to 3 X 5
Sentiment background of Misty Moonlight cut to 1 1/4 X 4
Sentiment White cut to 1 X 4
If you click on the picture it will open the PDF of the Retiring Items. Here are a few things to be aware of:
The retiring items are as supply lasts
The In Colors that are retiring will go quickly!
Pay attention to Bundles. They may carry over, there will be an astric or two. Check the coding on the bottom of the last page.
And if you place an order from me, please use my host code listed on the right column or beneath the picture.
Enjoy!!!
HOST CODE
My March Host Code is: B6JC9CHE Please use this code for orders under $150.00. I will have a small perk for those with orders over $50.00
The content in this blog is the sole responsibility of Jackie Beers as an Independent Stampin' Up! Demonstrator. The use of and content of classes, services or products offered is not endorsed by Stampin' Up!