I am still enjoying the new stamp sets awaiting you in the Occasions catalog coming soon. Today I have a simple thinking of you type card. This set is perfect for a little, or a lot, of color and stamping. I went for a little.
Hanging Garden, 146239
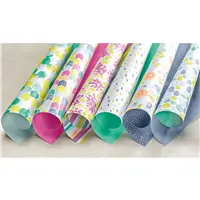
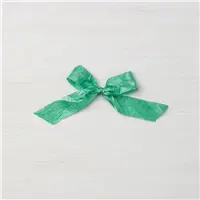
I used a mix of greenish colors today. I have been on a sort of monochromatic kick lately. This is just varying shades of green or teal. I colored the succulent plants with the Old Olive Stampin’ Blends. The basket is trimmed in the Pool Party. The DSP is Naturally Eclectic and has Pool Party and Emerald Envy. The ribbon is Emerald Envy and the card layer is Bermuda Bay. A very odd mix, but I think they all work together.
Thank you so much for visiting today! I hope you like the card and maybe will try some unexpected color blends. The supplies I used are listed at the bottom of the post.
Reminder: There are only two more days left to place your reservation for the stamparatus. You will receive it before it goes live in the 2018 Annual Catalog in June.
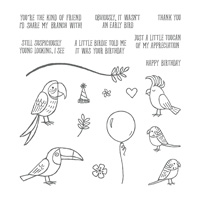
One of the benefits of being a Stampin’ Up! Demonstrator is getting to play with the new products first. Today’s card is one of those sets. When I saw the cards Brian King had made for a Stampin’ Up! event, I couldn’t wait to get my hands on it.
Bird Banter, 145852
I do believe this little guy is precious! The best thing about this stamp set is some of the unusual sentiments. I believe reading this sentiment upon receiving the card would just make me smile. And isn’t that why we make cards? Of Course it is!!
My bird is somewhat colorful I know. I chose the card base to go with the branch so it wasn’t the only brown. But after coloring the bird, I decided he needed a bright color to make him shine. That is the reason for the Pumpkin Pie. And the leafy DSP from Whole Lot of Lovely just seemed to fit perfectly.
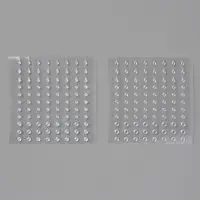
The one special item I used for the first time today are the Glitter & Clear Epoxy Shapes. They are tiny little shapes of clear epoxy. You get two sheets. One is clear and the other glitter. I used one of the clear over the bird’s eye. It looks like I added one of the squiggly eyes. I hope you can see it in the photo. I will definitely be using these little guys again soon.
Thank you for visiting with me today! I very much appreciate it. The supplies I used are listed at the bottom of the page. Clicking on any item will take you directly to my online store.
Reminder: There are only a few days left to place your reservation for the stamparatus. You will receive it before it goes live in the 2018 Annual Catalog in June.
I hope all of you have had a great Christmas! We spent the day with friends and just relaxed. And then I came home and made this card for you all.
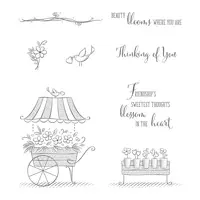
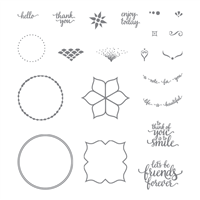
Friendship’s Sweetest Thoughts, 145826
When I first saw this set in the upcoming 2018 Occasions Catalog, I thought it was cute and then passed over it. But on the second go round (2nd of about 100!) I gave it another look and said Yes. I believe it has a lot of possibilities.
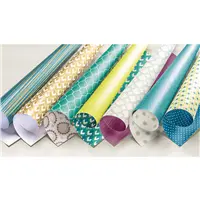
This is another fairly monochromatic card. I love doing these. Especially with the beautiful designer series paper that Stampin’ Up! offers. The DSP pretty much makes the card. All I did was stamp the flowers and color them with the Stampin’ Blends. I debated on doing a 4 X 4 card, but I loved the DSP and wanted to have it play a larger role. So I stayed with the regular size A2 card.
Thank you very much for visiting today! I love your comments. And if you have not received one of the Occasions Catalogs, or do not have a demonstrator, I would love to assist you with this. Feel free to comment or contact me.
The supplies I used are listed at the bottom of the page.
Reminder: There are only a few days left to place your reservation for the stamparatus. You will receive it before it goes live in the 2018 Annual Catalog in June.
I have another Birthday card for you today! As I mentioned earlier in the week, I have been behind even on my birthday cards to send out. I hate that. But this card is a super flexible layout. This layout would work for any type of card needed. All you would need to do is change out the sentiment and maybe add some other accessories. Here is the simple version for today.
Eastern Beauty, 143675
I just adore the entire suite of Eastern Beauty! The designer series paper is some of the prettiest that Stampin’ UP! has and the stamp set is one of the most versatile. As you can see from this layout, it does as I mentioned at the top of the post. It would work with pretty much any sentiment and DSP.
I mentioned yesterday about the new STAMPARATUS and want to repeat that information . Oh my, it is the cat’s meow of stamp positioners. I was on my trip when it was debuted and the first reservation period came. But from now to December 30 you can reserve one for yourself. They will begin shipping in March on a first ordered, first shipped fashion. And they will be available in the 2018 Annual Catalog in June. I cannot wait that long though!! For you to reserve your own, go to my website and log in with your account information. Then click on the reservation button under the Stamparatus icon. You can reserve your product now and will not be charged until it ships. There are several videos and other sneak peeks out there for you to checkout. I apologize that my technical difficulties are not allowing me to add that for you here. I hope that will be remedied soon.
Thank you so much for visiting today!! I greatly appreciate your visits and comments. If you have any questions, please do no hesitate to contact me.
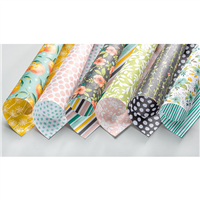
Happy November everyone! Time has flown by this year, especially the Fall. We are close approaching the Holiday Season. So before we get too crazy with engagements, shopping, etc., I thought it would be a good time to reinforce the Thank You and Appreciate You type of cards. And my sentiment is definitely one that would show our appreciation for a friend, co-worker, or random at of kindness.
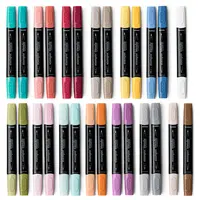
The new Stampin’ Blends are available for you to order beginning today. So I have CASED a card from the Stampin’ Blends Kit that Stampin’ Up! has created. It is a wonderful way to get the feel of the blends.
Color Me Happy, 144069
These colors just POP ! I am not very good with the blends yet, but they are beautiful and I know I will have a blast playing with them.
Other than the Night of Navy, I did not really have a color combination I was working with. I just randomly picked a few pairs of blends (They come with a light and a dark of each color) and started playing.
Tip: I stamped flowers randomly on a full sheet of Whisper White card stock , colored the flowers, and then cut it into angles and other shapes. A great way to try the blends and then have a variety of focal points for future cards.
Thank you so much for visiting today! I very much appreciate it. If you have any questions about the Stampin’ Blends, or anything else stamping related, please contact me. I hope you have an AWESOME day !!
My supply list of products I used today are listed at the bottom of the post.
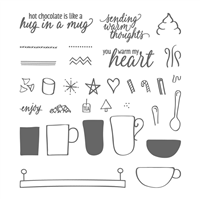
The Hug In A Mug stamp set is sort of a “sleeper” in the Holiday Catalog. I looked at it but passed it by in all of my flips through the catalog. That changed when I was given the set as part of the festivities at Brian King and Pam Morris’s World Card Making Day in Atlanta. After the hot chocolate treat favor we made with the set, I was definitely in love. So I have made some hot chocolate for you today.
Hug in a Mug, 144933
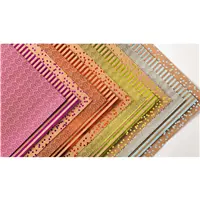
I apologize for my poor photography. The foil in this Foil Frenzy DSP is hard to photograph. It just wants to shine!! Today’s card is a 4 X 4 card. I can see making a lot of these for the winter months (or when Mother Nature decides to stay cold here in the south!).
I hope this card will give you incentive to check out this stamp set. It is on page 42 of the Holiday Catalog. It is a set that would be perfect year round.
Again, the DSP was my color chart. The Foil Frenzy paper is wonderful. It is more of a Craft than Crumb Cake but it all works together. I added the white layer to tie in to the stamped layer. But it is super quick and easy card.
I hope you enjoyed today’s card. I appreciate your visiting and hope you have a fun and safe Halloween.
Reminder: The last day for the DSP sale…………
The supplies I used are listed at the bottom of the page. By clicking on any item you will be taken directly to my online store.
There are three wonderful Stampin’ Up! Specials in October………
Designer Series Paper Sale October 1-31, Buy 3 Get 1 FREE! See details HERE.
Paper Pumpkin Kits for October and November will coordinate!! They will be great individually, but will work together in a special release. You must be signed up by November 10th for the November PP. It is ok that you missed the October PP. The November will still work on its own.
Merry Patterns Stamp Set is an exclusive Host set available during October. With a 300.00 order it is FREE and does not deduct from your other Host Rewards. See the Flyer HERE.
The content in this blog is the sole responsibility of Jackie Beers as an Independent Stampin' Up! Demonstrator. The use of and content of classes, services or products offered is not endorsed by Stampin' Up!