I am sharing with you in the next couple of days cards that I made for my Stamp Club’s Fall Swap. Then it is off to Orlando for the Stampin’ Up! 30th Anniversary! I am so excited. If I read the information correctly, we can share new products this time. Usually we cannot. So be sure and follow me on Facebook for the updates. I may not be able to do new posts but I know I will be able to add to the Blueline Facebook page.
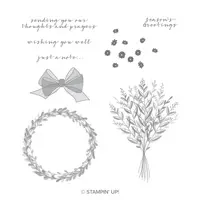
Now, back to the cards. The first is from my favorite set, Wishing You Well. I have shared a similar card before I believe. But this is definitely a keeper in the layout department. When making multiples this card is awesome.
Wishing You Well, 147864
I purposely did not put a sentiment on the front. That is the great thing about this stamp set. You do not need a sentiment to ground it. The additional bonus is that you can make multiples and put the appropriate sentiment on the inside as you need a card to send. A Win / Win situation!!
I have listed all of the information on today’s card below, as well as the supply list. Thank you for stopping in today. And be sure to like my Facebook page for updates from Orlando beginning on Thursday.
NOTE: There is a new feature being tested in the Online Store. It is “Shop the Project”. There are pictures of a card, etc, and you can click on it and see all of the supplies used. If you need any of them, you simply click on that item and it goes into your shopping cart. How cool is that??? Hopefully it will be utilized and become an added bonus to the website.
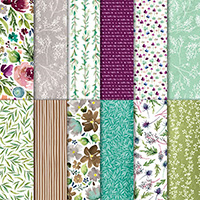
For today’s card, I am still using scraps of Designer Series Paper. And it is the Frosted Floral DSP again. I just cannot let go of these little pieces. Today I have used them as the focal point by making little banners. Here is the card.
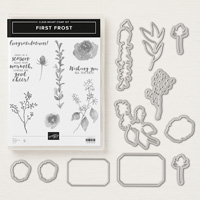
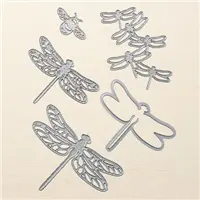
First Frost, 149943
Do you love this Designer paper as much as I do? Wow!! Well now I hope you will add this fabulous stamp set/bundle to that list. It is the First Frost Bundle and headliner of the suite that includes the above mentioned fabulous DSP! I have asked myself why this set is in the Holiday Catalog. At least to me, it is more a year round stamp set. All you have to do is change the colors. And the matching dies, of which there are 11, have the different sprigs, the roses and some frames. I don’t know why it is in this catalog, but I am thrilled that it is!! I love it.
This stamp set is one of the special stamps Stampin’ Up! has created that have this built in depth to them. You get the different texture/softness without two or three step stamping. A definite win!
The background sprigs are inked with Old Olive and stamped off before stamping on the white. I think they sort of mimic the sprigs on the DSP.
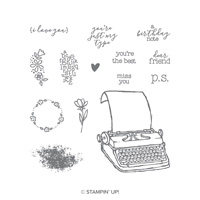
The sentiment is precious and is from the P.S. You’re The Best stamp set in the annual catalog. I hope you will take a look at that set. By using this little sentiment, the card could then have a multitude of different sentiments on the inside. This would be a great one to make using your scraps of DSP to just have on hand. Then you can add the appropriate sentiment needed on the inside.
Thank you for visiting today! I greatly appreciate it. All of the supplies used are listed at the bottom of the page.
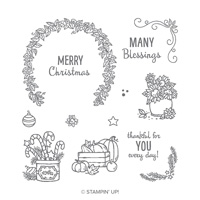
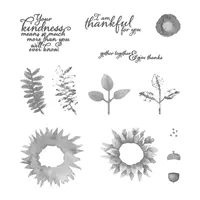
Today’s card is another quick and easy card that could have a variety of sentiments attached when needed. It showcases the gorgeous Frosted Floral Designer Series Paper and the Many Blessings stamp set.
Many Blessings, 147775
This versatile and gorgeous stamp set is inspired by Million Dollar Sales Achiever Ruth Snyder. It covers Christmas, Fall, and Spring/Summer. Also, since it is a special set, you can assume it will be carrying over after the Holiday Catalog is completed. WooHoo!! I know I will be utilizing it often. Actually I already have used it several times.
My photograph does not do the DSP justice. It is a frosted glimmer in gray. I apologize that it doesn’t really look that way in the picture. I made the focal point small to optimize the beautiful DSP. I love this type layout for small and mighty stamps!
I used Stampin’ Up!’s little trick from the Blends video. I stamped the image in Smoky Slate. By stamping in a softer color, when you apply your colors it looks like a “no line” picture. I also used the color lifter on the center of the pot to lighten the color somewhat. I am not a great blender, but these Stampin’ Up! blends make it so easy.
Thank you very much for stopping by today! I do really appreciate it. All of the products I used are listed at the bottom of the page.
Today is the unveiling of the 2018 Holiday Catalog!! WooHoo!! And instead of the using a set that you have probably seen numerous cards made from, I went with a more non-holiday set. The card I have made today is very simple and very flexible. It can be made in any color and most any sentiment added to it. In fact, you could make quite a few of these very quickly. I know it is pretty plain but I believe it is also super cute.
Flourish Filigree, 147870
This stamp set is not quite as noticeable in the Holiday Catalog as all the beautiful Christmas sets. Please give it a second look. It also coordinates with the Pretty Label Punch with the sentiments in the set. I chose to leave it blank. This way I can add the appropriate sentiment on the inside of the card as needed.
I used the Stamparatus to make this card to insure that I got complete coverage for a somewhat large stamp. Also I made several cards at the same time. The Stamparatus is perfect for that as well.
I wanted to have a little bit of Wow! So I used the Trio Punch to make the little see-through flower in each corner of the main layer. I love anytime you can see the card stock beneath.
Thank you for stopping by today! I very much appreciate it.
Welcome to InKing Royalty’s August Blog Hop! This year’s Blog Hop themes are inspired by popular songs – this month’s song is “Dog Days Are Over.” While we still feel the heat from a long, hot summer, August is a perfect time of year to start planning our Fall-themed cards. The projects in our hop will showcase Autumn, back-to-school and warm colors – you might even see a dog or two! We are excited to share our creations with you today! After you read my post, I hope you’ll hop over to the next person on the list at the base of this post.
I racked my brain for an End of Summer type card and kept coming up blank. Then I went out to fill the bird feeders and thought of the Blue Sunflower card I did previously. The light bulb came on!!! So I did an updated version of that. You can see the original card HERE. For the updated version I thought of a big sigh of relief . School has started back, all the before school and last minute chores are taken care of, and you can just take a breath and relax. That is relax for the few minutes before the holiday season begins!
Painted Harvest, 144783
I played around with different items across the front of this Double Z Fold Card. I kept coming back to the sentiment from Colorful Season “Just Breathe”. I love that and it totally described what my idea of the Hop Theme is. Since it was too large to stamp on the strip running across the front, I fussy cut around the sentiment. I was pleasantly surprised that I really like how it came out.
Here is a picture of the card opened.
I left the sentiment spot blank. I felt like there were actually two sentiments and that gives me room to write a short note to the recipient. But when you make it, feel free to add another sentiment! As always, the list of supplies I used are at the bottom of the post.
The base is 4 1/4 X 11, scored at 2 3/4, and 5 1/2. Z fold and burnish
The Mango pieces are 4 X 5 1/4, 2 @ 2 5/8 X 4
The Wood DSP pieces are 3 7/8 X 5 1/8, 1 @ 2 1/2 X 3 7/8, and a white at 2 1/2 X 3 7/8
The base strip is 1 X 11, scored at 2 3/4 and 5 1/2. Z folded and burnished
The strip pieces are: Mango: 7/8 X 5 1/8, 2 @ 7/8 X 2 1/2 . DSP is 3/4 X 5, 2 @ 3/4 X 2 3/8
Thank you for stopping by today. I hope you’ll hop along to the next stop on the bloghop, Robin Myren at Songbird Designs by Robin. There’s lots of inspiration to be found in this group – and you don’t want to miss it!
Today’s card is perfect for what I am going to be doing later this morning. Today is the day that Stampin’ Up! Demonstrators get to register for the 30th Anniversary Convention. WooHoo!! What is perfect is that I started today’s card without really thinking about that. The subconscious at work!
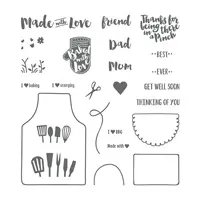
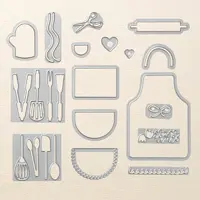
Apron Of Love, 145835
I was thrilled when this Apron Of Love set, with it’s matching Framelits, carried over to the new catalog. It has so much that can be related to an apron. To me, it brings back fond memories of an Aunt trying to teach me to cook. (Unfortunately it did not take!) I also remember my first Stampin’ Up! party/workshop I attended and the demonstrator wearing the SU apron. And yes, I do have a SU apron.
I made my apron a stamping apron and you can see the card sticking out of the pocket. It is paired with the Garden Impressions 6X6 Designer Series Paper. The colors are gorgeous in this DSP.
Yes, I do Love What I Do!!! And I hope you are inspired by today’s card. I have listed all of the supplies at the bottom of the post. This would have been a perfect card when the last Join Promotion was going on. Oh Well, it fits with my excitement of registering for OnStage. I get to hang out and stamp with my fellow demonstrators from around the country, and some from around the world!
Thank you for visiting today. I greatly appreciate each time you check out my posts.
The content in this blog is the sole responsibility of Jackie Beers as an Independent Stampin' Up! Demonstrator. The use of and content of classes, services or products offered is not endorsed by Stampin' Up!