I have a cute little card that would be perfect for a Just Because type card! It is the Merry Cafe and Coffee Thinlits. And even though there is no pumpkin color to the card, it says that it is “pumpkin spice season”. Actually it is starting to get there here in the south. Although to me any time is pumpkin spice time!! I love the stuff. But as I have said before, I do not drink coffee. I just get the pumpkin spice in everything else…..
Merry Cafe, 144965
This card base is the “Z” Top Fold card that I have done previously. I had a nice lady ask me for a link and I didn’t really have one. I just sort of did it myself. So I have made another with that fold and will give a little better direction on how I did it.
MEASUREMENTS & DIRECTIONS:
The card base is cut to 4 1/4 X 11. It is scored at 2 3/4 & 5 1/2
Fold and burnish on the score lines. Fold the 2 3/4 score line under so that the fold is against the 5 1/2 score line. But Do Not secure it yet
The first layers are: 3 3/4 X 5, 3 5/8 X 4 7/8, 3 1/2 X 4 3/4
Top layers re 2 5/8 X 3 3/4, 2 1/2 X 3 5/8
Adhere the bottom layers with the DSP together and secure to the base card.
Adhere the top layers together and lay them on the DSP layer to see where your ribbon will be. (I do not adhere this layer until after I secure the ribbon.
Choose your ribbon and cut a strip wider than your card. Use Fast Fuse or glue dots to adhere the ends between the folded “Z” top. Now tape or glue that top section closed , with your ribbon in between it. (This allows for a clean looking inside flap when the card is opened)
Now attach your focal point layer.
For added touch to the ribbon, I cut a strip, or 2 in this card’s case, and tie them around the attached ribbon at the top.
A NOTE about my ribbon today. I used the 5/8″ Burlap Ribbon for this card. However it was too thick for the amount of room I had at the top. So I cut it in half lengthwise. I then cut two individual strips from the leftover half and used them as the tie.
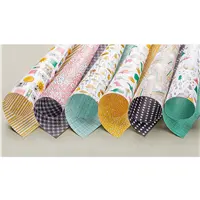
REMINDER: The Designer Series Paper Sale is almost over. I hope you will not let this great offer get away from you.
Thank you for visiting today!! If you have any questions, please do not hesitate to ask. Also the supplies I used are listed at the bottom of the page.
There are three wonderful Stampin’ Up! Specials in October………
Designer Series Paper Sale October 1-31, Buy 3 Get 1 FREE! See details HERE.
Paper Pumpkin Kits for October and November will coordinate!! They will be great individually, but will work together in a special release. You must be signed up by November 10th for the November PP. It is ok that you missed the October PP. The November will still work on its own.
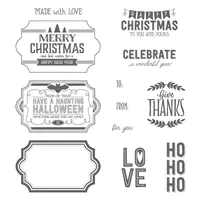
Merry Patterns Stamp Set is an exclusive Host set available during October. With a 300.00 order it is FREE and does not deduct from your other Host Rewards. See the Flyer HERE.
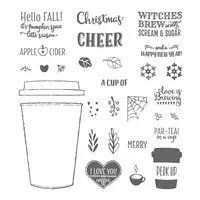
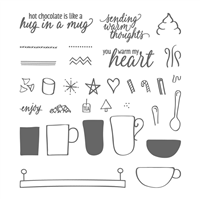
The card I designed for today is my first one with this super cute set from the Holiday Catalog called Hug In A Mug! Who would not love a Hug In A Mug? I adore that name. The set seems to be a little bit of a sleeper set possibly due to the Coffee Cafe in the Annual and then the seasonal coffee in the Holiday Catalogs. But this one is just really cute. I hope you will give it a look.
Hug In A Mug, 144933
This card is a CASE from one of the Make ‘n Takes we did at World Card Making Day. I loved the mug of steaming cocoa with the sentiment. I added the hearts to the Pool Party layer to go along with the sentiment also. Because of the quilt and the sentiment, I believe this card could be used for so many occasions. A hug and a quilt are just year round love!
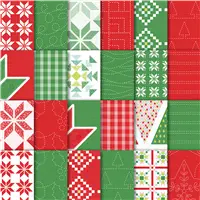
I have paired the stamp set with the Quilted Christmas 6 X 6 Designer Series Paper. This quilt pattern just emphasizes the Hug! At least that is what I think of when I see a hand quilted quilt. Also it brings back wonderful memories of my childhood!
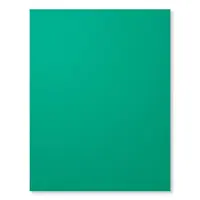
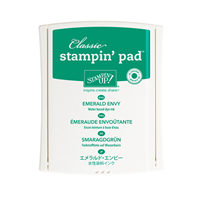
These are the unlikely trio of colors I used for this card. I would have never added the Lemon Lime Twist to these other two. I did pull all three colors from the DSP. And since it works in the DSP, it must work here. I thought it would make the sentiment POP. I hope you agree…..otherwise you are probably thinking I have lost my mind ! LOL…
Remember that today is the last day for the World Card Making Day Sale!! It is also the last day to sign up for the October Paper Pumpkin….remember that October and November are coordinating this year. I cannot wait to see what they are!
Thank you for visiting today! I hope you have a great day. The supplies I used are listed below. If you click on any item you will be taken directly to my online store.
There are four wonderful Stampin’ Up! Specials in October………
World Card Making Day Sale October 1-10, 15% off select card making essentials. See details HERE.
Designer Series Paper Sale October 1-31, Buy 3 Get 1 FREE! See details HERE.
Paper Pumpkin Kits for October and November will coordinate!! They will be great individually, but will work together in a special release. You must be signed up by October 10th to receive the October PP and then November 10th for the November PP.
Merry Patterns Stamp Set is an exclusive Host set available during October. With a 300.00 order it is FREE and does not deduct from your other Host Rewards. See the Flyer HERE.
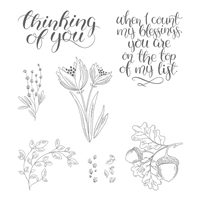
Here in Atlanta it actually feels a little like Fall today. That is a welcome change for us. So I have a super cute Fall card to show you. I have used the much overlooked Count My Blessings stamp set. At first glance this set may say Fall, but I believe most of it can be used any time of year.
My color inspiration was from the acorns and I chose fairly traditional Fall colors. I did use my Aqua Painter with Pumpkin Pie for the tips of the leaves and then feathered that into the old olive. The background is Soft Suede ink stamped onto Soft Suede card stock, I sometimes forget to do the simple things to make our own DSP, so to speak. It really is quick and easy.
This card is not at all difficult to do, even with the water coloring. More layers sometimes make it look like more I do believe.
A quick tip for the ribbon accent: I cut a strip of ribbon and tape each end to the back of my panel. Then cut a smaller piece and simply tie it around the attached strip. I get a pretty close to perfect little knot and do not need extra fingers for attempting to tie the ribbon pieces in front and yet keep it tight around the panel. I never could do that very well!!
Thank you so much for visiting today! I love hearing from you and I hope you will try a quick project like this one. The measurements I used are below and the supplies are listed at the bottom of the page. I hope you have a great day!
MEASUREMENTS:
8 1/2 X 5 1/2 Old Olive folded in half for the base
4 X 5 1/4 Whisper White
3 3/4 X 5 Soft Suede
2 3/4 X 2 7/8 Old Olive
2 1/2 X 2 5/8 Shimmery White for watercoloring
There are four wonderful Stampin’ Up! Specials in October………
World Card Making Day Sale October 1-10, 15% off select card making essentials. See details HERE.
Designer Series Paper Sale October 1-31, Buy 3 Get 1 FREE! See details HERE.
Paper Pumpkin Kits for October and November will coordinate!! They will be great individually, but will work together in a special release. You must be signed up by October 10th to receive the October PP and then November 10th for the November PP.
Merry Patterns Stamp Set is an exclusive Host set available during October. With a 300.00 order it is FREE and does not deduct from your other Host Rewards. See the Flyer HERE.
I showed a Smooshing technique card a few days ago. And now I have tried it with a little bit of a twist. The results may be questionable !!
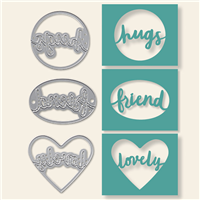
Lovely Words Thinlits Die, 143733
You can see my first attempt using the original method by clicking HERE. Julie DiMatteo was who I copied in my previous card and her video is wonderful. You can see her video HERE on the original Smooshing Technique. This one sort of looks like a child’s fingerprinting gone bad!! But it was fun to make, and for me that is what matters.
The “Take Two” is that instead of putting the ink refill drops on a plastic sheet and then touching the other plastic to it, I just dropped the ink refill droplets onto the Glossy card stock. I did not add water. I simply touched a acetate sheet to the drops and spread it around.
I chose the Thinlit Die Lovely Words to use as the focal point on my card instead of covering up the Smooshing I did. This is such an easy and quick way to add words to a card. And the Multi-purpose Adhesive Sheets are a must. I would have glue everywhere if that was how I tried to adhere this. Thank You Stampin’ Up! for bringing these back in the catalog!!!
Thank you for visiting today! I appreciate you stopping and checking out my cards. The supplies I used are listed below. You can click on any item and be taken directly to my online store.
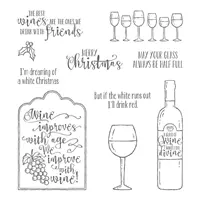
I love all of the stamps in the Half Full set. There are nice sentiments and they all work great with each other, as well as other sets. Plus they are just so dang cute!! Here is my card today.
Half Full, 144999
I could not decide on a white, red, or blush for my wines, so I went with all three!! More is better!! The splatters, I have messy friends, are actually from the Brightly Lit Christmas set. It was on my desk when I decided I needed a splatter. For that set I believe it is either snow or berries for the wreath!
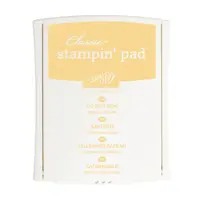
I colored the wine in the glasses with Stampin’ Write Markers and then stamped the spilled wine from the ink pads. The white wine is So Saffron, in case you need a nice white wine color.
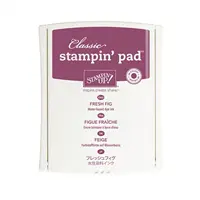
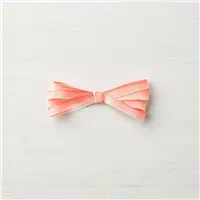
I offset the center panel to allow for the bow. The new 1/2″ Finely Woven Ribbon in Fresh Fig is beautiful, but it is a little thicker than some of our other ribbons. So the bow will not tie as small as I usually like to use. Therefore I needed more space for the bow to fit. I have seen several cards from other demonstrators, Mary Fish comes to mind, who have made some beautiful cards using this layout. So you could say I am doing a CASE of one of her cards.
Thank you so much for visiting today! I hope you enjoyed the card and I would love to hear your comments. The supplies I used are at the bottom of the page. You can click on any item and be taken directly to my online store. I hope you have a great day!!
I have another Fall card for today. Although to Give Thanks is something that could be used year round. I have used the “direct to paper” technique again to showcase this simple punched sentiment.
I really like this color combination. It is soft on the “direct to paper” technique but stands out on the card stock surrounding it. And the Calypso Coral Ombre Ribbon is just a must have!! It is gorgeous and so easy to work with.
If you missed my previous “Direct To Paper Technique” card, you can see it HERE.
The sentiment is from the Label To Love set. This set has sentiments for a variety of holidays and they all fit the Everyday Punch. The punch is a bundle with the Merry Labels set, but it works with both sets. A double winner!
MEASUREMENTS:
Card base is Crushed Curry cut 8 X 4 and folded in half
Pear Pizzaz layer is 3 3/4 X 3 3/4
Glossy card stock layer is 3 1/2 X 3 1/2
The supplies I used are listed below. You can click on any item and be taken directly to my online store. If you have any questions, please feel free to contact me. If you do not have a current Stampin’ Up! Demonstrator I would love to help you get started.
Thank you so much for visiting today! I very much appreciate your comments as well. I hope you have a wonderful weekend.
Please do not forget to look at this Awesome special for Paper Pumpkin. New Subscribers can try their first month for 50% off. That means it is only $10.00 to get the first box. The contents are worth well over that amount. There is no obligation to continue the subscription. But I hope you will fall in love with it as I have. If you decide that you do not want it after the first, or even the tenth, you simple go to the website and cancel. It is that easy. So give it a try at this half price rate.
The content in this blog is the sole responsibility of Jackie Beers as an Independent Stampin' Up! Demonstrator. The use of and content of classes, services or products offered is not endorsed by Stampin' Up!