I have some awesome new products to show you at the bottom of the post. So don’t close out too soon! But let’s get to the card of the day first.
The layout I have used for today’s card is one that would work for pretty much any card. And I adore it! It is also great for the scraps we all cannot stand to through away. The layers can be adjusted actually so that they would fit the scrap pieces you have. Isn’t that a great idea?
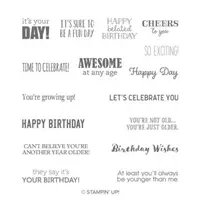
Itty Bitty Birthdays, 148618
I planned this card as a Birthday card, but in adding the categories that it wold fit, I realized this sentiment is an awesome one. It would be great for a Graduation, which is coming up real soon, or a retirement. And probably a few others.
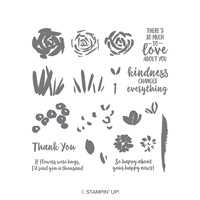
The sentiment is from Itty Bitty Birthdays stamp set. I love all of the “Itty Bitty” type sets. They are the perfect size and usually cover almost any occasion, even the more unusual ones. Or at least ones that you do not use very often.
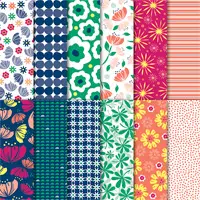
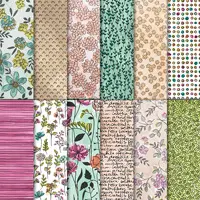
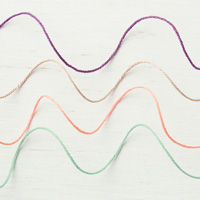
I have not used a lot of Grapefruit Grove card stock, so decided to remedy that today. It is one of the colors in the pack of this gorgeous DSP. It is the Happiness Blooms Designer Series Paper. I also used Night of Navy as the DSP backing , and Pineapple Punch for the sentiment backing.
Thank you so much for stopping in today. I hope you enjoyed today’s card and will return tomorrow to see another new project.
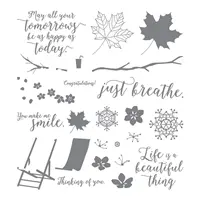
I am trying to use some older products as talk is beginning about the next Annual Catalog. I know we will be losing some awesome stamp sets. So I am working my way back through some sets. Today’s card is a carry over set from the Holiday Catalog, First Frost.
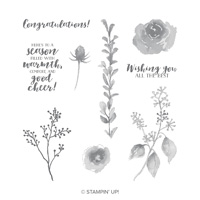
First Frost, 148420
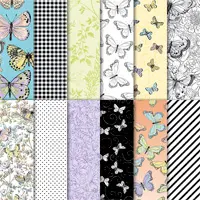
I love using stamp sets that have versatility. This set was in the Holiday Catalog, but obviously has other uses than the winter holidays. I have paired it with the Botanical Butterfly Designer Series Paper from Sale-A-Bration. I love this paper because of the black and white on the opposite side from the butterflies.
Another product I do not use often enough is the Tailored Tag Punch. I really like the versatility of it. It is a tad larger than some of the others, so it holds a bit larger stamped sentiment. Also, it is very easy to cut a background for it due to the straight sides. Here I just secured a little bit larger Basic Black piece of card stock and used my paper snips to cut the edge. Easy Peasy!!
Thank you for stopping by today! I appreciate it very much. All of the products are listed at the bottom of the page. And the Botanical Butterfly DSP is still available for FREE with a $50.00 order through the end of the month.
JOIN PROMOTION:
The Ultimate Shopping Experience is to purchase the Starter Kit. Please read through the next items and think about it. If you love paper crafting as much as I do, I believe you will want to talk with me. I hope you will consider it.
There are 2 Starter Kit choices:
You create your own kit. You get to choose ANY Stampin’ Up! products (includes bundles) However, SAB and Host stamps are excluded from the Starter Kit (but not your next order)!
You will receive a 20% discount on all future purchases through July 31, 2019. But there is no obligation to ever order anything else.
It’s a great way to Get Your Feet Wet, so to speak. Just see if you like being a demonstrator.
Hobby Demonstrators are welcome. I was one for about ten years, and really still am!
You will be the first ones to see the new catalog when it debuts in June, plus preorder from it.
There are NO OBLIGATIONS to continue or ever place another order.
The First Bonus is that you become part of my Team. I would love to have you and enjoy sharing my love for stamping and paper crafting with you.
You become a member of my Upline, Brian King, and his InKing Royalty group. There are great ideas and thoughts shared on our Facebook page.
Now for the 2 options and the Bonuses:
The first option costs $99.00 and you get the usual $125.00 worth of products (of your choice) PLUS an additional $50.00 of product for a total of $175.00 at a cost of only $99.00 to you. And did I mention FREE shipping on that order? That is another 10% off.
The second option costs $129.00. You get the same amount of products as the first choice, ($125.00 worth of your choice of products, Plus the additional $50.00 of Free Products, FREE Shipping) and the AWESOME new Craft & Carry Tote which is valued at $50.00. Basically you are paying an added $30.00 for the Craft & Carry Tote.
(I had the option to purchase, and of course I did. It is well worth the $50.00 and is a Fabulous deal for $30.00)
Here is the Tote. It is a great size, has dividers that can be moved for whatever products you are carrying each use. There are two outside pockets that are large enough to hold punches, and much more. There is a zipper outside pocket. It has regular straps as well as a shoulder strap. It has the Stampin’ Up! logo. It is made of a great heavy weight canvas. And it is so Pretty!!
I am showcasing two great Stampin’ Up! products today. The beautiful Designer Series Paper, and the Amazing Stamparatus. I love, love, love both of these products. This is a card I shared with my Stamp Club yesterday to show them some special abilities of the Stamparatus.
I added the fourth color to my combination to make the flower pop. I love Blushing Bride, but it is a bit too shy to POP!
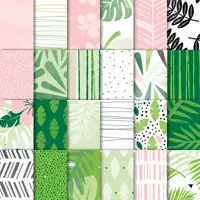
This Tropical Chic DSP is one of my favorites. I love bright colors and this is right up my alley. The flower from Colorful Seasons seem to be the perfect flower for this card. It fit perfectly with the size template I had made for the Stamparatus Wreath technique.
Here is a picture of my template. I think it pretty much explains the process to make your own very easily. Just find the center, line up the die, cut and turn it from square to diamond and cut again.
Wreath Template for Stamparatus
I hope you will give this technique a try. There are several videos already out there with directions so I did not create one. I would love to see your version if you decide to try it. I appreciate you stopping by today and hope you will return tomorrow. All of the supplies I used are listed at the bottom of the page.
MEASUREMENTS:
Base is 5 1/2 X 8 1/2 scored and folded in hald
Spruce layer is 5 3/8 X 4 1/8
DSP is 1 X 5 1/4, and 3 X 5 1/4
Square Spruce layer is 3 X 3
White layer is 2 7/8 X 2 7/8
Don’t forget that it is BONUS Days!! Check out the link below!
The Stampin’ Up! Share What You Love Designer Series Paper is by far my favorite of all time!! I have used it several times since I received my Pre-Order for the new catalog. And I cannot stop using it. I may need intervention! But in addition to the AWESOME paper, I am showcasing a new fold. Or it could be a new cut, or both! Here it is and then I will explain what I mean.
Abstract Impressions, 147513
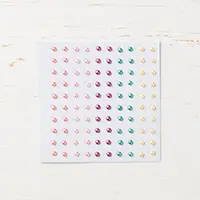
That DSP just shines! Actually it really does shine. This is one of the sheets that has a pearlized look to some of the flowers. The little pearls in the flower centers are the Share What You Love Artisan Pearls. They are just too cute!
The Fold/Cut is a little different. Since the DSP is card stock weight, it can serve as a card base without feeling flimsy. To achieve this look, I cut the Smoky Slate card stock to 5 1/2 X 8 1/2. I scored it at 4 1/4, the normal folding point for an A2 card. But I did not stop there. I went back to my cutter and with the score line at 3/4 on the trimmer ruler , I cut off the rest of the panel. (And I was able to use that cut piece to make the top layer with a bit leftover.)
The DSP is cut to 4 1/4 X 5 1/2. I burnished my fold on the Smoky Slate layer and placed adhesive on the inside of the 3/4 section. Then all I had to do was line up the DSP with the rest of the base and fold the small section over on top of it. Easy Peasy and perfect alignment. An added bonus is that when you open the card, you get to see the other side of this beautiful DSP!! WooHoo!! That is always a problem for me when the DSP is gorgeous on both sides. I hate to hide one of them. With this Cut/Fold, I do not have to hide either side.
Thank you so much for visiting my blog today! I greatly appreciate it and would be happy to answer any questions if I was not very clear on the instructions. I have listed all of the products used at the bottom of the post. I hope you have a great rest of your day!
It is still a great time to become a Stampin’ Up! Demonstrator. I would love to have you join my team. A great perk for demonstrators this time of year is getting to see the new catalog first. Then we get to order and play with the new products a month early. For me, that is one of the best parts of being a SU Demonstrator. Of course, the discount helps! If you are interested, please contact me and let’s talk.
Welcome to our Pals Blog Hop, May 2018. This month we’ll be “Stepping Up with Textures or Techniques.” What’s that? Projects that are “stepped up” by using textures or fun techniques. Who knows, maybe both! Join us in the fun while we inspire you to “step up” your creations.
You may be starting the hop here or you may be coming from a previous Pal’s blog. Either way, you’ve come to the right place. You’ll find the full line-up below to help you move or “hop” along from Pal to Pal.
For an old but goody technique, I have done a negative sponging technique. It is one of the simplest techniques to do and always gives surprising and beautiful results.
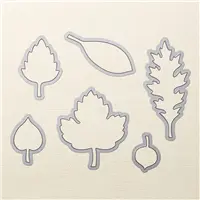
Leaflets Framelits, 138283
I have used the Leaflets Framelits (on the retiring list 🙁 ) to make a template. And it’s a 2 for 1, you get a leaf already cut out for a future project. I centered the negative of the leaf on my Whisper White card stock and secured it with some Washi Tape. You do not want the template to move while you are sponging. To begin, I colored the entire leaf with Calypso Coral, then went over all but the center with Cherry cobbler. I then went around the edges with Cajun Craze for a little more depth. Now just lift up the template and you have a beautiful stenciled Leaf.
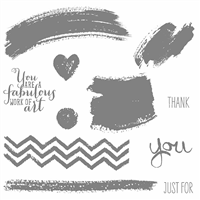
The sentiment is from an old favorite the Work of Art stamp set. I next die cut another leaf from a layer cut for my card. There are two ways to attach the stenciled leaf. It can be adhered to the top layer from underneath. Or it can be adhered to the base card and then the top layer attached over top with Stampin’ Dimensionals. That takes a bit of aligning, but I love the look.
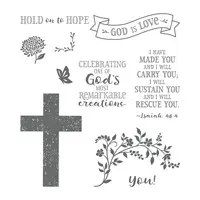
To finish off my card I stamped the little corner decoration in Cherry Cobbler. I love the simple little addition. It is from the Not Retiring new set Hold On To Hope. Although, this is a bundle and the 10% discount for the bundle will end when the Occasions Catalog ends. So jump on it now!
Thank you so much for visiting today! I appreciate your stopping by my blog during the hop. I would love to read comments from you. The supplies I used are listed at the bottom of the page. Remember the Retiring List and Clearance Rack are “While Supplies Last”. The leaf framelits and Work of Art set are both on that list.
Now it’s time to see how the rest of the Pals are Stepping up with Textures or Techniques. Please use the Blog Hop Line-Up below to move from blog to blog. Don’t forget to show us some love by commenting on our creations.
Mark your calendars for June 13, 2018 where we feature projects for Babies, Birthdays and Brides. You’ll probably even see products from Stampin’ Up!s new 2018-2019 Annual Catalog. Don’t miss it!
Another Paper Pumpkin Special: The March PP was so popular due to the special gift that it sold out. So Stampin’ Up! has offered a great deal to replace that. New Subscribers who sign up before April 10, will receive April and May for half price. So 2 months for the price of 1. A great deal. Use my link HERE, and enter the code: SAVEFIFTY0418
It is still a great time to become a Stampin’ Up! Demonstrator. I would love to have you join my team. A great perk for demonstrators this time of year is getting to see the new catalog first. Then we get to order and play with the new products a month early. For me, that is one of the best parts of being a SU Demonstrator. Of course, the discount helps! If you are interested, please contact me and let’s talk.
My card for today is for a special occasion. A good friend’s son just bought his first house. Of course I have been intending to order the new Host Rewards set “In The City” which would have been perfect. But since I have not ordered it yet I made do with what I had on hand.
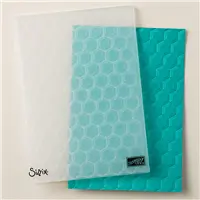
I wanted it to be more masculine, but have some brightness as well. I believe it came out pretty well. To add some texture to the card I used the Hexagon Embossing folder on the Sahara Sand card stock. The “YAY” is stamped in Always Artichoke on Very Vanilla and cut out using the Stitched Shapes Framelit Dies. The Always Artichoke layer behind it is cut out using the next larger die from that set.
The Balloons are stamped on Very Vanilla in Always Artichoke and Crushed Curry and fussy cut out. The are layered on top of each other and then raised with a Stampin’ Dimensional. The “string” is Linen Thread. The sentiment is from the same stamp set, “Super Duper”! and is punched out with the Classic Label punch. The layer behind it I hand cut.
And that is that for this card. It came together very quickly, and is a card, and a layout that could be used for most any occasion. That is a Win/Win to me !
The content in this blog is the sole responsibility of Jackie Beers as an Independent Stampin' Up! Demonstrator. The use of and content of classes, services or products offered is not endorsed by Stampin' Up!