Welcome to InKing Royalty’s January 2023 Blog Hop! If your craft projects aren’t already filled with hearts, then you might be behind the eight ball. No worries – we are here to help. We are excited to share our heart-filled creations with you and hope you love them! After you read my post, I hope you’ll hop over to the next person on the list at the base of this post.
The Hearts theme was an easy one to follow with the fabulous new Country Floral Lane Suite of products in the new Mini Catalog. I loved this Suite as soon as I saw it and hope you will as well.
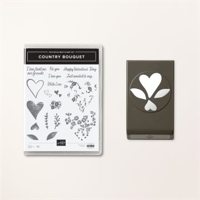
Stamps and Punches
My card is sort of a Heart Bouquet. And is not at all what I had planned originally! The Country Bouquet Bundle is a Punch Bundle. That was where I was originally headed. Then I saw the floral heart that I have used and changed directions just a bit. I did use the leaves from the punch. They are slightly hidden by the bow.
However, the floral heart intrigued me and I had to give it a try. It is a two step heart with the flowers and greenery separate. The flowers are stamped using Sweet Sorbet Ink and the greenery is Pear Pizzaz. Sadly with this being a punch bundle, I had to cut out the heart myself. Since a heart is mostly straight lines that was not a huge undertaking. I did use the leaves from the stamp set in Pear Pizzaz as well and punched them using the Country Bouquet Punch. Then decided it needed more greenery to look like a bouquet. So out came the Boughs Punch for the background greens. This punch has been getting a lot of use from me of late.
Papers
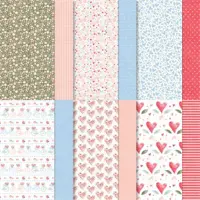
To continue with the Sweet Sorbet and Pear Pizzaz, I went with a striped piece of DSP. It is from the Country Floral Designer Series Paper that is also included in the Suite of products. I layered the striped DSP onto a piece of Basic White and then to the base card of Pear Pizzaz.
Finishes
There are several final add on touches to complete this card. First is the sentiment. It is from the Country Bouquet stamp set as well. So this is a one set card basically. I love that!! But it is die cut with a die from the Beautiful Trees Dies. It is nothing flashy, and just has a bit of an embossed border around the edges.
The most notable of the finishes is the beautiful bow. The Sweet Sorbet Metallic Ribbon is so pretty and extremely easy to work with. Due to that I went a bit out of the norm and created a three strand bow. I love how it really pops up. And the final touch is the Festive Pearls scattered around. There are some on flower centers of the heart, and one on the sentiment.
Thank you for stopping by today. I hope you’ll hop along to the next stop on the blog hop, Sheryl Abernathy at Elegant Sentiments. There’s lots of inspiration to be found in this group – and you don’t want to miss it!
Thank you for hopping along with us. If you get stuck during the Blog Hop, please use this line-up as a guide:
My January Host Code is HEMUVZZK. Please use this code for orders under $150.00. I will have a small gift for those with orders over $50.00 in addition to the Perk Rewards Program. You can read all of the information at the top of the page in the Menu Bar under SHOP / Perks.
Thank you for stopping by today. I hope you enjoyed today’s project and will come back. I do read and reply to all of the comments individually. They mean a lot to me. Please reach out if you have a question.
Happy Valentine’s Day to all of you! Surprisingly, I have made a very simple card to share with you. Sharing our hearts is always a good thing and I hope this card gives you a Smile!
This 3 Heart card is also for the Make My Monday Challenge. I hope you will give this challenge a try and allow us to see your spin on 3 Hearts! Here is a link to the site.
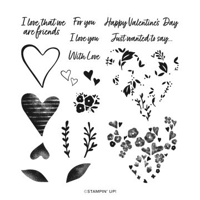
Stamps
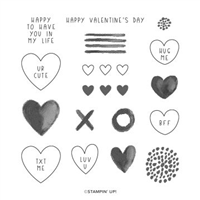
I joined two different stamp sets for this 3 Heart challenge, plus a matching die set. The sentiment is from an awesome stamp set named Happy & Heartfelt. And since fonts are a measuring tool that I use for sentiments, I give this one a 10! All of these are fun ones like this and are a great mix of sayings. For the second stamp set, I used the large swirl fro the Sentimental Swirls set. It was perfect for “hanging” my hearts on.
Dies, Texture, and Fun
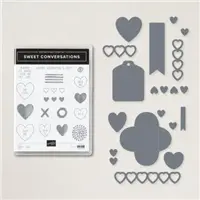
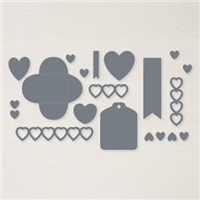
The hanging hearts are from the Sweet Hearts Dies. They are part of the Sweet Conversations Bundle, which I have used several times. And I did use it on the inside of the card. I chose two of the heart shapes and die cut two of each to see how they fit best on the swirl. They are “hanging” from the little Classic Matte Dots in White.
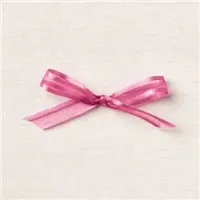
I hope you can see the background texture also. It is the Tasteful Textures Embossing Folder and gives just enough of a fancy paper feel for the simplicity of the card. To finish the card, I went with the great Open Weave Ribbon in Polished Pink. I think it adds the bit of a fancy touch to finish the card.
Sale-A-Bration is the Best Time of Year!!
HOST CODE
My February Host Code is HFEQADCZ. Please use this code for orders under $150.00. I will have a small gift for those with orders over $50.00 in addition to the Perk Rewards Program. You can read all of the information at the top of the page in the Menu Bar under SHOP / Perks.
Thank you for stopping by today. I hope you enjoyed today’s project and will come back. I do read and reply to all of the comments individually. They mean a lot to me. Please reach out if you have a question.
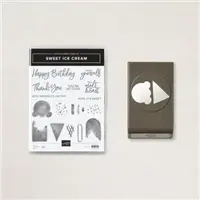
I needed a birthday card for a 1 year old little guy. I know he would not care about a card, but his Mom loves Disney. And I remembered seeing a card making the mouse ears from the Ice Cream Builder Punch. that was my start.
I made one of the Quick and Easy Shaker cards, with the added bonus of Micky Mouse Ice Cream. I used the Ice Cream Cone Builder Punch to punch a “scoop” from Bermuda Bay and Coastal Cabana cardstock. The ice cream stick is from the Sweet Ice Cream stamp set. The stamp set and punch come as a bundle with a 10% discount!
The “confetti” circle is from the Ice Cream Corner Designer Series Paper. I used the 2 1/4″ Circle Punch. The sentiment is from the stamp set. I used the scalloped oval of the Double Oval Punch to cut it out. That “You Melt My Heart” is so cute and unique. I think it would make a great card for anyone you are sending love to.
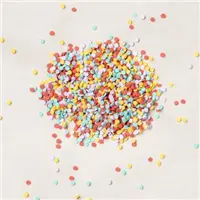
The shaker card is made using one of the Clear Envelopes. I cut a different piece of the Ice Cream Corner DSP to 4 X 5 1/4 and placed it inside the envelope. I then added quite a few of the Ice Cream Corner Sprinkles. I closed the envelope, with the closed part on the back side and folded the edges down for a tight fit. All I had to do now is add Tear & Tape to the back side and adhere it to the card base. Note: You have to be very careful as it is a One Shot to make it right type application. The Tear & Tape is not at all forgiving!! Ask me how I know! LOL!!
Once the shaker was put together, all I had to do is add the front pieces and I had an adorable little ice cream card. It just hints at Disney and Micky, but I know that’s what it is.
Thanks for stopping by today. I hope you will give this easy shaker card a try. And also remember to turn your ice cream scoop upside down for some mouse ears!
HOST CODE
My March Host Code is: B6JC9CHE Please use this code for orders under $150.00. I will have a small perk for those with orders over $50.00
I hope you had an enjoyable Valentine Day yesterday. We do not get too excited about these holidays. It was just a nice, relaxing, and WET, day. I am ready to go out and see sunshine!!! I am happy we just have rain and not the snow and storms some are having. I hope all of you are safe and dry!
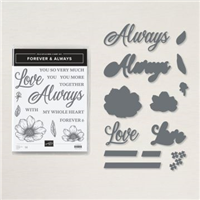
Today’s card is an extra Valentine card I made but did not share. It could also be for a wedding. I paired a few different products from the Forever & Always Bundle and suite.
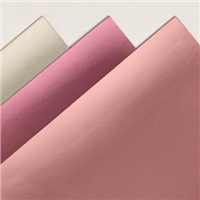
I mixed several blingy pieces on this card. I began with the card base of Blushing Bride cardstock. Next is a layer of the Love You Always Foil Sheet, which is blush or champagne color. The foil is topped with True Love Designer Series Paper in the polka dot.
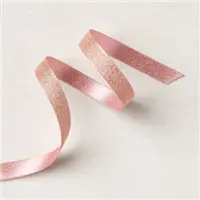
I added a banner with an angle cut made from the Love You Always Foil sheet. It is wrapped with a ribbon bow from the Blushing Bride Metalic Ribbon. The ribbon is beautiful! The back is Blushing Bride and the front is a mixture of blush and gold. I had to fiddle with my bow to keep only the front of the ribbon showing. It is well worth the fiddling time!
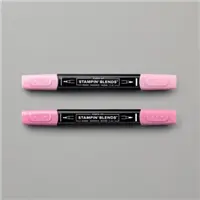
For the focal areas, I stamped the flowers from the Forever & Always Bundle and colored with Rococo Rose Stampin’ Blends. The leaves are colored using Just Jade Stampin’ Blends.
I went a bit rogue on the “LOVE”. I had used the Blush Foil, but wanted to bring out the gold in the ribbon. So I used Gold Foil to cut the background of the LOVE. (If I had a do over, I would use the blush for this as well)
Measurements:
Blushing Bride card base is 4 1/4 X 11
Foil layer is 3 7/8 X 5 1/8
DSP layer is 3 3/4 X 5
Angle Foil is 2 1/2 X 3 7/8 with a 1″ angle cut (place a mark at 1″ on the right side and put the mark on the cutting line. place the opposite corner on the cutting line as well, cut from mark to point)
Thank you for stopping by today. I hope you like my mix of products and will give these items another look in the catalog. Please let me know if you have any questions.
HOST CODE
My February Host Code is: MRYR7XY2 Please use this code for orders under $150.00. I will have a small perk for those with orders over $50.00
Last week I had asked on my Facebook page, Blue Line Stamping, to name a few stamp sets that you would like to see used. I used one on Monday. You can see that card HERE. And today I am sharing the second one. It is Kangaroo & Company.
I chose to make the Kangaroo as a Valentine Card. But since it doesn’t say that on the front, it could be used for any expression of love. The little envelope is part of the stamp set and I think it is simply adorable, so I wanted to include it. It’s sort of hanging in the air, so I see it as love is being sent. Yes, I know I have a crazy imagination!!! LOL!
The background for the card is from the True Love Designer Series Paper. I used the new Blending Brushes with Flirty Flamingo and Poppy Parade Inks to blend the colors onto the paper. I love how the dots still show through so well.
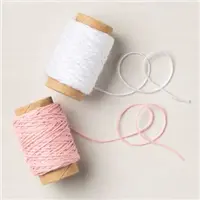
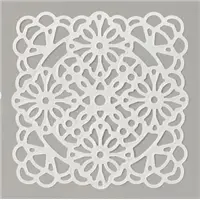
To ground everything, I added one of the Vellum Doilies. These little squares are so versatile and are perfect for this use. I also added the White Baker’s Twine from the Snail Mail Combo Trim Pack.
The kangaroo is adorable alone or with one of the included inserts for the belly slot. I went with the hearts for the “Love” theme. They are colored using Poppy Parade Stampin’ Blend Combo. I also utilized the little “stick” for lack of a better word. It is what the inserts can be attached to so they pull out of the belly slit. Here is a closer look at that.
Isn’t that adorable? The smaller sayings in the stamp set will all work on this little piece. It is long enough to easily hold the attached hearts in place. You do need to pay attention when adding your dimensionals so they do not interfere with it.
Thank you for stopping in today! I really do appreciate it. If you have any stamps you would like to see me create a card for, hop over to my Facebook Blue Line Stamping page and leave me a note. There are not very many that I do not have 🙂
HOST CODE
My February Host Code is: MRYR7XY2 Please use this code for orders under $150.00. I will have a small perk for those with orders over $50.00
Last week I posted a question on my Facebook page, Blue Line Stamping, asking what stamp sets you would like to see. Sadly I did not receive much of a response. If you are a regular follower of mine here, please take a minute to Like my Facebook page as well. I would appreciate it.
One of the sets that was requested was Forever & Always. So I am sharing a card using those products today. You can never go wrong with Black & White (plus a touch of color). And that is what I have used.
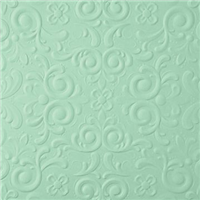
Normally I would not use quite as much color with my black and white card, but I felt the flowers and the love needed the two colors. You cannot see it from the full picture but the Basic Black background is embossed using the Parisian Flourish 3D Embossing Folder.
Here is a close up.
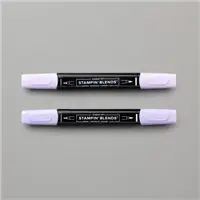
It really is beautiful in person. The details of the embossing worked wonderfully on the black. The flowers are colored using the Purple Posy Stampin’ Blends with the centers being the Light Blackberry Bliss Stampin’ Blend. Plus I added one of the Pastel Pearls to each center.
The leaves are colored using Old Olive Stampin’ Blends. I also added the background of the “Love” using Old Olive cardstock. The LOVE is Purple Posy cardstock attached to Foam Adhesive Sheet and then die cut. This is the best way for a simple adhering of the thin letters as well as giving it a raised look.
The strip of DSP is from the True Love Designer Series Paper. I wanted to add a grounding strip for the flower layers. The flowers are adhered to a die cut from the Stitched So Sweetly Dies. I used the largest of the scalloped layers.
Thank you for visiting today. I hope you enjoyed the card. I have all of the products I used listed at the bottom of the page. Remember that we are almost finished with this first round of Sale-A-Bration. It ends on February 28th.
HOST CODE
My February Host Code is: MRYR7XY2 Please use this code for orders under $150.00. I will have a small perk for those with orders over $50.00
The content in this blog is the sole responsibility of Jackie Beers as an Independent Stampin' Up! Demonstrator. The use of and content of classes, services or products offered is not endorsed by Stampin' Up!