I have another first on today’s card. Not a super first, but a step for myself. A few weeks ago I shared a card using one of the Kits. It was the Watercolor one. That was the first time I had used a kit project. (You can see that post HERE) And today I have used die cut / punch outs from one of the DSP. It is similar to what the kits contain. To say I was impressed with the paper and the colors is an understatement. I was amazed and in love. So much that it is the star of today’s card.
PAPERS
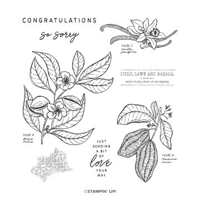
The amazing DSP pack this gorgeous bouquet comes from is the Wildflower Birthday Designer Series Paper. There are two sheets of punch outs just as there are two sheets of each pattern paper. All of these punch outs are as pretty as this bouquet. I hope you see why it is the star of the card. Now I am ready to give all of the kits another look.
This is also the second time in recent days that I have used Blueberry Bushel for the card base. This bright color pops on it’s own. And it really pulls the bits of blue from the bouquet. The blue is the first thing I notice now.
STAMPS
The bouquet really is impressive and fills the front of the card. So there was not a lot of need, or room, for a sentiment layer. However I wanted to add one. So I went with this simple sentiment using two different stamps from the Sentimental Park stamp set. Because they are photopolymer, it was so easy to stamp the bottom sentiment and then add the top centered above it. To give the Basic White strip a touch of extra, I flagged each end with my paper snips.
EXTRAS
This bouquet is beautiful but it still needed something behind it. To add some additional texture I went with the Distressed Tile Embossing Folder. I think it adds just the right background without taking away from the bouquet.
To add bling to match the gold from the bouquet, I added a trio of the Gold Textured Adhesive Dots along with a bow from the Gold Twisted Thread. This thread is easy to work with and a great way to add some shine to a card.
HOST CODE
My FEBRUARY HOST CODE is S2EYAW9N. Orders of $50.00 or more will receive an appreciation gift from me. I appreciate you choosing me as your demonstrator!
Thank you for stopping by today. I hope you enjoyed today’s project and will come back. I do read and reply to all of the comments individually. They mean a lot to me. Please reach out if you have a question.
Smile and Keep On Stamping,
Jackie
New Scrapbooking Catalog
The newest addition to Stampin’ Up! is an Online catalog of Scrapbooking products. You can see the catalog by clicking the photo below and save it to your computer.
Online Exclusives
New Online Exclusives have dropped. There are Halloween, Fall, Christmas, and many that are great year round. Of course the new Designer Series Papers and Embellishments are fabulous as well!
You can go directly to these in my Online Store by clicking HERE
The Friendly Seagulls stamp set from Sale-A-Bration is one that makes me smile every time I look at it. I am a huge french fry fan and apparently so are these guys. This card is one that only takes a couple of products to create. And when you add a Free stamp set, it is definitely a winner!
STAMPS
There is one additional stamp set used in addition to Friendly Seagulls. It is the texture around the edges of the Crumb Cake card base. This stamp is from the Lovely & Sweet stamp set. I used tone on tone to add this texture.
The Friendly Seagull is stamped on a scrap Basic White and then fussy cut. He is colored with Stampin’ Blends. The french fry box is as well. I love the flock of birds in the top left as an addition for distance. And stamping them off of the “scene” area is something I like to do. I have a painting that has part of the picture painted on the matting. This made me think of that.
The sentiment is fun and bold. So it needed to stand alone. I stamped the two parts and then did straight cuts, no fussy cutting, to keep it simple. The way they are placed makes it seem as if the seagull is shouting out his love of fries. Except for having his mouth full of them. 🙂
PAPERS
This is one of the simplest cards in regard to papers. There are only two. The Crumb Cake card base and then the Basic white for everything else. I used scraps for the seagull, fries, and sentiments. Since I stamp almost every day, I have a ton of scraps from cutting paper. I try to keep them under control but White is the one that can quickly become overloaded!
EXTRAS
The special part of the card is the Pool Party square. This is such a fun and easy technique. I inked the Clear Block D with Pool Party ink, stamped off, and then stamped onto my square of Basic White. And that is my ocean. To add some texture, and bling, I added a trio of the Antique Pearls to the bottom. The seagull is popped up with dimensionals and the fries are glued down. So the pearls are in between the two in terms of height.
HOST CODE
My FEBRUARY Host Code is S2EYAW9N. Orders of $50.00 or more will receive an appreciation gift from me. I appreciate you choosing me as your demonstrator!
Thank you for stopping by today. I hope you enjoyed today’s project and will come back. I do read and reply to all of the comments individually. They mean a lot to me. Please reach out if you have a question.
Smile and Keep On Stamping,
Jackie
New Scrapbooking Catalog
The newest addition to Stampin’ Up! is an Online catalog of Scrapbooking products. You can see the catalog by clicking the photo below and save it to your computer.
Online Exclusives
New Online Exclusives have dropped. There are Halloween, Fall, Christmas, and many that are great year round. Of course the new Designer Series Papers and Embellishments are fabulous as well!
You can go directly to these in my Online Store by clicking HERE
It has finally dawned on me that Valentine’s Day is just a short couple of weeks away. When looking through my stamp sets I checked out the wonderful new Hearts of Elegance Bundle. The Dies are what grabbed my attention for a fun card that is a little different. It is a heart shaped card.
Here is the fun open view:
STAMPS & DIES
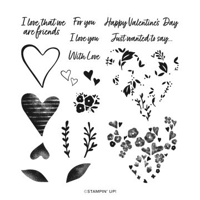
The Hearts of Elegance Bundle, from the new drop of Online Exclusives, contains great Valentine and Love sentiments as well as a few additional images. The Die set is fabulous! There are two large Dies, the two larger on the front of the card, and then several smaller ones. The inside White and the DSP are the same Die that doesn’t exactly fit the second largest. But it does fit the largest and has a few smaller in the layering line.
The rose is from the stamp set and did not complete as I envisioned. The single stamping of it left two much open space. So I turned it just a bit and stamped again. That worked perfectly except I should have done them in complimentary colors I believe. I did add some highlights with Stampin’ Blends. And the banner sentiment is from the set and fits perfectly across the front of the card. As does the inside Happy Valentine’s Day!
PAPERS
The color choices in paper are pulled from this gorgeous DSP. It is the Marbled Elegance Designer Series Paper. The paper has been so popular that it is currently out of stock. Hopefully it will return soon. I did not realize it was out until I had already used it on the card.
To match the DSP, I used Melon Mambo as the card base and Pretty In Pink for the large layer. I believe I covered up the pink of the marbling with the banner though. The fun heart shaped card was made by beginning with a regular 8 1/2 X 5 1/2 card base folded in half. I only wanted the one corner to be connected for a unique look. To make this happen I placed the Largest heart shape Die on the front of the folded card in landscape mode. And I simply pushed one of the heart tops past the fold just a bit. It does take several run throughs on the Cut & Emboss machine to cut through the two pieces of cardstock.
EXTRAS
This gorgeous DSP really doesn’t need a lot of bling assistance. Since I shared a card yesterday that had no bling, I felt obligated to add a bit more today. The Low Profile Dots seemed perfect to add a more gold. Plus they were handy! And they help bring out the gold leaves for the rose. That was a thought that may throw some folks off. I took some creative license and added the gold leaves to the rose as an added touch of bling. When Wild Wheat retires I will be lost as I use it regularly for a gold ink color.
HOST CODE
My January Host Code is KSG3THS3. Orders of $50.00 or more will receive an appreciation gift from me. I appreciate you choosing me as your demonstrator!
Thank you for stopping by today. I hope you enjoyed today’s project and will come back. I do read and reply to all of the comments individually. They mean a lot to me. Please reach out if you have a question.
Smile and Keep On Stamping,
Jackie
New Scrapbooking Catalog
The newest addition to Stampin’ Up! is an Online catalog of Scrapbooking products. You can see the catalog by clicking the photo below and save it to your computer.
Online Exclusives
New Online Exclusives have dropped. There are Halloween, Fall, Christmas, and many that are great year round. Of course the new Designer Series Papers and Embellishments are fabulous as well!
You can go directly to these in my Online Store by clicking HERE
Friday was our Anniversary and I made a fun and different Anniversary card. Actually it is cased, somewhat, from Mary Fish’s Friday card. Her use of the More Than Autumn Bundle hit a perfect note for my hubby’s card.
Stamp Bundle
This layout is a mix of Mary Fish’s card and me spilling glue! My direction went from portrait to landscape to cover that error. But it is a regular crafting thing right! I will explain why this was so perfect for an Anniversary, as you probably think it is out in left field. I love everything pumpkin! So my hubby jokes that in the Fall he become my second love while I indulge in pumpkin. LOL!!!
The More Than Autumn Bundle is one I keep using. It has a bit of everything. For this card I used less than usual. On the inside is a piece of pumpkin pie, but the front uses the “pumpkin” , “love you more than”, and then the heart from the die set.
Other Dies
The three layers with the pumpkin are from the Greetings of the Season Dies. These are amazing Dies! Even if you do not want or need more Christmas sentiments, the Die set is definitely worth having. Each one of the three tags has the tag hole. I just layered them to cover it.
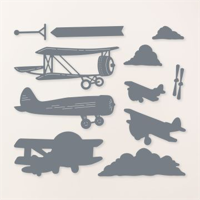
The arrow Die with the rest of the sentiment is from the Adventurous Sky Dies. It fit the size of the words perfectly. And added another little layer. I have lots of small layers going on here.
Extras
To add to the layers, I felt like the background needed some texture. I did not want the card to seem just a pile of different colors. Well the Forever Plaid Embossing Folder fixed that little problem wonderfully! I know you can see the serious detail of the impressions. Sadly it is currently out of stock, but will be back the week of October 7.
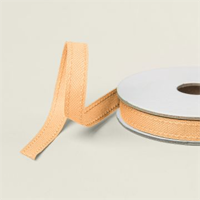
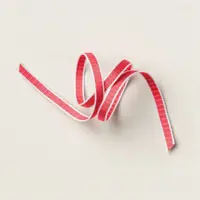
To tie in with the Pumpkin I used the Peach Pie Ribbon for the top tag. And then added a simple bow using the Linen Thread. I felt the ribbon itself was a bit large to tie off on it’s own. Plus I just love Linen Thread! And the final addition is the bling. Although this does not have a very shiny touch. These are the Faux Glass Dots. There are a four different Fall colors that look like old glass. I love them, and they fit the card.
Thank you for stopping by today!!
New Scrapbooking Catalog
The newest addition to Stampin’ Up! is an Online catalog of Scrapbooking products. You can see the catalog by clicking the photo below and save it to your computer.
Online Exclusives
New Online Exclusives have dropped. There are Halloween, Fall, Christmas, and many that are great year round. Of course the new Designer Series Papers and Embellishments are fabulous as well!
You can go directly to these in my Online Store by clicking HERE
HOST CODE
My SEPTEMBER Host Code is S9CRPBZ4. Please use this code for orders under $150.00. I will have a small gift for those with orders over $50.00 in addition to the Perk Rewards Program. You can read all of the information at the top of the page in the Menu Bar under SHOP / Perks.
Thank you for stopping by today. I hope you enjoyed today’s project and will come back. I do read and reply to all of the comments individually. They mean a lot to me. Please reach out if you have a question.
Today I am sharing a fun Slim Line card with the Ice Cream Swirl Bundle as a Valentine Card. What could be better than ice cream and your sweetheart? Maybe more ice cream?? LOL!!!
Bundles and Stamps
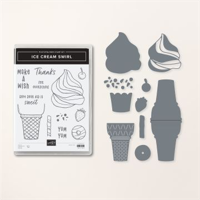
The star of this card is the Ice Cream Swirl Bundle. I love the ice cream cone! The dies are amazing and so simple to layer. Since my husband likes vanilla ice cream, it was simple to use Basic White for the ice cream. The base is a solid piece with the more swirled look layered on top. It gives a great 3D look to the ice cream. And the cone has definition build into the die. An Easy Peasy layer.
The stamp part of the bundle is on the inside of the card. But I did add another great Valentine set for the front sentiment. The For You is from the Country Bouquet stamp set in the Annual Catalog. I wanted just a small tag for the ice cream cone.
Punches
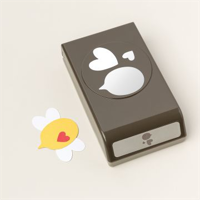
This card is fairly simple looking but utilized a variety of products. There are two stamp sets and one die set mentioned above. And then I used two separate punches. The sweet hearts are from the Bee Builder Punch. The larger heart is used to punch the bee wings, and the smaller ones are for the antenna. I was thrilled when Stampin’ Up! showed those extra uses for the punch!
The second punch is for the tag. It is the Best Label Punch. This little guy is a favorite for simple little tags like this one. I use it fairly often for sweet and little sentiments. Adding the ribbon may seem a little odd on an ice cream cone. I call that creative license! LOL!!!
Papers
The fun hearts paper is from the Bee Mine Designer pack. Fun but not overly girly. I paired it with Real Red card base and just a layer of Basic White. Of course the hearts are Real Red as well. I consider the hearts as my bling on this card. And I know that is shocking. But I was being conservative.
Measurements
Since this is a slim line that I have not used in a while, I have measurements for you. The card base is 8 1/2 X 7 and scored and folded at 3 1/2. The White layer is 8 1/4 X 3 1/4. I cut two of those, one for front and one for inside. And the DSP is 8 X 3. I hope you will give a slim line a shot!
Thank you for stopping by today!!
HOST CODE
My FEBRUARY Host Code is PR4KTFTS. Please use this code for orders under $150.00. I will have a small gift for those with orders over $50.00 in addition to the Perk Rewards Program. You can read all of the information at the top of the page in the Menu Bar under SHOP / Perks.
Thank you for stopping by today. I hope you enjoyed today’s project and will come back. I do read and reply to all of the comments individually. They mean a lot to me. Please reach out if you have a question.
The card today is another using the Bee My Valentine Bundle. This time around is a little different regarding paper usage.
Papers
The Be Mine Designer Series Paper is the same paper as on the previous Bee Valentine. You can see that card HERE if you missed it earlier in the week. The special addition to this card is the sweet jar of Love. It was fussy cut from a piece of the DSP. There are jars with “honey”, “hug”, and the heart. I opted for the heart to match the Sweet Sorbet in the center DSP piece. The wonderful patterns in this pack of paper is perfect for any Spring cards, but especially to pair with this fun bee.
The card base is Daffodil Delight and is paired with the Basic White layer. That has the honeycomb stamp with Daffodil Delight Ink to create the background. The honeycomb pairs perfectly with the bee and the jar of Love.
Bundle
The only stamps used are from the Bee My Valentine set. The fun sentiment makes me think of a Southern type statement! You cannot help but smile. I believe this would make a great Thank You card for someone as well. And of course the bee with the Bee Builder Punch is perfect for creating your own bee. He can be going in any direction and with a variety of facial expressions. Plus you get the bonus of the two hearts. The wings and antenna are made with two sizes of hearts. I can see myself using these hearts on all kinds of projects!
Finishes
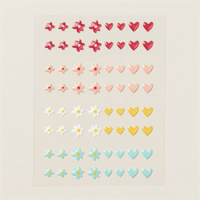
The sentiment layer is simply a strip of Basic White across the card. So I had to add some fun to that. Raising the bee and the little jar created some depth, but we must have bling! The Adhesive Backed Hearts & Flowers embellishments fill that need perfectly. And they have a kind of retro look to them. There are one on each end of the sentiment and then the yellow heart in the upper left corner. It sort of blends in with the honeycomb.
Measurements
The card base of Daffodil Delight is 4 1/4 X 11, folded at 5 1/2. The Basic White layer is 3 7/8 X 5 1/8. And the DSP is 2 1/2 X 3 1/4. For the sentiment it is a strip of Basic White cut to 3 1/2 X 3/4. I used scraps for the bee and wings. Since these are on one punch. I suggest stamping and punching the bee, then stamp and punch each of the others.
Thank you for stopping in today! I hope you have a great crafting weekend.
Online exclusives are here to stay! Click on the photo and be taken directly to them in my online store. If you place an order, please use my Host Code listed just below.
HOST CODE
My JANUARY Host Code is BQEMX92K. Please use this code for orders under $150.00. I will have a small gift for those with orders over $50.00 in addition to the Perk Rewards Program. You can read all of the information at the top of the page in the Menu Bar under SHOP / Perks.
Thank you for stopping by today. I hope you enjoyed today’s project and will come back. I do read and reply to all of the comments individually. They mean a lot to me. Please reach out if you have a question.
The content in this blog is the sole responsibility of Jackie Beers as an Independent Stampin' Up! Demonstrator. The use of and content of classes, services or products offered is not endorsed by Stampin' Up!