I love making cards and even the occasional sympathy card. They should be just as lovely and special as all of our cards. So this one, which is for a dear friend, was my first play with the Irresistible Blooms Bundle.
Stamps and Dies
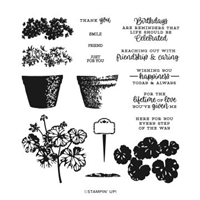
The fun die in the center of this card is my most favorite from Stampin’ Up! right now. It is quite different from any other and really pops. The die is from the Irresistible Blooms Dies. I used the stamp set also, but it is on the inside of the card.
The front sentiment is one that fit my thoughts for this card perfectly. It is from the Potted Geranium stamp set. That set has some awesome sentiments and I will be sharing other cards with it soon.
Paper and Punches
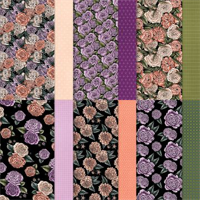
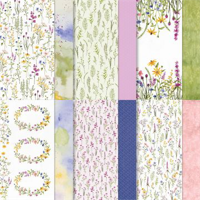
The beautiful paper that is showing from behind the die cut is from the Hello Irresistible Designer Series Paper. That paper is simply beautiful! The different colors are amazing. And it has like an embossed resist look to it. This sheet showing is like it was sponged with soft pastels onto an embossed image. So very pretty!!!
The sentiment is stamped on the reverse of a paper in the same DSP pack. I love the soft Pastel look and went with all pastel colors actually. The card base is Soft Sea Foam card stock. And the layer is So Saffron. It is rare for me to use So Saffron but it is perfect in this case. Plus both of those colors are in that sponged look.
To finish the front of the card I needed something. Instead of die cutting leaves from the Die set. I used the Bough Punch. With a couple of Soft Sea Foam leaves and Petal Pink flower pieces it was complete.
Embellishments
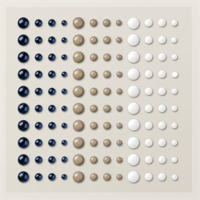
The card is not finished without embellishments. So I miss -spoke above. By spreading some love with Enamel Dots, I was able to add a soft bling to the card. And since it is soft looking, I went a bit heavy on the bling! Those little round areas of the die cut just seemed to be calling for a little embellishment on each. But I did restrain myself and left a few empty.
To see all of the Online Exclusives, click on this photo. You will be taken to my online store and directly to those exclusive offers. Please use my Host code if you are inclined to make a purchase! 🙂
HOST CODE
My March Host Code is ZF27VSFC. Please use this code for orders under $150.00. I will have a small gift for those with orders over $50.00 in addition to the Perk Rewards Program. You can read all of the information at the top of the page in the Menu Bar under SHOP / Perks.
Thank you for stopping by today. I hope you enjoyed today’s project and will come back. I do read and reply to all of the comments individually. They mean a lot to me. Please reach out if you have a question.
Today’s project is part of a Fun Fold Hop. I hope you will continue on from me and share the love with the other designers. We all love comments and to know if you like our Fun Folds.
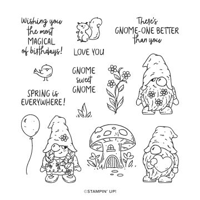
My card is a version of a fold I made a few years ago as Christmas cards. Not sure why I have waited this long to recreate it. The Friendly Gnomes and Lucky Clover were my inspiration for this fun card. They create a sweet Luck and Love card.
Stamps
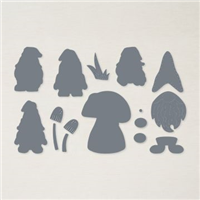
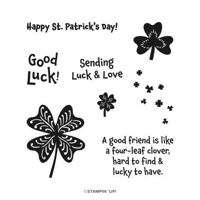
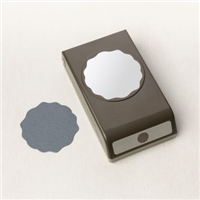
You can see that I used a mix of the Friendly Gnomes and the Lucky Clover to create my little scene. The Friendly Gnomes are just so darn cute. I love the look of the gnomes and since I love to color it was a great choice for me. The Gnomes Dies from the Holiday Mini carried over and fit the little guys in this stamp set. Also the little flower on the step is from the Friendly Gnomes set. To give the Gnome a little background, I punched a piece of Petal Pink with the Decorative Label Punch. It gives some strength to him standing up.
I hate that the Clover Punch sold out so quickly. But it is really not needed if you use the stamp. As long as you don’t mind a bit of cutting, you are good to go. And the shape is such that it is not at all a detailed cut. I used both the large and the smaller clover. Giving the Gnome a little clover for his hat seemed to really tie the two together. The Good Luck and large clover are cut with the Label Me Fancy Punch. The sentiment is over to the right to leave room for the clover to hang on the left side. And the clover received a little extra love with a Heart Pearl in it’s center.
Papers and Colors
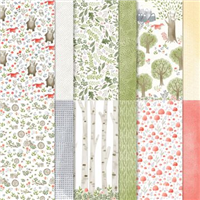
The DSP used is from the Annual Catalog paper Happy Forest Friends. The woodsy paper fit perfectly with the gnomes and clovers. I used two different sheets. In the photos above you can see that the closed card has two pieces of the woodsy paper. And the “step” is the second one showing a green forest floor look.
All of the other colors came from the woodsy paper. I went with Mossy Meadow for the card base, but softened that with Petal Pink as the layers. The heart and the Good Luck are both Calypso Coral, again pulled from the DSP.
Measurements
The Mossy Meadow card base is 8 1/2 X 5 1/2, scored at 4 1/4 and 6 3/8. On the front, the Petal Pink layers are 2 pieces cut to 5 1/4 X 1 7/8. The 2 woodsy DSP pieces for the front are both 5 X 1 3/4. For a base on the inside of the card, there is a Petal Pink layer measuring 5 1/4 X 4. It has Basic White layer at the top cut 5 X 1 3/4 and then the grassy DSP piece is the same size. But the grassy piece is raised using Stampin’ Dimensionals. This allows the front fold to “stop” against it to hold the card in position. This is a super quick and easy card to put together as it is simple measurements. I hope you will give this a try!
Thank you for visiting today! Please Hop on over to the next person in line.
Reminder that this is the LAST DAY of Sale-A-Bration and especially for the awesome Join Promotion! I know you want the $175.00 worth of products . Please reach out and talk with me about it.
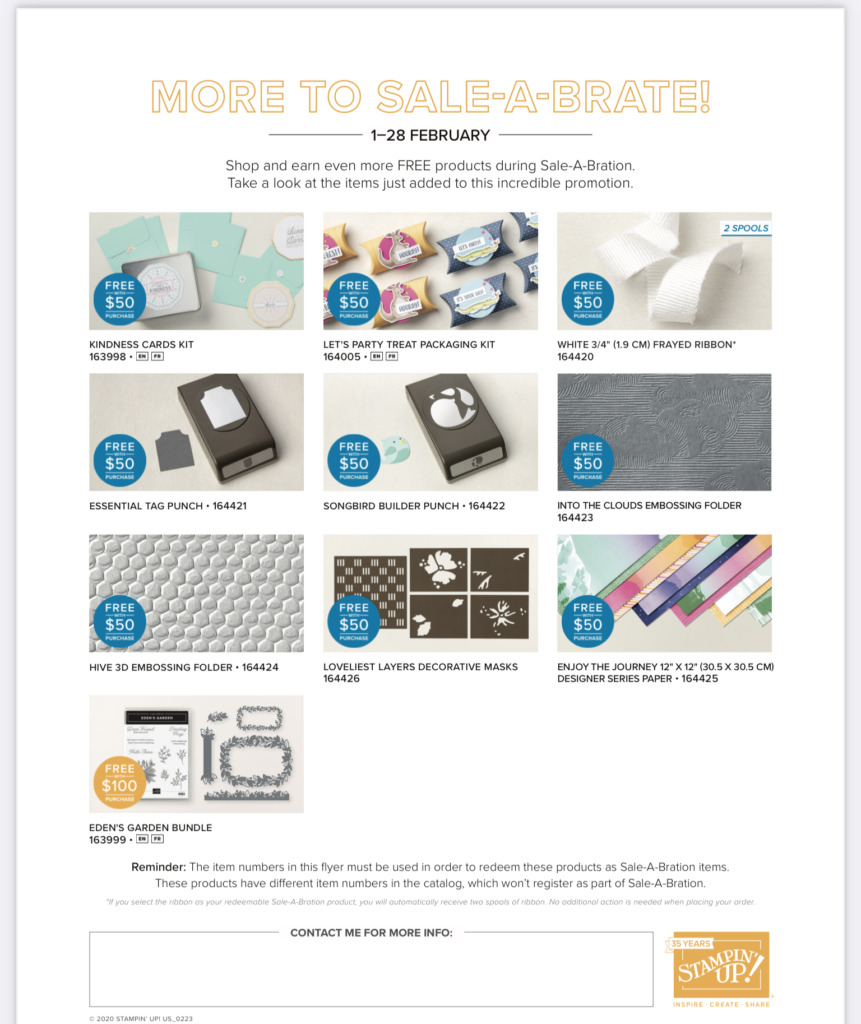
Additional FREE Sale-A-Bration Items for February…..
Sale-A-Bration and Join Promotion
Not only is SAB all about Free Products, but Stampin’ Up! has really upped the rewards if you choose to join my team.
The regular Starter Kit, I call it the Ultimate Bundle, is 125.00 in product for 99.00. You get to choose all of the products yourself. For these two months of SAB, there are three options for you to choose and the rewards are amazing!
Option 1: The exclusive Boho Blue Mini Machine ($63 ) + your choice of $175 of Stampin’ Up! products for only $129 .
Option 2: The original white Mini Machine ($63 ) + your choice of $175 of Stampin’ Up! products for only $129 .
Option 3: Your choice of $175 of Stampin’ Up! products for only $99 .
Options 1 and 2 offer you 50.00 more in product and the Mini Machine for only 30.00 above the regular price.
Option 3 offers you $50 more product than the standard Starter Kit offer for the regular price!
These are the best deals I have seen. If you are interested, please reach out to me and let’s chat about it.
HOST CODE
My February Host Code is FCF2FJVJ. Please use this code for orders under $150.00. I will have a small gift for those with orders over $50.00 in addition to the Perk Rewards Program. You can read all of the information at the top of the page in the Menu Bar under SHOP / Perks.
Thank you for stopping by today. I hope you enjoyed today’s project and will come back. I do read and reply to all of the comments individually. They mean a lot to me. Please reach out if you have a question.
Happy Valentines Day to you all! My card is a non traditional Valentine card. But it has a fun and easy technique for a special look.
Paper
The special thing about this card is the Pinwheel. And I believe this particular paper from the Favored Flowers Designer Series Paper in Sale-A-Bration is sold out. Please don’t concern yourself there if you do not have this paper. All you need are two coordinating papers and there are tons of those in either of the Stampin’ Up! Catalogs!
I pulled the two card stock colors from this DSP. They are Fresh Freesia for the card base and background of the pinwheel, and Mossy Meadow for the layer. These are not traditional Valentine colors, but are my preference over red.
Stamps
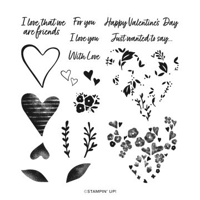
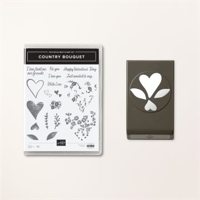
There really is only one stamp used on the front of the card. That is the sweet “With Love” tag. It is from the Country Bouquet stamp set. Yes, the Country Bouquet Punch is sold out for now, but the stamp set is still available and has many uses without the punch! I love the simple message on the tag.
Extra Touches
Even though the pinwheel is the star of the card, I wanted the rest to be detailed and textured. To accomplish this I used the Timeworn Type Embossing Folder on the Mossy Meadow Layer. Then I wrapped Fresh Freesia Open Weave Ribbon around that layer and tied a bow. The finishing touches are the punched end of the tag. I used the Happy Labels Punch and the smaller of the two scallops and tucked the tag under the pinwheel. Then for the pinwheel’s center, I added one of the Fresh Freesia Opaque Gems . These are great as they come in a variety of sizes.
Making the Pinwheel
The pinwheel has been around for many years and is a simple process. There are a couple of ways to layer the pieces though. What I have done is one of the easiest I think. I started with two squares of Fresh Freesia measuring 2 5/8 X 2 5/8. I used my Stampin’ Up! Grid Paper to help me line everything up. Place the first square down as a square. Next lay the second square over top but in diamond form. You can see where the grid paper helps with getting everything equally aligned! Adhere the centers of these together.
For the DSP part you will need 4 pieces each of 2 different patterned papers. What I used is the front and back of one piece. So I cut 8 and then turned 4 the opposite direction. My main suggestion is to lay them out on the grid paper to decide how you like the papers if one is more a favorite. I liked the floral so wanted it to be top , bottom, and sides.
Having the Fresh Freesia piece makes aligning the DSP squares very simple. You simply allow the same amount of border with each piece you place down. I began at the top floral piece. ***The most important thing is this is the first and last piece! When you adhere this square, only add adhesive on the right of center. Leave the left side free. Now adhere all of the other simply alternating the pattern. When you get to the last one, apply adhesive and slip part of it underneath the first square. That is the reason it was not fully adhered.
Thank you for visiting today and I hope you have a fun day!
Additional FREE Sale-A-Bration Items for February…..
Sale-A-Bration and Join Promotion
Not only is SAB all about Free Products, but Stampin’ Up! has really upped the rewards if you choose to join my team.
The regular Starter Kit, I call it the Ultimate Bundle, is 125.00 in product for 99.00. You get to choose all of the products yourself. For these two months of SAB, there are three options for you to choose and the rewards are amazing!
Option 1: The exclusive Boho Blue Mini Machine ($63 ) + your choice of $175 of Stampin’ Up! products for only $129 .
Option 2: The original white Mini Machine ($63 ) + your choice of $175 of Stampin’ Up! products for only $129 .
Option 3: Your choice of $175 of Stampin’ Up! products for only $99 .
Options 1 and 2 offer you 50.00 more in product and the Mini Machine for only 30.00 above the regular price.
Option 3 offers you $50 more product than the standard Starter Kit offer for the regular price!
These are the best deals I have seen. If you are interested, please reach out to me and let’s chat about it.
HOST CODE
My February Host Code is FCF2FJVJ. Please use this code for orders under $150.00. I will have a small gift for those with orders over $50.00 in addition to the Perk Rewards Program. You can read all of the information at the top of the page in the Menu Bar under SHOP / Perks.
Thank you for stopping by today. I hope you enjoyed today’s project and will come back. I do read and reply to all of the comments individually. They mean a lot to me. Please reach out if you have a question.
Today’s card is a sweet Love You! card for anyone. It is pairing old and new products for the Make My Monday Challenge.
As I mentioned at the top of the page, this is my card as a designer on the Make My Monday Blog Challenge with the theme of Love Is In The Air. Please click on the image below to be taken to the blog. You will see the other designers’ cards and can upload your own version of the theme.
New Products
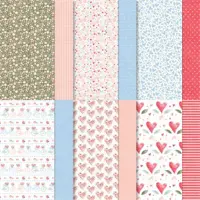
I said this card is a combination of old and new products. I am going to begin with the New ones. The DSP is from the Dainty Flowers Designer Series Paper , which is a Sale-A-Bration item. That means it is FREE with a qualifying order of $50.00.
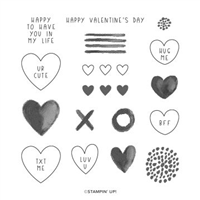
The second new is the I Love You stamp. This special little stamp is part of the Country Bouquet stamp set. It is a Valentine and Love type set with a country theme. And I do Love it!
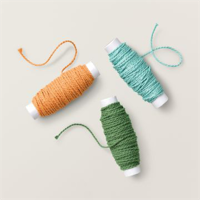
The third and final New item is the Thread. To add some extra detail at the top of the card, I went with the Garden Green Bakers Twine from the Three Twine Combo Pack. Even though my card stock is not Garden Green, the shading works perfectly.
Loved Products
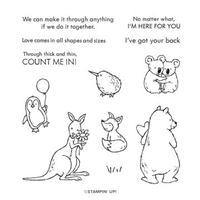
I don’t want to be rude and call this group of products OLD, so I am using the well loved description! The Koala Bears are from the Count On Me stamp set in the Annual Catalog. It is a variety of animals with lovely expressions and signs of affection. These two hugging seemed perfect for the Love theme.
The next two items are the heart layers for the Koala Bears. They are the Heart Punch Pack duo. These are such a perfect size for so many images in the catalogs. I used Mossy Meadow for the large scalloped heart so it would contrast more against the DSP.
And the final of the Loved products is the little bit of bling. This is one of the 2021-2023 Opal Dots. It shows a bit darker in person. I wanted a little something to pair with the yellow flowers of the paper. Everything else is on the deeper tones of color.
Thank you for stopping in today!
Sale-A-Bration and Join Promotion
Not only is SAB all about Free Products, but Stampin’ Up! has really upped the rewards if you choose to join my team.
The regular Starter Kit, I call it the Ultimate Bundle, is 125.00 in product for 99.00. You get to choose all of the products yourself. For these two months of SAB, there are three options for you to choose and the rewards are amazing!
Option 1: The exclusive Boho Blue Mini Machine ($63 ) + your choice of $175 of Stampin’ Up! products for only $129 .
Option 2: The original white Mini Machine ($63 ) + your choice of $175 of Stampin’ Up! products for only $129 .
Option 3: Your choice of $175 of Stampin’ Up! products for only $99 .
Options 1 and 2 offer you 50.00 more in product and the Mini Machine for only 30.00 above the regular price.
Option 3 offers you $50 more product than the standard Starter Kit offer for the regular price!
These are the best deals I have seen. If you are interested, please reach out to me and let’s chat about it.
HOST CODE
My January Host Code is HEMUVZZK. Please use this code for orders under $150.00. I will have a small gift for those with orders over $50.00 in addition to the Perk Rewards Program. You can read all of the information at the top of the page in the Menu Bar under SHOP / Perks.
Thank you for stopping by today. I hope you enjoyed today’s project and will come back. I do read and reply to all of the comments individually. They mean a lot to me. Please reach out if you have a question.
Welcome to InKing Royalty’s January 2023 Blog Hop! If your craft projects aren’t already filled with hearts, then you might be behind the eight ball. No worries – we are here to help. We are excited to share our heart-filled creations with you and hope you love them! After you read my post, I hope you’ll hop over to the next person on the list at the base of this post.
The Hearts theme was an easy one to follow with the fabulous new Country Floral Lane Suite of products in the new Mini Catalog. I loved this Suite as soon as I saw it and hope you will as well.
Stamps and Punches
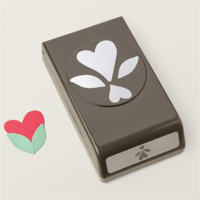
My card is sort of a Heart Bouquet. And is not at all what I had planned originally! The Country Bouquet Bundle is a Punch Bundle. That was where I was originally headed. Then I saw the floral heart that I have used and changed directions just a bit. I did use the leaves from the punch. They are slightly hidden by the bow.
However, the floral heart intrigued me and I had to give it a try. It is a two step heart with the flowers and greenery separate. The flowers are stamped using Sweet Sorbet Ink and the greenery is Pear Pizzaz. Sadly with this being a punch bundle, I had to cut out the heart myself. Since a heart is mostly straight lines that was not a huge undertaking. I did use the leaves from the stamp set in Pear Pizzaz as well and punched them using the Country Bouquet Punch. Then decided it needed more greenery to look like a bouquet. So out came the Boughs Punch for the background greens. This punch has been getting a lot of use from me of late.
Papers
To continue with the Sweet Sorbet and Pear Pizzaz, I went with a striped piece of DSP. It is from the Country Floral Designer Series Paper that is also included in the Suite of products. I layered the striped DSP onto a piece of Basic White and then to the base card of Pear Pizzaz.
Finishes
There are several final add on touches to complete this card. First is the sentiment. It is from the Country Bouquet stamp set as well. So this is a one set card basically. I love that!! But it is die cut with a die from the Beautiful Trees Dies. It is nothing flashy, and just has a bit of an embossed border around the edges.
The most notable of the finishes is the beautiful bow. The Sweet Sorbet Metallic Ribbon is so pretty and extremely easy to work with. Due to that I went a bit out of the norm and created a three strand bow. I love how it really pops up. And the final touch is the Festive Pearls scattered around. There are some on flower centers of the heart, and one on the sentiment.
Thank you for stopping by today. I hope you’ll hop along to the next stop on the blog hop, Sheryl Abernathy at Elegant Sentiments. There’s lots of inspiration to be found in this group – and you don’t want to miss it!
Thank you for hopping along with us. If you get stuck during the Blog Hop, please use this line-up as a guide:
My January Host Code is HEMUVZZK. Please use this code for orders under $150.00. I will have a small gift for those with orders over $50.00 in addition to the Perk Rewards Program. You can read all of the information at the top of the page in the Menu Bar under SHOP / Perks.
Thank you for stopping by today. I hope you enjoyed today’s project and will come back. I do read and reply to all of the comments individually. They mean a lot to me. Please reach out if you have a question.
Happy Valentine’s Day to all of you! Surprisingly, I have made a very simple card to share with you. Sharing our hearts is always a good thing and I hope this card gives you a Smile!
This 3 Heart card is also for the Make My Monday Challenge. I hope you will give this challenge a try and allow us to see your spin on 3 Hearts! Here is a link to the site.
Stamps
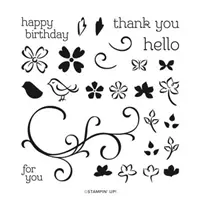
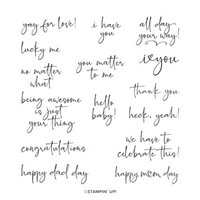
I joined two different stamp sets for this 3 Heart challenge, plus a matching die set. The sentiment is from an awesome stamp set named Happy & Heartfelt. And since fonts are a measuring tool that I use for sentiments, I give this one a 10! All of these are fun ones like this and are a great mix of sayings. For the second stamp set, I used the large swirl fro the Sentimental Swirls set. It was perfect for “hanging” my hearts on.
Dies, Texture, and Fun
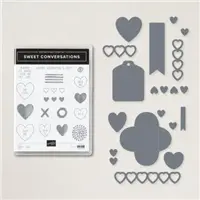
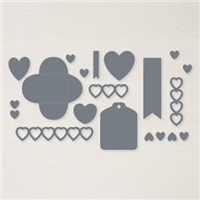
The hanging hearts are from the Sweet Hearts Dies. They are part of the Sweet Conversations Bundle, which I have used several times. And I did use it on the inside of the card. I chose two of the heart shapes and die cut two of each to see how they fit best on the swirl. They are “hanging” from the little Classic Matte Dots in White.
I hope you can see the background texture also. It is the Tasteful Textures Embossing Folder and gives just enough of a fancy paper feel for the simplicity of the card. To finish the card, I went with the great Open Weave Ribbon in Polished Pink. I think it adds the bit of a fancy touch to finish the card.
Sale-A-Bration is the Best Time of Year!!
HOST CODE
My February Host Code is HFEQADCZ. Please use this code for orders under $150.00. I will have a small gift for those with orders over $50.00 in addition to the Perk Rewards Program. You can read all of the information at the top of the page in the Menu Bar under SHOP / Perks.
Thank you for stopping by today. I hope you enjoyed today’s project and will come back. I do read and reply to all of the comments individually. They mean a lot to me. Please reach out if you have a question.
The content in this blog is the sole responsibility of Jackie Beers as an Independent Stampin' Up! Demonstrator. The use of and content of classes, services or products offered is not endorsed by Stampin' Up!