Welcome to the Pals monthly blog hop. We’re so glad you’re here! December is time for glitz and bling with “All that Sparkles & Shines”. Today we feature projects that sparkle or shine. Maybe even a little of both.
You may be starting the hop here or coming from a previous Pal’s blog. Either way, you’ve come to the right place. You’ll find the the full line-up below to help you move, or “hop” along from Pal to Pal.
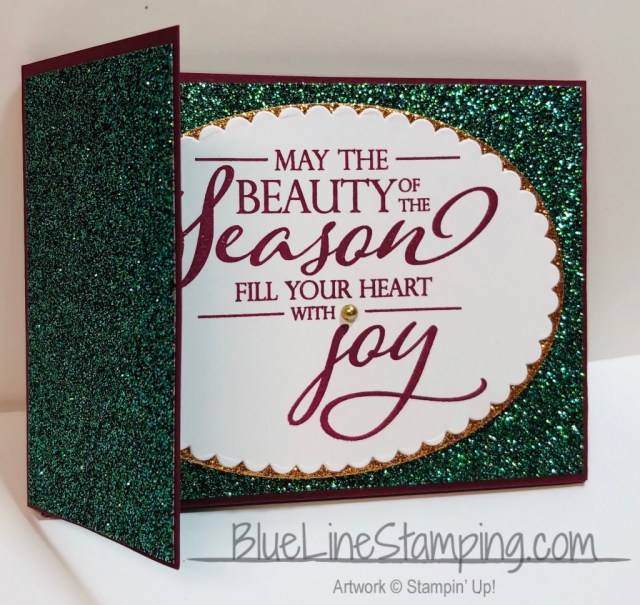
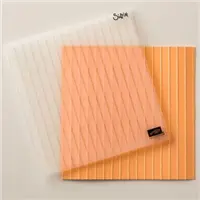
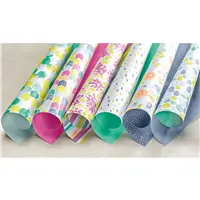
I have a very glittery gift card holder for you today. I do not normally use a lot of the glitter paper, but I can not think of a better time to bring it out than at Christmas. I CASED Dawn Griffith’s Tri Fold Gift Card Holder to make this great project. It is pretty, quick, and easy. The amount of time you need to make this one just depends on how much stamping you want to do. I went with more bling, and less stamping.
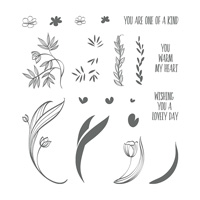
Merry Christmas To All, 147702
The left side tucks under the sentiment for a closure. Here is a picture of that.
And here is the inside of the holder.
Note: Here is the LINK to Dawn’s video for her gift card holder and the basic measurements..
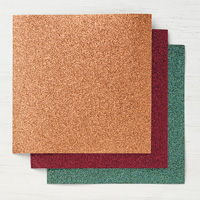
I went with Merry Merlot and the Noel Glitter DSP to make my version of this great holder. The sentiment and stamping that is behind the gift card are from the “Merry Christmas To All” stamp set. The tree on the inside of the small section is from my favorite set, “Timeless Tidings”. I have used that tree so many times!!
I really kept my stamping to a minimum to allow the glitter to shine. I hope you will give this cute idea a try. The decorations and plus / minus layers are what really makes it yours. I know that I will be using this basic design for a lot of gift card giving occasions. It could be easily made feminine or masculine with just the DSP and the stamps.
Thank you for hopping by today. I hope you will return tomorrow for another project. All of my supplies are listed at the bottom of the post.
More inspiration awaits! Use the Blog Hop Line-up below to visit the rest of this month’s hoppers. My fellow Pals are excited to show you what they’ve created. Don’t forget to show us some love by commenting on our creations.
Mark your calendars for Wednesday, January 9, 2019 when our Hoppin’ Pals share projects “From the Heart”. Don’t miss the fun.
I have somewhat of a Funky Fold in my card today. I received a similar card at the swap a couple of weeks ago and loved that it was different. I recreated it, but instead of folding, I cut away to make the same front result. And I changed the front decorations as well. I had in my mind a gentleman card with a tie. However, it ended up more like a female card with a scarf! I just never know what my end result will be! 🙂
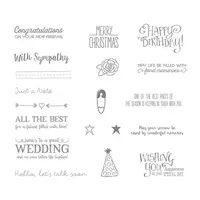
Lovely Wishes, 145924
I will begin with the “V”. The card I received was 4 1/4 X 11, scored equally and then each end was cut so that when they overlapped the front it formed this V. I decided it would be easier to do a regular fold from that beginning cut, but cut out the V section. My method saves some cutaway card stock but requires a little measuring. So the other may be simpler???
I used the Simple Stripes Embossing Folder and ran it through the Big Shot once in each direction to make the plaid design on the front section. I then used Tear & Tape to secure the bottom and the side. I also used the Tear & Tape to adhere the ribbon around the neck of my “sweater”.
I hope you like my funky fold card. It is a good design for pull out invitations or even adding a gift card on the bottom portion of the pull out card.
Thank you for visiting today. The supplies I used are all listed at the bottom of the page. Please don’t forget about the Retiring Items and the Clearance Rack was updated on Tuesday. My much loved Island Indigo is on the Retiring List as well. So if it a favorite of yours you should grab some now!
Another Paper Pumpkin Special: The March PP was so popular due to the special gift that it sold out. So Stampin’ Up! has offered a great deal to replace that. New Subscribers who sign up before April 10, will receive April and May for half price. So 2 months for the price of 1. A great deal. Use my link HERE, and enter the code: SAVEFIFTY0418
It is still a great time to become a Stampin’ Up! Demonstrator. I would love to have you join my team. A great perk for demonstrators this time of year is getting to see the new catalog first. Then we get to order and play with the new products a month early. For me, that is one of the best parts of being a SU Demonstrator. Of course, the discount helps! If you are interested, please contact me and let’s talk.
As part of the Stamping Event I am enjoying today, we are doing a Shoebox Swap tonight. I decided to make a versatile card. My card is designed for a baby/Mom & Dad card. However, by simply changing one stamp it would be changed for almost any occasion. The Designer Series Paper would work for almost any reason as well.
Better Together, 141736
I know you have seen this card before either from me or others. It is such a useful and pretty card that it needs repeating periodically I do believe!
With using this beautiful Naturally Eclectic Designer Series Paper, I really did not want to cover it up. So I went with simplicity in the focal point on the front which allows the DSP to shine.
And here is a view of the inside and the gift card slot.
Now you see the gift card slot and will understand the directions listed under Measurements below. Be sure and add the Tear & Tape close to the edge so you have plenty of room for your gift card. Although if you do make it too tight, it is not the end of the world….. There is plenty of room for the card to slide in long way also. Not planned, but a nice unexpected find!!
NOTE: If you are like me and really love this paper, buy morel now!!! As it gets closer to the new catalog this, and other items, may sell out. And they will definitely be retired when the current catalog ends. Sad, but happy to see what new papers are revealed!
Thank you so much for visiting today! If you have any questions or comments, I would love to hear from you. And if you do not currently have a SU Demonstrator, I would love to send you a catalog and help you with any future purchases.
The measurements and the supplies are listed further down. I hope you have an awesome weekend!!
Fold and burnish the score lines. Fold the smallest section to the inside.
Place Tear & Tape on each side of the small section close to the edges. Your gift card slides in here.
Cut 2 Whisper White pieces at 3 3/4 X 4 (1 is the inside layer)
Cut 1 Whisper White piece at 1 1/4 X 4 for the side piece
Cut DSP at 3 1/2 X 3 3/4 and 1 X 3 3/4
Sentiment layers are: Soft Sky = 1 3/4 X 2 1/4, and Whisper White = 1 5/8 X 2 1/8
Another Paper Pumpkin Special: The March PP was so popular due to the special gift that it sold out. So Stampin’ Up! has offered a great deal to replace that. New Subscribers who sign up before April 10, will receive April and May for half price. So 2 months for the price of 1. A great deal. Use my link HERE, and enter the code: SAVEFIFTY0418
It is still a great time to become a Stampin’ Up! Demonstrator. I would love to have you join my team. A great perk for demonstrators this time of year is getting to see the new catalog first. Then we get to order and play with the new products a month early. For me, that is one of the best parts of being a SU Demonstrator. Of course, the discount helps! If you are interested, please contact me and let’s talk.
The content in this blog is the sole responsibility of Jackie Beers as an Independent Stampin' Up! Demonstrator. The use of and content of classes, services or products offered is not endorsed by Stampin' Up!