Today’s card is a mix of FunFold, Beautiful Paper, and an easy Wow factor. It all begins with the Expressions In Ink and Artistically Inked products.
Paper
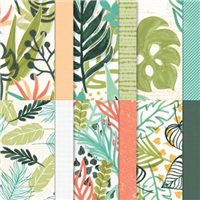
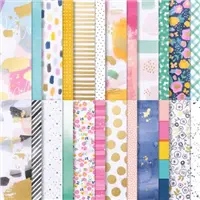
Choosing which product is the star of this card was difficult , the paper or the stamps. Since the paper has been purchased the most over the last year, I will say that is the winner. It is the Expressions In Ink Designer Series Paper. I have used two different pieces of the gorgeous pack of papers.
First is the Gold Striped piece. It is on the front and on the right edge of the back layer. To say it is pretty is very lacking. And the best piece is what I have just barely peeking from behind the center flower. A marble look with pink and yellow flowers and veins of gold could not be prettier. This fabulous DSP is paired with Pale Papaya. Which works wonderfully with the gold and the brightness of the pinks.
Stamps and Dies
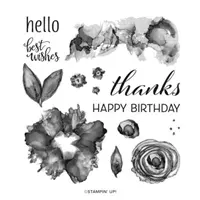
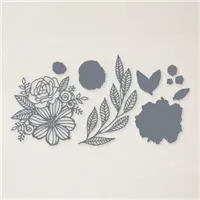
Artistically Inked is the name of this gorgeous bundle. The flower in the center of the card is stamped and die cut using Pale Papaya Ink as well as Pear Pizzaz. There are a variety of colors in the paper to choose from, but these were the ones I chose for this card. Both stamped images are die cut and then adhered to the center panel with Stampin’ Dimensionals. And the finishing touch is a couple of Champagne Rhinestones. The color matches the Pale Papaya pretty closely.
Directions and Measurements
Beginning with the Pale Papaya card base, it is cut 5 1/2 X 8 1/2 and scored at 2 1/8 and 4 1/4. Make an accordion fold on the left side of the card with the scores. Next the striped DSP is cut 1 7/8 X 5 1/4. (There are two of these pieces but you only see the one on the front in the photo. The other piece is on the inside of that accordion and is viewed when the card is open.)
The inside back layer is Basic White cut to 4 X 5 1/4. You can see the matching DSP on the right side edge. A strip of the gold DSP is cut to 1/2 X 5 1/4 and adhered flush to the right edge of the White.
The front diamonds are cut 2 from Pale Papaya at 1 3/4 X 1 3/4 , and 2 cut from the flowery DSP at 1 1/2 X 1 1/2. These are adhered together and then placed as a diamond with the points centered on the folded line. One is even with the DSP at the top and the other at the bottom. Carefully place the adhesive so it is only on the left side. Otherwise these would stick to the inside back layer.
For the center diamond cut a piece of Pale Papaya to 3 X 3 and a piece of Basic White to 2 3/4 X 2 3/4. Adhere the die cut flower and leaves to that piece using Stampin’ Dimensionals. Center the diamond between the two smaller diamonds. Add this diamond using Stampin Dimensionals also. Be careful that your adhesive is only on the left side!
WAVES OF THE OCEAN SUITE …EARLY RELEASE
CLICK ON THE PHOTO TO SEE THE COMPLETE SUITE OF PRODUCTS
ALL TOGETHER … SPECIAL BUNDLE
CLICK ON THE PHOTO TO SEE ALL OF THE PRODUCTS
HOST CODE
My April Host Code is STVD4BDV. Please use this code for orders under $150.00. I will have a small gift for those with orders over $50.00 in addition to the Perk Rewards Program. You can read all of the information at the top of the page in the Menu Bar under SHOP / Perks.
Thank you for stopping by today. I hope you enjoyed today’s project and will come back. I do read and reply to all of the comments individually. They mean a lot to me. Please reach out if you have a question.
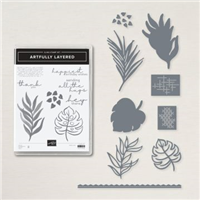
Fun Folds are the best kind of folds for creating cards. Today I have paired a Double Z fold with products from the Artfully Composed Suite of Products in the Mini Catalog.
Front
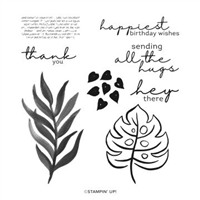
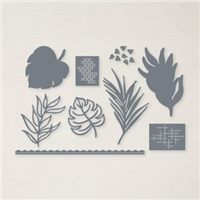
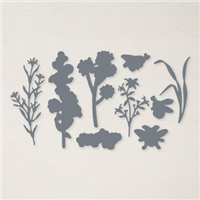
The front of the card stars not only the beautiful Artfully Composed Designer Series paper, but some of the Artfully Layered Stamps. And to top it off there are two different die cut leaves using the Tropical Layers Dies, which are part of the bundle. For a bit of the unexpected, I heat embossed the sentiment and some extra little heart shaped leaves onto the solid die cut leaf.
Inside Back
I know it seems odd doing the back before the center but you will see the method behind my madness…hopefully! The Double Z fold, the extra Z fold, is attached to the front and the back of the card. You can see the back section is attached to a piece of the DSP which has a very similar leaf. And to pair better with that DSP, I added the word stamp from the set using Pale Papaya Ink.
Center Section
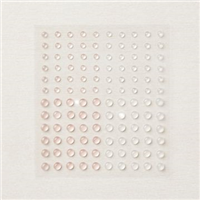
From this center view you can see all of the sections of the card. The center panel of the small Z is where you would write your greeting and sign. It is the least exciting of the card and why I went here last. But this open view allows you to view the full Double Z at work. And you can see that the front sentiment layer is raised with Stampin’ Dimensionals with a few of the Polished Dots embellishments for some bling.
Measurements:
The card base of Pear Pizzaz is cut to 5 1/2 X 8 1/2 and scored at 2 1/8 and 4 1/4 on the 8 1/2″ length. The panels are 2 Mint Macaron pieces cut to 1 7/8 X 5 1/4. With the back larger panel cut to 4 X 5 1/4. For the DSP there are 2 pieces cut to 1 3/4 X 5 and the larger one is cut to 3 7/8 X 5 1/8.
The smaller Z section is also Mint Macaron and is cut to 3 1/8 X 7. The Basic White panels are the front focal piece cut to 2 7/8 X 2 7/8. And the small panels are 2 that are cut 1 7/8 X 2 7/8 each.
To adhere the smaller Z section, fold both the little Z and the card as they would be closed. Center the small Z on the closed card. Pay attention to how much of the focal layer is actually over that front left fold. Place Stampin’ Dimensionals only on that part. Adhere it to the front panel. Then find where the back section lands. Add adhesive to that panel and close the card.
WAVES OF THE OCEAN SUITE …EARLY RELEASE
CLICK ON THE PHOTO TO SEE THE COMPLETE SUITE OF PRODUCTS
ALL TOGETHER … SPECIAL BUNDLE
CLICK ON THE PHOTO TO SEE ALL OF THE PRODUCTS
HOST CODE
My April Host Code is STVD4BDV. Please use this code for orders under $150.00. I will have a small gift for those with orders over $50.00 in addition to the Perk Rewards Program. You can read all of the information at the top of the page in the Menu Bar under SHOP / Perks.
Thank you for stopping by today. I hope you enjoyed today’s project and will come back. I do read and reply to all of the comments individually. They mean a lot to me. Please reach out if you have a question.
This month, the theme is Fabulous Flowers. We really hope that you will be inspired by all the amazing creations the Pals are sharing with you! As you hop from blog to blog, we would love for you to leave a comment. You will find the lineup at the end of my post to help you “hop” along from Pal to Pal.
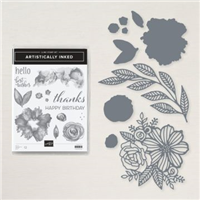
The Flowers theme is so perfect right now. I have a variety of flowers blooming so making a card inspired by them using the Hand-Penned Petals and Hand Penned DSP was a given.
Stamps and Paper
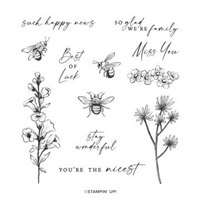
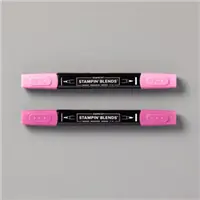
As I said above, I used the Hand-Penned Petals stamp set. These flowers are so pretty and beautifully painted. To continue the theme I went with the Hand Penned Designer Series Paper. Attempting to create the focal flower to look like the ones in the paper was my goal. The fillings for the two flowers are stamped. But there is not a fill stamp for the leaves. So to mimic the “not perfect” look of the stamps, I squiggled the leaves with the Light Mint Macaroon Stampin’ Blend. And yes “squiggled” is a technical term !! LOL!!
Embellishments
To finish the card took some thought. Adding the Brushed Brass Butterfly was easy. And that is a perfect fit for a pretty flower. But there was still too much open space. The idea for a bow, which I do quite often, filled the gap. Using the Simply Elegant Trim in Gold does not quite match the Brass of the butterfly. But it is pretty close.
Click the photo below for a PDF Instruction Sheet.
More inspiration awaits, so use the lineup below to visit the rest of the Design Team. The Pals are excited to show you what they’ve created! Then, please mark your calendars for our next blog hop on May 11th. Our theme will be New 2022-2024 In Colors, with the Pals showcasing the brand new In Colors in the new Annual Catalog.
CLICK ON THE PHOTO TO SEE THE COMPLETE SUITE OF PRODUCTS
ALL TOGETHER … SPECIAL BUNDLE
CLICK ON THE PHOTO TO SEE ALL OF THE PRODUCTS
HOST CODE
My April Host Code is STVD4BDV. Please use this code for orders under $150.00. I will have a small gift for those with orders over $50.00 in addition to the Perk Rewards Program. You can read all of the information at the top of the page in the Menu Bar under SHOP / Perks.
Thank you for stopping by today. I hope you enjoyed today’s project and will come back. I do read and reply to all of the comments individually. They mean a lot to me. Please reach out if you have a question.
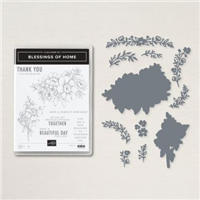
My card for today has one carryover and one retiring item. My project is a fun fold that I have shown previously. This one uses Blessing of Home and the beautiful Pansy Petals Designer Series Paper.
The front of the card is pretty, maybe a little elegant, but not a show stopper. However when you open it you get to see the Fun Fold.
Stamps
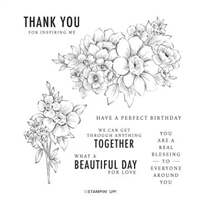
Yipee! that the Blessings of Home is carrying over to the upcoming Annual Catalog. This is such a pretty stamp set. And as you can see from the second photo, not only do you get the gorgeous flower but a great sentiment as well. The sentiment is so sweet and would work for a couple of different occasions. Hopefully you noticed the flower on the bottom of the right hand fold. I simply stamped the larger flower with only the top section covering the paper. It makes a cute and easy to do addition.
Paper
Speaking of the gorgeous flower, it is hard for me to explain other than I only see it as I have used it. And that is Softly colored. I cannot envision that flower boldly colored. So with that in mind, I looked for softer paper to pair with it. The Pansy Petals Designer Series Paper came to the rescue. On the inside of the card you can see the pastel background with softer pansies spread around. To pair with that piece, I went with the bolder, but still soft, striped piece on the front. And of course the card base came from that piece as well.
Directions
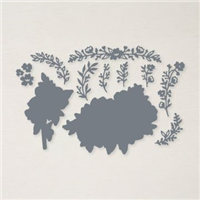
This fun fold was posted a few weeks ago. You can see this card by clicking HERE. One of my reasons for using this flower is to show how well different shapes work with this technique. The only consideration is that your die cut have a bit of width to it. As you can see from the open view, the die cut is only adhered to the inside folded section on half. So it needs to have a bit to glue down so it is secure.
Reminder
There are only today and tomorrow to take advantage of the Savings Are In Bloom promotion. I have a photo just below. By clicking on it, you will see all of the stamp sets that are at 20% discount. And don’t forget about the Mini Stampin’ Cut and Emboss Machine. That is an awesome deal!
SAVINGS ARE IN BLOOM
CLICK ON THE PHOTO FOR A VIEW OF ALL ITEMS DISCOUNTED
WAVES OF THE OCEAN SUITE …EARLY RELEASE
CLICK ON THE PHOTO TO SEE THE COMPLETE SUITE OF PRODUCTS
ALL TOGETHER … SPECIAL BUNDLE
CLICK ON THE PHOTO TO SEE ALL OF THE PRODUCTS
HOST CODE
My March Host Code is JGGHP66J. Please use this code for orders under $150.00. I will have a small gift for those with orders over $50.00 in addition to the Perk Rewards Program. You can read all of the information at the top of the page in the Menu Bar under SHOP / Perks.
Thank you for stopping by today. I hope you enjoyed today’s project and will come back. I do read and reply to all of the comments individually. They mean a lot to me. Please reach out if you have a question.
Welcome to InKing Royalty’s February Blog Hop! This is a great time of year to build your stash of handmade birthday cards, so we are sharing birthday-themed projects with you today. We are excited to share our creations and hope you love them! After you read my post, I hope you’ll hop over to the next person on the list at the base of this post.
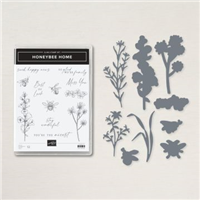
My choice for a great birthday card is the pairing of Honeybee Home stamps with the Abstract Beauty Designer Series Paper. And of course, a Fun Fold!
Paper
The gorgeous DSP is from t he Abstract Beauty 4 X 6 Designer Series Paper. These sheets have beautiful colors plus some gold accents. I chose to pair this piece with a bold Magenta Madness as the base card. And surprisingly a soft Balmy Blue for the layer. I love how they look together. There is also the back of the flowered DSP as the layer behind the focal flower.
Stamps
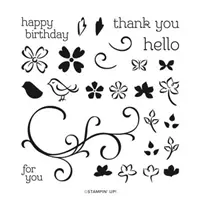
Even though the brightest star of the card is the beautiful paper, I do love the stamped flower. It is from the Honeybee Home Bundle. I stamped , colored, and then Die cut with the matching die. And the Happy Birthday is from the Sentimental Swirls set. (I used that set on Monday’s card). The font and the size of the sentiment fit perfectly in the open space.
Finishes
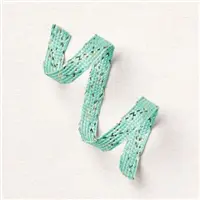
To finish this fun layout, I added a bow to the flower. It is the Jade & Gold Braided Ribbon in the Annual Catalog. And it is amazing to work with! In a way, it sort of stretches. And I will say that the ends fray when cut. But the way it stretches and flattens out makes for a beautiful bow! For the final touch I added three of the Genial Gems next to the sentiment. And yes there is still plenty of room to sign and write a note beneath the upper and lower flaps plus the flower layer.
Layout
This fun card layout, or Fun Fold, is a Mary Fish sketch. It is #38 if you want to see her versions of the design. I love that it is a Fun Fold but yet very quick and easy to do.
The card base of Magenta Madness s 4 1/4 X 9 1/4 (if you take 4 1/4 X 11 and cut off the 1 3/4 save that for the flower layer)
The Balmy Blue layer is 4 X 1 5/8 (x2)
The DSP layer is 3 3/4 X 1 3/8 (x2)
The focal layer is Magenta Madness (the cut off piece) 4 1/4 X 1 3/4
The focal layer DSP is 4 X 1 1/2
The inside White is 4 X 5 1/4
The focal layer is only adhered to the top flap!
Thank you for stopping by today. I hope you’ll hop along to the next stop on the blog hop, Lisa Graham at Lisa’s Little Ink Spots. There’s lots of inspiration to be found in this group – and you don’t want to miss it!
Thank you for hopping along with us. If you get stuck during the Blog Hop, please use this line-up as a guide:
My February Host Code is HFEQADCZ. Please use this code for orders under $150.00. I will have a small gift for those with orders over $50.00 in addition to the Perk Rewards Program. You can read all of the information at the top of the page in the Menu Bar under SHOP / Perks.
Thank you for stopping by today. I hope you enjoyed today’s project and will come back. I do read and reply to all of the comments individually. They mean a lot to me. Please reach out if you have a question.
A Fun Fold Blog Hop is my favorite. Because I truly love Fun Folds of any kind. Today’s card is a Double Card with an Extra Fold.
Paper and Folds
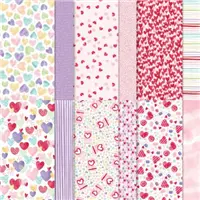
This Fun Fold is cased from Lisa Cursio. I love mixing the different patterns of paper from the Sweet Talk Designer Series Paper. I have used two pieces from that paper pack. I love mixing Red and Purple reminiscent of the Red Hat Club colors.
The fold is actually very easy to do. It just takes a bit more cardstock. The card base is 5 1/2 X 10 1/2, so more than half of a piece of 8 1/2 X 11. Other than the larger size, the folds are a base card with a smaller card added to it’s front. The Plus, is the extra side fold. Here are the other views of the card.
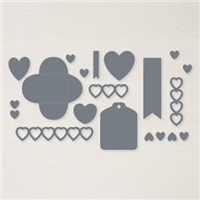
Stamps and Dies
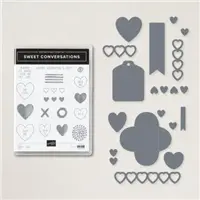
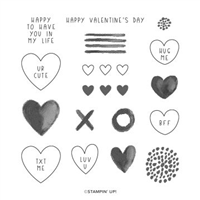
The stamps and dies are from the Sweet Conversations Bundle. It is part of the Suite with the Sweet Talk DSP. The front tag is from the Sweet Heart Dies. This is probably my favorite of the set. It is a perfect size! Both the sentiment and the heart are from the set. And the inside Luv U is from the set too. The only different stamp set is the Special Moments set from the SAB catalog. It is the Wonderful statement on the inside.
My January Host Code is GR679MMV. Please use this code for orders under $150.00. I will have a small gift for those with orders over $50.00 in addition to the Perk Rewards Program. You can read all of the information at the top of the page in the Menu Bar under SHOP / Perks.
Thank you for stopping by today. I hope you enjoyed today’s project and will come back. I do read and reply to all of the comments individually. They mean a lot to me. Please reach out if you have a question.
The content in this blog is the sole responsibility of Jackie Beers as an Independent Stampin' Up! Demonstrator. The use of and content of classes, services or products offered is not endorsed by Stampin' Up!