Hello, welcome to the Stampin’ Pretty Pals’ Blog Hop! This month our Design Team created projects featuring “Sale-A-Bration Products.” We hope you enjoy and will be inspired by them! Don’t forget to leave comments. We love hearing from you! At the end of my post, you will find the full line-up to help you “hop” along from Pal to Pal.
Sale-A-Bration is one of my favorite times of the year! I love getting FREE products for purchasing things I love! And I have a “Bundle” of things I have fallen in love with to share with you today.
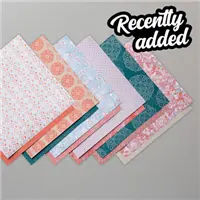
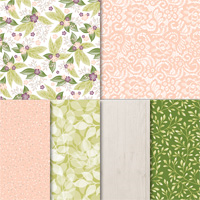
I have used the Berry Blessings stamp set and the Berry Delightful Designer Series Paper. These two are a Bundle in the Sale-A-Bration Catalog. The bundle is FREE with a $100.00 purchase. My photo does not do the beauty of the DSP justice. The colors are very vibrant!
For the center stamped area, I used a separate piece of White cardstock to stamp on. The outline of the leaves is Garden Green with the inside being Granny Apple Green. The berries are outlined with Pacific Point and the inside is Balmy Blue. I also added a few extra berries using a “stamped off” Highland Heather over the Balmy Blue. I fussy cut those and added a few with dimensionals overtop of the center stamped ones and then scattered a few on the “bridge” in place of an embellishment.
The gorgeous plaid blue DSP is the flip side of the berry DSP. I decided I wanted contrast instead of all of the panels being the same. The two sentiments I have used are part of the Berry Blessings stamp set. I stamped those using Memento Tuxedo Black Ink to stand out from the bright colors of the DSP. And of course… I used the Double Oval Punch. It seems as if I have used that punch on every card I have made since it debuted!!
This fold will still fit inside an A2 envelope. Here is a photo of it flattened for inserting into an envelope.
You can see that the left side is folded and the right side is flattened out. It will do this in either direction. So depending on how you decorate, it will still flatten out. The size of the flattened version is 4 1/4 X 5 1/2, so normal size of a card.
I had a request for a Bridge Fold Card for a class I am doing soon. After figuring out what it was, I have really enjoyed making this card using that fold. My favorite thing is different Folds!
I have the measurements for you and would love to see your version of this Fun Fold.
Base of the card is cut to 8 X 4 1/4 (Tip: cut the 3″ off of the 11″ side before cutting in half for the 4 1/4. You can use this piece for the inside and the bridge piece)
Score on the 8″ side at 1 1/4, 2 1/2, 5 1/2, and 6 3/4.
The inside White layer is 2 3/4 X 4
The four sections cardstock layer is 1 1/8 X 4 1/8
The four DSP sections are 1 X 4
The base of the Bridge is 1 X 5 1/2
The cardstock layer is 7/8 X 5 3/8
The DSP layer is 3/4 X 5 1/4
Thank you for stopping by today! I hope you enjoyed my project and will give it a try.
More inspiration awaits! Use the Blog Hop Line-up below to visit the rest of this month’s Design Team. My fellow Pals are excited to show you what they’ve created! Mark your calendars for our next blog hop on February 10th when our theme will be “Birthday Bonanza” where the design team will be sharing birthday projects that celebrate our family and friends. Don’t miss the fun! Until then, please stay safe and have fun in your craft room.
Welcome to InKing Royalty’s April Blog Hop! During this year’s blog hops, we are enjoying a year of celebrations. This month’s projects celebrate Springtime, so I hope you are ready for gorgeous Spring colors, flowers and butterflies – and maybe some sweet baby animals. We are excited to share our creations with you today! After you read my post, I hope you’ll hop over to the next person on the list at the base of this post.
I tried looking in my yard for “Spring” ideas and could only find flowers , birds, and squirrels. Those are all great, but I wanted something different. I opened Facebook to take a break and the first post that popped was a fellow demonstrator with a Kite on the front of a card. The post was from For The Love Of Stamping. As soon as I saw the kite, it reminded me of the Graduation Cap card I did two weeks ago. So I took her idea and designed my own kite card. I used the fold I had created for the other card. New kite flying memories in the making.
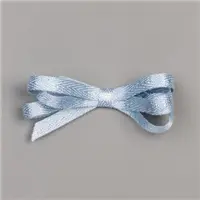
My color choices came from the Woven Threads Designer Series Paper. I debated on the order of the three colors and finally ended with this one. It was more due to the gorgeous Seaside Spray Metalic Ribbon. It looked best on the Purple Posy card stock . 🙂
The kite is a miniature of the Graduation Cap Card and opens as that one did. Here is a view of the open kite.
If you look closely at the bottom tip of the kite, you can see a tiny piece of a clear velcro dot. The thickness of the card stock for the kite made it not want to remain closed. So a tiny piece of a cirlce velcro dot was added there. You really do not notice it even in person.
The card itself does open and has a sentiment there as well. The opening of the kite is just a bonus!
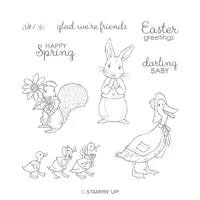
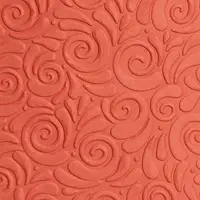
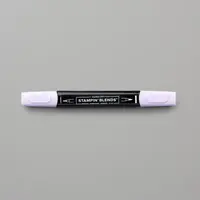
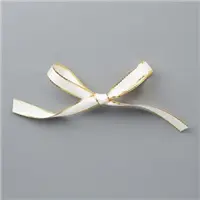
The embossed area is from the Swirls and Curls Embossing Folder and fits with the flying the kite in the wind theme. I finished the card with the Happy Spring sentiment from the Fable Friends stamp set layered on circles. The kite string is the Seaside Spray Metalic Ribbon along with a bow from the Whisper White Seam Binding Ribbon. The finishing touch is the Basic Pearl that I colored using the Light Purple Posy Stampin’ Blend to add to the sentiment.
I appreciate you checking my blog today and hope you will leave a comment. I have added a link to the Graduation card and some directions for the kite below the Blog Hop Lineup. Please continue hopping!
Thank you for stopping by today. I hope you’ll hop along to the next stop on the bloghop, Jennifer Spiller at Westside Paper Creations. There’s lots of inspiration to be found in this group – and you don’t want to miss it!
Thank you for hopping along with us. If you get stuck during the Blog Hop, please use this line-up as a guide:
Click HEREto go to the Graduation Cap Card. The top fold of the kite is the same as the fold on that cap. The other measurements are listed here. If you have any questions, please contact me and I will be happy to assist you.
Directions:
Card base is 4 1/4 X 11, scored at 5 1/2
layers are 4 X 5 1/4, and 3 7/8 X 5 1/8
Kite piece is 2 1/2 X 7 1/2 scored at 3 3/4. Then like the graduation card, make a mark at 2 1/4 and 5 1/4 on each side and make a scored X using the marks.
Also make a mark on each end of the kite layer at 1 1/4
Fold on all the score lines and then cut from the end center mark to the side mark. Do this on each side to make the bottom point of the kite.
The inside of the kite and the top of the kite are the same measurements. Each is 2 1/4 X 3 3/8. Make marks at the top and bottom of the 2 1/4 side at 1 1/8. On each long side make a mark at 1 3/8 on each side.
Cut from the top to the side mark on both sides and the bottom to the side mark on each side. This makes the pointed ends for the kite.
HOST CODE
My April Host Code is HKP6K3Z4. Please use this code for orders under $150.00. I will have a small perk for those with orders over $50.00.
Welcome to the Pals’ Blog Hop! While the COVID 19 pandemic is adding stress to our lives, we Pals hope this blog hop will help to lift your spirits. Let us inspire you to take a creative break and relax for a little while. This month our theme is “Special Occasions” where we have made a project for just about any occasion you can think of! You’ll find the full line-up below to help you “hop” along from Pal to Pal.
My choice for a Special Occasion card is a Graduation Card. I feel badly for all of the graduating students this year. I know most look forward to walking across the stage. So I tried to make a bit of a different card.
I hope it appears to you as a graduation cap!! Here is the inside with it’s funky fold.
I used a variety of stamp sets for this card. They will all be listed in the supply list at the bottom of the post.
I love different folds and had made a similar card to this when a neighbor’s son graduated a few years ago. Sadly in looking for it, I realized it was before I began my blog. So I had to go by memory and a card on Pinterest. The card I started with is from Chris Sloger from 2014.
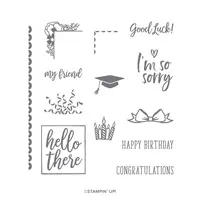
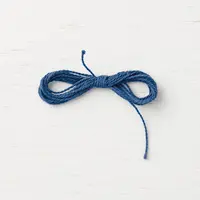
For the front of the card, I used the Witty-Cisms stamp set with the Layering Circles Dies. The Congratulations stamp is from the I say Hello stamp set and it cut using the Rectangle Stitched Dies. The “tassel” is Night Of Navy and Whisper White Bakers Twine. The White twine is a bit thicker, which required the circles to be raised with double Stampin’ Dimensionals. This might be a bit difficult to mail due to the thickness of the folds and the tassel layer!
I especially love the “point of the cap” and the mimic of that on the inside layer. The star from Morning Star stamp set, seems to fit perfectly in the pointed section.
Here is my video of basic instructions. I also have written instructions at the bottom of the page from before I added the video.
More inspiration awaits! Use the Blog Hop Line-up below to visit the rest of this month’s Design Team. My fellow Pals are excited to show you what they’ve created! Mark your calendars for Wednesday, May 13th, when we will say “Goodbye to January Mini and 2019 Annual Catalog and/or Hello to 2020 Annual Catalog.” The Design Team will showcase their favorites from the retiring catalogs or new products from the new catalog. Don’t miss the fun! And, until then, please stay safe.
Card Base is 4 1/4 X 11, score at 5 1/2. Then make little marks at 3 3/8 and 7 5/8. Rotate 180 and make the marks on the other side. If you imagine connecting the marks you should have a long X.
Line up the marks from opposite sides using your Simple Scored (I have a black marker line down the 6″ score line of my SS so it shows up very well) or use your Paper Trimmer and scoring blade. Using the scoring tool, connect the two marks. Rotate the paper and repeat with the other two marks.
Fold on all of the score lines. Crease well with your bone folder.
For the inside layer, cut to 5 1/4 X 4, Make a mark on the 4″ side at 2″. Rotate to the5 1/4″ side and make a mark at 2″. Rotate 180 and make the mark on the opposite side at 2″.
Using your Paper Trimmer, line up the mark on the 4″ side and one of the longer side marks and cut off that triangle. Repeat for the opposite side.
Welcome to the Pals’ May Blog Hop. We’re so glad you’re here because we made some great projects with “More Than One Score.” You may be starting the hop here or coming from a previous Pal’s blog. Either way, you’ve come to the right place. You’ll find the full line-up below to help you move, or “hop” along from Pal to Pal.
My “more than one score” card is a Double Pocket Card. It has a few scores and a few folds, but it needs very little adhesive to hold it together. The added bonus is that it can be made in quite a few sizes. I made mine today to hold a tea bag and a note card. Of course, I used the retiring Tea Room Designer Series Paper to go with the tea bag!
Tea Room Designer Series Paper, 146894
I mixed and match with my products used. I have the Tea Room DSP, which is retiring, the Frosted Bouquet Framelits, which are carrying over, and the Free As A Bird stamp set, which is new for the upcoming catalog. One of the best about Stampin’ Up! products is that they mix and match so well.
I got this inspiration from a Splitcoast tutorial from Claudia Rosa. It was from several years ago. I played around with paper size until I got what actually fit the tea bag. For an unknown reason, that was my original idea for it!
Here is the card pulled out. I used the Detailed Trio Punch to make the ribbon hole. It is just the perfect size!
I should have mentioned above that my card is 4 X 4. So with the tea bag adding some thickness, it would still fit into a regular size envelope. At the bottom of my post, along with the supply list, I will add the directions on how to fold this. It is super easy, and I have some photos to go along.
More inspiration awaits! Use the Blog Hop Line-up below to visit the rest of this month’s Design Team. My fellow Pals are excited to show you what they’ve created! Don’t forget to show us some love by commenting on our creations. Mark your calendars for Wednesday, June 12, 2019 when our Hoppin’ Pals share their “Anything with Wings” projects. Don’t miss the fun!
Click on the Last Chance icon to go to my Online store. This will give you up to date what is left on the retiring lists. And if you would like to place an order, I have a Host Code just below the icon.
If you place an order with me, please use the April Host Code of 3KNKXJFH. If your order is $75.00 (of product) or more, I will send you a small gift. If it is over $150.00 (of product) I will send you a small gift, but DO NOT use the code. 150.00 is the minimum host rewards so you get the host rewards.
8 X 8 piece of card stock or DSP, scored at 4″ on two sides with your desired pattern facing up
Fold and burnish, then lay flat, again with your desired pattern facing up
Cut along the left side score into the center intersection
Take the top left corner and fold it approximately 3/4 of the way down, but keep straight with the score lines
Take the bottom right section and fold it up along the score lines, so that it is now a triangle
Fold the top left over on top of the top right
Fold the bottom left underneath the bottom right
Fold the now bottom right corner up over top of the fold that is on top of it
Burnish all of your folds
Finally, fold the bottom section up and on top of the top section
You will need just a bit of Tear & Tape for the right corner of the center pocket and one section of tape along the left side to hold the front piece in place.
Welcome to InKing Royalty’s April Blog Hop! This year’s Blog Hop themes are inspired by a single word – and this month our projects are centered around SPRING. Spring is a special time of year – it’s fun to celebrate the beauty of nature and to get back outside during this transition of the seasons. We are excited to share our creations with you today! After you read my post, I hope you’ll hop over to the next person on the list at the base of this post.
My card is a fun fold that I have not done in years. I found one I had made in some cleaning out I have been doing and then saw one on Pinterest almost the next day. So I thought today’s Hop would be a great time to bring it out again. As the title says, it is a Squash Card. That is a different name for a funky fold. I have several different photos of the closed and open card. Please bare with me.
Wonderful Floral Dies, 148529
This is the closed up look. The card ends up being 4 1/4 X 4 1/4. Even though it is a little thicker than a regular A2 card, it still fits in the A2 envelope. And the bonus of that is no extra postage charge!
Here is it opening:
This view gives you the idea of how you would insure the inside decorations do not get folded or bent. And Here is another of a little more open.
And the final of a fully opened card.
Can you see that you could easily add a gift card holder to the left hand side? I was tempted to redo the entire card when I had that thought!! Sanity prevailed though and I settled for just giving you that idea.
I used the Wonderful Floral Dies and the Floral Romance Designer Series Paper to create the die cuts and the leaves. I love the look of the leaves cut from the DSP. The butterfly was laying on my desk from a previous project and I thought it would fit perfectly on that last panel.
This card began with an 8 1/2 X 8 1/2 piece of DSP. I scored at 4 1/4 on two sides so that it is quartered. I then scored from one corner to the other. After burnishing on the score lines, fold the two diagonal score lines to the inside and burnish again. That is what makes the fun fold. Then decorate as you see fit. The card I saw on Pinterest was made by Lyssa Zwolanek of Song Of My Heart in 2015. You may be able to find it or a newer version. Of course, I would be very happy to assist you in making one like this if you contact me.
All of the supplies used are at the bottom of the post. Stampin’ Up! updated the Clearance Rack on Monday, so please check it out for some awesome deals.
Thank you for stopping by today. I hope you’ll hop along to the next stop on the bloghop, Julie DiMatteo at The Paper Pixie. There’s lots of inspiration to be found in this group – and you don’t want to miss it!
Thank you for hopping along with us. If you get stuck during the Blog Hop, please use this line-up as a guide:
Click on the Last Chance icon to go to my Online store. This will give you up to date what is left on the retiring lists. And if you would like to place an order, I have a Host Code just below the icon.
If you place an order with me, please use the April Host Code of 3KNKXJFH. If your order is $75.00 (of product) or more, I will send you a small gift. If it is over $150.00 (of product) I will send you a small gift, but DO NOT use the code. 150.00 is the minimum host rewards so you get the host rewards.
The content in this blog is the sole responsibility of Jackie Beers as an Independent Stampin' Up! Demonstrator. The use of and content of classes, services or products offered is not endorsed by Stampin' Up!