
Welcome to InKing Royalty’s April Blog Hop! During this year’s blog hops, we are enjoying a year of celebrations. This month’s projects celebrate Springtime, so I hope you are ready for gorgeous Spring colors, flowers and butterflies – and maybe some sweet baby animals. We are excited to share our creations with you today! After you read my post, I hope you’ll hop over to the next person on the list at the base of this post.
I tried looking in my yard for “Spring” ideas and could only find flowers , birds, and squirrels. Those are all great, but I wanted something different. I opened Facebook to take a break and the first post that popped was a fellow demonstrator with a Kite on the front of a card. The post was from For The Love Of Stamping. As soon as I saw the kite, it reminded me of the Graduation Cap card I did two weeks ago. So I took her idea and designed my own kite card. I used the fold I had created for the other card. New kite flying memories in the making.

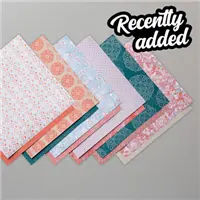
My color choices came from the Woven Threads Designer Series Paper. I debated on the order of the three colors and finally ended with this one. It was more due to the gorgeous Seaside Spray Metalic Ribbon. It looked best on the Purple Posy card stock . 🙂
The kite is a miniature of the Graduation Cap Card and opens as that one did. Here is a view of the open kite.

If you look closely at the bottom tip of the kite, you can see a tiny piece of a clear velcro dot. The thickness of the card stock for the kite made it not want to remain closed. So a tiny piece of a cirlce velcro dot was added there. You really do not notice it even in person.
The card itself does open and has a sentiment there as well. The opening of the kite is just a bonus!
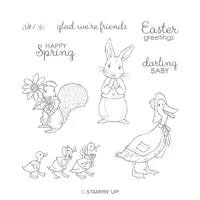
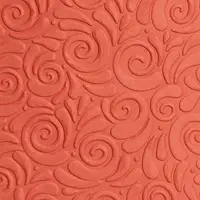
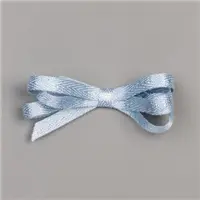
The embossed area is from the Swirls and Curls Embossing Folder and fits with the flying the kite in the wind theme. I finished the card with the Happy Spring sentiment from the Fable Friends stamp set layered on circles. The kite string is the Seaside Spray Metalic Ribbon along with a bow from the Whisper White Seam Binding Ribbon. The finishing touch is the Basic Pearl that I colored using the Light Purple Posy Stampin’ Blend to add to the sentiment.
I appreciate you checking my blog today and hope you will leave a comment. I have added a link to the Graduation card and some directions for the kite below the Blog Hop Lineup. Please continue hopping!
Thank you for stopping by today. I hope you’ll hop along to the next stop on the bloghop, Jennifer Spiller at Westside Paper Creations. There’s lots of inspiration to be found in this group – and you don’t want to miss it!
Thank you for hopping along with us. If you get stuck during the Blog Hop, please use this line-up as a guide:
- Brian King at Stamp with Brian
- Pam Morris at Tap Tap Stamp
- Ann Murray at Murray Stamps Ink
- Sue Jackson at Just Peachy Stamping
- Sheryl Sharp at Sharp Notes by Sheryl
- Julie DiMatteo at The Paper Pixie
- Peggy Noe at Pretty Paper Cards
- Robin Myren at Songbird Designs by Robin
- Lynn Kolcun at Avery’s Owlery
- Shawn de Oliveira at Shawn Stamps
- Linda Krueger at The Stamp Coach
- Joanne Brown at Stamping with JoJo
- Sheryl Abernathy at Elegant Sentiments
- Jackie Beers at Blue Line Stamping ← YOU ARE HERE
- Jennifer Spiller at Westside Paper Creations
- Candy Ford at Stamp Candy
Click HERE to go to the Graduation Cap Card. The top fold of the kite is the same as the fold on that cap. The other measurements are listed here. If you have any questions, please contact me and I will be happy to assist you.
Directions:
- Card base is 4 1/4 X 11, scored at 5 1/2
- layers are 4 X 5 1/4, and 3 7/8 X 5 1/8
- Kite piece is 2 1/2 X 7 1/2 scored at 3 3/4. Then like the graduation card, make a mark at 2 1/4 and 5 1/4 on each side and make a scored X using the marks.
- Also make a mark on each end of the kite layer at 1 1/4
- Fold on all the score lines and then cut from the end center mark to the side mark. Do this on each side to make the bottom point of the kite.
- The inside of the kite and the top of the kite are the same measurements. Each is 2 1/4 X 3 3/8. Make marks at the top and bottom of the 2 1/4 side at 1 1/8. On each long side make a mark at 1 3/8 on each side.
- Cut from the top to the side mark on both sides and the bottom to the side mark on each side. This makes the pointed ends for the kite.

HOST CODE
My April Host Code is HKP6K3Z4. Please use this code for orders under $150.00. I will have a small perk for those with orders over $50.00.

The New Paper Trimmer:

SUPPLIES:


Cute! Kites are for spring. I love the embossing on the white background, and what a fun way to express a sweet sentiment. Really sweet and quite original.
Super clever design! Thanks for the tip about the clear Velcro dot~you’re right: I never would have noticed it if you hadn’t pointed it out. So glad you were part of the hop today; your creativity is inspirational.
How fun is this!? I love the kite and the colors you’ve used on your card! Such cleverness, Jackie! ♥ I’m so glad you hopped with us today.
What a clever idea for a card. I can’t wait to CASE it! Thanks
WOW! How cute is this card?! Love love love the kite. Perfect springtime activity.
Love this, Jackie! Love the kite in the swirly wind!!!
What a great fun fold! I am going to have to try this soon! The kite does all the work on this card, and the white space just accents the kite.
Wow, Jackie, what a surprise when the kite opens up! Adorable!
Fun card! The swirly background really does give the feeling of a windy day.
OK OK so I’m like, “so cute a kite.” Then scroll down a bit…”What?! it opens up?!”. OMG love this. Such a great idea. Thanks for sharing, Jackie!