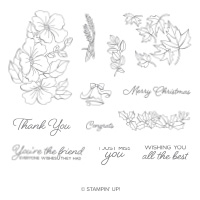
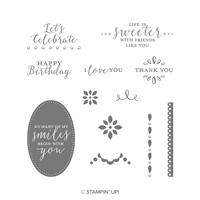
I have another sneak peek of the Blended Seasons Stamp Set that will be available only during August. It is a super stamp set with Christmas, Fall, and Summer stamps. And the font of the sentiments is just wonderful!
Blended Seasons, 149016
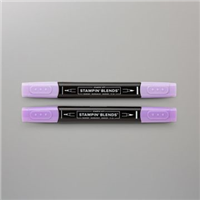
This sentiment is probably my favorite and I love the combination fonts for it. Can you tell that I just received my new Stampin’ Blends? I had to give them a try. On this card I only used the Highland Heather one though. The blends make coloring so quick and easy. And you definitely do not need to be a great colorer. I am for sure not one of those!! But the blends make it look good anyway! Yay!!
I did a little more layers than normal on this card. Again, that was done to show off some of the beautiful colors from the Color Revamp. These are Gorgeous Grape, Highland Heather, and of course Old Olive.
Thank you for stopping by today! I very much appreciate it. I hope you will return on Monday for some new card ideas.
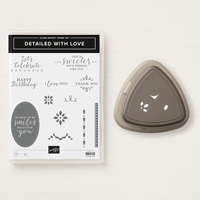
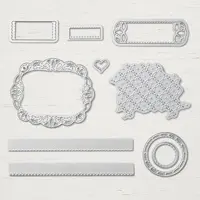
Punches are one of my favorite crafting products. I think of them as a staple of paper crafting. So I was thrilled when Stampin’ Up! came out with this new Detailed Trio Punch to pair with the Detailed With Love stamp set. Yes, they are a bundle!! The 3 in 1 punch is perfect. All three corners are almost must haves and here they are all in one. I have used the same center piece as I did on my previous card. But the look is very different!
Detailed With Love Bundle
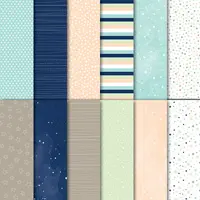
Would you believe that this Designer Series Paper is the Twinkle, Twinkle DSP? I rarely do baby cards, but loved this DSP. I believe it is perfect for non-baby cards! And it is a totally different look from the first card I made using this bundle. You can see that card HERE.
Thank you very much for visiting today! I greatly appreciate it. If you have any questions about the card, Stampin’ Up!, or JOINING MY TEAM, please contact me. Now is an awesome time to become a demonstrator. Please check all of the specials listed below. And as always, my supply list is also at the bottom of the post.
Choose one of the Color Families receive all 10 of the Ink Pads FREE when you join during July !! WOW!!
It helps if you put the correct date on the scheduled post. Sorry about that!!
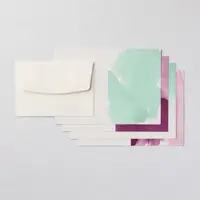
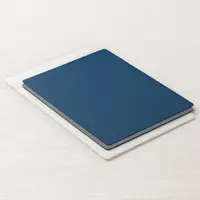
Today I have a one layer card. That is super unusual for me. I do love my layers! But I hope when you see this one, you will consider these great notecards as quick and easy cards to have on hand. Half of the work is already done for you. Take a look and then I will explain what is already on the card.
Delightfully Detailed Notecards, 146911
I love how this card turned out! These notecards are delivered with the watercolor wash look already on them. They are half in Mint Macaron and half in Blackberry Bliss. I love the subtle watercolor look which screams for you to just stamp on top of it. The Blackberry Bliss has a darker background and is maybe even more beautiful.
These notecards would be the perfect way to make and have on hand some quick Thank You type cards, or for a beginner crafter to not have to worry about doing layers. You get 20 notecards and envelopes for $9.50.
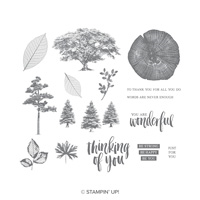
I stamped the sentiment in Soft Suede and the tree by coloring with my Stampin’ Write Markers in Shaded Spruce and Soft Suede. And that is the completed card! It cannot get much simpler than that. The stamp set is Rooted In Nature, a wonderful set, especially for more masculine cards.
I also stamped on the envelope to give a little “something special is in here” look to it. I try to always remember to do that. It is a leaf from the same set stamped in Mint Macaroon.
Thank you for visiting today! I hope you will return on Monday. Please remember to review all of the current specials. The JOIN NOW is the best ever!!!
Choose one of the Color Families receive all 10 of the Ink Pads FREE when you join during July !! WOW!!
I have a bit of an unusual, at least for me, project for you today. From my West Coast trip I brought a friend ,who loves Ghirardelli Chocolate, a gift. Of course I had to make a decorative box to hold it. This is definitely not my specialty!! But I measured and winged it, and here are the results.
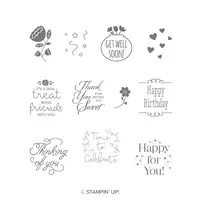
Treat Time, 146626
I did used retired DSP. I wanted a thicker paper for my gift box. There are some great new ones, I just did not have a large enough piece. I have been really using my DSP lately! And here is the inside of the box.
I used Julie DiMatteo’s favorite mini magnets as the main closure. I did add a decorative slide off band as well. In doing so, I fell in love with this stamp set, Treat Time ! Oh My, who would not LOVE to get a card or gift with the sentiment “It’s A Real Treat Being Friends With You”? I think that is my new favorite sentiment.
Thank you for visiting today. Remember to check out the specials, and especially the FREE Ink Pads for joining!!
MEASUREMENTS:
8 X 12 Thick DSP
Score at 2, 3 1/8, 5, & 6 1/8 on the short side
Score 1 1/8 from each end.
Choose the top, and remove the first two sections on each end of the top.
Adhere and close as you choose
Choose one of the Color Families and receive all 10 Ink Pads FREE when you join in July! Wow !!
I have another quick and easy card today. I am also showcasing the beautiful Highland Heather from the Stampin’ Up! Color Revamp. It is gorgeous! And I am once again using the Detailed With Love stamp set. It is a very versatile set for sure.
Detailed with Love, 146606
I have also, for the first time, used the new Stampin’ Up! Embossing Mats. I used it for the detailed cutting in the center of the card. I may not have needed to do that, but I did not have a lot of time and didn’t want to mess up the card. So I played it safe and I love the outcome. I will definitely be playing with these mats more in the near future.
Thank you so much for stopping by today. This is a very simple layout that could be utilized in a variety of ways. I hope you will give it a try.
Be sure and check out all of the current Specials going on right now. The Super Joining Bonus is the best I have ever seen. I would love to talk with you about joining my team. There is no pressure to continue and you still get a lot of wonderful product for your money.
MEASUREMENTS:
Card base is 11 X 4 1/4
Heather layer is 5 1/4 X 4
White strip is 1/2 X 4
Choose one of the Color Families as a Free Bonus to your Starter Kit! That is 10 FREE Ink Pads!! WOW !
The card I have made for today is a little bit different. I have mostly focused on the punch instead of the stamp set or paper. It is the Detailed Trio Punch. I really like it. As described, there are three punches in one. A Corner Rounder, YAY!!, a Flower, and a Ribbon Slot. It is a great tool to have in your tool bag.
Detailed With Love, 146606
I wanted to focus on the punch, so I kept the rest of the card pretty simple. The ribbon is the gorgeous Polka Dot Tulle Ribbon. It comes in Whisper White or Very Vanilla. Other than the ribbon the layers are the focal point.
Thank you for visiting today. I hope you will come back tomorrow for another new card. And please check out the Specials Deals going on. The Join and get a SET of Ink Pads is an all time greatest offer!! I would love to talk with you about joining my team of stampers.
MEASUREMENTS:
the layers are 2 1/2 X 3, 2 3/4 X 3 1/4, and 3 X 3 1/2
The content in this blog is the sole responsibility of Jackie Beers as an Independent Stampin' Up! Demonstrator. The use of and content of classes, services or products offered is not endorsed by Stampin' Up!