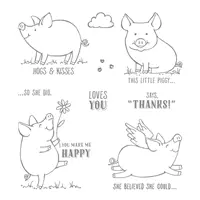
I have been waiting since OnStage for This Little Piggy set. I have had it for a couple of days and have made probably a card a day with it! These little guys are just so cute 🙂
I know the Pink Tourette doesn’t quite look right with Basic Black and Crushed Curry, but what choice did I have for a cute little pig ? HaHa!!!
Doesn’t that cute face on the piggy bring a smile to you? All of the pigs in the set are this cute! The Pick a Pattern DSP helps the young and happy feeling of the card I do believe. It is so eclectic that it is a perfect background for the cute little focal point. This DSP is a sleeper in a way. At first glance it has more child-like designs but when you look at the other side of the paper, at least for me, it was a “WOW” .
There are extra layers to this card, but that could be narrowed down if you didn’t want it to me as heavy. I wanted this to be a really nice card and added the extra background layers to help make it pop.
I started with a base of Thick Whisper White
The Basic Black layer is 5 3/8 X 4 1/8
The Whisper White layer is 5 1/4 X 4
The DSP layer equals between the two pieces a width of 3 7/8 X 5 1/8
The piglet is stamped on Whisper White with Tuxedo Black Memento ink and colored with Pink Pirouette marker
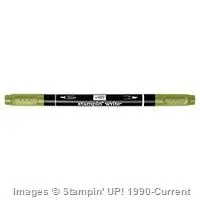
The grass is done with the Old Olive marker
The balloon is stamped in Crushed Curry ink on Whisper White and punched with the Balloon Bouquet punch
The edge of the balloon is shaded (it doesn’t show well in the picture) by dragging the Basic Black marker around the outside of the ballon. It sort of mimics the circles in the DSP.
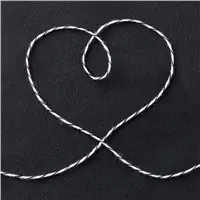
The bow on the balloon is Black and White Baker’s Twine.
I will definitely be posting more Little Piggy cards in the coming weeks. Thank you for stopping by today. I very much appreciate your comments.
The supplies I used are listed below: You can click on any item and be taken directly to my On Line Store.
Welcome to the June 2017 Pals Blog Hop. Thank you so much for joining us today. This month’s theme, Pick a “B”, features projects inspired by Babies, Birthdays and Brides to name few. You may just get a glimpse of new catalog products while you hop with us today.
Whether you’re just starting the hop, or have come from a previous Pal’s blog, you’ll find the line-up toward the end of my post to help you move along.
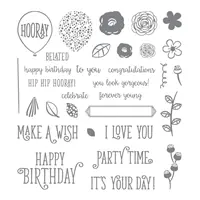
I chose a Birthday card for my “B” of the day. I may be over-using the new In Colors from Stampin’ Up!, but every year they just get better. (As does the catalog) Wow on everything in this new catalog!! So here is my new Birthday Card:
Happy Birthday Gorgeous, 143662
I love how this card turned out. I think it is bright and happy which equals a SMILE. That is my goal. I used two of the new In Colors with Berry Burst and Lemon Lime Twist. You are going to see a lot of the Lemon Lime Twist! I am in love and find myself continually reaching for it. Quite a few of the items I used today are new to this catalog. WOW!
For this card the base is Berry Burst card stock at 8 1/2 X 5 1/2 folded in half.
The Lemon Lime Twist layer is 5 1/4 X 4
The Whisper White layer is 5 1/8 X 3 7/8 and embossed with the Softly Falling Embossing Folder
The Lemon Lime scalloped oval is from the Layering Ovals Framelits
Happy Birthday is stamped in Tuxedo Black Memento Ink and then cut with the corresponding Layering Oval.
The balloons are stamped in Lemon Lime Twist and Berry Burst and punched with the Balloon Bouquet Punch. I used the In Color Stampin’ Write Markers to draw the string for the balloons.
The balloons and Happy Birthday are from the Happy Birthday Gorgeous stamp set.
The glitter dots are the new Glitter Enamel Dots and are the palest of the berry color
Thanks again for hopping with the Stampin’ Pretty Pals today. Take a minute to mark your calendar for our next hop on July 12th. We’re having a pattern party! Now hop along using the Blog Hop Line-up below. See you on July 12th for the next Pals Blog Hop!
The card I created for today reminds me of some jeans I had in the late 60’s. I was probably about 12 years old and can still see them in my mind. HaHa !!
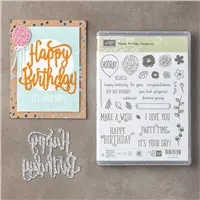
Happy Birthday Gorgeous Bundle, 145301
Can you picture that print and colors on a pair of white jeans? Now you are laughing with me! And yes, I have used Lemon Lime Twist again. I am addicted!!
I hope you will join with me in loving this wonderful bundle. This is the Happy Birthday Gorgeous Bundle. It is the stamp set and the Happy Birthday Thinlits. It is a wonderful combination.
To go perfectly with the Happy Birthday Thinlits is the Multi-purpose Adhesive Sheets. If you are like me, I could never really get the hang of using the Fine Tip Glue Pen on the little tiny words and not make a mess. Yes I used it but the adhesive sheets are SOOOOOO much easier. I cut a piece of the adhesive sheet a little larger than the Happy Birthday Die and adhere it to the scrap of paper I am using and that it that. Once you have the die cut, just peel off the paper and stick it to your card. No Mess and only smiles!
I got a little out of order on the card in talking about the adhesive sheets. Oops! I used the Touches of Texture speckle stamp for some background on my card. I used Lemon Lime Twist ink and then stamped off to soften it a little. I then stamped the outline of the flowers in Berry Burst ink. Since the set is photopolymer it is so easy to line up the inside of the flower and it is stamped in Powder Pink ink. The Powder Pink is the perfect pink. It is still a pretty pink but quite a bit darker than Pink Pirouette. It really does show up.
This is such a quick card and would be easy to make multiples of. This background could be done on a full sheet of Whisper White card stock and then cut into the layers that you need for later. My tip of the day!
Thank you so much for stopping by today. Please do not forget the Host Rewards Extras for June!!
Have you been wondering why I am suddenly posting every day, and even on the weekend? My wonderful SU UPLINE, Brian King, present a challenge to our group of InKing Royalty. We are supposed to make a card with the new products every day from June 5 – 19! What a challenge, but Oh What Fun!!! Twist my arm and make me play, YES!!
Today’s card is a mixture of items. But I think it has a little bit of whimsy look. What do you think?
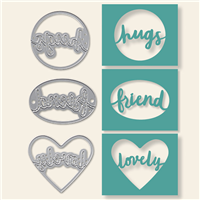
Happy Birthday Gorgeous, Lovely Words,
I used the new Color Theory DSP Stack, Happy Birthday Gorgeous, and the Lovely Words Thinlits. Of course I have to get some Lemon Lime Twist involved. I know I should back off of using it so much. I am trying!
The base of the card is Crushed Curry card stock cut to 8 1/2 X 5 1/2 and folded in half
The layer of Lemon Lime Twist card stock is cut to 5 1/4 X 4
The next layer of Crushed Curry is cut to 5 1/8 X 3 7/8
The layer of Color Theory DSP is cut to 5 X 3 3/4
The “Friend” is cut from the Lovely Words Thinlits Die from Lemon Lime Twist card stock with the Multii-purpose adhesive sheet added to the card stock prior to die cutting. (It adds glue all over the die for easy adhesion)
Make A Wish is stamped directly onto the DSP using Lemon Lime Twist Ink
The balloons are stamped in Lemon Lime Twist on scrap Whisper White and punched with the Balloon Bouquet Punch and then raised with Stampin’ Dimensionals
And that is a pretty simple card. Before long I will have all of you addicted to Lemon Lime Twist too !!
Even though I listed all of the products, the photos are below and you can click on any of them to go directly to my on line store.
Thank you for stopping by today!! Please do not forge the wonderful ADDITIONAL HOST DOLLARS for this month.
I seem to be doing a lot of FIRSTS lately, and that is a good thing. 🙂 My card today is my first 4 X 4 card that I have posted. It is a very quick and easy card for any reason just by changing the sentiment. But this one is a Happy Birthday.
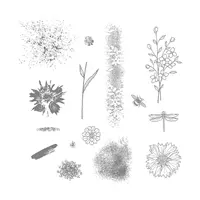
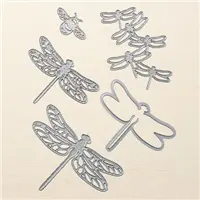
Detailed Dragonfly Thinlits, Awesomely Artistic
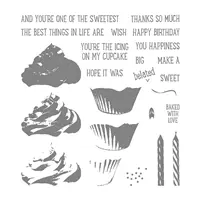
Aren’t those dragonflies awesome? I used Awesomely Artistic set for the flowers , the badge, and the splatter. The Happy Birthday is from the Sweet Cupcake set. And the dragonflies are from the Detailed Dragonfly Thinlits. That is pretty much the card!
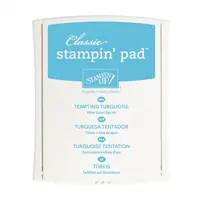
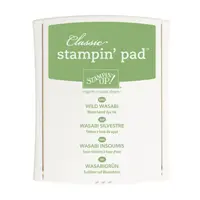
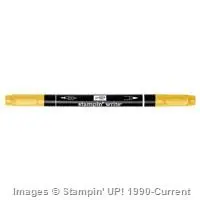
The base is Smoky Slate cut to 8 X 4 and folded in half. The Tempting Turquoise layer is 3 7/8 X 3 7/8, and the Whisper White layer is 3 3/4 X 3 3/4. I am really falling in love with these square cards! I stamped the foliage in Wild Wasabi and then colored it with Pear Pizzaz and Daffodil Delight Stampin’ Write Markers. The splatter is stamped off and done in Smoky Slate. The banner is stamped in Smoky Slate with the words in Tempting Turquoise. It was very easy to fussy cut and then pop up with our Stampin’ Dimensionals.
The dragonflies actually die cut a connection of five. But for this small card it was too much. So I trimmed them down to three and added a glue dot under two of the dragonfly bodies. Glue dots are extremely sticky so no worries about them falling off!
All of the items I used today are carrying over to the new catalog. But don’t forget to check the retiring list for things that are not carrying over!
These are the items I used for this Dragonfly Birthday card.
This is my first post that is not a card! Oh MY !! But who does not like to receive cute little treats, especially chocolate. And this is a really quick pouch to make so if would be perfect for a little treat for a group and can be decorated to match the occasion. Here is my Delightful Daisy Treat Pouch:
Daisy Delight Bundle, 145361
Is this not Delightfully Cute ? HaHa…. I received the prototype for this little treat pouch at a swap and there was no name, so I cannot give the original maker credit. (Always put your name on your swaps!)
Too bad you cannot really see the beautiful Delightful Daisy DSP that is the band around the pouch. It is gorgeous!! I will give you the measurements for everything and show a picture of the inside piece. But trust me, this is super quick and easy if you were making multiples !!
The base of the pouch is done in Powder Pink card stock and measures 6 1/2 X 2
Score from each end at 3″, then punch each end with the Scallop Tag Topper Punch
The Band is done with the Delightful Daisy DSP and measures 5 1/4 X 2
Score the band at 1/2, 1, 3 , & 3 1/2. Use your bone folder to score each fold to assure it lines up properly
Add the Tear Tape to the very edge of the end opposite of the 1/2″ score.
Lay the band down with all folds folded and you can see that it overlaps perfectly. Peel off the tape and adhere.
Lay your nuggets down on the pouch and fold the top over then hold it and slide the band on.
Decorate the front as you like!!!
Wasn’t that quick and easy ? Here is a photo of the pouch, or the card stock that is scored and punched.
Delightful Daisy Treat Pouch
Can you see how technical this is???? I am really being silly. This is one of the easiest treat pouches I have ever made. So please give it a try.
For the Daisy on the front, I stamped the daisy twice in Powder Pink and punched out with the daisy punch. I sponged some Daffodil Delight to blend it with the DSP. I stamped the Happy Birthday from the Birthday Banners Set in Powder Pink and just snipped the ends to make a banner. I used glue dots to adhere the daisy and a dimensional in the center of the daisy to hold the banner. Then just slide it over the top of the pouch and tie a bow. The bow is more for securing the candy during transport so they do not slide out the top!! We cannot have that!!
I hope you will try making these cute things and use your creativity to decorate the front. Thank you for stopping by today! I do not have the product list as they are all new items and I was having technical difficulty getting the pictures. I will figure this stuff out eventually! The main thing to remember is the Daisy Delight Bundle !!
The content in this blog is the sole responsibility of Jackie Beers as an Independent Stampin' Up! Demonstrator. The use of and content of classes, services or products offered is not endorsed by Stampin' Up!