Welcome to InKing Royalty’s January Blog Hop! This year’s Blog Hop themes will be inspired by popular songs – the first is “I Think I Love You.” Our Blog Hop today is jam-packed with projects that are perfect for Valentine’s Day or that showcase love. How sweet is that?! We are excited to share our love-themed creations with you today. After you read my post, I hope you’ll hop over to the next person on the list at the base of this post.
I went a little “Love You” crazy on my card! This week I have been making cards using ideas and layouts from cards that are several years old. I found the idea for today’s card in a box of old swap cards. I loved the idea, so I recreated it with LOVE in mind.
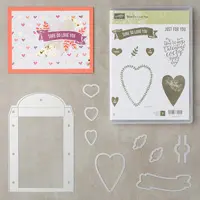
Sure Do Love You Bundle, 145653
I have been going a little overboard with the bright colors lately. This is another one. It didn’t start out that way, but sort of evolved. Hopefully you can see that it would be cute in more subdued, and maybe less, colors!
The paperclip is the focal point of the card and can be used as a bookmark or attach a magnet for a totally different purpose. To make the paperclip heart, I cut a solid heart and the stamped heart using the Lots To Love Box Framelits. I placed several stampin’ dimensionals between the two hearts and around the paperclip. The two Lemon Lime Twist hearts are cut using the same set of framelits as well.
The measurements will be at the bottom of the post after the blog hop list. There are also some hints to make the paperclip fit better.
Thank you for stopping by today. I hope you’ll hop along to the next stop on the bloghop, Shawn de Oliveira, https://www.shawnstamps.com/
Jackie
Thank you for hopping along with us. If you get stuck during the Blog Hop, please use this line-up as a guide:
The card base is 5 1/2 X 8 scored and folded in half
The next layer is 5 1/4 X 4
The DSP layer is 5 X 3 3/4
The larger Pocket layer is 2 1/2 X 4 1/2
The next layer is 2 1/4 X 4 1/4
The DSP strip is 1 1/8 X 2 1/4
Hint: I used the 3/4 ” Circle Punch and punched in the center of the top pocket layer. I then punched again just a little on each side of that to allow the paperclip to slide in.
When you are taping the pocket layers together, have the paperclip through the slit. Otherwise the pocket is too flat and may pull away from the card. The same when applying the pocket to the card.
I suggest using Tear & Tape, or a similarly strong tape and go around the edges of both layers. (Adhering to the bottom pocket layer and the card itself.
ENJOY!!!
If you have any questions about today’s card, please do not hesitate to contact me !
Have you ever thought about becoming a Stampin’ Up! Demonstrator? During Sale-A-Bration is the perfect time to join. Not only are you getting the Ultimate Bundle ($125.00 worth of product for $99.00) but you also get to choose 2 additional stamp sets, up to $25.00 each. Additionally you will receive a 20% discount on any future purchases. Or, if you are just wanting to test drive the idea, you would not be required to make another purchase until July! There is no pressure for you to continue as a demonstrator. And there is no penalty if you decide not to continue. Please contact me and let’s talk about it. You can review the documents by clicking on the picture below.
I have a warm and fuzzy Panda Love for you today. These little guys are so cute and so easy to work with that I could not resist another quick card.
Party Pandas, 147221
The Party Pandas set is a Sale-A-Bration set. You can get it FREE, with the purchase of $50.00 from the Annual or Occasions Catalogs. Besides the panda, the second star of the card is the Painted With Love Designer Series Paper. I could use this paper every day! It is beautiful on each side of every sheet. I don’t think I have ever said that before.
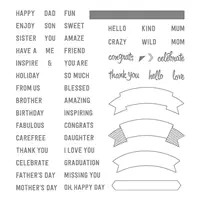
The “Love” on the envelope is from the Thoughtful Banners stamp set. There are a couple of small words from that set that fit perfectly on the little envelope. Obviously the color inspiration came from the DSP. I love Rich Razzleberry and Melon Mambo would not normally put the two together. But WOW!!, I love them together with this small piece of paper that combines both.
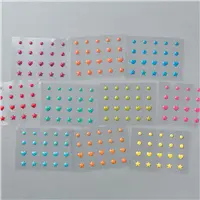
The other highlight of the card is the Glitter & Clear Shapes. I used the small round ones for the Panda’s eyes. It gives it a 3-D look and makes the stand out. The hardest part of this card is cutting all the layers. I have provided the measurements that I used below.
Thank you so much for visiting today! I appreciate the lovely comments and am happy to answer any questions you have.
MEASUREMENTS:
Rich Razzleberry base is cut to 11 X 4 1/4 and folded in half for a top fold card
The two larger pieces (Melon Mambo and DSP) are cut to 2 1/2 X 4 each
The two larger Basic Black pieces are cut to 2 5/8 X 4 1/8
The Whisper White piece is cut to 1 7/8 X 2 5/8
The small Basic Black piece is cut to 2 X 2 3/4
Have you ever thought about becoming a Stampin’ Up! Demonstrator? During Sale-A-Bration is the perfect time to join. Not only are you getting the Ultimate Bundle ($125.00 worth of product for $99.00) but you also get to choose 2 additional stamp sets, up to $25.00 each. Additionally you will get a 20% discount on any future purchases. Or, if you are just wanting to test drive the idea, you would not need to make another purchase until July! There is no pressure for you to continue as a demonstrator. And there is no penalty if you decide not to continue. Please contact me and let’s talk about it.
Today’s card is a super easy card and my first Global Design Project Challenge !! I am excited and nervous. My wonderful upline Brian King challenged us to join in. The first picture is the design layout we are supposed to CASE.
You are allowed quite a bit of flexibility in your interpretation of the challenge design. But it being my first time, I didn’t go too far away from the drawing. Here is my card:
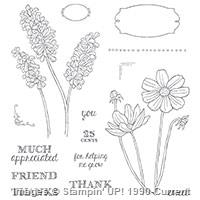
Oh So Eclectic , 143940
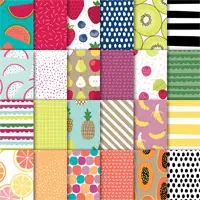
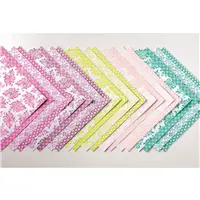
I am in love with the new InColors from Stampin’ Up! The two I used in this card are Tranquil Tide and Berry Burst. I think they are so rich and bright. The DSP is the Fresh Florals Designer Series Paper Stack. It is 4 each of 2 double-sided designs of all 5 of the new In Colors. WOW! They are gorgeous!
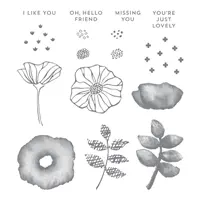
The stamp set is Oh So Eclectic and I just used the two step single flower. The flower is Berry Burst and I colored in the stem with a Pear Pizzaz marker. I then fussy cut the flower and glued it to a 2″ Circle punched from Tranquil Tide card stock. The greeting is from Oh So Eclectic as well and is stamped in Berry Burst. It is punched with the Classic Label Punch. I added a new Glitter Enamel Dot for some sparkle.
You can tell that I did not follow exactly the diagram. Instead of a ribbon and bow I just used a strip of Whisper White card stock to run down the side and behind the focal point. And that is my simple card.
Thank you for visiting today! You can go to the Global Design Project page and check out all of the cards that are linked there.
I am behind on trying out the new Eastern Beauty bundle. And I have to say it is amazing! At first glance I thought it really was not my style. But the more samples I saw using the set made me rethink my opinion. So after getting my hands on it and playing… Oh My!! I love it !! The set is so versatile. Here is my first adventure with the Eastern Beauty Bundle.
Eastern Beauty Bundle, 145308
I really like how this turned out and this design could be used for so many different occasions. I don’t know if you can see from the picture, but the petals of the Powder Pink flower are popped open a little. That is from the Eastern Medallion Dies that are part of the bundle. There are 14 pieces to the bundle! I still have not played with the majority of the options. I have seen where other demonstrators have die cut and circle punched several sheets of possibilities. Once June 1 arrives I am sure you will be able to find all of these on Pinterest.
As you can tell my card was very simple with stamping the circles in Powder Pink and Berry Burst. I then stamped and Die Cut the flower. The strip of Lemon Lime Twist DSP was just to tie everything together and balance it out. And like i said earlier, this layout would go with many different sentiments for almost any occasion.
Thank you for stopping by today! We are winding down on the current catalog and the Retiring List. There are some great values to be found there. But you only have a couple more days, it ends on May 31st.
If you do not have a current Stampin’ Up ! Demonstrator and would be interested in a new 2017-2018 Annual Catalog, drop me a note and I will be happy to send you one.
Below are the products I used today. You can click on the card or any of the products to go directly to my online store.
With all of the graduations going on now, I had a request for a Thank You card from a graduating senior. To say I was pleased is an understatement!! The card was for a favorite Aunt who loves to garden. This is what I came up with.
Helping Me Grow, 140764, $26.00
I used bright colors and a single stem from the Helping Me Grow stamp set and I do like the way it turned out. I hope the recipient does as well. Below are the card details.
The base is Melon Mambo cut to 8 1/2 X 5 1/2 and folded in half
The Whisper White layer is 5 3/8 X 4 1/8
The Wild Wasabi layer is 5 1/4 X 4 and embossed with the Petal Burst Embossing Folder
The smaller Melon Mambo is 4 3/4 X 2
The smaller Whisper White is 4 5/8 X 1 7/8
The flower and sentiment are stamped with Basic Black Archival Ink
The flower is colored with Melon Mambo and Pear Pizzaz markers
Clear Wink of Stella is added to the flower petals
I hope you enjoyed this quick and easy card. I very much appreciate your comments. And if you have any questions, please do not hesitate to contact me.
The Helping Me Grow stamp set is on the Retiring List. If you are interested in it, I would jump on it now. You can just mash the Shop button at the top of my page.
The products I used are listed here and you can just click on any item to go to my on line store as well.
Welcome to InKing Royalty’s May Blog Hop! Today’s Blog Hop is filled with projects that offer you a sneak peek at new items in Stampin’ Up!’s 2017 Annual Catalog. We are so excited about the June 1 release of this new catalog – it’s AMAZING – and we are excited to share our sneak peek creations with you today. After you read my post, I hope you’ll hop over to the next person on the list at the base of this post.
My card for today’s InKing Royalty Hop is using items that I won at OnStage and that I got with the pre-order that us demonstrators LOVE! Is a great treat to see the catalog first and to then get to touch and play with new items.
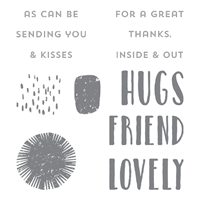
Oh So Eclectic, Lovely Inside and Out
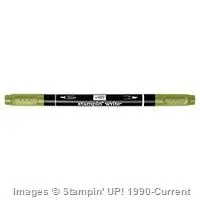
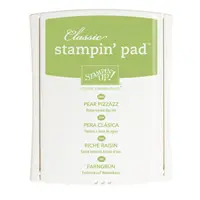
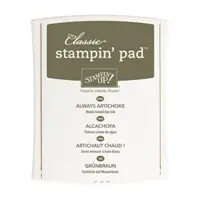
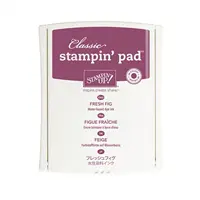
The sets I used are Lovely Inside & Out for the sentiment and Oh So Eclectic for the flowers and leaves. Oh So Eclectic is a very versatile stamp set and can be used singly or as a TWO STEP process. I did the two step process and stamped the leaves in Pear Pizzaz and then the top with Always Artichoke. The flower is stamped in Fresh Fig (one of the new InColors and one I LOVE!) and then secondly in Archival Basic Black. I used a Pear Pizzaz Stampin’ Write Marker to color the stem of the flower.
I added the sentiment in Pear Pizzaz and Always Artichoke and then used my friend Julie DiMatteo’s technique ( Julie’s posts are a must see, she is Number 2 in todays lineup.) I added a little splatter to the white part of the card. To do easy splatter Julie uses a marker, Fresh Fig, and flicks the large tip on the inside of the cap. It is so simple….proof is in the card that I did! I then added a couple of rhinestones just for some bling.
Thank you for stopping by today. I hope you’ll hop along to the next stop on the blog hop, Karen Browning at
The content in this blog is the sole responsibility of Jackie Beers as an Independent Stampin' Up! Demonstrator. The use of and content of classes, services or products offered is not endorsed by Stampin' Up!