With all of the graduations going on now, I had a request for a Thank You card from a graduating senior. To say I was pleased is an understatement!! The card was for a favorite Aunt who loves to garden. This is what I came up with.
Helping Me Grow, 140764, $26.00
I used bright colors and a single stem from the Helping Me Grow stamp set and I do like the way it turned out. I hope the recipient does as well. Below are the card details.
The base is Melon Mambo cut to 8 1/2 X 5 1/2 and folded in half
The Whisper White layer is 5 3/8 X 4 1/8
The Wild Wasabi layer is 5 1/4 X 4 and embossed with the Petal Burst Embossing Folder
The smaller Melon Mambo is 4 3/4 X 2
The smaller Whisper White is 4 5/8 X 1 7/8
The flower and sentiment are stamped with Basic Black Archival Ink
The flower is colored with Melon Mambo and Pear Pizzaz markers
Clear Wink of Stella is added to the flower petals
I hope you enjoyed this quick and easy card. I very much appreciate your comments. And if you have any questions, please do not hesitate to contact me.
The Helping Me Grow stamp set is on the Retiring List. If you are interested in it, I would jump on it now. You can just mash the Shop button at the top of my page.
The products I used are listed here and you can just click on any item to go to my on line store as well.
Welcome to InKing Royalty’s May Blog Hop! Today’s Blog Hop is filled with projects that offer you a sneak peek at new items in Stampin’ Up!’s 2017 Annual Catalog. We are so excited about the June 1 release of this new catalog – it’s AMAZING – and we are excited to share our sneak peek creations with you today. After you read my post, I hope you’ll hop over to the next person on the list at the base of this post.
My card for today’s InKing Royalty Hop is using items that I won at OnStage and that I got with the pre-order that us demonstrators LOVE! Is a great treat to see the catalog first and to then get to touch and play with new items.
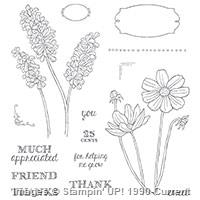
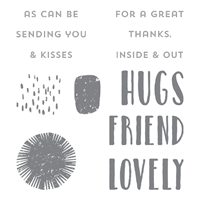
Oh So Eclectic, Lovely Inside and Out
The sets I used are Lovely Inside & Out for the sentiment and Oh So Eclectic for the flowers and leaves. Oh So Eclectic is a very versatile stamp set and can be used singly or as a TWO STEP process. I did the two step process and stamped the leaves in Pear Pizzaz and then the top with Always Artichoke. The flower is stamped in Fresh Fig (one of the new InColors and one I LOVE!) and then secondly in Archival Basic Black. I used a Pear Pizzaz Stampin’ Write Marker to color the stem of the flower.
I added the sentiment in Pear Pizzaz and Always Artichoke and then used my friend Julie DiMatteo’s technique ( Julie’s posts are a must see, she is Number 2 in todays lineup.) I added a little splatter to the white part of the card. To do easy splatter Julie uses a marker, Fresh Fig, and flicks the large tip on the inside of the cap. It is so simple….proof is in the card that I did! I then added a couple of rhinestones just for some bling.
Thank you for stopping by today. I hope you’ll hop along to the next stop on the blog hop, Karen Browning at
I find myself giving Gift Cards a lot more than buying actual gifts. I am at the age, not saying what age !, that if I want something I go buy it. And most of my friends are the same. So I find it better to give a gift card for a favorite store or restaurant than to worry over what they might like and not already have. Are you in that same area?
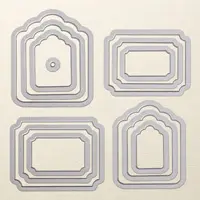
This card holds a gift card and is large enough for you to still write on and it fits in a standard envelope. Yay, and yay! Here is is:
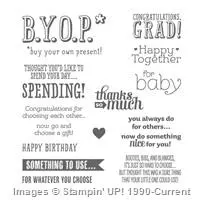
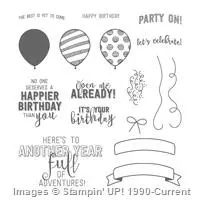
BYOP, & Balloon Adventures
BYOP & Balloon Adventures
As you can see in the first picture, the “Open Me Already” holds the card closed if you were giving the gift in person. You would not need to place it in an envelope.
I apologize for the SAB DSP I used. I designed this card for a girl’s weekend shoe box swap and at the time it was during SAB. Then, of course, I forgot to use it in a post before it retired. However I am giving you all of the measurements so you can use any DSP you have on hand.
The measurements are:
Base is 5 1/2 X 8 1/2 and is scored at 2 & 5 3/4
Card slot is 2 X 4 1/4 and is scored at 1/4 on 2 short sides & 1 long side
Inside greeting is 4 3/4 X 3 1/4
DSP – small is 5 X 1 3/4 and larger is 5 X 2 1/2
For the gift card slot , cut out the 2 corners where the scoring intersects. This makes for a less bulky fold. Score all the lines and add glue or tear tape to the three folds. I recommend folding the sides in first and then the bottom . This way your card, or cash, has a little more room in the bottom without getting hung on that flap. And it will hold cash as well as a gift card !
For the front closure be sure and place your dimensionals no higher than the center of the label and place them beside each other in the center. That way there is room for the top flap to fold under and by them being beside each other I think it gives it a little more strength. You don’t want your card to not work properly !!
Please if you have any questions about this card and my directions leave a comment or email me. I am happy to explain further.
Thank you for stopping by. The supplies I used are listed below. And Do Not Forget the Retiring List !!
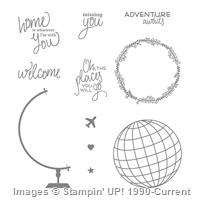
I absolutely love to travel! And I bought this stamp set to use with that in mind. I have to confess that this is the first time I have actually used it. Don’t you just hate that? Now that I have inked it up, I am in love. Talking about quick and easy!! Wow. A few stamps and you have a really cute card. And the stamp set is: “Places You’ll Go”.
Places You’ll Go
You really cannot tell from the picture, but the globe is layered. It gives the front just a little more definition. I wanted this to be a sweet card and I do like it. Isn’t it nice to have a card that uses only one stamp set. Sometimes it is difficult to do that!
The base is Crumb Cake card stock cut to 4 1/2 X 11, scored at 5 1/2 and then the front folded under. This made for a great way to add ribbon and it not be wrapped on the inside of the card. I cut the ribbon, taped the two ends down on the back side of the crumb cake, and then took a short piece and just tied a not around the ribbon across the top. Easy Peasy!!
The Real Red layer is 3/4 X 4 3/8, and the Very Vanilla layer is 3 5/8 X 4 1/4. I like the smaller amount of red showing as opposed to the normal 1/4″ difference in layers. Remember that you will need a smaller than normal layer of Very Vanilla for the inside of the card. You do not want to see it around the edges of the red from the front. I used 3 1/2 X 4 for the inside.
The content in this blog is the sole responsibility of Jackie Beers as an Independent Stampin' Up! Demonstrator. The use of and content of classes, services or products offered is not endorsed by Stampin' Up!