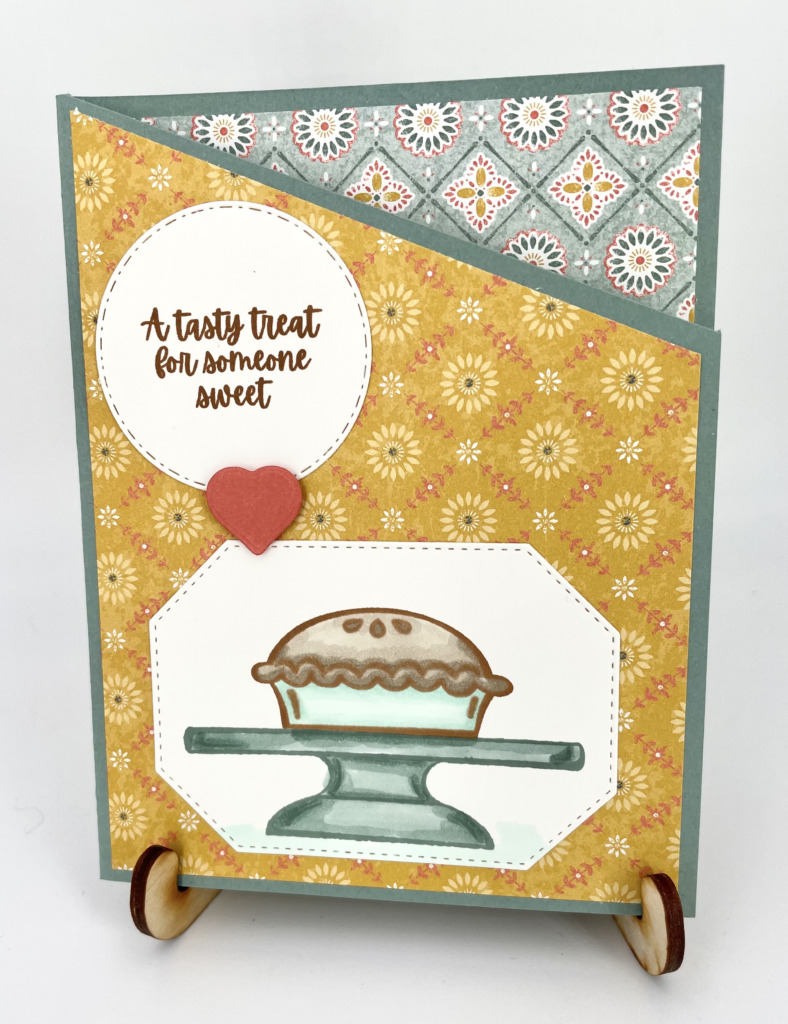
Today’s project is a Birthday card with some Sweet Treats for the recipient. There are also a few angles thrown in for a bit of a change.
Angle Cut Card and Paper
To give this birthday card a bit of different look, I made a simple angle cut across the front flap. After scoring the card base, I positioned the top of the score line in the cutting track. Next I rotated the front, top right of the card to the 1 1/2 mark. And then cut to make the angle. (These directions are quite easy with the Stampin’ Up! Paper Trimmer as it goes to 1 1/2 on the right side of the cutting track. This extra measuring area is so handy!)
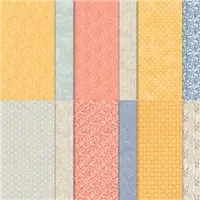
The Designer Series Paper is from the Harvest Meadows pack. I cut the top layer of DSP to 4 X 5 1/2. Make the same cut on this piece of paper to match the angle. For the inside of the card, I only added DSP to the upper section where it is seen from the cut away. That piece measures 4 X 2. I also added a White piece meaasuring 4 X 3 1/4 to complete the inside layer. This leaves plenty of space for your sentiment and signature.
Stamps and Dies
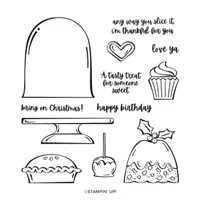
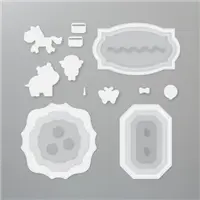
There are a variety of Dies used on this project. I started with stamping the cake plate and pie from the Sweets & Treats stamp set. This set will definitely be missed!! I then die cut the yummy pie and plate using a piece from the Hippo & Friends Dies. These dies are so nice and in several different shapes. To help the sentiment pop a bit, I used the circle from the Warm Wrap Dies. The cute, little heart is cut from one of these dies as well.
HOST CODE
My December Host Code is AVHFJFAU. Please use this code for orders under $150.00. I will have a small gift for those with orders over $50.00 in addition to the Perk Rewards Program. You can read all of the information at the top of the page in the Menu Bar under SHOP / Perks.
Thank you for stopping by today. I hope you enjoyed today’s project and will come back. I do read and reply to all of the comments individually. They mean a lot to me. Please reach out if you have a question.
Simple and easy to make gift card holders are the best. When they show off beautiful DSP, they are perfect. That is what I have to share with you today.
And here is the good part.
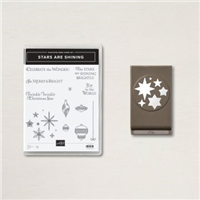
Stamps and Punches
The beautiful stars are punched from DSP using the Starlit Punch which is part of the Stars Are Shining Bundle. I love punch bundles! They are so easy to create multiple cards with. And this one gives multiple stars in one punch. I did not use all of them on the front of this card.
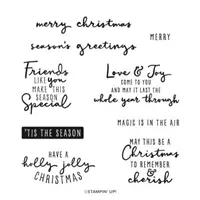
The sentiment is from the Stars Are Shining Stamp Set, the other half of the bundle. There are some great sentiments and stamps in the set. This one fit perfectly with my theme. For the inside sentiment I went to the Christmas To Remember stamp set. This set is all sentiments that are sweet and perfect.
I used the Banner Pick A Punch to cut the sentiment. This may be the first time I have used the single point banner instead of the two point one. Also I used the Label Me Lovely punch to make the finger pocket on the gift card pouch. Although it is not really necessary if you want to skip that step.
Papers
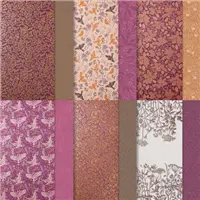
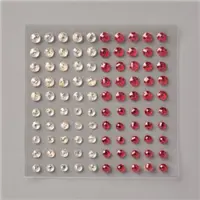
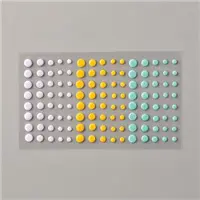
This Whimsy & Wonder Designer Series Paper is one of the prettiest papers this year. I chose the snowflakes because the pink looks beautiful against the Misty Moonlight card base. Afterwards I had the idea to punch the stars from the same paper. The bits of foil in the snowflakes are now in the stars as well. And it was a little scrap of DSP that I used, so no waste. There are a few added Rhinestones for a touch more bling!
Directions and Measurements
The card base is Misty Moonlight cut to 4 1/4 X 5 1/2
The DSP layer is 4 X 5 1/4
The accordion folded White piece is cut 4 1/4 X 9 3/4 and scored at 3 1/4 & 6 1/2
The decorated top Misty Moonlight is cut 4 1/8 X 3 1/8
The gift card pocket Misty Moonlight is cut 4 X 2 and then notched using the Label Me Lovely Punch
The DSP strip across the pocket is cut 4 X 1
HOST CODE
My December Host Code is AVHFJFAU. Please use this code for orders under $150.00. I will have a small gift for those with orders over $50.00 in addition to the Perk Rewards Program. You can read all of the information at the top of the page in the Menu Bar under SHOP / Perks.
Thank you for stopping by today. I hope you enjoyed today’s project and will come back. I do read and reply to all of the comments individually. They mean a lot to me. Please reach out if you have a question.
I love to make little treat boxes and had an opportunity to make some for a group. Merci Chocolates are so yummy, and I think of them as the perfect little Thank You treat. A little humorous play on words!
Here is a close up of one piece of the Blackberry Beauty Designer Series Paper. I love the shine!
I had just pieces of the gorgeous paper leftover. So I made these boxes , which required paper in sizes that fit what I had to work with. It was meant to be!
My Merci Chocolate Treat Boxes are cased from The Paper Pixie. She is the Queen of 3D projects. Here is the link to her post for wonderful directions. Just click the photo below.
HOST CODE
My December Host Code is AVHFJFAU. Please use this code for orders under $150.00. I will have a small gift for those with orders over $50.00 in addition to the Perk Rewards Program. You can read all of the information at the top of the page in the Menu Bar under SHOP / Perks.
Thank you for stopping by today. I hope you enjoyed today’s project and will come back. I do read and reply to all of the comments individually. They mean a lot to me. Please reach out if you have a question.
Welcome to the Stampin’ Pretty Pals’ Blog Hop! This month, the theme is “My Favorite Things.” The Design Team will be showcasing their favorite products from any of the current products and you might even see some sneak peeks, as well! We really hope that you enjoy and will be inspired by them! As you hop from blog to blog, don’t forget to leave comments because we love hearing from you. You will find the lineup at the end of my post to help you “hop” along from Pal to Pal.
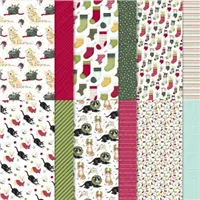
With my first flip through the current Mini Catalog, I Flipped over the Sweet Little Stockings Suite! I am a dog and cat lover so this set was a dream come true. Of course My Favorite Things had to come from that suite.
Stamps and Dies
This adorable Santa Kitty is from the Sweet Little Stockings stamp set. There are matching dies that are for the different size stockings as well as the different animals. Plus there are some extra features. The Santa Hat is one. I stamped the stocking and kitty onto the layer. But the Santa Hat is stamped on scrap and die cut. Each of the pieces are colored using Stampin’ Blends with the hat getting a touch of Wink of Stella where the White Fur is.
The sentiment is from the stamp set also. As is the inside sentiment. The front one is stamped and then layered using the Double Oval Punch . A final touch is a scattering of the gorgeous Wonderful Gems jewels.
Here is an inside view as well as a view of how the front DSP layers.
Paper
I saw a couple of different versions of this card with that many names. To keep it simple, I am just calling it a Double Flap Card. As is usual for me, the DSP is the star of the show. This front piece is from the Sweet Stockings Designer Series Paper. The way the card is folded requires the paper to be on both of the flaps for a continuous look. All color choices came from the DSP piece.
Directions
The card base is cut to 5 1/2 X 8 1/2 and scored at 3 1/4 and 7 1/2. Both fold towards the center, which is the normal 4 1/4. They right side narrow flap barely covers the left side. I will tweak my measurements a bit next time for a little more overlap.
The focal layer is a 3 1/2 X 3 1/2 square of cardstock that is scored on one side at 7/8. Do Not fold on the score line it is simply a guide. BEFORE adding DSP, adhere the square with the score long along the front edge of the right side flap and on top of the flap.
The DSP is cut 4 X 5 1/4 and cut in portrait mode if directional like mine is. Then cut 7/8 from the right side of the 4″ side. This is the DSP for the right narrow flap. Part of the illusion of a solid card front is the matching up of the DSP and how it is applied. Adhere the left piece with normal margins at the top, bottom, and left edge. The paper will be flush with the right edge. Now adhere DSP to the narrow flap by placing that piece flush with the left side with normal margins at top, bottom, and right edge.
More inspiration awaits, so use the lineup below to visit the rest of the Design Team. The Pals are excited to show you what they’ve created! Then, please mark your calendars for our next blog hop on January 12th. Our theme will be “Time to Sale-A-Brate” when our Design Team will showcase items from Sale-A-Bration as the focal point of their project.. Until then, have fun in your craft space.
Who doesn’t love Free Shipping!!! Click on my menu button at the top of the page and go to my online store. If you are like me there are plenty of products still on your Want List!
Thank you for stopping by today. I hope you enjoyed today’s project and will come back. I do read and reply to all of the comments individually. They mean a lot to me. Please reach out if you have a question.
Before I get to today’s card, I have a great announcement for you. Stampin’ Up! is offering Free Shipping on qualifying orders (50.00 and over), tomorrow only. That is correct….FREE SHIPPING ON DECEMBER 8TH! And there are still Last Chance items available.
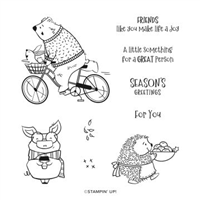
Now for today’s card. It is a Joyful Birthday card using the Joyful Life stamp set. These cute critters make me Smile!
Stamp Set and Dies
As I said above, these little critters are just so darn cute. You cannot help but Smile when they pop up on a card. This one is carrying a bowl of Granny Smith Apples as a birthday gift. Or at least in my mind she is doing that! The sentiment is from the stamp set as well. To add a pretty shape for the small sentiment, I went with one of the Stitched So Sweetly Dies. These are a great set to have on hand for smaller, but fun shape, layers.
Paper
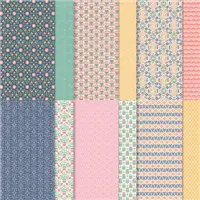
The card base is Calypso Coral cardstock with a layer of Basic White. The star of the show is the Sweet Symmetry Designer Series Paper. I love the color combination in the main pattern I used. And the cross piece is from the same pack. All of the sheets of paper coordinate beautifully with each other. My card colors generally come from the piece of DSP I have chosen as my star. It makes the layout go pretty quickly.
HOST CODE
My December Host Code is AVHFJFAU. Please use this code for orders under $150.00. I will have a small gift for those with orders over $50.00 in addition to the Perk Rewards Program. You can read all of the information at the top of the page in the Menu Bar under SHOP / Perks.
Thank you for stopping by today. I hope you enjoyed today’s project and will come back. I do read and reply to all of the comments individually. They mean a lot to me. Please reach out if you have a question.
Today’s card is a gift card holder that I had not seen previously. And since I love gift card holders I was thrilled. I hope you will be as well.
This card is for the Make My Monday challenge which debuts today. I hope you will check out cards from the other designers and maybe add your own card in.
And here is the magic of the Pop Up Gift Card.
The Gift
I saw this design on YouTube from Stamp With TLC. She has a pdf of her directions. The inside holder is two square boxes that are touching with the gift card in between them. By using DSP, it makes the card quite a bit thinner when closed. Another advantage is the paper is more flexible and you need that for these to lay down. I tweaked the inside card holder a bit and loved designing the cover.
Stamps, Dies, and Paper
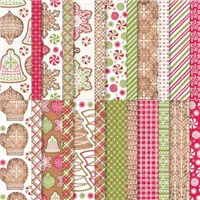
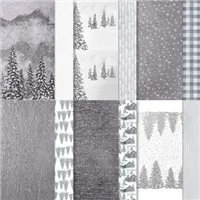
You probably recognized this Frosted Gingerbread Bundle. It is so different from other stamp sets that it is easy to pick out. All of the stamps and dies are from the Bundle. The “ornaments” are from a piece of the DSP, as are the two different pieces on the front of the card. Gingerbread & Peppermint is an apt name for this beautiful Designer Series Paper! I love how it all coordinates.
The ornaments are hung using the Real Red Sheer Ribbon. I also added a strip of it around the center of the card to tie the two DSP pieces together. The peppermint pieces at the top of the two hangers are also from the DSP and are die cut. And the inside gift card holder is additional pieces of the DSP. There is also a little peppermint next to the inside sentiment that I punched with a tiny punch.
Here is a PDF of how I made the Pop Up. I changed the dimensions from Stamp With TLC version. Click HERE for the PDF
Thank you for stopping by today.
HOST CODE
My December Host Code is AVHFJFAU. Please use this code for orders under $150.00. I will have a small gift for those with orders over $50.00 in addition to the Perk Rewards Program. You can read all of the information at the top of the page in the Menu Bar under SHOP / Perks.
Thank you for stopping by today. I hope you enjoyed today’s project and will come back. I do read and reply to all of the comments individually. They mean a lot to me. Please reach out if you have a question.
I am falling back to a Birthday theme for today’s project. Even though we are in Fall / Winter / Holiday mode, there are still birthdays. I prefer not to give birthday cards that reflect the season of the year. So here is a simple, fun guy birthday card.
Stamps
The hat, stars, and hat emblem are all from the Hats Off stamp set. This is part of a Bundle, I just did not use the dies for this card. Everything is stamped ,and in the case of the emblem is colored ,for a quick and easy card.
Punch
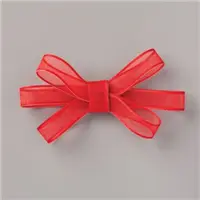
The punched sentiment is a cute stamp which I love from the Happiest of Birthdays stamp set. I felt the card needed a touch of layering, so used the Rectangle Postage Stamp Punch to cut the sentiment out. The final addition is a Linen Thread multi strand bow. Even guys can have a bow if it is made from a masculine looking material! LOL!!
Clearance Rack Refresh and Last Chance Sale
The Clearance Rack was updated yesterday. And the Last Chance Sale began as well. If you click on the image below, you will get a PDF of the Last Chance Items. Both Clearance Rack and Last Chance products are while supplies last. And you know how quickly those items can fly off the shelves.
HOST CODE
My December Host Code is AVHFJFAU. Please use this code for orders under $150.00. I will have a small gift for those with orders over $50.00 in addition to the Perk Rewards Program. You can read all of the information at the top of the page in the Menu Bar under SHOP / Perks.
Thank you for stopping by today. I hope you enjoyed today’s project and will come back. I do read and reply to all of the comments individually. They mean a lot to me. Please reach out if you have a question.
Today’s project is my version of the Pin Wheel Card. It is a great 3D card that showcases products perfectly. Best yet is that it still folds flat.
This is the overhead view to see the Pin Wheel.
The inside sentiment and signature section.
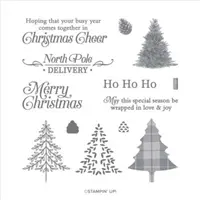
Who doesn’t love Ho Ho Ho ?
The special sentimnet.
Stamps
The Perfectly Plaid stamp set was perfect for the Heartwarming feeling. I was looking for just a fun and simple layout. It worked perfectly. Of course, you could add as much detail to each panel as you wish. I just wanted a simple addition to each panel.
Punches
To keep with the clean, simple, and my normal quick card building, I used two different punches on this card. The Ho Ho Ho is punched using the Double Oval Punch. The scalloped back layer helps the White sentiment layer to pop. And the second punch is the Pine Tree Punch. This punch matches the Perfectly Plaid trees.
Thank you for stopping by today! Don’t forget the Last Chance Sale that begins today. You can click on the picture below to see the pdf of the list.
HOST CODE
My DECEMBER Host Code is AVHFJFAU. Please use this code for orders under $150.00. I will have a small gift for those with orders over $50.00 in addition to the Perk Rewards Program. You can read all of the information at the top of the page in the Menu Bar under SHOP / Perks.
Thank you for stopping by today. I hope you enjoyed today’s project and will come back. I do read and reply to all of the comments individually. They mean a lot to me. Please reach out if you have a question.
Today is the last day to take advantage of the Special Join Promotion and purchase the Starter Kit for just $75.00. You would still choose the $125.00 in products of your choice, but would only pay $75.00 with Free Shipping!
Then comes the added bonus……. Tomorrow, December 1st, begins the Last Chance Sale for items that are retiring from the current Mini Catalog. You can get the PDF of the list by clicking on the Last Chance box below. Some of these items are discounted, and some are not. But by becoming a demonstrator you get a 20% discount on all items that you order.
First….you join today for $75.00 and get to choose $125.00 in products with Free Shipping
Second…you take advantage of your demonstrator discount of 20% to purchase the Last Chance Items. Especially the already discounted ones. You can get some at 40% off with your discount applied.
Third…you can also take advantage of the Pre-Order for the January-June Mini Catalog, which begins tomorrow. The catalog goes live in January, but as a demonstrator you get to preorder items,. And again get 20% off on your orders.
Lastly….once you join my team, there is No Pressure for you to ever place another order. You do not have to take advantage of any of these other things I have listed. You can purchase the Starter Kit and be happy with that.
Thank you for taking the time to read this post. If you have any questions about the points I have made, feel free to message me and I will be thrilled to talk with you.
Fabulous Stampin’ Up! Join Promotion
Join my team by purchasing the Starter Kit for $75.00 and receive $125.00 of products totally of your choosing! That is a fabulous deal at a $24.00 discount off of the regular Starter Kit price. This is always the Ultimate Bundle of products, and now it is even better! You can simply click on the picture below and Join.
HOST CODE
My November Host Code is M4GF9KZ7. Please use this code for orders under $150.00. I will have a small gift for those with orders over $50.00 in addition to the Perk Rewards Program. You can read all of the information at the top of the page in the Menu Bar under SHOP / Perks.
Thank you for stopping by today. I hope you enjoyed today’s project and will come back. I do read and reply to all of the comments individually. They mean a lot to me. Please reach out if you have a question.
Thank You cards are always needed, but especially around the Christmas Holiday. I made a packet of two different designs to share with you today.
Peaceful Cabin to begin
I love the simple stamping that the Peaceful Cabin stamp set calls for. There are dies which can make gorgeous cards by die cutting the images and layering. To me they are wonderful without the layering. I stamped the trees by stamping with Just Jade Ink and then stamping again without re-inking. The adorable fox just fit with the gray color scheme.
Peaceful Place Designer Paper
A friend who is also a demonstrator posted a card very similar to this one yesterday. Her version was beautiful and had more details. Since mine is a Thank You card, I kept it fairly simply as I was making several of each of these.
The star of this card is the DSP. The trees here are a piece of the DSP, as is the background strip. The Peaceful Place DSP is so versatile and gorgeous. The idea for these cards came to be due to having strips the size of the ones on both cards. I cannot bear to waste beautiful DSP.
Check back later today for the Last Chance Lists from the Mini Catalog.
Fabulous Stampin’ Up! Join Promotion
Join my team by purchasing the Starter Kit for $75.00 and receive $125.00 of products totally of your choosing! That is a fabulous deal at a $24.00 discount off of the regular Starter Kit price. This is always the Ultimate Bundle of products, and now it is even better! You can simply click on the picture below and Join.
HOST CODE
My November Host Code is M4GF9KZ7. Please use this code for orders under $150.00. I will have a small gift for those with orders over $50.00 in addition to the Perk Rewards Program. You can read all of the information at the top of the page in the Menu Bar under SHOP / Perks.
Thank you for stopping by today. I hope you enjoyed today’s project and will come back. I do read and reply to all of the comments individually. They mean a lot to me. Please reach out if you have a question.
The content in this blog is the sole responsibility of Jackie Beers as an Independent Stampin' Up! Demonstrator. The use of and content of classes, services or products offered is not endorsed by Stampin' Up!