I hope you had a great New Year’s Eve and a wonderful beginning to your New Year. I stayed home and enjoyed the quiet.
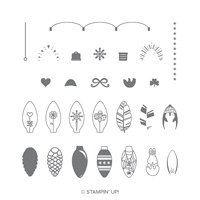
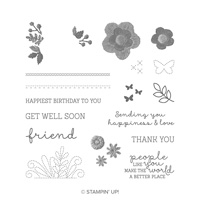
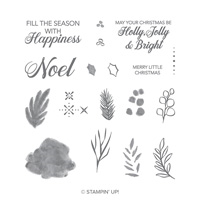
Today I am continuing with sharing new projects with some of the Retiring Items from the Holiday Catalog. Today’s project uses a stamp set that I am surprised did not carry over. It has multiple stamps for most of the different times of year. I am referring to the Making Everyday Bright stamp set. The matching punch and stamp set did carry over however.
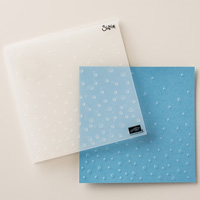
I have also used my Stamparatus for another great “Additional Idea”. I have posted previously about the “Wreath Blank”. You can see that HERE. That post explains the wreath process and how to make one of your own. I will remind you that I used the Layering Squares Dies. And used the largest of the Non-scalloped ones. I suggest making a couple of the templates to have on hand. I store mine in the Stamparatus Carry Bag so I always know where they are.
Here is today’s project, which could be either a “love you” or Valentine card.
Making Everyday Bright, 148813
I will say that I TWO Step wreath maker on this one. The stamps were not cut to allow doing the bulb and the glow at the same time. So I had to do the process twice to get both images. I believe it was well worth my time to do that. I am very happy with the final product.
I did have trouble deciding what to put in the center. I finally decided on the heart from the Cookie Cutter Builder Punch. I punched it from Flirty Flamingo card stock and then added some Fine Tip Glue Pen glue to the top of it for a bit of added shine.
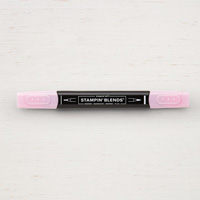
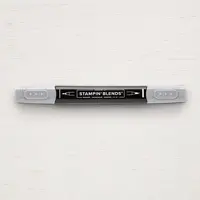
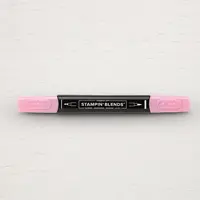
The inside of the heart lightbulbs are colored with the Light Flirtly Flamingo Stampin’ Blend. The DSP I used is the beautiful All My Love DSP from the upcoming Occasions Catalog.
Thank you so much for checking out my post. I hope this gives you some cause to review the Clearance Rack for this stamp set. As always, the complete supply list is at the bottom of the post.
In the next couple of days, I am sharing a couple of items that are on the chopping block . Don’t panic, I simply mean they are retiring. This makes me sad because I hate to see some great sets get sent out to pasture. Although if Stampin’ Up! did not do that there would not be room to add new products. And I love new products the best!! It is just one of life’s dilemmas.
To say goodbye to some of these lovely stamp sets and dies, I thought I would share some projects with you that showcase them over the next couple of days. The 2019 Occasions Catalog does not begin until the 3rd of January, so we still have a few more days of play time.
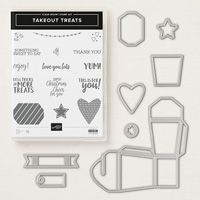
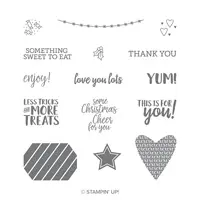
Today’s project is last minute treat holders. I know everything I have done this holiday season has been last minute. And I have used these little treat holders a few times. I say “last Minute” because they are very quick and easy to make. I thought they would also be good for a New Year’s Eve or Day idea. A friend used to always have a New Year’s Day Brunch and this would be a cute Table Favor type item.
So here are my boxes. I used a variety of papers to show they look terrific no matter the color scheme.
Takeout Treats Bundle, 149990
I used two DSP from the retiring list and one from the new Occasions Catalog. And here is one filled with some really yummy cinnamon candy.
Takeout Treats Bundle, 149990
The one with the candy is from the All My Love Designer Series Paper. I believe these would make great little Valentines’s Day Treats for any group of folks (young or old).
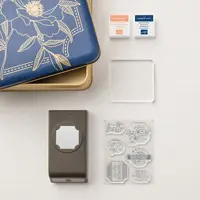
I am showing extra pictures today. I wanted to show you the use of a BLANK when stamping multiples of something. And of course, it showcases the Stamparatus!
I die cut out the tags I needed from this scrap piece of paper. I then placed it in the Stamparatus. As you can see in the bottom right opening, I stamped there to make sure I had the stamp positioned properly. Now I simple put my tags back into that bottom right slot and stamp each one.
I feel like I have found the lucky pot of gold every time I use this method. It is so much easier than trying to die cut the already stamped paper, or lining up the old Stamp – a – majig each time. Plus extra uses for the Stamparatus are wonderful.
As I offered back in the Fall, if you purchase a Stamparatus from me, I will send you the Stamp ‘n Storage Magnet pad spacer free of charge.
I do have one tip for these Takeout Treat Boxes. Be careful in your cutting out of the pattern if you have directional paper. You have to think about it a minute as you lay out the piece so both sides are going in the correct direction. Remember, you have to cut two of the shape to make one box. Also, you really should use the Multi-purpose Liquid Glue for these. It gives you just a minute of wiggle room to get the seams lined up perfectly. Normally I do not use glue because I make a mess. But for these type projects it is definitely the way to go.
Thank you so much for viking today! I hope you will return tomorrow for my next Retiring Project. As always the complete supply list is at the bottom of the post.
I am playing along with the Global Design Project Sketch Challenge 170 today. I love the different placement of the sentiment. Or in this case, the divided sentiment. Here is my project.
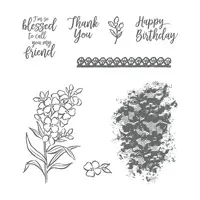
Lasting Lily (SAB), 149717
I changed the orientation my card, and I am now a fan of this split sentiment. I will be doing this in different forms soon. I went with soft colors for this card. And yes, I consider the Crumb Cake a soft color when paired when these colors. The Neutral Collection, for the most part, are flexible like that.
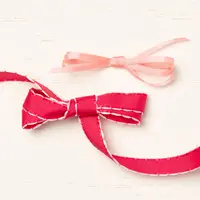
I have paired a Sale-A-Bration stamp set with one of the 2019 Occasions Catalog new Designer Series Paper and ribbon. I love the paper and ribbon in the catalog and this is one of the prettiest. The ribbon is a combo pack of Flirty Flamingo in 1/8″ and Lovely Lipstick in 1/2″ widths.
The stamp set is a FREE with $100.00 purchase. I know that sounds expensive, but you get 16 stamps in the set. There is a large ,and this small flower, and several sentiments in beautiful fonts. I am a sucker for fonts!! So Please do not overlook this awesome set.
Thank you so much for visiting today. We are expecting a lot of rain for the next several days, so I hope to be creating new projects for next week to share with you. And as always, the complete supply list is at the bottom of the page.
I have another Gift Card Holder to share with you today. They are one of my most favorite things to make. That is partly because I use them quite often. Because of that, I like to do different versions so the recipient doesn’t think I only know how to make one kind. Plus they are just fun to do!!
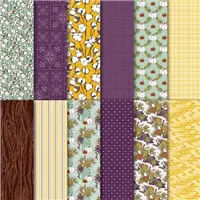
Needle & Thread, 148724
Isn’t this designer paper precious? It is the Needlepoint Nook Designer Series Paper. Of course it is part of the Need & Thread suite of products. The stamp set is Needle & Thread and looks like needlepoint in the stamped flowers. I know the photograph doesn’t show it very well. The flowers on the DSP look like fabulous embroidery, and the colors are very vibrant. It seems like you should be able to touch the threads!
The outside of this card with the double fold, looks similar to a gift card and regular card fold that I have done several times. But I normally do not put matching DSP on each of the sides so it looks like a Gate Fold. I CASED this from a gift card holder I found on Pintrest by Michelle Wright, another Stampin’ Up! Demonstrator. The inside is different from her version though. It is similar to ones I have done in the past. Especially the holder for the gift card. Here is the inside view.
I like to make sure my gift card is not going to accidentally fall out of the card. The end with the card is my preferred method for placing the gift card. The raised circle on the right DSP piece is what you see on the front and what helps hold the card closed. TIP: When you are placing that circle , only put dimensionals on the one side of the circle to allow room for the flap to fit under it. I have all of the measurements listed below.
Thank you for visiting today! I very much appreciate it and hope you will return tomorrow. All of the supplies are listed at the bottom of the page.
Measurements:
Card base is 4 1/4 X 11, scored at 2 3/4 , and 5 1/2
On the 2 3/4 scored end, trim off 3/4″
Fold and burnish the score lines. The 2 3/4 end folds to the inside.
Use the 1 1/4 circle punch to punch a half circle as a finger groove
Apply tear& tape to the very edges on each side of the section. Place the gift card holder, or a business card, inside as you adhere that piece. That insures you have room for your gift card without stressing the paper.
Cut 3 card stock pieces at 2 1/2 X 4
Cut 2 DSP pieces at 2 1/4 X 3 3/4
Cut 1 white card stock at 2 1/4 X 3 3/4 for the message inside
I hope you enjoyed your Holiday!! For me it was very relaxing, but then I do not have children ,at least not the two legged variety 🙂 !
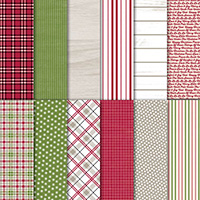
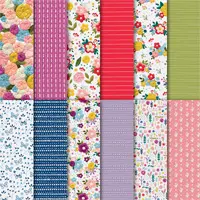
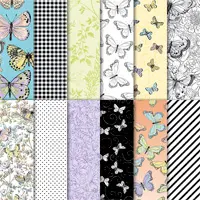
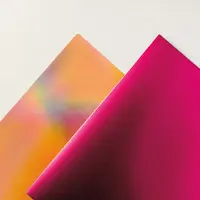
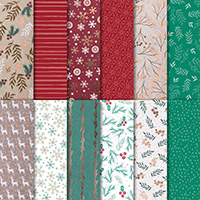
Today I am sharing the beautiful Sale-A-Bration Butterfly Designer Series Paper. All of the products, at least the majority, are new products from either Sale-A-Bration or the Occasions Catalog. You all should be receiving your new catalogs any day now. If you are in need of one, and do not currently have a demonstrator, please contact me. I would love to get one in the mail to you.
Butterfly Gala Bundle, 150599
I LOVE this paper. I do not think you can see all of the beautiful colors incorporated in it, but trust me! It is beautiful. And it is FREE with a $50.00 purchase. Well, I can assist you with that purchase.
Butterfly Gala Bundle = 35.00
Gingham Gala 6X6 DSP = 11.00
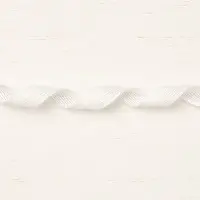
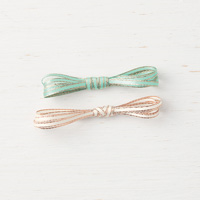
White 5/8 Flax Ribbon = 7.00
Total $53.00
And it’s a Winner: You have just earned the FREE Designer Series Paper. Plus all of the Gingham DSP pairs with the Butterfly DSP. So please think about this as a way of getting the free products.
Thank you for visiting today. I have included the complete supply list at the bottom of the page.
This is a short and sweet post today. I wanted to wish you all a Very, Merry Christmas. And to Thank You for visiting my blog. I am sharing the Christmas Card I sent out this year.
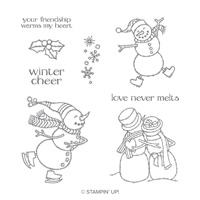
Spirited Snowmen, 148072
“Friendship Warms My Heart” is such a great sentiment to me. I love that so many of my friends are more like family. So this was perfect. I really hope it made the recipient smile.
Thank you for visiting today. I have included the supply list at the bottom if you have this set and want to save the idea for next year’s card.
I usually have some baked goods to give as Host gifts during the holidays with a cute gift tag I make. This year I have not made very much. I do have some for tomorrow, so of course I had to make a cute tag to go with it. To me, tags are simply miniature cards. At least the one I made today is designed like that.
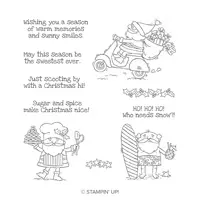
So Santa, 147821
I think these Santas are just adorable and will really miss this great stamp set when it retires. When I first saw this cute guy I knew immediately he would be on my baked goods tags. I could not resist.
The stamping and layout are very simple for this. If I needed quite a few of these I really would not want to spend a lot of time making them. This one is stamped, colored with Stampin’ Blends, and then layered. That is all it took.
Thank you so much for stopping in today. I hope you are having a great holiday and will continue to enjoy time with family and friends. I will have a quick post tomorrow for your morning coffee. I will be sharing the Christmas card I mailed out this year. As always, the complete supply list is at the bottom of the post.
I am a bit late in showing Sneak Peeks of the upcoming Occasions and Sale-A-Bration catalog . So today I have Fresh Friday! A new card with new products, and sort of a new layout. So here we go!
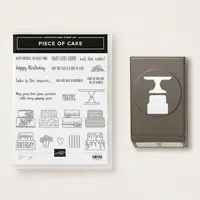
Piece of Cake Bundle, 150579
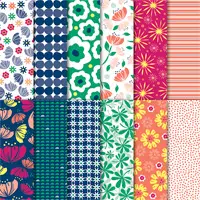
Do you think this card is cheery enough? LOL! I started with this gorgeous DSP from the Happiness Blooms Designer Series Paper. I have always loved the Pineapple Punch and this was a great way to use it as a background and focal point at the same time.
The sentiment and punched cake are the Piece of Cake Bundle. It is a must have! The adorable little flower is Frosted Flower Embellishments and is perfect for the little bit of addition to the cake. Even better, it comes with adhesive attached. Woohoo!!
The cake and cake stand are punched from a Sale-A-Bration freebie of Grapefruit Grove & Lovely Lipstick Foil Sheets. Ordering the paper and Stamp / Punch Bundle pretty much get you to the $50.00 needed for the Free foil sheets. So bookmark all of this for the January 3 go live date!!!
Thank you so much for visiting today. I hope you have a great weekend and Christmas. I will be here and please stop in if you have a chance. Almost all of the supplies are listed at the bottom of the page. I could not grab the Frosted Flower Embellishments, and the Birthday Cheer stamp set. That is the background that is stamped on the Pineapple strip.
Today I have continued with the Pretty Paper, Pretty Ribbon theme from yesterday’s InKing Royalty Blog Hop. I made a couple of cards and the one I used yesterday in the hop was my favorite. The one I am sharing today is the second favorite. Again, there is only a tiny bit of stamping. It is definitely different.
Tea Room Ribbon Combo, 146893
This is not a normal stamping card as you can see. But I have always loved the ribbon trees you see in different forms each year. I used to have throw pillows that had a gorgeous gold ribbon for the tree. So I created one in miniature for my card. This ribbon is from the Tea Room Suite of products. You get the Coastal Cabana ribbon and the Vanilla ribbon together in one pack. They are a great value and are beautiful.
To match the ribbon color, I went with Coastal Cabana as a layer. It is not a normal Christmas color, but who cares! The beautiful gold DSP is from the Broadway Bound Specialty DSP. It is thick and gorgeous!
Thank you so much for stopping by today. I will be back to a normal card to share with you tomorrow. As always, all of the supplies I used are listed at the bottom of the page.
Welcome to InKing Royalty’s December Blog Hop! This year’s Blog Hop themes are inspired by popular songs – this month’s song is “Pretty Paper, Pretty Ribbons.” As you can guess, our Blog Hop today is filled with projects that are inspired by beautiful paper and beautiful ribbons – how clever! We are excited to share our creations with you today! After you read my post, I hope you’ll hop over to the next person on the list at the base of this post.
From the minute I heard this Blog Hop title, I have had that song in my head. Except that is about all of the song I can remember. So I am humming Pretty Paper, Pretty Ribbon! Yikes. So….with that in my head, I came up with a “Wrapped” card. That song reminds me of a gift. Here is my gift to you today.
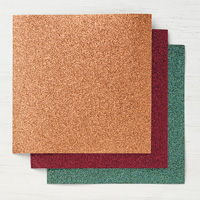
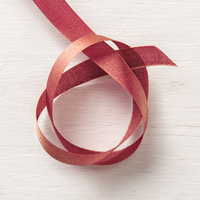
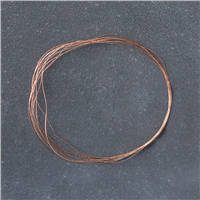
TMerry Merlot & Copper Reversible Ribbon, 147818
This is really not a card for mailing, but I love how it turned out. The focal points of the card are the ribbon and the tag. Although the Joyous Noel Specialty DSP, and Glimmer Paper, are fabulous. The little tag is stamped with the sprig from the Peaceful Noel stamp set. The sentiment ,”This Is For You!”, is from the Takeout Treats stamp set. It is embossed with Copper embossing powder. The reversible ribbon with Merry Merlot and Copper really ties in with the two papers and the embossed sentiment.
All of the supplies for today’s project are listed at the bottom of the post. And don’t forget the Clearance Rack, it has been updated this week!! You may find some of my supplies on there.
Thank you for stopping by today. I hope you’ll hop along to the next stop on the bloghop,Rachel Shedeed at Bluebonnet Stampin’. There’s lots of inspiration to be found in this group – and you don’t want to miss it!
The content in this blog is the sole responsibility of Jackie Beers as an Independent Stampin' Up! Demonstrator. The use of and content of classes, services or products offered is not endorsed by Stampin' Up!