I do not have a new card or project to share today. I just wanted to wish all of you a very, Merry Christmas! I hope that you are able to spend time with family and friends and enjoy the day.
I do have a few of my favorite Christmas cards from this year for you to look over if you want. I have taken a couple of days to de-stress. And will be back with you next week.
I hope you enjoyed a little review. Wishing you a wonderful and loving day! Merry Christmas!!
HOST CODE
My December Host Code is: 4QDB2ZYE Please use this code for orders under $150.00. I will have a small perk for those with orders over $50.00
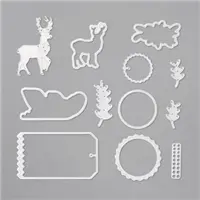
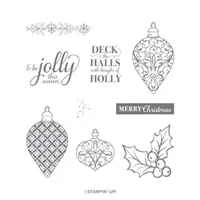
Today I am taking a short break from Christmas cards and projects. I have received a couple of orders of upcoming products, including Sale-A-Bration items. So I am sharing some of that with you today.
I love this little donkey!! He is sitting there looking like I feel. I have been busy for the last couple of weeks, and us old retired people are not supposed to be that busy!
The little guy is from the Darling Donkeys Sale-A-Bration stamp set. That means he and his friends can be yours FREE with a $50.00 purchase once the new catalog and SAB go live on January 5th.
I am also showcasing some of the new Designer Series Paper that will be available for anyone who joins during Sale-A-Bration! It is a real Sneak Peek of the next Annual Catalog in May. So a long way off sneak peek.
For this layout, I cut my layers with the Pretty Peacock at 5 1/4 X 4, and then both sheets of DSP to 5 X 3 3/4. I then placed the opposite corners of the DSP on the paper trimmer cutting line and sliced it in half. Now I have two extra pieces to make another card like this.
Thank you for stopping by today. Please come back tomorrow for another new project.
HOST CODE
My December Host Code is: 4QDB2ZYE Please use this code for orders under $150.00. I will have a small perk for those with orders over $50.00
I have been working on finishing my Christmas Cards, Gift Tags, and gifts for pharmacy and doctor offices. I have a huge mess in my craft room. I was supposed to be finished with everything by now, but life gets in the way sometimes!
A friend loves my projects and I usually give her some gift tags each year. So that is my project to share with you today. And Yes, I have already given them to her. I wouldn’t want her to be as late as I am in wrapping gifts! 🙂
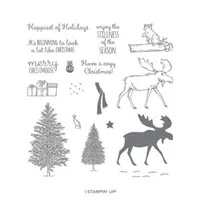
I kept the tags very simple. Although I think they are pretty cute. My favorite part is the tag itself. It is the tag from the Die Set North Pole Wonder. I will hold on to this set simply for that tag! I paired it with the tree from the Merry Moose stamp set. It is stamped in Just Jade Ink. The sentiment is a favorite little one, little in size I mean. It is from the Festive Post stamp set.
I finished the tag with the star from the All The Trimmings Embellishments. I used some old White Baker’s Twine to corral the ribbons. I used the Bumblebee In Color Ribbon and left them not tied for ease in attaching to the packages in whatever way she wanted. I can tell you that trying to gather those ribbons together to make them look even a little neat was not in the least easy!! They did not want to cooperate at all.
I couldn’t simply give the bundle of tags! So I created a little box to slip them into.
The little box is made from Just Jade card stock with Tis The Season Designer Series Paper on the front and back. I stamped the same little sentiment on a scrap of Whisper White and punched it out using the Pine Tree Punch. I also added the same little star on the tree. There are ten tags in the little box and it is pretty small.
Here are the measurements for the little box:
card stock cut to 4 7/8 X 3 1/2
score on the 3 1/2 at 1/2″
score on the 4 7/8 at 1/4, 2 3/8, 2 5/8, 4 3/4
Fold and burnish the score lines.
with the 1/2′ score line at the bottom. Cut up each line to that score line.
Cut out the two tiny pieces.
Adhere the sides and the bottom.
The DSP is cut 2 wide by 3 1/8 tall
Adhere the DSP before putting the box together
Thank you for stopping by today! I hope you are enjoying this time of year and have a minute to stop back in tomorrow.
HOST CODE
My December Host Code is: 4QDB2ZYE Please use this code for orders under $150.00. I will have a small perk for those with orders over $50.00
Everything is so crazy right now that I forgot to write today’s post! I feel like I would lose my head if it wasn’t attached. But that aside, I have one of my favorite cards to share with you.
I realize that the DSP I used, Brightly Gleaming, is sold out, and the Sound of The Season Dies may be as well. I apologize for that. However, the layout of this card is very adaptable to whatever you may have on hand. The front panel can be resized to fit your stamp or dies.
I love the look of this card and by that I mean the way it is layered. The base of the card is a 5 1/2 X 8 1/2 that you score at 4 1/4. Then cut off 1 1/4 from the front and put aside for another project. Now cut off 1 1/2 and keep for this card. The DSP is cut to 5 1/4 X 1 1/4 and you need two pieces. Adhere one piece to the section still attached to the base and the other to the cut off piece.
The measurements for my center piece are the Copper Foil is cut to 3 X 3 3/4. The DSP is cut to 2 3/4 X 3 1/2. Adhere those together. The way I put the pieces together is to lay the bottom of the base at the bottom edge of my desk pad. Now place the lose piece of card stock with DSP along the bottom and flush with the bottom and sides. Dry fit the top section to see where to place you Stampin’ Dimensionals, or your adhesive of choice. Add your adhesive and adhere it to the top and bottom.
My finishing touch was a banner for the Merry Christmas. I used the Banners Pick A Punch, which makes this so very easy to do. The only difficult part was making sure I had the dimensionals in the correct place to catch the top layers of the card. I almost attached the bottom edge to the inside!!! I also added the Embroidered Ribbon as the bow for the ornament.
The inside layer is a regular 4 X 5 1/4 piece. Just remember to choose a stamp that fits behind your center piece with room for your signature and any extra writing.
Here is a view of the inside. I added a bit of pretty stamping along the bottom of the inside, but still have enough room to write.
Thank you very much for stopping by today. Please come back on Monday for new projects. If you have any questions regarding this one and the direction, message me and I will be happy to assist you.
HOST CODE
My December Host Code is: 4QDB2ZYE Please use this code for orders under $150.00. I will have a small perk for those with orders over $50.00
I shared this card yesterday as an addition to the Blog Hop New Year’s Card. I do love how this one turned out, so I wanted to give you all of the fun details. I will not have the stamp and punch in the supplies though. They are not available to customers yet. So they are not in my file for supplies. Sorry!!
This card was for Brian King, my Stampin’ Up! upline. Yesterday was his birthday.
I almost did not get purchase the Handsomely Suited Bundle. Now I am so happy that I did. I had so much fun making this card. It is not overly bright, but it still makes me Smile!
There are two long tie images in the stamp set. I used them alternately to create the background. I started with a piece of DSP from the Peony Garden Designer Series Paper pack. Who would have thought??? I was originally looking for the gray paper in that pack. But when I saw this piece, I knew it would work and my card took a different turn.
To pull out the Terracotta Tile flecks in the paper, I stamped the ties in that color of ink. I then went looking for other DSP with that color in it. I have a lot of scraps of DSP, and that was perfect for this card. I found two pieces in the Play With Pattern 6X6 DSP pack. The polka dot paper that is behind the sentiment is one. And the bow ties are from the other piece. I thought the white background of the bow ties would brighten up the card.
The sentiment is from the stamp set. I love when you can make a full card from one stamp set! I don’t always do that, but love the possibilities. The background for the sentiment is another upcoming product, the Double Oval Punch. It is a Must Have!!!! I added the Smoky Slate layer to the back of the two ovals to tie in the base of the card and break up all of the Terracotta Tile. I used the Layering Ovals Dies and it matched perfectly with the punched ovals. WooHoo!!
This was a fun card to make and the layout is a very versatile one. I will be using this one again. Thank you for stopping by today. Please come back tomorrow for another new project!
HOST CODE
My December Host Code is: 4QDB2ZYE Please use this code for orders under $150.00. I will have a small perk for those with orders over $50.00
Welcome to InKing Royalty’s December Blog Hop! During this year’s blog hops, we are enjoying a year of celebrations. This month’s projects celebrate New Year’s Day, a special day to start anew and prepare for the coming year. We are excited to share our creations with you today! After you read my post, I hope you’ll hop over to the next person on the list at the base of this post.
Before I can tell you about the New Year card I have made, I have to stay in this year for a moment. Today is the birthday of our Team Leader, the Awesome Brian King. So I have a birthday card for Brian to share with him and all of you.
Happy, Happy Birthday, Brian!!!
Since Brian has been working from home most of the year, I doubt he has worn many ties. So I gave him several! I will share the details of this card at a later date. But it is a sneak peek of the Handsomely Suited Bundle.
Now for my New Year’s Card. I could not decide what to do so of course I began looking through the catalogs. I was totally stumped until I came across the sentiment I have used on this card. It is from the upcoming January – June Mini Catalog and the stamp set Dragonfly Garden.
This is Not At All a typical New Year card. But I saw the sentiment and that is my wish for the upcoming year. We need a year of GOOD THINGS!!!!! I hope you will forgive me for breaking the rules a bit. Since I did not really have a stamp I thought screamed Happy New Year, I consider this my New Year’s Resolution, to try to only do good things.
The adorable flowers are from Dragonfly Garden stamp set as well. The DSP is the Dandy Garden Designer Series Paper and is part of the Suite of products. I used two different pieces for my “book fold” card. I love stamping directly onto the DSP, and this piece is light enough in color that you can still see the colors used in the flowers.
Here is a peek of the inside, which shows the “book fold”.
I also added a strip of the DSP on the bottom of the inside. That beautiful ribbon on the front is new to the upcoming catalog also. It is the Blackberry Bliss Striped Ribbon. I placed a few of the Elegant Gems around on the card. One is on the sentiment. They really do glisten a bit, but the light of the photograph sort of blends them in.
I do not have the regular supply list at the bottom because so many of the products are not available to customers until January 5th. But I do have the measurements of the Book Fold for you.
Measurements:
Card base of Bumblebee card stock is 4 1/4 X 11, scored at 5 1/2 and 6 1/2
Whisper White card stock is cut 7/8 X 4 1/8 and 4 3/8 X 4 1/8
DSP is cut to 3/4 X 4 and 4 1/4 X 4
DSP behind the Postage rectangle punch is 1 5/8 X 2 1/4
Fold the card stock on the score lines. Add the layers on the 1″ section. Wrap the ribbon around that area if adding ribbon. Then adhere that section only to the back of the card. Decorate the rest as you choose.
Thank you for stopping by today. I hope you’ll hop along to the next stop on the blog hop, Lynn Kolcun at Avery’s Owlery. There’s lots of inspiration to be found in this group – and you don’t want to miss it!
Thank you for hopping along with us. If you get stuck during the Blog Hop, please use this line-up as a guide:
I am unfortunately sharing cards with retired, and possibly sold out, products. However, I hope you can use these as ideas for your own take on them. My title says Blue Bells and I immediately thought of the flower of the same name! My brain has really been out of sync lately!!
The Blue Bells are the Balmy Blue Glimmer Paper I used for these Christmas Bells. I believe the paper is sold out, but there are several other glimmer papers that would work just as well. I paired the blue with the Snowflake Splendor Designer Series Paper.
My thought on this card was a string of bells like on a sleigh. My Mom had a string like this of larger bells that she would hang on our porch each Christmas. The little stamped bell is part of the stamp set itself as is the small sentiment.
Thanks for stopping in today. Please come back tomorrow for the December InKing Royalty Blog Hop. There will be great projects from my fellow Royals that I am sure you will love.
HOST CODE
My December Host Code is: 4QDB2ZYE Please use this code for orders under $150.00. I will have a small perk for those with orders over $50.00
I have a bit of whimsical card to share with you today. I was playing with the Merry Moose stamp set yesterday. I though of a retro look and packages under a tree. And then I came up with this………
I was trying to keep as much of the Plaid Tidings Designer Series Paper showing as I could with the large scene I had created. My thought was an oldish technique of tearing paper. And I liked it! It does go along with the more rustic look I created.
The moose is actually carrying a package to add to the group beneath the tree. I got this crazy idea from the little racoon on the log in the stamp set It was like he was waiting on the packages. Sadly he got torn off of the scene. But the idea he gave me worked, at least for me!
The packages are a stamp with three attached. I colored them and then cut them apart for placement. To finish my little scene, I added the sentiment from the stamp set as well. It is framed with the upcoming new Double Oval Punch. I LOVE this punch. It is a wonderful size to fit a variety of sentiments.
Thank you for stopping by today. I am sure you have heard of the Whisper White card stock going away due to the business closing. It has been a hard year for a lot of companies both small and larger. That said, the Clearance Rack and the Retiring Products are going strong. If you are interested in the sale products, please click on the SHOP button at the top of the page. items are selling out and it is difficult to keep the list up to date. So best to just go to the store and see what is still available.
HOST CODE
My December Host Code is: 4QDB2ZYE Please use this code for orders under $150.00. I will have a small perk for those with orders over $50.00
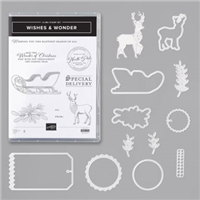
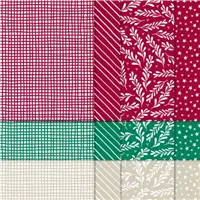
I have a two for one project to share with you today. The stamp set is a beautiful one and is on the Retiring List. It is the Wishes & Wonder Bundle. I paired it with another favorite, the Classic Christmas Designer Series Paper.
This is a quick card to make, which is my favorite kind. I used two different pieces of the Classic Christmas Designer Series paper to create the front panel. I then cut a tag using the Dies from the Wishes & Wonder Bundle. The stamped “postage” is from the stamp set. The circle and scalloped circle are also fro the dies. I finished it off with strips of each of the DSP pieces along with a Whisper White Seam Binding Ribbon at the top.
To pair with the card, I made a gift tag to match.
The sleigh is from the stamp set as well! I used the same tag die but made it to open. I folded the card stock in half with the fold on the left side. I layed it on the die with that fold just up against the INSIDE of the left cutting edge. This way it cuts everything but that side. Here is an open view.
I used the same stamps from the card to add to the sleigh. The inside stamps are from the set as well. I think these would make a great addition to a gift.
Measurements:
card base is 4 1/4 X 11
White is 4 X 5 1/4
DSP is 3/4 X 5 and 2 7/8 X 5
Folded Tag is 4 1/2 X 3 3/4
Thank you for stopping by today. I hope you have a wonderful weekend and please return on Monday.for more new projects.
I have the Retiring List here as well. Click on the picture and it will open to the three pages. It has been updated to show that individually purchasing the bundle pieces is cheaper than the bundle. Some of the dies are 30% off.
HOST CODE
My December Host Code is: 4QDB2ZYE Please use this code for orders under $150.00. I will have a small perk for those with orders over $50.00
After quite a lot of Christmas cards, today’s project is a Thinking of You type card. A dear young lady injured her leg and I wanted to let her know I was thinking of her. She loves nature and animals, so this card is right up her alley.
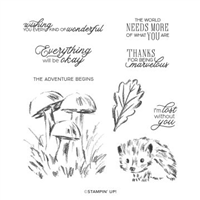
Isn’t this little guy adorable? I am not totally sure what he is, but I think a hedgehog??? I just love the expression on that face. I cased the stamped area from the Annual Catalog where the Walk In The Woods stamp set is shown. Sorry, I don’t have it in front of me to say the page number.
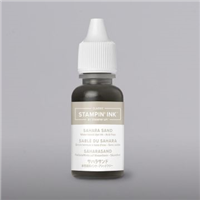
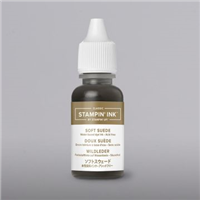
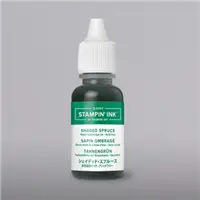
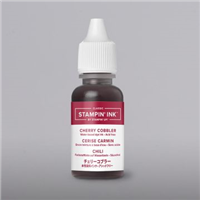
I wanted to try some more watercoloring with these images. I used my H clear Stamping Block and just a drop of the ink refills. The new Water Painters are awesome to use! I added a bit of water from the painter and mixed with the color I was using each time. The coverage is wonderful. For the grass and leaves, I began with Shaded Spruce and moved to Old Olive. The mushrooms are Soft Suede, Sahara Sand and Crumb cake. The tops are Cherry Cobbler. For Mr Hedgehog, I also used the Sahara Sand, Crumb Cake and Soft Suede.
The cut of the card is a little different and I apologize for not showing the inside. I had written inside before I thought that I had not taken pictures. Duh!!! You can see from how the stamped layer hangs over the front Shaded Spruce, that I have cut the top layer of the card. I cut off about 1 1/2″ I believe. I added a piece of the Classic Christmas Designer Series Paper, I love those little trees, to the inside to show where the front layer is cut off. The Whisper White layer to write on is still plenty large enough for a sentiment and writing.
The front sentiment, which I love because it is a little bit different, is from the Walk In The Woods stamp set. I didn’t show it, but the inside was a sentiment from the Life Is Beautiful set.
I have added the Retiring List from the current Mini Catalog. Simply click on the picture of the list and it will open to the three page list. This list has removed the stamps in other than English as well as the bundles. It is cheaper in this sale to purchase those bundled items separately. If you do place an order, please use my December Host Code. It is further down just above the supply list, and on the right side column if you are viewing on an ipad or larger device.
.
Thank you for stopping by today. I hope you enjoyed taking a break from Christmas Cards and will return tomorrow for , you guessed it, another Christmas Card!!! Hugs to you all!
HOST CODE
My December Host Code is: 4QDB2ZYE Please use this code for orders under $150.00. I will have a small perk for those with orders over $50.00
The content in this blog is the sole responsibility of Jackie Beers as an Independent Stampin' Up! Demonstrator. The use of and content of classes, services or products offered is not endorsed by Stampin' Up!