Welcome to InKing Royalty’s January Blog Hop! This year’s Blog Hop themes will be inspired by popular songs – the first is “I Think I Love You.” Our Blog Hop today is jam-packed with projects that are perfect for Valentine’s Day or that showcase love. How sweet is that?! We are excited to share our love-themed creations with you today. After you read my post, I hope you’ll hop over to the next person on the list at the base of this post.
I went a little “Love You” crazy on my card! This week I have been making cards using ideas and layouts from cards that are several years old. I found the idea for today’s card in a box of old swap cards. I loved the idea, so I recreated it with LOVE in mind.
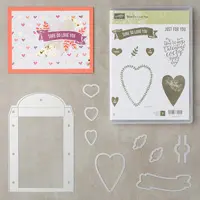
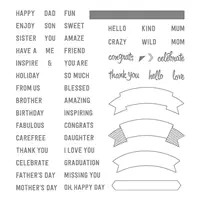
Sure Do Love You Bundle, 145653
I have been going a little overboard with the bright colors lately. This is another one. It didn’t start out that way, but sort of evolved. Hopefully you can see that it would be cute in more subdued, and maybe less, colors!
The paperclip is the focal point of the card and can be used as a bookmark or attach a magnet for a totally different purpose. To make the paperclip heart, I cut a solid heart and the stamped heart using the Lots To Love Box Framelits. I placed several stampin’ dimensionals between the two hearts and around the paperclip. The two Lemon Lime Twist hearts are cut using the same set of framelits as well.
The measurements will be at the bottom of the post after the blog hop list. There are also some hints to make the paperclip fit better.
Thank you for stopping by today. I hope you’ll hop along to the next stop on the bloghop, Shawn de Oliveira, https://www.shawnstamps.com/
Jackie
Thank you for hopping along with us. If you get stuck during the Blog Hop, please use this line-up as a guide:
The card base is 5 1/2 X 8 scored and folded in half
The next layer is 5 1/4 X 4
The DSP layer is 5 X 3 3/4
The larger Pocket layer is 2 1/2 X 4 1/2
The next layer is 2 1/4 X 4 1/4
The DSP strip is 1 1/8 X 2 1/4
Hint: I used the 3/4 ” Circle Punch and punched in the center of the top pocket layer. I then punched again just a little on each side of that to allow the paperclip to slide in.
When you are taping the pocket layers together, have the paperclip through the slit. Otherwise the pocket is too flat and may pull away from the card. The same when applying the pocket to the card.
I suggest using Tear & Tape, or a similarly strong tape and go around the edges of both layers. (Adhering to the bottom pocket layer and the card itself.
ENJOY!!!
If you have any questions about today’s card, please do not hesitate to contact me !
Have you ever thought about becoming a Stampin’ Up! Demonstrator? During Sale-A-Bration is the perfect time to join. Not only are you getting the Ultimate Bundle ($125.00 worth of product for $99.00) but you also get to choose 2 additional stamp sets, up to $25.00 each. Additionally you will receive a 20% discount on any future purchases. Or, if you are just wanting to test drive the idea, you would not be required to make another purchase until July! There is no pressure for you to continue as a demonstrator. And there is no penalty if you decide not to continue. Please contact me and let’s talk about it. You can review the documents by clicking on the picture below.
I have a warm and fuzzy Panda Love for you today. These little guys are so cute and so easy to work with that I could not resist another quick card.
Party Pandas, 147221
The Party Pandas set is a Sale-A-Bration set. You can get it FREE, with the purchase of $50.00 from the Annual or Occasions Catalogs. Besides the panda, the second star of the card is the Painted With Love Designer Series Paper. I could use this paper every day! It is beautiful on each side of every sheet. I don’t think I have ever said that before.
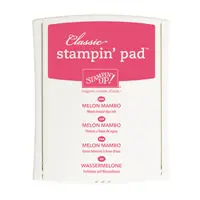
The “Love” on the envelope is from the Thoughtful Banners stamp set. There are a couple of small words from that set that fit perfectly on the little envelope. Obviously the color inspiration came from the DSP. I love Rich Razzleberry and Melon Mambo would not normally put the two together. But WOW!!, I love them together with this small piece of paper that combines both.
The other highlight of the card is the Glitter & Clear Shapes. I used the small round ones for the Panda’s eyes. It gives it a 3-D look and makes the stand out. The hardest part of this card is cutting all the layers. I have provided the measurements that I used below.
Thank you so much for visiting today! I appreciate the lovely comments and am happy to answer any questions you have.
MEASUREMENTS:
Rich Razzleberry base is cut to 11 X 4 1/4 and folded in half for a top fold card
The two larger pieces (Melon Mambo and DSP) are cut to 2 1/2 X 4 each
The two larger Basic Black pieces are cut to 2 5/8 X 4 1/8
The Whisper White piece is cut to 1 7/8 X 2 5/8
The small Basic Black piece is cut to 2 X 2 3/4
Have you ever thought about becoming a Stampin’ Up! Demonstrator? During Sale-A-Bration is the perfect time to join. Not only are you getting the Ultimate Bundle ($125.00 worth of product for $99.00) but you also get to choose 2 additional stamp sets, up to $25.00 each. Additionally you will get a 20% discount on any future purchases. Or, if you are just wanting to test drive the idea, you would not need to make another purchase until July! There is no pressure for you to continue as a demonstrator. And there is no penalty if you decide not to continue. Please contact me and let’s talk about it.
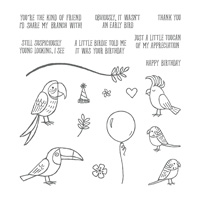
The Bird Banter stamp set is such a fun set to use. There are so many possibilities. Today I made an unusual pairing that are young at heart. I say that because of their funky hair colors !! I took quite a bit of artistic license in my color choices.
Bird Banter, 145852
Can you see the blue tipped hair on the cockatoo? I say there are no rules in our color choices, or hair styles!!
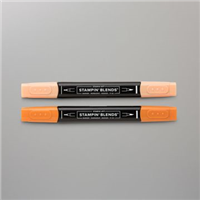
The Painted With Love Designer Series Paper is still the star of the show. It was also the color inspiration for the most part. The Pool Party was an add on. I colored with the Stampin’ Blends again. I am so in love with these pens. They are the easiest to color with. I am definitely no expert, so this shows how forgiving they are to work with.
The balloon is stamped and cut from a small scrap of Delightful Daisy Designer Series Paper. Never throw away your scraps, but especially DSP scraps. They are perfect for small accents.
This is a 4 X 4 card that is very quick to complete. It would be great to make a set with the different birds from this set. Hhhmmm……I may have to do that. Stay tuned.
MEASUREMENTS:
Rich Razzleberry base cut 8 X 4 and folded in half
Very Vanilla layer 3 3/4 X 3 3/4
DSP layer 3 5/8 X 3 5/8
Rich Razzleberry center layer 2 5/8 X 2 5/8
Very Vanilla center layer 2 1/2 X 2 1/2
Thank you so much for visiting with me today! I hope you enjoyed this card. I would love to hear from you. And if you do not have a current Stampin’ Up! Demonstrator, I would be happy to get you the current catalogs. I would also enjoy talking with you about becoming a Stampin’ Up! Demonstrator. The next paragraph mentions some of the wonderful reasons to consider this.
Have you ever thought about becoming a Stampin’ Up! Demonstrator? During Sale-A-Bration is the perfect time to join. Not only are you getting the Ultimate Bundle ($125.00 worth of product for $99.00) but you also get to choose 2 additional stamp sets, up to $25.00 each. Additionally you will get a 20% discount on any future purchases. Or, if you are just wanting to test drive the idea, you would not need to make another purchase until July! There is no pressure for you to continue as a demonstrator. And there is no penalty if you decide not to continue. Please contact me and let’s talk about it.
Welcome to the Pals January 2018 Blog Hop. Our theme this month is “From the Heart” featuring heartfelt projects like Valentine’s Day, Thinking of You, Get Well and Sympathy. Whether you’re just starting the hop, or have come from a previous Pal’s blog, you’ll find the line-up toward the end of my post to help you move along.
For today’s blog hop, I went with bright colors and gold embossing on a Valentine’s Day card. This Painted With Love Specialty Designer Series Paper is the star though. It is even prettier in person. Because the paper is so beautiful, I went with a fairly simple layout.
Sure Do Love You, 145766
All of the stamps I used are in the new stamp set “Sure Do Love You”. The floral heart did not catch my eye at first. But when I started thinking of the card, I knew it was perfect to surround the sentiment. And with the gold foil in the DSP I had to emboss the floral heart with gold as well.
I stamped the sentiment in Rich Razzleberry. The little “always” is stamped in Melon Mambo and die cut using the Lots To Love Box Framelit. These are matching framelits for the stamp set. Purchased as a bundle, you save 10% on this fabulous stamp set and extremely versatile set of framelits!
If you have any questions, please do not hesitate to contact me. The supplies I used are listed at the bottom of the post.
Thank you so much for hopping with the Stampin’ Pretty Pals today. Please take a minute to mark your calendar for our next hop on February 14, 2018. Now hop along using the Blog Hop Line-up below. Don’t forget to leave us a comment. We really like that.
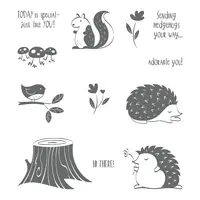
The stamp set I used today is a playful set that is super cute. I did not do it justice. But the sentiments and characters are pure magic. This is a super quick and easy card.
Hedgehugs, 145879
I should have masked the top of the stump, but I hope you can see how cute this little couple is. I stamped them with Soft Suede and then colored with the Stampin’ Blends. The little flower is colored with Stampin’ Write Markers.
Thank you for visiting today! I very much appreciate you checking in. I love to read your comments.
Reminder: There are only two days left to place your reservation for the stamparatus. You will receive it before it goes live in the 2018 Annual Catalog in June.
The content in this blog is the sole responsibility of Jackie Beers as an Independent Stampin' Up! Demonstrator. The use of and content of classes, services or products offered is not endorsed by Stampin' Up!