Before I get to today’s card……I will not have posts after today until July 9th. I am going on vacation. Some friends and I are flying to Seattle and driving down the coast to San Francisco. I cannot wait to see the beautiful scenery.
Okay, about the card. I do quite a few gift card holders. I LOVE to give gift cards and am excited to come up with new ways to gift them. But today I am going Old School! Yes, as the title said, it is a money envelope. Actually it should be money or check envelope.
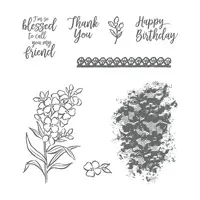
Southern Serenade, 145921
I love this! I have not needed a cash or check card in a really long time. But since I will be needing to settle up with my friends for various costs, I thought I would make a cute one and share it with you.
I left this cutie quite plain. Since It is going to a couple, I did not want it to be too frilly. And here is the open picture.
The base is 7 X 7 1/4 and scored on the 7 1/4 side at 2 and 5 1/4 (this actually equals 2 from each side if that is easier). Fold and burnish the score lines. Choose which section is your money holder and using the 1 1/4 circle punch do a half punch in the center of that edge. On the opposite end, use the Detailed Trio Punch to round the corners.
The white strip is 1 X 7 and is also rounded corners on one edge. Stamp your sentiment so that it reads properly when the flap is opened. Then adhere to the flap leaving about a 1/4 – 1/2″ hanging over.
Place Tear & Tape on the edges of the section you did the half circle punch. Before you adhere it, place a piece of card stock in the pocket so that it is not too tight when you place your cash/check.
For the decoration I chose to do a bright daisy. I used a scrap of Mango Melody card stock and punched 2 times with the Daisy Punch. I stamped the Thank You on scrap white card stock and used the 1 1/4 circle punch to punch it out.
The belly band is 1 X 8 1/4 and is loosely wrapped around the envelope, so it will easily slide off. Adhere it in front by overlapping the strip. Then place the layered flower on top with Stampin’ Dimensionals. This will cover the overlap of the wrap.
Thank you for visiting today and I hope you will return on July 9th. I very much appreciate you checking out my projects.
It is still a great time to become a Stampin’ Up! Demonstrator. I would love to have you join my team. A great perk for demonstrators this time of year is getting to see the new catalog first. Then we get to order and play with the new products a month early. For me, that is one of the best parts of being a SU Demonstrator. Of course, the discount helps! If you are interested, please contact me and let’s talk.
I am submitting today’s card for the Global Design Project #144 Challenge. It is a CASE the designer. I used her layout for my design . To CASE can mean using a little, a lot, or just the layout. I was a little in the middle of that on my card.
Coffee Cafe, 143677
And here is the challenge card I cased.
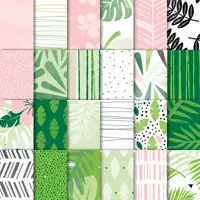
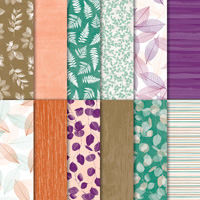
I was so thrilled when the Coffee Cafe set and matching framelits carried over to the new catalog. Then I realized I had not used them in quite some time. So here they are paired with the gorgeous Tropical Escape 6X6 Designer Series Paper.
All of the supplies I used are listed the bottom of the page. Thank you so much for visiting today! I very much appreciate it and love to hear from you.
COLOR COMBINATION: Of course these are in the Gorgeous DSP.
It is still a great time to become a Stampin’ Up! Demonstrator. I would love to have you join my team. A great perk for demonstrators this time of year is getting to see the new catalog first. Then we get to order and play with the new products a month early. For me, that is one of the best parts of being a SU Demonstrator. Of course, the discount helps! If you are interested, please contact me and let’s talk.
Yesterday I focused on the Copper Tea Tin that I made as a gift for a friend, and the special card for her. Today I am showcasing the six 3X3 cards that I placed inside the tin for her to use. Yes, I said 6 cards, with envelopes, and there is room for more! As I said yesterday, these tins are AMAZING !!
A Big Thank You, 147377
I stayed with the Nature’s Poem DSP from the outside of the tin. All of the sentiments are from the A Big Thank You stamp set. My thoughts on these little cards are as either Random Act of Kindness or as small gift inserts. Either way, I think anyone would smile upon receiving one.
Here is a photo of the cards inside the tin. I really was not exaggerating !! There really is room for more cards, gift card, or maybe a small gift.
I hope you think these tins are as wonderful as I do. If you have any questions, or would like to purchase some of them, please contact me. I would love to assist you. All of the products I used are listed at the bottom of the post.
Thank you for visiting today! I very much appreciate it. Be sure and check back tomorrow because it is the InKing Royalty June Blog Hop. You would not want to miss that. There are always amazing cards to hop along and view.
It is still a great time to become a Stampin’ Up! Demonstrator. I would love to have you join my team. A great perk for demonstrators this time of year is getting to see the new catalog first. Then we get to order and play with the new products a month early. For me, that is one of the best parts of being a SU Demonstrator. Of course, the discount helps! If you are interested, please contact me and let’s talk.
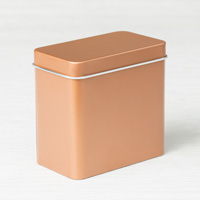
Today I have used the AWESOME Copper Tea Tin as the holder for some gorgeous little cards. I will show the tin today and the main card. Tomorrow I will show all of the 3 X 3 cards I made to go inside.
Copper Tea Tins, 147034
I love little containers! So when I saw these tins in the new catalog I was so excited. They are a perfect size. For today’s project, I decorated with Nature’s Poem Designer Series Paper. I believe I have used more DSP since I got my pre-order than in the last year. This year Stampin’ Up! has outdone themselves with the gorgeous papers they have created. But, back to the tin….. I used a 12″ strip of the DSP towrope around the tin. I think the cajun craze (that is the color listed on the DSP pack) leaf in the DSP matches really well with the copper color of the tin.
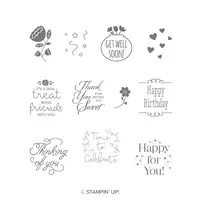
The sweet sentiment on the tin is from the Treat Tine stamp set. There are some wonderful sentiments there. I am crazy about sentiments that are special, and I love the different fonts used in this set. Another MUST Have!
For the main card, which is actually for my friend, I CASED Julie DiMatteo’s Diamond card from her last week Facebook Live. You can see her Friday post of it HERE
A Big Thank You, 147377
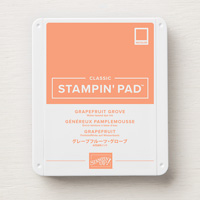
I used Grapefruit Grove instead of Cajun Craze that is listed as the coordinating colors on the DSP. I like it even better! (That is what I used on the sentiment circle for the bellyband of the Copper Tin.) The sentiment is from A Big Thank You. It is a Must Have if you do any Thank You cards. The sentiments are fabulous!!
I hope you will come back tomorrow to see the cards I placed inside the tin and see how many will fit! It is an amazing little guy. Thank you so much for visiting today! All of the supplies I used are listed at the bottom of the page.
It is still a great time to become a Stampin’ Up! Demonstrator. I would love to have you join my team. A great perk for demonstrators this time of year is getting to see the new catalog first. Then we get to order and play with the new products a month early. For me, that is one of the best parts of being a SU Demonstrator. Of course, the discount helps! If you are interested, please contact me and let’s talk.
Wasn’t yesterday’s Blog Hop wonderful? There is always a great variety of stamps, colors, and embellishments. Today I have used the same stamp set as yesterday. I am on a more masculine streak it seems. Today’s card would be perfect or Father’s Day.
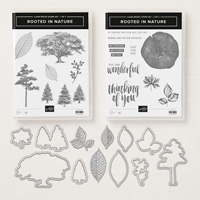
Rooted In Nature, 148353
I made yesterday’s card over a week ago, and as I was writing this post realized how very alike these two cards are. I am not sure if that is good or bad!!
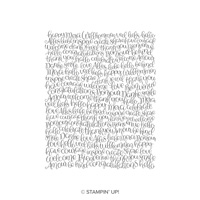
This card is quite a lot of green. I used he Handwritten stamp as the background and stamped in Soft Sea Foam. The sentiment is stamped in Mossy Meadow. I used Stampin’ Write Markers in the Mossy Meadow and Soft Suede for the tree. The leaves/branches are Old Olive both full strength and stamped off.
To give the sentiment layer some depth without trying to cut and piece the punch to create a background, I have a very easy method I use. I simply run my Stampin’ Write Marker around the edge of the punched piece a time or two. My holding the marker almost flat, I touch the fatter part of the large tip end on the edge of the cardstock. Give it a try, I believe you will like the result.
Thank you very much for hopping yesterday and for coming back today. I promise to use a different stamp set tomorrow! LOL… All of the supplies I used are listed at the bottom of the page.
It is still a great time to become a Stampin’ Up! Demonstrator. I would love to have you join my team. A great perk for demonstrators this time of year is getting to see the new catalog first. Then we get to order and play with the new products a month early. For me, that is one of the best parts of being a SU Demonstrator. Of course, the discount helps! If you are interested, please contact me and let’s talk.
The Stampin’ Up! Share What You Love Designer Series Paper is by far my favorite of all time!! I have used it several times since I received my Pre-Order for the new catalog. And I cannot stop using it. I may need intervention! But in addition to the AWESOME paper, I am showcasing a new fold. Or it could be a new cut, or both! Here it is and then I will explain what I mean.
Abstract Impressions, 147513
That DSP just shines! Actually it really does shine. This is one of the sheets that has a pearlized look to some of the flowers. The little pearls in the flower centers are the Share What You Love Artisan Pearls. They are just too cute!
The Fold/Cut is a little different. Since the DSP is card stock weight, it can serve as a card base without feeling flimsy. To achieve this look, I cut the Smoky Slate card stock to 5 1/2 X 8 1/2. I scored it at 4 1/4, the normal folding point for an A2 card. But I did not stop there. I went back to my cutter and with the score line at 3/4 on the trimmer ruler , I cut off the rest of the panel. (And I was able to use that cut piece to make the top layer with a bit leftover.)
The DSP is cut to 4 1/4 X 5 1/2. I burnished my fold on the Smoky Slate layer and placed adhesive on the inside of the 3/4 section. Then all I had to do was line up the DSP with the rest of the base and fold the small section over on top of it. Easy Peasy and perfect alignment. An added bonus is that when you open the card, you get to see the other side of this beautiful DSP!! WooHoo!! That is always a problem for me when the DSP is gorgeous on both sides. I hate to hide one of them. With this Cut/Fold, I do not have to hide either side.
Thank you so much for visiting my blog today! I greatly appreciate it and would be happy to answer any questions if I was not very clear on the instructions. I have listed all of the products used at the bottom of the post. I hope you have a great rest of your day!
It is still a great time to become a Stampin’ Up! Demonstrator. I would love to have you join my team. A great perk for demonstrators this time of year is getting to see the new catalog first. Then we get to order and play with the new products a month early. For me, that is one of the best parts of being a SU Demonstrator. Of course, the discount helps! If you are interested, please contact me and let’s talk.
The content in this blog is the sole responsibility of Jackie Beers as an Independent Stampin' Up! Demonstrator. The use of and content of classes, services or products offered is not endorsed by Stampin' Up!