I am playing along with the FabFriday’s color challenge – you can see the other projects HERE
This is the color challenge banner for FabFriday 114:
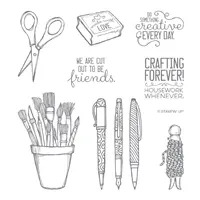
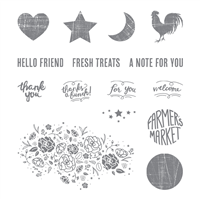
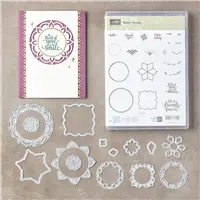
This is my first post with this wonderful Crafting Forever stamp set. I think it is so appropriate for any crafter. And I am sure you know other crafting folks to send a card to.
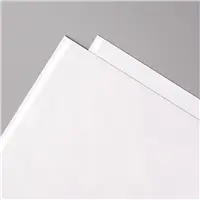
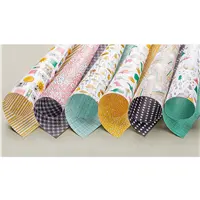
I used the Baby Wipe Technique again. This time though it is on Glossy White Card Stock, and I just touched it to the card stock. It is a different look, but one I really like. I believe it shows off all of the new In Colors. The Glossy White card stock is an old item that was discontinued a few years ago and now is back. It is wonderful base for a variety of techniques.
I wanted to make a different background and couldn’t choose a color. So I thought of the baby wipe technique and managed to use all of them. I believe this is the first time that I have really liked all the colors in a new set.
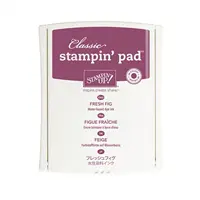
The background technique reminds me of my stamp surface after a few hours of playing! Can anyone relate to that? It was a fun experiment to try and not as messy as it looks either. I took a baby wipe and wadded it up then touched it to the ink pad, then to the card stock. I re-wadded it each time so that I didn’t mess up my ink pads or combine the colors on the card stock. I think I only used 2 baby wipes though. I did use all 5 of the new In Colors. The Powder Pink just doesn’t show up as well in the photo.
The jar of tools was colored with markers and then cut out using the Layering Ovals Thinlits. And the sentiment, which I thoroughly agree with, was stamped in Tranquil Tide and cut out with the Stitched Shape Thinlits. Both are raised with our awesome dimensionals.
Thank you for stopping by today! The supplies I used are listed below. You can click on any item and be taken directly to my On Line Store.
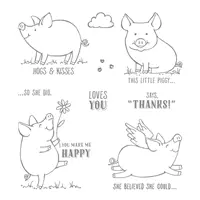
I have been waiting since OnStage for This Little Piggy set. I have had it for a couple of days and have made probably a card a day with it! These little guys are just so cute 🙂
I know the Pink Tourette doesn’t quite look right with Basic Black and Crushed Curry, but what choice did I have for a cute little pig ? HaHa!!!
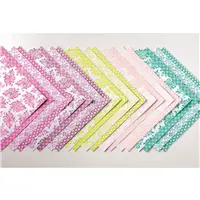
Doesn’t that cute face on the piggy bring a smile to you? All of the pigs in the set are this cute! The Pick a Pattern DSP helps the young and happy feeling of the card I do believe. It is so eclectic that it is a perfect background for the cute little focal point. This DSP is a sleeper in a way. At first glance it has more child-like designs but when you look at the other side of the paper, at least for me, it was a “WOW” .
There are extra layers to this card, but that could be narrowed down if you didn’t want it to me as heavy. I wanted this to be a really nice card and added the extra background layers to help make it pop.
I started with a base of Thick Whisper White
The Basic Black layer is 5 3/8 X 4 1/8
The Whisper White layer is 5 1/4 X 4
The DSP layer equals between the two pieces a width of 3 7/8 X 5 1/8
The piglet is stamped on Whisper White with Tuxedo Black Memento ink and colored with Pink Pirouette marker
The grass is done with the Old Olive marker
The balloon is stamped in Crushed Curry ink on Whisper White and punched with the Balloon Bouquet punch
The edge of the balloon is shaded (it doesn’t show well in the picture) by dragging the Basic Black marker around the outside of the ballon. It sort of mimics the circles in the DSP.
The bow on the balloon is Black and White Baker’s Twine.
I will definitely be posting more Little Piggy cards in the coming weeks. Thank you for stopping by today. I very much appreciate your comments.
The supplies I used are listed below: You can click on any item and be taken directly to my On Line Store.
I have to say that I laughed when I first saw this You’ve Got Style set in the new catalog. I love the ladies and the sentiments. I hope I did her justice in today’s card.
You’ve Got Style, 143898
Isn’t she just hilarious? I love her style! And when I was looking for my color inspirations and landed on the Foil Frenzy DSP, I knew it was perfect. Then when it came to putting the card together I could not bring myself to align it normally. The lady just shouted wacky! So that is how she ended up.
The base is Thick Whisper White card stock. The next layers are each the normal smaller layers of Berry Burst card stock, and Foil Frenzy DSP. The lady has a layer of Berry Burst card stock as well. As does the sentiment. The lady is stamped in Basic Gray Archival Ink and then colored with Watercolor Pencils and a Blender Pen. To give it a little more sparkle I added a couple of the Iridescent Sequins and gave the fir on color, cuffs, and hat brim a touch of Clear Wink of Stella. I believe anyone would have a smile on their face if they received this Sassy Lady in the mail.
Thank you so much for visiting my blog today. If you have any questions, or comments, please let me know. And remember our great Host Rewards Special for June.
I was experimenting with new products and ended up with a “different” sort of card. It was pretty much what I had envisioned, I just had a hard time getting it there. Don’t you hate that! A lot of my “visions” never work, so I was very happy with this one.
Wood Words, 143928
This card is a little more difficult to explain that most of the ones I come up with. But please stay with me 🙂
The base of the card is Thick Whisper White cut to 4 1/4 X 11, and folded in half
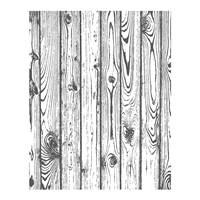
The wood layer is stamped directly onto the card front with the Hardwood background stamp in Crumb Cake
The wooden box is a scrap of the Wood Textures DSP Stack
The flowers are from the Wood Words stamp set. They are stamped in Sahara Sand and then touched up with markers
The Farmer’s Market sign is From Wood Words and stamped in Pear Pizzaz and then punched with 1 1/4 circle punch
The backing of the sign is from another scrap of the Wood Texture DSP punched with the 1 3/8 circle punch
The banner is Sweet Sugarplum stamped onto Whisper White card stock and punched with the Duet Banner Punch
The little loop is out of Linen Thread and the “nail” is a Metallic Enamel Shape
The flowers and the Welcome are raised up with Stampin’ Dimensionals
Thank you for stopping by today! I love to hear your comments. And if you would like to place an order you can click on the card, an item in the supply list, or the “shop” button and be taken directly to my online store.
Today’s card is made partly with the first stamp set I fell in love with when it was debuted at OnStage. Brian King presented it and showed such beautiful cards that I knew it would be coming to me as soon as I could order it. Since we are all about crafting, who could not love this set. And for today’s card I went a little more neutral with it to show it’s versatility. Of course the sentiment, even though from another stamp set, fits perfectly with the theme.
Crafting Forever, Truly Artistic
What do you think of the more neutral look? The Fresh Florals DSP is almost as much a star as the Crafting Forever and Just Add Text stamp sets. I do believe these two stamp sets compliment each other.
I only used Tranquil Tide and Very Vanilla on this card, With the exception of Memento Black ink for the pens and then I colored them with the Bermuda Bay Watercolor Pencils. I think it blends well enough with the Tranquil Tide. Those pencils and the colors provided in them tend to work with most of our colors.
Thank you for visiting today! I truly appreciate your comments. And if there are any questions, or you need assistance with a purchase, please let me know.
When I first saw this suite I was not sure that I would use it. Then as I saw the cards and ideas that were being created with it, I thought “This may be ok”. And when I played with it…. I was hooked!! Oh My! The entire suite is just the best. Today’s card is another of my play dates with this stamp set and the new InColors.
Eastern Beauty Bundle, 145308
I would apologize for continually using Lemon Lime Twist…..But I cannot….. It is my current addiction. I just love how it seems to coordinate with everything.
I did use the New (actually an old item returning) Multipurpose Adhesive Sheets! If you use the framelits, and especially the word framelits, this is a must have. You adhere the sheet to your card stock and then use the framlit to cut out your design or words. NOTE: Remember to put the adhesive side on the bottom. You don’t want your words to be upside down! I used the adhesive sheets on all three pieces of my design. After die cutting just remove the paper and it is covered in sticky goodness. No more glue everywhere for me.
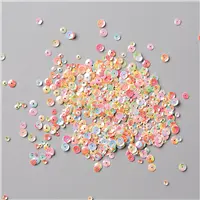
As you can see there is very little stamping on this card. The base of the card is Thick Whisper White card stock. I used four of the new InColors and then just stamped that cute saying underneath. The center of the design is one of the Glitter Enamel Dots.
I hope you will give this wonderful Eastern Beauty Suite a chance. It is definitely a keeper!!
The products I used are listed below. Thank you for stopping by and I thank you for your comments.
The content in this blog is the sole responsibility of Jackie Beers as an Independent Stampin' Up! Demonstrator. The use of and content of classes, services or products offered is not endorsed by Stampin' Up!