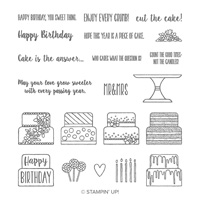
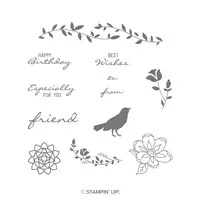
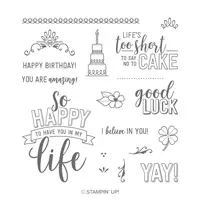
Today I have an unusual Birthday Card. I made it for a dear friend that I love to laugh with. I fell in love with this stamp set, Young At Heart, when I first saw the ladies. Then after reading the sentiments I knew I had to have it in my hands. As we get older it seems to me it is the little things that make us happy. And for me that is Friends!!!
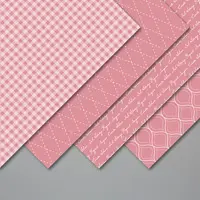
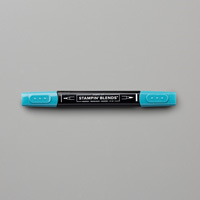
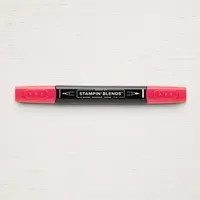
The look of the front is dominated by the Designer Series Paper in the background. I wanted that to shine and not have a battle between the stamped areas and the DSP. And yes, I have used the Stampin’ Blends again. I think I am addicted!!!
Because of the dark card base, it is Pretty Peacock, I knew I needed a white insert for the inside. I decided to use one of the DSP leftover pieces to add some pizzaz to the inside as well. I do not usually show the inside of my cards, but I have this one for you.
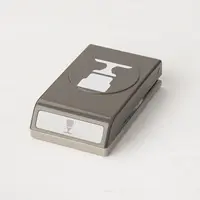
I had originally intended for the inside sentiment to be on the front of the card. Of course I realized that didn’t work for the birthday. So I used the new Timeless Label punch to give it some love and then added it to the DSP strip on the inside.
Thank you for stopping by today! I hope you like the unusual birthday card. In a way, different is nice!
AWESOME UPDATES:
I hope you saw my post from yesterday about the Clearance Rack Update and the Trimmer Blades. The Clearance Rack was updated yesterday and the Trimmer Blades become available at Noon Eastern Time today.
Also, a heads up about Bonus Days returning!! During July, for every $50.00 you spend in merchandise, you will receive a Coupon Code worth $5.00. There is no limit to the number of coupons you can receive. Then in August, you can redeem them towards anything on the Website. WooHoo!!
There is also another great Join Promotion during July and August. I would love to have you on my Team!! The new promotion adds to the amount of FREE products that comes with the Starter Kit. The Starter Kit should be named The Ultimate Shopping Experience!! For $99.00 you normally receive $125.00 of products. During July and August you will receive an additional $30.00 of products. So for $99.00 you would receive $155.00 in products. ALSO….the Starter Kit is FREE Shipping. Additionally, there is no pressure to ever place another order. However, you will receive a $10.00 coupon to redeem the month after you join during this promotion. AND, any additional orders you place you will receive the Demonstrator discount of 20% off of your merchandise. If you are at all interested, I would LOVE to talk with you about the advantages of becoming a Stampin’ Up! Demonstrator. Please contact me!!
My June Host Code is M2PNZPVT. Please use this code for orders under $150.00. I will have a small perk for those with orders over $50.00.
Welcome to InKing Royalty’s June Blog Hop! This year’s Blog Hop themes are inspired by a single word – and this month our projects are centered around NEW. With the launch of Stampin’ Up!’s 2019 Annual Catalog, NEW gives us the opportunity to showcase new products and play with new colors. There are also new occasions (babies, weddings, graduations) to celebrate, so you are going to see a variety of projects in this hop. We are excited to share our creations with you today! After you read my post, I hope you’ll hop over to the next person on the list at the base of this post.
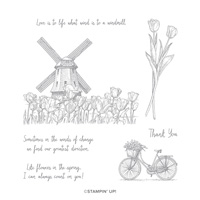
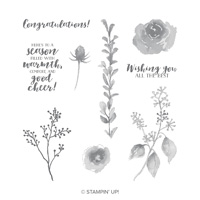
My card reflects two of the NEW theme ideas. I am showcasing a NEW stamp set, Winds of Change. I looked at this set when I received my catalog and it was a must have. As you know, I love to color with the Stampin’ Blends, and this set is perfect for coloring. I also LOVE to travel. Next month I am going on another Viking River Boat Cruise. And we begin in Amsterdam! I have never been to Amsterdam before, so this is my second NEW for the theme. I am so excited about the trip, and am equally excited to share my card idea with you.
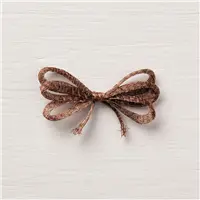
Even the sentiment on the card goes along with the theme! I googled Amsterdam and looked at all of the windmills for some color inspiration. They are typically brownish, but the blades can be different colors. I added just a touch of the Granny Apple Green to my blades to match the bottom section of the windmill building.
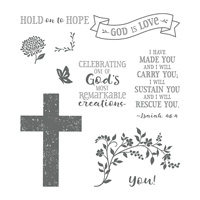
All of the pictures I saw were in vibrant colors, so that is what I went with. I always prefer a mix of colors in flowers, so I mixed my tulips and then added a whimsical touch with the butterfly. The butterfly is from the Hold On To Hope stamp set and the Cross of Hope Framelits. I colored it with Granny Apple and Daffodil Delight markers then die cut it.
The sentiment is done with my favorite new technique. I used the Rectangle Stitched Framelits and cut to fit the size I needed. (As I mentioned in yesterday’s post, there are several videos out there on how to do this little trick).
Thank you for stopping by today. I hope you’ll hop along to the next stop on the bloghop, Lynn Kolcun at Avery’s Owlery. There’s lots of inspiration to be found in this group – and you don’t want to miss it!
Thank you for hopping along with us. If you get stuck during the Blog Hop, please use this line-up as a guide:
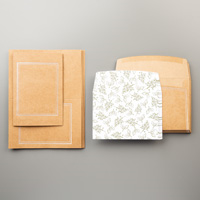
I have trying some new products for today, but am mixing them with carry overs. The main new product is the Magnolia Lane Cards and Envelopes. They are in a great Craft or Crumb Cake card stock with some silver embossing. I love that look of elegant mixed with a more grounded color.
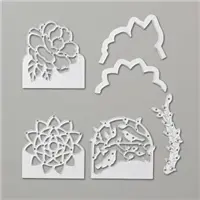
I paired the Botanical Bliss stamp set and dies for a different look to this base. I stamped inside the framed area with Crumb Cake Ink, using the flower from First Frost, to add a bit of background. I die cut the tag and then watercolored it.
I used Shimmery White Card Stock as I think it is perfect for watercoloring. I was a bit different on my watercolor. I scribbled with markers on a clear block and then used the Aqua Painter to pick up the ink. It gives a softer look I believe. However, since you cannot purchase individual markers, it would work perfectly fine to get ink in the lid of your ink pad and pick it up that way.
The Crumb Cake tag is the new Timeless Label Punch. I shortened it to fit on the tag without hanging over the sides. The Metallic Pearls were an add on that I believe worked well. The red ribbon is a retired one that I found a piece in the bottom of my ribbon drawer as I was pulling out retired ones. Couldn’t let that go!!
I also used markers and stamped the flower image onto the front of the matching envelope. I try to remember to add that little touch.
Thank you for stopping in today. I hope you will reconsider, or look at for the first time, these cards and envelopes. It is a great deal.
My June Host Code is M2PNZPVT. Please use this code for orders under $150.00. I will have a small perk for those with orders over $50.00.
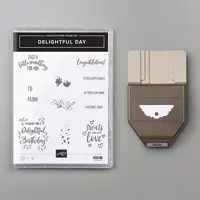
The new products I am using today may be one that you have not seen yet. At least I have not seen very many samples made with either of them. It is the new Delightful Day Bundle. It includes the Delightful Day stamp set and the Delightful Tag Topper Punch. I LOVE the punch. It is similar to the Scalloped Tag Topper Punch, which is one of my all time favorites.
I love using tags on the front of a card. Depending on how they are adhered, they could become a bookmark or decoration. This one is adhered with dimensional, but could just as easily be attached another way.
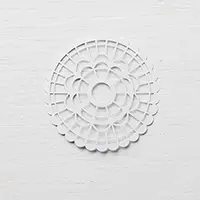
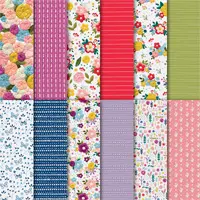
This card is a super quick and easy one. I used the Dot To Dot Embossing folder to give dimension and cuteness to the background. The DSP is Garden Impressions. It is punched with the Delightful Tag Topper Punch as well as the white layer. I placed one of the Pearlized Doilies behind just to give some more visual interest. I debated on another layer to my tag but opted for the simple doily.
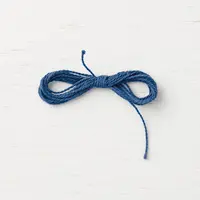
The tag pieces are 2 X 4 1/4 for the DSP and 1 3/4 X 3 3/4 for the Whisper White layer. I added a loop of baker’s twine in place of ribbon. I also added the clothespin from my old stash. I think the new mini binder clips would be perfect. Unfortunately I had not ordered them yet 🙁
Thank you for stopping by today. I hope you will give this sweet and simple card a try.
My May Host Code is XKQZNUBZ . Please use this code for orders under $150.00. I will have a small perk for those with orders over $50.00.
Click on the Last Chance icon to go to my Online store. This will give you up to date what is left on the retiring lists. And if you would like to place an order, I have a Host Code just below the icon.
I am having technical difficulties, so sorry I’ve been delayed in my posts. Some of you early risers may be wondering where I have been! Thank you for hanging with me.
If you follow me very often, you know I LOVE folds in my cards. Various folds are my favorite cards to make. So today I have another great fold that is super simple to do. And a great way to use those leftover pieces of DSP. A win/win to me:)
Sorry for the finger in the photo! It wanted to open up and not be photographed. Here is the card opened also.
I really like this simple fold and it really showcases the designer series paper. The white section could be DSP as well. You could add your sentiment and signature on the panel just above that spot, where I have the small flowers DSP. I wanted to use more of the stamps from the set so chose to have the large white area. The “stitching” is a nice touch and so easy to line up being the photopolymer stamps. I did not get it exactly centered but am happy with how they overlapped.
I used Stampin’ Write Markers to color the spray of leaves behind the main flower on the front. They are not listed in the supply list since you cannot purchase them individually. I really hate that!!
I have the measurements listed below. If you have any questions, please let me know.
Thank you for visiting today! I hope you have a great day and will return tomorrow.
Measurements / Directions:
Card base is 5 1/2 X 11 (with 8 1/2 X 11, you only get one card from the piece)
Score at 1 1/4, 4, 6 3/4, Fold and Burnish, then make Mountain/Valley folds
Cut DSP 2 @ 1 X 5 1/4 ( This is for the smallest section and I used different patterns for variety)
Cut DSP 2 @ 2 1/2 X 5 1/4 ( or 1 DSP and 1 White if you want your sentiment there)
Cut 1 White (or DSP) at 4 X 5 1/4
My May Host Code is XKQZNUBZ . Please use this code for orders under $150.00. I will have a small perk for those with orders over $50.00.
Click on the Last Chance icon to go to my Online store. This will give you up to date what is left on the retiring lists. And if you would like to place an order, I have a Host Code just below the icon.
If you place an order with me, please use the April Host Code of 3KNKXJFH. If your order is $75.00 (of product) or more, I will send you a small gift. If it is over $150.00 (of product) I will send you a small gift, but DO NOT use the code. 150.00 is the minimum host rewards so you get the host rewards.
I have a window card to share with you today. At least that is what I call it. You can purchase card bases with opening already cut in them, but we have the tools to do that ourselves easily. Please let me know what you think.
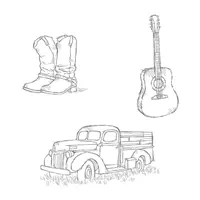
Country Livin’ 141925
With the exception of the window, this is a very simple card. There are a couple of techniques added however. But first the window. The birthday card that I shared on Friday had a Melon Mambo scalloped circle as a layer. I used that negative to sponge color onto the white inside layer of this card. I then used the same layer to cut the window from my card base. I was going to add another layer over the top, but instead just added the ring around the window. That is done by using the two closest sizes of the scalloped circle dies. Easy Peasy!!
Here is a view of the inside. I have not stamped another sentiment yet.
I love this stamp set, Country Livin’. It is unique to most of the Stampin’ Up! sets. It goes for male and female cards and is perfect for quick and easy cards. Sadly it is on the Retiring List 🙁
I stamped with Soft Suede Ink and then colored with the Crumb Cake Stampin’ Blends. Ideally I would have stamped first, masked the boots, and then sponged the background. Of course I didn’t think of that until after I had made the background. A bit of the blue carries through onto the boots, but in a way it adds the “worn” look the boots need.
Thank you for stopping by today. I appreciate you and hope you will return tomorrow. I have the complete list of supplies at the bottom of the page.
My May Host Code is XKQZNUBZ . Please use this code for orders under $150.00. I will have a small perk for those with orders over $50.00.
Click on the Last Chance icon to go to my Online store. This will give you up to date what is left on the retiring lists. And if you would like to place an order, I have a Host Code just below the icon.
If you place an order with me, please use the April Host Code of 3KNKXJFH. If your order is $75.00 (of product) or more, I will send you a small gift. If it is over $150.00 (of product) I will send you a small gift, but DO NOT use the code. 150.00 is the minimum host rewards so you get the host rewards.
The content in this blog is the sole responsibility of Jackie Beers as an Independent Stampin' Up! Demonstrator. The use of and content of classes, services or products offered is not endorsed by Stampin' Up!