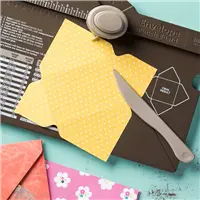
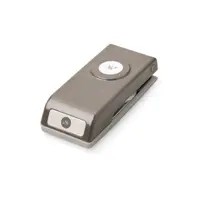
One of the tools that is retiring soon is the much loved Envelope Punch Board. I must say that I cannot remember the last time I used it for an envelope vs making a box or treat holder. So that said, I will miss this versatile tool. To say goodbye I have made another little box with it.
I do not know who created this version. I had it on my desk for some time. I’m sure my friend and fellow demonstrator Julie DiMatteo has a version. I will have the simple directions listed below.
So here is the cute little box. It just happens to hold a Ghirardelli Chocolate!
Envelope Punch Board, 133774
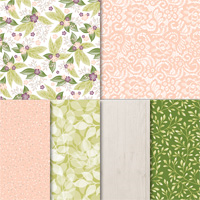
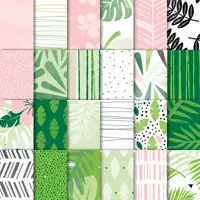
This paper is the Garden Impressions 6X6 Designer Series Paper Stack. It is perfect anytime but especially for spring. And depending on the size of the box you are making it may be a perfect size. I used a 4 1/4 X 4 1/4 piece, plus used one of the cutoff pieces for the bellyband.
Here is the inside view:
These are very quick to make. The most time is just deciding on which beautiful paper you want to use! I have the measurements and simple directions below.
I am giving you a sneak peek of a new stamp set as well. It is the Celebrate With Cake. It will be available in the upcoming annual catalog. It is one of the several that Stampin’ Up! has designed for a stamper with the #simplestamping in mind. I LOVE it!!!
Directions:
4 1/4 X 4 1/4 card stock or DSP
Start at the 1 3/4 mark on the Envelope Punch Board, punch and score
Slide down to the 2 1/4 mark, punch and score.
Now just rotate to all sides and punch and score by lining up the score lines
Fold and burnish on all the score lines
Cut away the four small corner squares
Decide which is the top.
Round the edges of the top and bottom sections using the Envelope Punch Board Corner Rounder feature.
Lay your piece of chocolate inside and dry fit the sides and bottom sections.
Add glue or adhesive of choice to the two side pieces where the bottom piece will cover it.
Cut a 5 1/4 X 3/4 strip for the bellyband
Dry fit the bellyband by using your fingers to crease it as you fold it around.
Adhere the two ends together and cover the seam with your decoration
Thank you for stopping in today. I have included all of the products used at the bottom of the post. If you have any questions about products or my directions, please do not hesitate to contact me.
The Clearance Rack has been UPDATED again!!!
Click on the Last Chance icon to go to my Online store. This will give you up to date what is left on the retiring lists. And if you would like to place an order, I have a Host Code just below the icon.
If you place an order with me, please use the April Host Code of 3KNKXJFH. If your order is $75.00 (of product) or more, I will send you a small gift. If it is over $150.00 (of product) I will send you a small gift, but DO NOT use the code. 150.00 is the minimum host rewards so you get the host rewards.
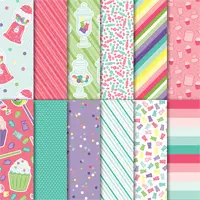
I am trying to use the gorgeous designer series paper that will soon be retiring. I love it all and want to keep it. But instead I am sharing it with you and as birthday cards I send.
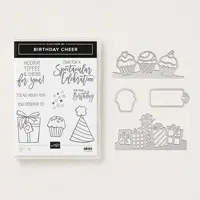
Birthday Cheer Bundle, 150576
This How Sweet It Is Designer Series Paper is just wonderful. This is two different pieces from the package. I chose the simple white for the die cut to showcase the paper.
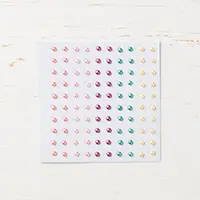
The Birthday Tag ended up being a bit large, but then that is what the card is all about! I attached it with the Glitter Enamel Dot on the cupcake.
Thank you for stopping in today! I very much appreciate it and hope you will return tomorrow. The complete list of supplies I used are at the bottom of the post.
Click on the Last Chance icon to go to my Online store. This will give you up to date what is left on the retiring lists. And if you would like to place an order, I have a Host Code just below the icon.
If you place an order with me, please use the April Host Code of 3KNKXJFH. If your order is $75.00 (of product) or more, I will send you a small gift. If it is over $150.00 (of product) I will send you a small gift, but DO NOT use the code. 150.00 is the minimum host rewards so you get the host rewards.
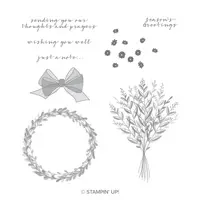
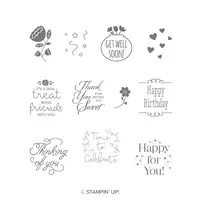
I know I say I love a stamp set quite often, and I do love so many of the sets. The one I am using today is the first of the “distinctive” type stamps that I fell for. It is the Wishing You Well stamp set. It was in the Holiday Catalog and carried over to the Occasions Catalog. Unfortunately it did not make the cut for the upcoming new Annual Catalog. (Insert Sad Face!)
So I had to make a quick and easy #simplestamping card with it. The set is just perfect for the simple stamping. The #simplestamping is a challenge that Sara Douglass (SU CEO) did back in November. It is going back to basics with Stamps, Paper, Ink. Sometimes I think we get carried away with the embellishments and layers. This is a great way to get back to basic stamping. Here is my card for today.
Wishing You Well, 147864
I have to say, my most favorite stamp in this set is the bow. It is so delicate looking but the shading the stamp gives is remarkable. Plus it is very easy to fussy cut if you wanted to raise it for another look.
I made this card with my Stamp Club yesterday. The only thing I did differently is add a couple of the Share What You Love Artisan Pearls to a few flowers. It draws your eye more to the flower. But I wanted to share with you the simpler version. All this card took was some card stock, two ink pads, and one stamp set. This would be a great one to make multiples of.
Thank you for visiting today. As always, the complete supply list is at the bottom of the post.
Click on the Last Chance icon to go to my Online store. This will give you up to date what is left on the retiring lists. And if you would like to place an order, I have a Host Code just below the icon.
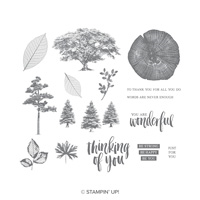
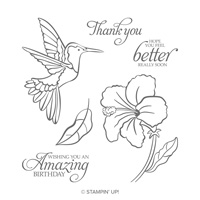
I have a very simple and quick card to share today. I have fallen back to the annual catalog for the Rooted In Nature stamp set. I wanted to showcase some of the retiring colors and thought the nature set would be perfect.
Rooted In Nature, 146482
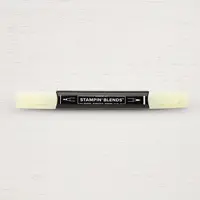
I used the Tranquil Tide and Lemon Lime Twist retiring ink colors as well as Granny Apple Green. The leaf that looks sort of Blue is the Tranquil Tide. It is really amazing how colors sort of change when next to other colors.
The sentiment is a favorite of mine. I love the look it gives. I flanked it with the Lemon Lime Twist smaller leaves and then made a tag from the Banner Triple Punch. Of course I had to add something else. So I decided on the Linen Thread. You can never go wrong with that thread!!
Thank you for stopping by today. I appreciate it and as always have listed all of the products used at the bottom of the post.
Click on the Last Chance icon to go to my Online store. This will give you up to date what is left on the retiring lists. And if you would like to place an order, I have a Host Code just below the icon.
If you place an order with me, please use the April Host Code of 3KNKXJFH. If your order is $75.00 (of product) or more, I will send you a small gift. If it is over $150.00 (of product) I will send you a small gift, but DO NOT use the code. 150.00 is the minimum host rewards so you get the host rewards.
Welcome to InKing Royalty’s April Blog Hop! This year’s Blog Hop themes are inspired by a single word – and this month our projects are centered around SPRING. Spring is a special time of year – it’s fun to celebrate the beauty of nature and to get back outside during this transition of the seasons. We are excited to share our creations with you today! After you read my post, I hope you’ll hop over to the next person on the list at the base of this post.
My card is a fun fold that I have not done in years. I found one I had made in some cleaning out I have been doing and then saw one on Pinterest almost the next day. So I thought today’s Hop would be a great time to bring it out again. As the title says, it is a Squash Card. That is a different name for a funky fold. I have several different photos of the closed and open card. Please bare with me.
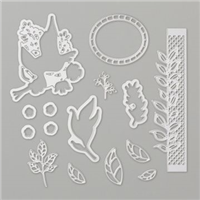
Wonderful Floral Dies, 148529
This is the closed up look. The card ends up being 4 1/4 X 4 1/4. Even though it is a little thicker than a regular A2 card, it still fits in the A2 envelope. And the bonus of that is no extra postage charge!
Here is it opening:
This view gives you the idea of how you would insure the inside decorations do not get folded or bent. And Here is another of a little more open.
And the final of a fully opened card.
Can you see that you could easily add a gift card holder to the left hand side? I was tempted to redo the entire card when I had that thought!! Sanity prevailed though and I settled for just giving you that idea.
I used the Wonderful Floral Dies and the Floral Romance Designer Series Paper to create the die cuts and the leaves. I love the look of the leaves cut from the DSP. The butterfly was laying on my desk from a previous project and I thought it would fit perfectly on that last panel.
This card began with an 8 1/2 X 8 1/2 piece of DSP. I scored at 4 1/4 on two sides so that it is quartered. I then scored from one corner to the other. After burnishing on the score lines, fold the two diagonal score lines to the inside and burnish again. That is what makes the fun fold. Then decorate as you see fit. The card I saw on Pinterest was made by Lyssa Zwolanek of Song Of My Heart in 2015. You may be able to find it or a newer version. Of course, I would be very happy to assist you in making one like this if you contact me.
All of the supplies used are at the bottom of the post. Stampin’ Up! updated the Clearance Rack on Monday, so please check it out for some awesome deals.
Thank you for stopping by today. I hope you’ll hop along to the next stop on the bloghop, Julie DiMatteo at The Paper Pixie. There’s lots of inspiration to be found in this group – and you don’t want to miss it!
Thank you for hopping along with us. If you get stuck during the Blog Hop, please use this line-up as a guide:
Click on the Last Chance icon to go to my Online store. This will give you up to date what is left on the retiring lists. And if you would like to place an order, I have a Host Code just below the icon.
If you place an order with me, please use the April Host Code of 3KNKXJFH. If your order is $75.00 (of product) or more, I will send you a small gift. If it is over $150.00 (of product) I will send you a small gift, but DO NOT use the code. 150.00 is the minimum host rewards so you get the host rewards.
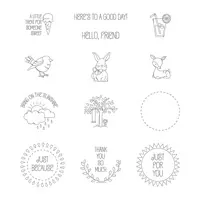
I would forget my brain if it wasn’t attached! I forgot to take a photo of my treat box that I used as table favors and give aways at OnStage last week. I used the directions from my fellow Demonstrator and 3D Queen Julie DiMatteo to make them. They are so quick to do that I needed some for another occasions and will share that one with you today. I have a link to Julie’s post and video. The only difference is that I shortened the flap and tucked it inside as opposed to the longer flap and magnet closure that Julie used. They are both after the pictures.
A Good Day 145873
I don’t know if you can see the little finger groove to help in opening.
This is a better shot of the finger groove and the tucked in flap.
And here is the good stuff on the inside! The ones from OnStage held a Snack size Hershey bar, but I used all of those. So these each had two Ghirardelli Minis.
Here is the post from Julie on the treat holder. Click HERE . The only difference is that the size is 4 X 4 1/2 for mine instead of her 4 X 5. Do all the measurements just as Julie does. The right side of the 4 1/2 will have two score marks 1/2 apart and not a longer as hers does. I simply rounded that end and used the 1/2″ circle punch to make a finger groove. Both are super easy to make.
Thank you for visiting today. I hope you enjoyed the little box. please come back tomorrow for the monthly InKing Royalty Blog Hop! You will see several really nice projects. And as always, my supply list is at the bottom of the post.
Reminder: I have used this sweet stamp set, A Good Day, twice this week. It is a favorite Go To set for little tags. It is on the retiring list. So don’t let it get away from you!
Click on the Last Chance icon to go to my Online store. This will give you up to date what is left on the retiring lists. And if you would like to place an order, I have a Host Code just below the icon.
If you place an order with me, please use the April Host Code of 3KNKXJFH. If your order is $75.00 (of product) or more, I will send you a small gift. If it is over $150.00 (of product) I will send you a small gift, but DO NOT use the code. 150.00 is the minimum host rewards so you get the host rewards.
The content in this blog is the sole responsibility of Jackie Beers as an Independent Stampin' Up! Demonstrator. The use of and content of classes, services or products offered is not endorsed by Stampin' Up!