This time of year offers opportunities for a variety of card themes. It is hard to believe that we will be making Christmas cards soon, or even now! I have a little Fun Fold card to share with you today.
Stamps and Dies
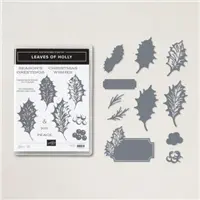
These fun holly leaves and berries are from the Leaves of Holly Bundle which includes the stamp and Holly Berry Dies. There are solid leaves plus the open ones that I have used that are awesome layered together. The berries, if you can see up close, are actually layered. Sweet Sorbet and Poppy Parade were layered to show the shading.
The sentiment and it’s layer are from the Bundle also. To have the little ticket like notches on the corners of that layer adds great detail as opposed to a straight strip.
Papers and Finishes
The DSP was the consideration for the specific greens and reds chosen. It is from the Santa Express Designer Series Paper. Shaded Spruce was pulled from the paper for the card base and the holly leaves. The layer of White, along with the White sentiment layer helps to make others pop against that darker background.
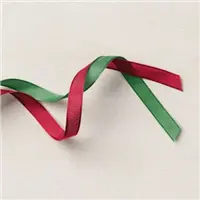
The real red ribbon is from the Red and Green combo pack. It is very easy to work with for tying bows, which I love. To give a touch of sparkle, I added an Opal Dot from the 2021-2023 Opal Dots.
Fold
This card is a little bit narrower than a normal card due to the fold. Here is a look at the open card.
To make the angle pocket on the inside required a 10 3/4 length of cardstock and then divide that into thirds. So it had no choice but to be a little smaller. That is not a problem for me and hopefully not for you either. The card begins with 10 3/4 X 5 1/2 and is scored at 3 5/8 and 7 1/4. On the far right section, cut from the score line down to the outer bottom corner. When folded inside, it creates the little pocket. Only place a small amount of glue at the bottom of the pocket to leave room for the insert. Plus, a gift card will fit there as well! That is a win in my book.
The inside DSP is the reverse of the front piece. It is cut 3 X 4 7/8 and cut on the diagonal. When making the diagonal cut, have your preferred side up. Cut from top right to bottom left. The inside White layer is 3 1/4 X 5.
Mini Catalog and Sale-A-Bration
Click on either catalog photo and you will be taken to my Online Store where you can download either or both catalogs.
HOST CODE
My August Host Code is H9KF4JUC. Please use this code for orders under $150.00. I will have a small gift for those with orders over $50.00 in addition to the Perk Rewards Program. You can read all of the information at the top of the page in the Menu Bar under SHOP / Perks.
Thank you for stopping by today. I hope you enjoyed today’s project and will come back. I do read and reply to all of the comments individually. They mean a lot to me. Please reach out if you have a question.
Today’s card is another that qualifies as #simplestamping. This one is a very “clean” card, which is not something I do very often.
Stamps
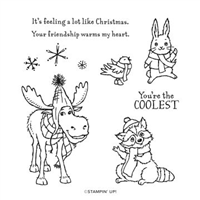
The All Bundled Up stamp set from the Mini Catalog is so cute! The various little critters have been used by me several times since the catalog launched. Animals are a favorite image and these are top notch. These are easy to color and have some wonderful expressions. This little guy was stamped with Memento Tuxedo Black Ink and then colored using Crumb Cake, Pool Party and Balmy Blue Stampin’ Blends. To help ground him, I used the light Pool Party Blend and squiggled a bit of a shadow at his feet.
The second stamp set used on this card is the Peaceful Deer stamp set. Only sentiments were used. There was temptation for a few of the small images of this set. However, I restrained myself and stuck with the simplicity of the single bunny.
Layout
A layout of White on White is such a great choice and makes the perfect “clean” card. But I went just a step further and did some dry embossing on the top layer of White. Using my Simply Scored, I scored all four sides at 1/4″ and 3/8″. It does not show well in the photo. There is a bit at the top you can see. Please trust me that it is on all four sides! With most of the top layer left white, I thought it needed a little something. And a few score lines really add to the card. Plus by raising the top layer with Stampin’ Dimensionals, that gives more depth to the card.
The final touch was adding a little bling. Even a little bunny needs some bling. So there are three of the Fine Sparkle Gems added above the sentiment. To be different, I added two that are a Pool Party color and one of a more Balmy Blue color.
Sale-A-Bration
This is the last few days of Sale-A-Bration for 2022! These Free items go away when the calendar clicks over to September. And there are quite a lot of awesome items which you can get at no cost with a $50.00 or $100.00 order.
Mini Catalog and Sale-A-Bration
Click on either catalog photo and you will be taken to my Online Store where you can download either or both catalogs.
HOST CODE
My August Host Code is H9KF4JUC. Please use this code for orders under $150.00. I will have a small gift for those with orders over $50.00 in addition to the Perk Rewards Program. You can read all of the information at the top of the page in the Menu Bar under SHOP / Perks.
Thank you for stopping by today. I hope you enjoyed today’s project and will come back. I do read and reply to all of the comments individually. They mean a lot to me. Please reach out if you have a question.
The Splendid Thoughts Bundle has become a favorite of mine. And since Hugs are a favorite as well, I decided to make a Splendid Hug!
Idea and Colors
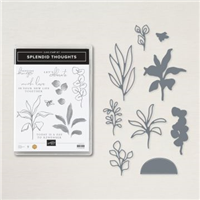
This card came from an idea I had a few weeks ago. If you look closely at the photo you will see that the Old Olive leaf appears to be stamped. Actually it is the negative from a previous card and I used that negative to add the image using Blending Brushes. That was the idea from previously. And surprisingly it actually worked out!! The Stampin’ Up! Blending Brushes were used with Old Olive Ink to put the base for this focal layer.
With knowing I was going to use this soft DSP sheet from the Splendid Day Designer Series Paper, I kept the other colors to a softer nature. The different die cut leaves/stems are from Pool Party and Soft Sea Foam cardstock. To be a variety of greenish colors, they all work well together.
Stamp Set and Dies
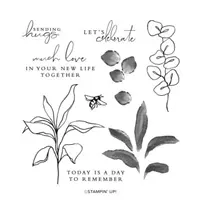
You know how I love making a card with only one stamp set. This one is a one Bundle card. It is the Splendid Thoughts Bundle that includes the Splendid Thoughts stamp set and matching Splendid Stems dies. Even the sentiment and sentiment shape are from the Bundle. And that shape is an all time favorite! It is a little unique and fits quite a few sentiment as well.
Finishes
To finish this card I added a couple of things. First is the adorable little bee. He is from the same stamp set and is colored with Stampin’ Blends. One of the lovely Festive Pearls is added on the sentiment layer. This one color, and I’m not really sure what color it is, seems to take on the colors it is around. To me it looks like Soft Succulent here.
And the finishing touch for this card is the beautiful Soft Sea Foam Ribbon. This ribbon is a dream to work with for tying bows. To keep the bow from covering up the sentiment, it had to be placed on the left side. Then I realized it would be hanging off the card. So the final decision was to move the focal layer over to the right hand side. It is a different look and I love it! Lucky for me there are no rules on things being lined up properly.
Mini Catalog and Sale-A-Bration
Click on either catalog photo and you will be taken to my Online Store where you can download either or both catalogs.
HOST CODE
My August Host Code is H9KF4JUC. Please use this code for orders under $150.00. I will have a small gift for those with orders over $50.00 in addition to the Perk Rewards Program. You can read all of the information at the top of the page in the Menu Bar under SHOP / Perks.
Thank you for stopping by today. I hope you enjoyed today’s project and will come back. I do read and reply to all of the comments individually. They mean a lot to me. Please reach out if you have a question.
Welcome to our Fun Fold Blog Hop! All of the Stampin’ Up Demonstrators involved love Fun Folds and sharing them with all of you. Once you have finished my blog post there is a list at the bottom for you to continue Hopping along to see the other creations. We are hoping you love them and will leave some comments.
The Fun Fold that I have chosen to share with you today is a Buckle Fold. It has been around for quite a while and is a variation of a Double Fold that has even more variations. That is what is so fun about card making! For a Fun Fold, I went with a fun holiday and chose Halloween.
Fun Fold
If you are a regular follower of my blog, I always say I begin with the paper. Since this was a Fun Fold Hop, I decided on the fold and then went looking for everything else that would fit. So I am going to begin with the fold basics.
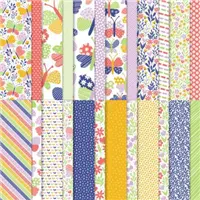
The card base is Gorgeous Grape cardstock that is cut 4 1/4 X 8 5/8 and scored at 3 1/8. And the beautiful DSP is from the Butterfly Kisses Designer Series Paper cut to 2 7/8 X 4, Those colors are what decided the Gorgeous Grape and the layer of calypso Coral. The Calypso Coral layer is cut to 3 3/4 X 3 3/4. And the White layer is cut to 3 1/2 X 7 and scored at 3 1/2.
To make the Buckle, I used the Sending Dies. There is a long and narrow sentiment die which fit perfectly. Actually It was the longest die that is narrow I have in my collection! After measuring the die length, the height of the White piece was determined and that my focal images would fit on it. Adhere the DSP piece prior to die cutting the slit. Layer the folded white onto the Calypso Coral layer and hold in place to ensure the “buckle” works. Here is a closeup view of the buckle part.
The white piece easily slips through the slit to hold the card closed. Other than getting the die centered on that front piece of the card, this is a simple card to make.
Stamps
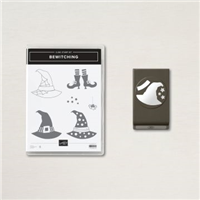
Now that the card is basically complete it is all down to the fun decorations. The Bewitching Bundle, stamp set and Witch Hat Builder punch, are so cute. One of the hardest things was choosing which hat to use! By going with the mostly solid hat, I could just punch the hat using Basic Black cardstock. Stamping the hat on scrap in Gorgeous Grape and punching it out only the hat band gave a more colorful one. It is colored with Stampin’ Blends. The leggings and shoes are stamped and colored with Stampin’ Blends also.
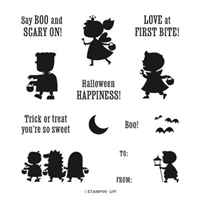
The front of the card sentiment is the little “BOO”. It was stamped and die cut with the smallest of circles. Both the Boo and the inside sentiment are from the second cute Halloween stamp set. This one is the Scary Cute (how appropriate) set.
Embellishments
By raising the hat with Stampin’ Dimesnionals, it gives a bit of depth to the card. And did you notice all of the stars? Those are on the punch as well. The black ones came when I punched out the black hat. And the purple ones were made with just a corner of a scrap of Gorgeous Grape cardstock. They are all adhered around but needed something. So all but the smallest received a Rhinestone, including the little BOO. Even witches need bling!
Thank you for reading my post today! It is very much appreciated. Below is the list of other designer who have more Fun Folds for you to check out.
Click on either catalog photo and you will be taken to my Online Store where you can download either or both catalogs.
HOST CODE
My August Host Code is H9KF4JUC. Please use this code for orders under $150.00. I will have a small gift for those with orders over $50.00 in addition to the Perk Rewards Program. You can read all of the information at the top of the page in the Menu Bar under SHOP / Perks.
Thank you for stopping by today. I hope you enjoyed today’s project and will come back. I do read and reply to all of the comments individually. They mean a lot to me. Please reach out if you have a question.
Today’s project is a fun and quick masculine card. This is a #simplestamping card, which means you do not need a lot of products to accomplish. And that can be the best kind.
Stamps
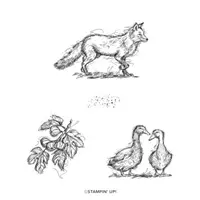
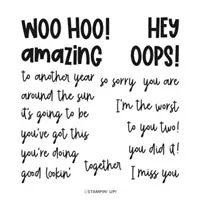
There are two different stamp sets used on this card. The first is the Stylish Sketches, which is where the fox is from. It is a Free with a $50.00 qualifying order during Sale-A-Bration. And the second is the Amazing Phrasing stamp set. This is such a fun set of great sentiment and phrases. They mix and mingle together or alone. And it is also a Sale-A-Bration stamp set that is Free with a $100.00 qualifying order. (Qualifying means it is the amount prior to shipping & tax)
With using a darker piece of DSP for the fox, I knew it would need multiple stampings to be dark enough. So out came the Stamparatus. This way I could stamp, check the darkness, and repeat as much as needed. The sentiment was stamped on scrap paper. It is actually two different stamps. The Hey is alone. After stamping I trimmed around them using my Paper Snips. The Hey was more squarely cut to emphasize the boldness . And the other two words were more closely snipped to mimic the Charming Sentiments Bundle where the words are closely die cut. That is such a fun look!
Paper
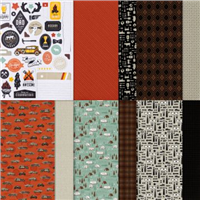
The DSP used is two pieces from the He’s The Man Designer Series Paper. With the fox, I knew I wanted masculine and loved the Cajun Craze striped piece. But I thought finding a complimentary piece might be difficult. It was a piece of cake. The next sheet I pulled out was this herringbone looking piece in soft looking Sahara Sand. The two work beautifully together. Using Basic Black cardstock was more to draw more from the fox image. And it is difficult to see in the photo, but the Black behind the fox is over top of the Sahara Sand DSP.
Finishing
Actually adding the fussy cut sentiment was one of the last things I placed. They are all raised with Dimensionals. For the final touch I added three of the Brushed Metallic Dots. These are so nice and come in three different shades of metal.
SAB is winding down!
There are only ten days left of Sale-A-Bration. If you have any items left on your wish list, now is the time to place an order. There are items in the little booklet, which is shown below and can be downloaded. Or the first photo which has the new additions to the product list for August. Either way once we hit September 1 SAB is over for 2022.
Mini Catalog and Sale-A-Bration
Click on either catalog photo and you will be taken to my Online Store where you can download either or both catalogs.
HOST CODE
My August Host Code is H9KF4JUC. Please use this code for orders under $150.00. I will have a small gift for those with orders over $50.00 in addition to the Perk Rewards Program. You can read all of the information at the top of the page in the Menu Bar under SHOP / Perks.
Thank you for stopping by today. I hope you enjoyed today’s project and will come back. I do read and reply to all of the comments individually. They mean a lot to me. Please reach out if you have a question.
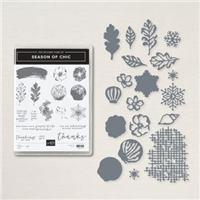
The Season of Chic and Texture Chic is one of the prettiest suites ever! So a birthday card using these beautiful products has to be a really nice card.
Paper
Because this paper is so beautiful, it has to be the beginning. Even though it looks a little Shabby Chic, this is a layout I have used many times. Again, it is the beautiful paper that seems to give it a different look. You may be as surprised as I am! This gorgeous paper is the Texture Chic Designer Series Paper. This card showcases both sides of the same piece.
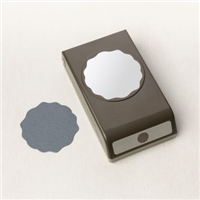
Pool Party was pulled from the “back side” pattern. You can see it as the center layer and the bottom strip. My idea was to punch the center of the DSP using the Decorative Circle Punch and then layer the reverse side back into the spot. It did not fit perfectly and was not what I had envisioned. Even though it does not show well in the picture, I punched a Decorative Circle from a piece of Gold Foil and layered it behind the DSP circle. So now you see little pieces of Pool Party and Gold behind the focal layer.
Stamps and Dies
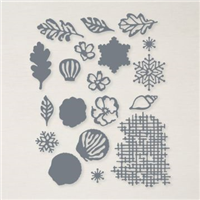
The Season Of Chic stamp set has a variety of “seasonal” stamps. But I went with the simple, but elegant, flower. It is stamped using Smoky Slate and then colored with the Petal Pink Stampin’ Blends. It and the overlay edging are both cut with the matching Chic Dies . The overlay was left white and only adhered by a glue dot in the center. Surprisingly it gives quite a bit of definition like that.
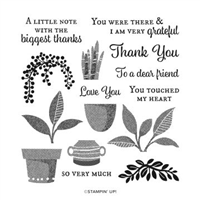
For the sentiment I wanted a more simple one. This one was found in the Plentiful Plants stamp set. And to give it a bit of a bolder pop, I added a scrap of the Pool Party cardstock to hang below the bottom of the sentiment. Then both were cut at an angle.
Finishing Touches
To help ground the sentiment and add a bit more bling, I used a strip of the Gold Ribbon beneath the sentiment layer. It helps everything to pop a bit more from the darker DSP strip there. And the finishing touch is the larger of the Champagne Rhinestones in the center of the flower. The lightest part of the DSP is a Petal Pink, which is the card base, but there are darker variations all over. The champagne color fit right in!
Mini Catalog and Sale-A-Bration
Click on either catalog photo and you will be taken to my Online Store where you can download either or both catalogs.
HOST CODE
My August Host Code is H9KF4JUC. Please use this code for orders under $150.00. I will have a small gift for those with orders over $50.00 in addition to the Perk Rewards Program. You can read all of the information at the top of the page in the Menu Bar under SHOP / Perks.
Thank you for stopping by today. I hope you enjoyed today’s project and will come back. I do read and reply to all of the comments individually. They mean a lot to me. Please reach out if you have a question.
The content in this blog is the sole responsibility of Jackie Beers as an Independent Stampin' Up! Demonstrator. The use of and content of classes, services or products offered is not endorsed by Stampin' Up!