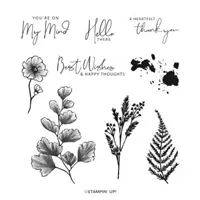
Ferns are the theme of today’s card. Nature’s Prints is an awesome stamp set for any card need. Flexibility is a trait of a wonderful stamp set.
Beginning
To begin with the colors is only part of where this card started. The Sweet Sorbet embossed piece is the actual beginning. It was a discarded piece laying on my desk. And as they say….the rest is history! LOL!! When I saw the embossing from using the Fern 3D Embossing Folder, I knew which stamp set I wanted to use. And that led to what colors. Based on the Sweet Sorbet I decided to go with bright colors and opted for Starry Sky.
Stamps
The Nature’s Prints stamp set is a perfect one for a variety of reasons. But for this card it was due to the sentiments and the fern stamp in the set. That fern stamp matches the embossing on the Sweet Sorbet layer. To mimic that I stamped tone on tone down the side of the card base. Then to carry that for the sentiment I stamped off once and then stamped the fern onto the White layer. The sentiment is stamped using Sweet Sorbet Ink.
Finishes
Actually the next step deciding how to layer everything. To give more dimension and texture I tore the top and right side of the embossed Sweet Sorbet layer. After adding the sentiment layer I tied a bow around it using the beautiful Starry Sky Metallic Ribbon. For the finishing touch I had to add some bling. This time I went with the Classic Matte Dots in White. They bring help blend the White sentiment layer with the other colors.
HOST CODE
My September Host Code is KVGNY4TA. Please use this code for orders under $150.00. I will have a small gift for those with orders over $50.00 in addition to the Perk Rewards Program. You can read all of the information at the top of the page in the Menu Bar under SHOP / Perks.
Thank you for stopping by today. I hope you enjoyed today’s project and will come back. I do read and reply to all of the comments individually. They mean a lot to me. Please reach out if you have a question.
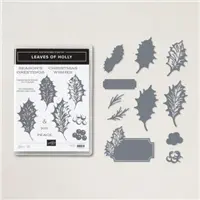
Even a little bit of gold is a bold look on a card. And today’s project showcases gold in a fun way with the Leaves of Holly Bundle.
Paper
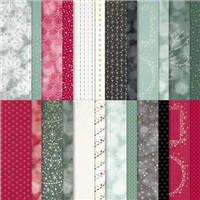
The various papers are the star of this card. By using Gold Foil for the holly leaves gives them extra Pop and more shine for the card. And the beautiful piece of DSP peeking from behind the Soft Succulent contains gold flecks. This paper is from the Lights Aglow Designer Series Paper. Each piece of the gorgeous paper in this pack has bits of gold in them. It being a 6X6 makes the sheets the perfect size to cut strips as I did here.
Stamps and Dies
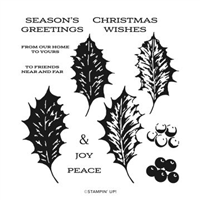
The Leaves Of Holly Bundle is a great Winter and Christmas Bundle. The holly leaves are wonderful in that there are both detailed and more solid stamps for each leaf. There are also matching Dies for each of the layering leaves. All of the sentiments are good ones. The shape of the sentiment layer is an included Die too.
Extras
The dividing of the Soft Succulent layer is the highlight of this card but It still needed some texture. By using the Timeworn Type 3D Embossing Folder it made a variety of different textures. And the final touch of a Festive Pearl gives a bit of bling to the sentiment. Between the pearl and the shaped sentiment layer helps it not be totally overlooked from all of the gold!
Directions
This layout is a case of a Mary Fish card. The card base is a normal one but the layer is the exciting part. To create the layer cut a piece of Soft Succulent to 3 1/4″ X 5 1/4″ and then emboss it. Next cut the left side off at 1″. A 1″ X 5 1/4″ strip of the wonderful DSP is what makes this fun layer.
Place Stampin’ Dimensionals down the center of the back of the 1″ piece of cardstock that was cut. Adhere it to the left side of your card with equal space at the top, bottom, and left edge. Next add adhesive to the strip of DSP and place it just a bit underneath the edge of the raised cardtock and flush at top and bottom. Finally add Stampin’ Dimensionals to the larger piece of cardstock and place it on the right side the same way as the left side.
HOST CODE
My September Host Code is KVGNY4TA. Please use this code for orders under $150.00. Those with orders over $50.00, in addition to the Perk Rewards Program, will receive a small gift from me. You can read all of the information at the top of the page in the Menu Bar under SHOP / Perks.
Thank you for stopping by today. I hope you enjoyed today’s project and will come back. I do read and reply to all of the comments individually. They mean a lot to me. Please reach out if you have a question.
Stampin’ Up! has Two great specials for the month of September. The first is that Each week will be a different set of discounted products! For this week it is a mixture of Dies, DSP, and embellishments. The second is that Dies have been added for some of the Annual Catalog stamp sets. These are available individually or as a bundle with the set. My favorite is one for This Birthday Piggy! Click on my button saying “Shop” and go to “Specials”. You will see both the Weekly Deals and the Perfect Partners special.
The Beach
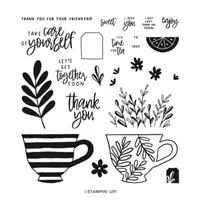
My project for you today is a fun Beachy card. The Beach is on my mind and this one turned out as I envisioned. SunKissed stamp set is not just a Christmas set.
Stamping
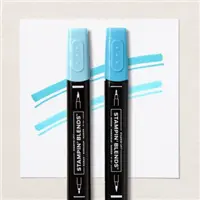
The Sunkissed stamp set is a simple beachy theme with both regular and Christmas sentiments. This little scene is what I plan on doing next week. That is doing nothing but sitting on the beach!! Until then I will share this beach with you. The stamping is the beach scene. It is stamped onto Sahara Sand cardstock with Memento Tuxedo Black Ink and colored using Stampin’ Blends. The darker “sand” area is a Crumb Cake Stampin’ Blend to create more depth.
The beach scene was torn along the water edge to give the beach and sand look. However the umbrella required a bit more finesse and was cut around. Then the beach scene is added to the DSP piece to give more of the 3D look. For the final stamping, I used Memento Black again and stamped the simple “Enjoy” from the Cup of Tea stamp set. That is definitely what I plan on doing.
Paper
Sadly I am a day late on sharing this card regarding the paper. The DSP piece is a reverse side of a piece from the Rings of Love Sale-A-Bration Designer Series Paper. But if you are lucky enough to have some, then you are ready. There is a similar piece in the Awash In Beauty DSP. To pull out the bit of Soft Sea Foam that is in the upper edge of the paper, I went with a Soft Sea Foam card base. That is an ocean color as well and fits in perfectly.
HOST CODE
My September Host Code is KVGNY4TA. Please use this code for orders under $150.00. I will have a small gift for those with orders over $50.00 in addition to the Perk Rewards Program. You can read all of the information at the top of the page in the Menu Bar under SHOP / Perks.
Thank you for stopping by today. I hope you enjoyed today’s project and will come back. I do read and reply to all of the comments individually. They mean a lot to me. Please reach out if you have a question.
Today is the Final Day of Sale-A-Bration for 2022. Today’s project showcases three of the available ones. The Hippest Hippos are definitely Smile worthy.
Stamps
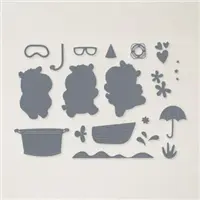
This adorable little hippo has such a cute expression! One of the things I love about Stampin’ Up! are the cute animal stamps. This Hippest Hippos stamp set is a Free from SAB with a $50.00 order. There are three of these adorable hippos. They are wonderful to color with Stampin’ Blends, which I have done here. And besides the sweet hippos, there are fun sentiments included in the set. This sweet thought is one of the sentiments.
Die Sets
There are two different Die sets used on this card, and both are available Free during Sale-A-Bration. First is the Hippo Dies. These come separately from the stamp set, but match perfectly. Which is a great idea in that if you are not interested in having both, you can choose to one you prefer. Although for me, having the matching dies simplifies everything. Also additional dies in the set are decorations for the hippos but do not have a matching stamp.
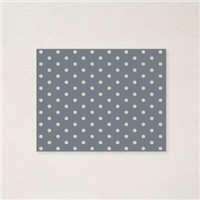
The second Die set used is the Dots and Spots Die. You can see that in the “More to SAB” lower in the post. Actually the Dots and Spots Die is in the current Annual Catalog. All of the “More” items are in the Annual Catalog. What a deal is that? To get them Free on this Final day of SAB. However, be sure to use the item number listed in the “more” flyer. It is different than the one in the catalog.
Finishes
Soft colors were what I chose to help the lovely hippo pop a bit more. And in following that, I gave the little flower a bright color of Polished Pink. To help that stand out I used the Double Oval Punch to layer the sentiment. And used more of the Polished Pink as the background. There is a simple White strip of cardstock for the hippo to stand on and hold the sentiment. For the final touch I gave the sentiment one of the 2022-2024 Matte Dots in Parakeet Party as its bling. This gives some sparkle and highlights the Soft Sea Foam layer.
Last Chance
As I have mentioned, this is the Final Day of Sale-A-Bration. Please do not let any of these items slip away if they are on your Wish List!
Mini Catalog and Sale-A-Bration
Click on either catalog photo and you will be taken to my Online Store where you can download either or both catalogs.
HOST CODE
My August Host Code is H9KF4JUC. Please use this code for orders under $150.00. I will have a small gift for those with orders over $50.00 in addition to the Perk Rewards Program. You can read all of the information at the top of the page in the Menu Bar under SHOP / Perks.
Thank you for stopping by today. I hope you enjoyed today’s project and will come back. I do read and reply to all of the comments individually. They mean a lot to me. Please reach out if you have a question.
Today’s project is a super simple card using the Wonderful World Bundle. And other than the inside, there is no stamping. How simple is that?
Wonderful World Bundle
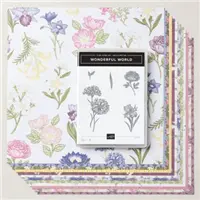
This cute and wonderful card is from the Wonderful World Bundle in Sale-A-Bration. And it is down to the wire for getting this FREE Bundle. Yes, this sweet Wonderful World stamp set with matching Wonderful World Designer Series paper is Free with a qualifying purchase of $100.00. But Sale-A-Bration ends tomorrow night. So if you have items left on your wish list, now is the time to get to my online store and place your order.
The stamp set Wonderful World is three beautiful flowers with a couple of additional leaves and stems. They are red rubber so could be colored in a variety of ways. Or you could do as I did! All I needed was a shape to die cut the flower I chose. It is hard to believe, but that focal flower is simply die cut from the Wonderful World Designer Series paper!
There are two sheets of the DSP which have a Flirty Flamingo background on one side and the opposite is covered in the flowers you see in the large piece of DSP I used. To get the circle shape, I used the stitched circle from the Celebration Tags Dies. But any circle or even oval would work. How simple is that?
Stamping
In the introduction I mentioned there was no stamping on the card. As you can see, that is correct. So in return I am showing a part of the card that I normally do not. And that is the envelope. Sending naked envelopes is something I try to avoid. But I generally do a smaller decorative stamp relating to the enclosed card. This time I went with the daffodil from the stamp set. It is stamped using So Saffron Ink on the envelope and on the inside of the card.
Finishes
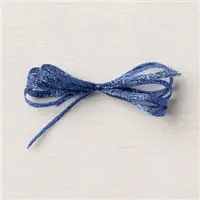
All of the colors came from the DSP of course. That is my usual method. And I highlighted the yellow by adding So Saffron instead of Daffodil Delight for a little softer look. With the addition of the Orchid Oasis Metallic Ribbon there is plenty of sparkle and shine. This ribbon is a dream to work with!
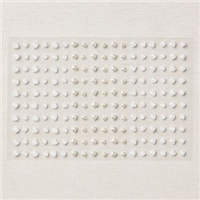
For the final touch, I raised the focal flower circle using Stampin’ Dimensionals. But trying to find what bling would be best on that piece was a bit more of a challenge. After some debate, I decided on the Heart Pearls. Flowers should be given from the heart, so I thought that was a perfect match.
Mini Catalog and Sale-A-Bration
Click on either catalog photo and you will be taken to my Online Store where you can download either or both catalogs.
HOST CODE
My August Host Code is H9KF4JUC. Please use this code for orders under $150.00. I will have a small gift for those with orders over $50.00 in addition to the Perk Rewards Program. You can read all of the information at the top of the page in the Menu Bar under SHOP / Perks.
Thank you for stopping by today. I hope you enjoyed today’s project and will come back. I do read and reply to all of the comments individually. They mean a lot to me. Please reach out if you have a question.
This is a Back To School card with an apple for the teacher. Except teachers probably deserve an entire basket full!
This card is for the Make My Monday Blog Challenge. Please click on the link and see what the other design team members have made for their version of Back To School. And you can submit your own card to the challenge also.
Stamps
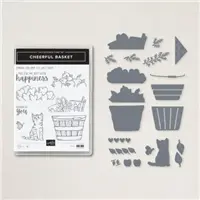
Two weeks ago the InKing Royalty Blog Hop’s theme was Back to School. It took some mixing and matching to make a card that fit the title. Now here is another challenge for the same type card! This one I came out a little easier on. The wonderful Cheerful Basket stamp set came to the rescue. There are a variety of fillings for this sweet little basket. And the apples seemed to fit the bill. However, I will admit to getting the idea from that last hop where someone used apples!
The basket is stamped using Soft Suede Ink and colored with Crumb Cake Stampin’ Blends. While the apples are stamped using Memento Tuxedo Black Ink and colored with Real Red and Granny Apple Green Stampin’ Blends. For the sentiment, I went with the wonderful Charming Sentiments Bundle. It is a stamp set of fun sentiments with matching Dies. The Dies cut just around the sentiments so it appears as if you fussy cut it.
Paper and Colors
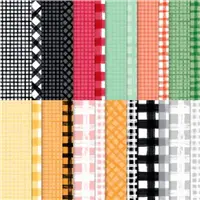
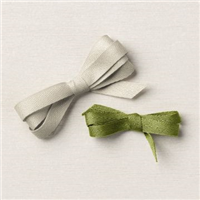
Of course the apples are the starring role of this card so it makes sense to do Real Red for the card. The gorgeous Gingham pattern is from the Gingham Cottage Designer Series paper. This piece has larger red and white check on the back side. But I thought this piece was perfect with the two shades of red. By adding the layer of White between the DSP and card base it helps to make the DSP pop. The old olive ribbon helps to pull the leaves out a bit as they are small and somewhat hidden. Plus it breaks up all of the red.
Card layout
This card would qualify as a Fun Fold. It has an offset gate fold look. Doing the Fun Fold was a way to break up the DSP and add some more depth to the card. Here is a look at the open card.
It may not show well, but the top section is quite a bit larger than the bottom. And this card could be made as a portrait layout using the same measurements. The card base is 5 1/2 X 8 1/2 and scored at 1 1/2 and 5 3/4. For the White layers, the bottom section is cut 1 1/4 X 5 1/4 and the top is cut to 2 1/2 X 5 1/4. The DSP layers are 1 X 5 and 2 1/4 X 5.
Mini Catalog and Sale-A-Bration
Click on either catalog photo and you will be taken to my Online Store where you can download either or both catalogs.
HOST CODE
My August Host Code is H9KF4JUC. Please use this code for orders under $150.00. I will have a small gift for those with orders over $50.00 in addition to the Perk Rewards Program. You can read all of the information at the top of the page in the Menu Bar under SHOP / Perks.
Thank you for stopping by today. I hope you enjoyed today’s project and will come back. I do read and reply to all of the comments individually. They mean a lot to me. Please reach out if you have a question.
The content in this blog is the sole responsibility of Jackie Beers as an Independent Stampin' Up! Demonstrator. The use of and content of classes, services or products offered is not endorsed by Stampin' Up!