I love cards with different folds! Today’s card sort of qualifies in that catagory. It is a scalloped circle card. You can make these with any die cut shape. This one is a cute little gift card.
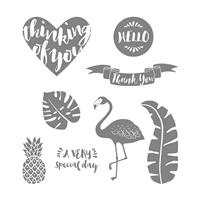
Pop of Paradise, 141581
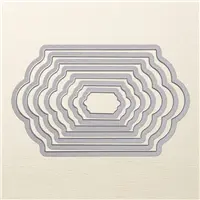
This little gift card, or it could be a little Random Act of Kindness card, is made using the Layering Circles Framelits. You fold your card stock, lay the die off the fold end (so that it isn’t cutting there), and VOILA! You have a circle card. How easy is that?? I then simple used the next two smaller scalloped circles to finish the card.
I hope you will give this technique a try! Let me know if you do please. I used Stampin’ Write Markers in Old Olive, Always Artichoke, Crushed Curry, and Soft Suede to color the pineapple and give it some depth.
Thank you for visiting today. I appreciate your visits and comments very much. I hope you have an awesome weekend! The supplies I used are listed at the bottom of the page.
Have you ever thought about becoming a Stampin’ Up! Demonstrator? During Sale-A-Bration is the perfect time to join. Not only are you getting the Ultimate Bundle ($125.00 worth of product for $99.00) but you also get to choose 2 additional stamp sets, up to $25.00 each. Additionally you will receive a 20% discount on any future purchases. Or, if you are just wanting to test drive the idea, you would not be required to make another purchase until July! There is no pressure for you to continue as a demonstrator. And there is no penalty if you decide not to continue. Please contact me and let’s talk about it. You can review the documents by clicking on the picture below.
Today I have a card that ended up pretty darn cute. But Oh My! It was ugly in between ! I was trying the Brusho powder and started out okay, made a mess, regrouped, and ended up back in the pretty cute category. I will let you decide if it is okay now 🙂
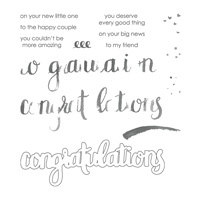
Yay You, 145946
What do you think? My original plan was an embossed butterfly with the surrounding area having the flecks of Brusho. That turned into a quick mess. Thankfully I had already embossed the butterfly. So I just began coloring it in. It is a little darker than intended, but it works. And after being cut out, it looks totally better than before. I definitely need more time with the Brusho powders.
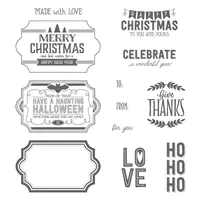
This sentiment is the star of the card. I love that statement and feel I should send it to several people on a regular basis who inspire me everyday!! It is from the Occasions Catalog Host set, which is usually overlooked. Now I would place a qualifying order, or have a party, specifically to get that sentiment! If you feel the same way, please give me a call and lets plan something!
Thank you so much for stopping by today. I very much appreciate you visiting and love to read your comments. I hope you have an awesome day!
The supplies I used are listed at the bottom of the page.
Have you ever thought about becoming a Stampin’ Up! Demonstrator? During Sale-A-Bration is the perfect time to join. Not only are you getting the Ultimate Bundle ($125.00 worth of product for $99.00) but you also get to choose 2 additional stamp sets, up to $25.00 each. Additionally you will receive a 20% discount on any future purchases. Or, if you are just wanting to test drive the idea, you would not be required to make another purchase until July! There is no pressure for you to continue as a demonstrator. And there is no penalty if you decide not to continue. Please contact me and let’s talk about it. You can review the documents by clicking on the picture below.
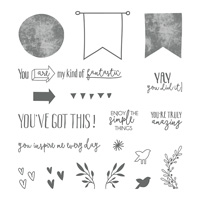
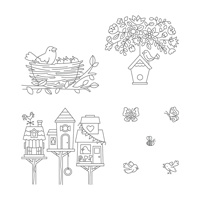
This Flying Home stamp set is just adorable. At first glance I thought it was too similar to some other ones. But then I thought of each of the stamps in a small frame. A perfect Springtime sampler. I did not go that route today though. This is just a sweet little 4 X 4 card that would be great for almost any occasion.
Flying Home, 145929
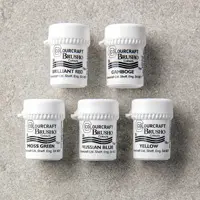
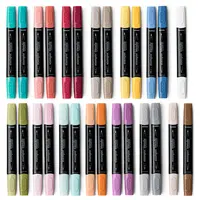
Of course, the perfect companion to this cute stamp set are the Stampin’ Blends. I know I have been utilizing them quite a lot. They are just so darn easy to use so I find myself reaching for them over and over.
I kept this card super simple. It is a 4 X 4 with Night of Navy as the base, and navy layered with Whisper White is all I used. Of course I played with a variety of colors in my flowers and birdhouse. 🙂
This card would be perfect for a Stampin’ Up! Party. It would be easy for any level of stamper. If you do not have a demonstrator I would love to talk with you and help you with your stamping needs.
Thank you so much for visiting today! I hope you have an awesome weekend and will stop back next week. The supplies I used are listed at the bottom of the page.
Have you ever thought about becoming a Stampin’ Up! Demonstrator? During Sale-A-Bration is the perfect time to join. Not only are you getting the Ultimate Bundle ($125.00 worth of product for $99.00) but you also get to choose 2 additional stamp sets, up to $25.00 each. Additionally you will receive a 20% discount on any future purchases. Or, if you are just wanting to test drive the idea, you would not be required to make another purchase until July! There is no pressure for you to continue as a demonstrator. And there is no penalty if you decide not to continue. Please contact me and let’s talk about it. You can review the documents by clicking on the picture below.
Before I get to the treat holder I have for you, I want to let you know about a special that begins today. The Fast Fuse Adhesive Mega Special is back!! Last year Stampin’ Up! had a promotion and it was so popular that supply depleted much quicker than expected. Therefore the special was shortened by quite a lot. It Is Back!!! From Today through February 12, when you purchase 1 Fast Fuse Adhesive, you will get 2 Fast Fuse Refills FREE !!! That is an awesome deal! I hope you will take advantage of it.
Now for the cute little treat holder I have made. It is super quick, simple, and easy to make multiples of. I used the Diaper Fold and 6 X 6 Designer Series Paper to create it.
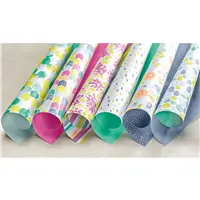
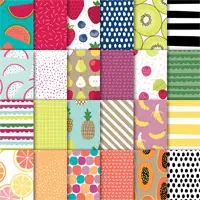
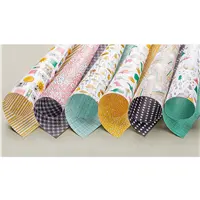
Tutti Fruiti 6 X 6 Designer Series Paper, 145606
I just adore this Tutti-Fruitti DSP. The colors are very vibrant and there are so many different designs. The sentiment is from the Yay You Host set from the Occasions Catalog. That set is wonderful and unfortunately gets overlooked being in the back of the little catalog.
I fit a Ghirardelli Chocolate into my little holder. But I know there are a lot of other candy, tea, etc that would fit in one of these. You can also make them larger. Just continue using a square sheet of card stock or DSP. The hardest decision to make is which direction you want the DSP to go!!
For a more finished product, I wrapped this treat holder up. I did not have any of the 3 X 6 Gussetted Bags, so I used the 6 X 6 bag and folded it. My tag is from the carried over from Holiday Catalog set, Labels To Love, and the Everyday Label Punch. I think this is a sweet little treat to give to someone.
Labels To Love, 144967
Thank you for stopping by today! I very much appreciate it and hope you will tell your friends to take a look at my creations. If you have any questions, please do not hesitate to contact me.
Remember the FAST FUSE SPECIAL !!!!
Have you ever thought about becoming a Stampin’ Up! Demonstrator? During Sale-A-Bration is the perfect time to join. Not only are you getting the Ultimate Bundle ($125.00 worth of product for $99.00) but you also get to choose 2 additional stamp sets, up to $25.00 each. Additionally you will receive a 20% discount on any future purchases. Or, if you are just wanting to test drive the idea, you would not be required to make another purchase until July! There is no pressure for you to continue as a demonstrator. And there is no penalty if you decide not to continue. Please contact me and let’s talk about it. You can review the documents by clicking on the picture below.
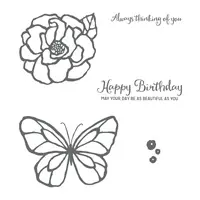
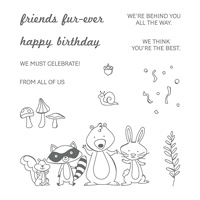
I did something scary yesterday! I cut apart a stamp !!! That is the first time I have ever done that. I have seen a few cards with the We Must Celebrate stamp set and the lovable little animals. And then I saw other demonstrators posting cards with only one of the animals, and another with several stacked on top of each other.. That was my deciding moment. What do you think of this?
We Must Celebrate, 145898
Looking at these cute faces makes me smile. Since I have been on a coloring kick with the Stampin’ Blends for a while, these cute animals just fit right in. In a way I think it looks like a kid colored it. Then I look again and really liked it. But I hope it gives you ideas for this wonderful stamp set.
The background was totally created with the Stampin’ Blends. I like the unevenness of the grass and sky. It gives it some depth without looking too solid. But more that anything, I just enjoyed coloring and letting my imagination go. I really hope you will give it a try as well.
Thank you so much for visiting today! If you have any questions or comments, I would love to hear from you.
Have you ever thought about becoming a Stampin’ Up! Demonstrator? During Sale-A-Bration is the perfect time to join. Not only are you getting the Ultimate Bundle ($125.00 worth of product for $99.00) but you also get to choose 2 additional stamp sets, up to $25.00 each. Additionally you will receive a 20% discount on any future purchases. Or, if you are just wanting to test drive the idea, you would not be required to make another purchase until July! There is no pressure for you to continue as a demonstrator. And there is no penalty if you decide not to continue. Please contact me and let’s talk about it. You can review the documents by clicking on the picture below.
I saw the layout from the current Global Design Project Challenge yesterday and decided I really liked the layout. So of course I will be submitting a card at the last minute. The story of my life lately! This card is super cute and SWEET though!
Fruit Basket, 145833
Who doesn’t love strawberries??? I even have a strawberry birthmark (thankfully very faded now). So when I saw this set, I knew I had to have it. These berries are extremely easy to line up the berry and the cap. The set is photopolymer which makes it match perfectly. I added some Wink of Stella to the single berry on the left, but it doesn’t show in the photograph.
I did stamp what I think would be called a “reverse mask” to do the berries outside the basket. I stamped the basket on scrap card stock and then cut it out. That way I could have some berries on the table in front of it.
I hope you will give this set a try. The little fruit pieces have a matching punch set! Woohoo! I will definitely be using that in my next card. The supplies I used are listed the bottom of the page. If you have any questions, please contact me. I love hearing from you.
Have you ever thought about becoming a Stampin’ Up! Demonstrator? During Sale-A-Bration is the perfect time to join. Not only are you getting the Ultimate Bundle ($125.00 worth of product for $99.00) but you also get to choose 2 additional stamp sets, up to $25.00 each. Additionally you will receive a 20% discount on any future purchases. Or, if you are just wanting to test drive the idea, you would not be required to make another purchase until July! There is no pressure for you to continue as a demonstrator. And there is no penalty if you decide not to continue. Please contact me and let’s talk about it. You can review the documents by clicking on the picture below.
The content in this blog is the sole responsibility of Jackie Beers as an Independent Stampin' Up! Demonstrator. The use of and content of classes, services or products offered is not endorsed by Stampin' Up!